The Oven has baked its last loaf. This blog is no longer being updated.

My cooking videos appear at youtube.com/janeragavan

I write on food at star2.com

Daring Bakers: Armenian Nazook and Nutmeg Cake

Friday, April 27, 2012

DID THE FIRST ARMENIANS IN PENANG MAKE NAZOOK AND NUTMEG CAKE? 
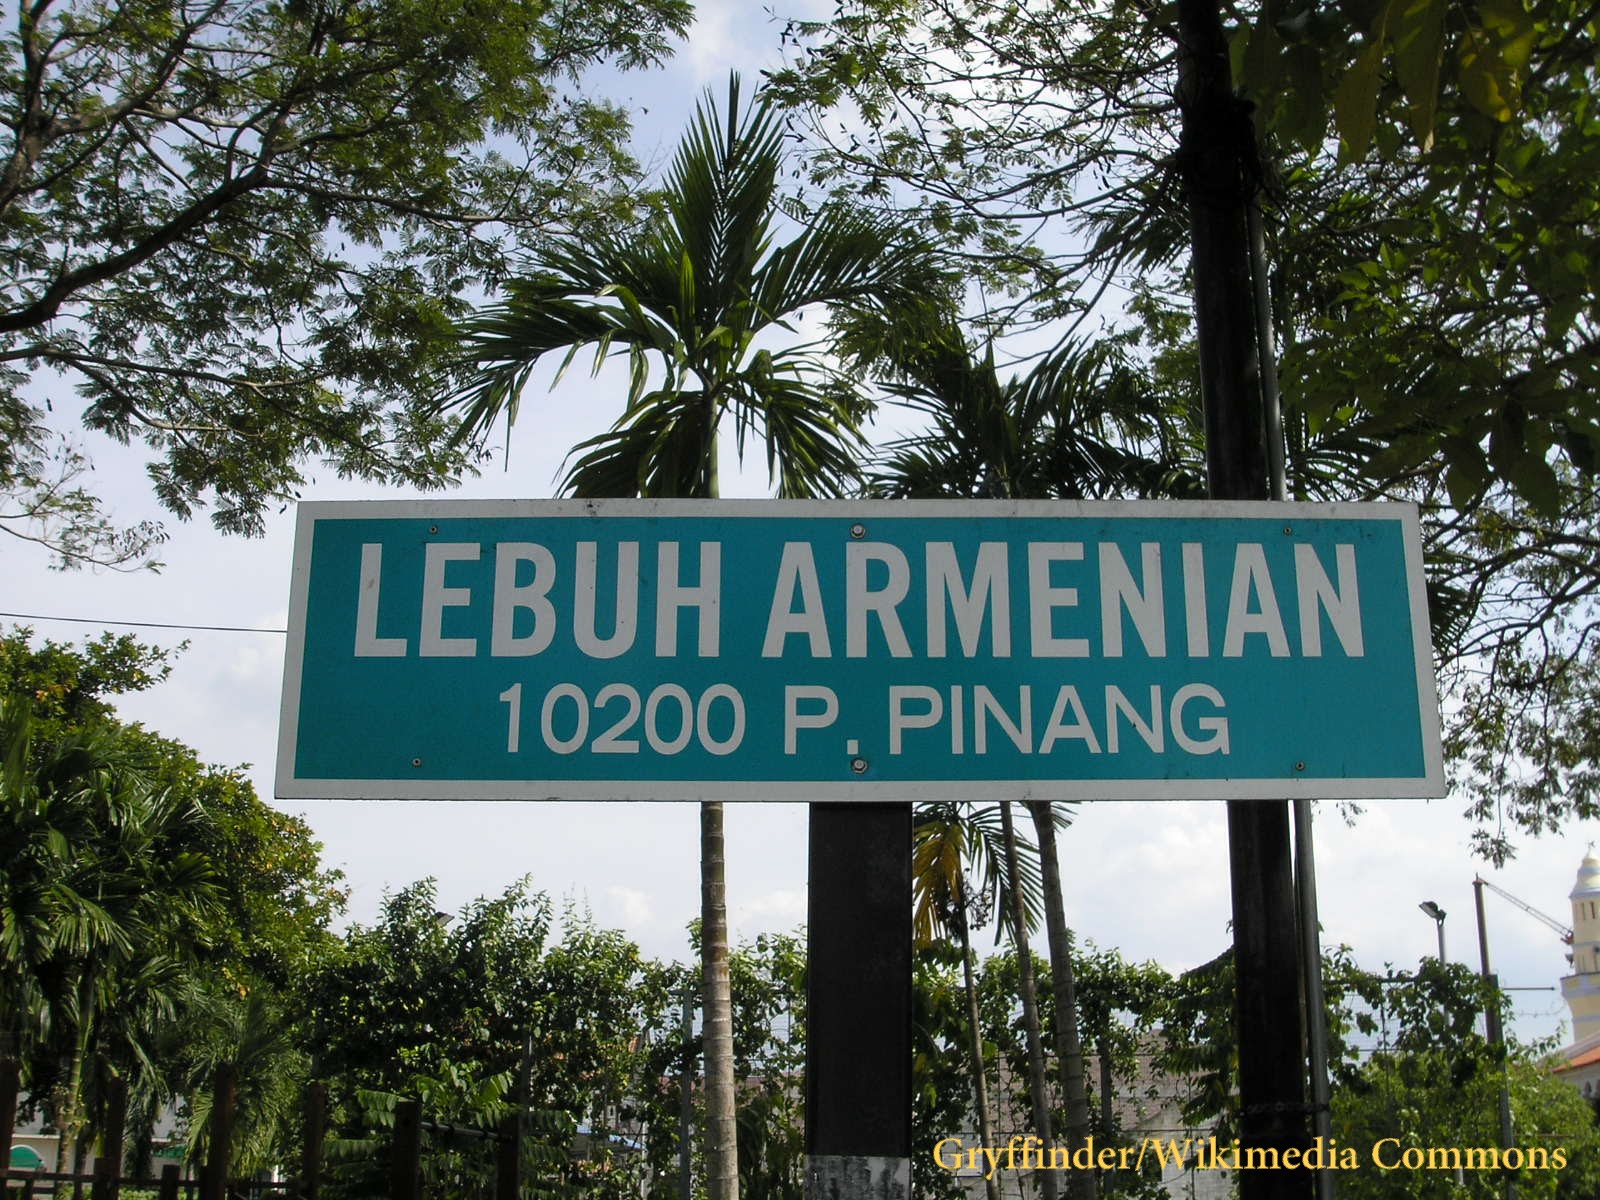
Lebuh Armenian or Armenian Street is in George Town, a Unesco historic city situated on Malaysia's west coast island of Penang. Armenians arrived in then Malaya in the late 18th to early 19th centuries and set up as traders, doctors and other businesses.
(Unfortunately, I don't have any pictures of my own, but am allowed to use the photo by Gryffinder at Wikimedia Commons with credit to the author. Thank you, Gryffinder.)
There's not a lot online about the Armenians in Penang, but there is at least one book written on the subject. And this blogger quotes from that book at his site. In fact, there is a lot more information about the Armenian nazook and nutmeg cake online.
Ah yes, the pastries... the wonderful, wonderful pastries. Now that the brief history lesson is over, I'll get on with the subject of this post.
The Daring Bakers’ April 2012 challenge, hosted by Jason at Daily Candor, were two Armenian standards: nazook and nutmeg cake. Nazook is a layered yeasted dough pastry with a sweet filling, and nutmeg cake is a fragrant, nutty coffee-style cake.
Jason's instructions, along with links to videos on making the two sweets, were most helpful and I enjoyed making them.
Well, thanks to Jason's challenge, I found out about Armenian cakes as well as a little about Malaysian history! For more pictures of Armenian Street, this site has some really beautiful ones (all right, that was the last tourism plug for Penang. Promise.)
Armenian nutmeg cake (top) and nazook 
As the pictures show, my perspective was all wrong. I got it backwards with both items. Halving the amount of ingredients called for in Jason's recipe, I made two small nutmeg cakes, each one 10cm across (which made the slices doll-sized); and only a dozen nazook instead of about 20 (they were about palm-sized)!
The other Daring Bakers got the perspective correct. For a look at the results of the talented lot, do visit The Daring Kitchen.
Lovely layers
I didn't change the filling in the nazook but for the cake, I substituted about a quarter of the soft brown sugar for gula merah (red sugar). This sugar also comes from a palm tree, but I am still trying to find out if it is from the coconut palm or Palmyra or even some other kind of palm. Anyway, it is dark reddish brown and comes in loose form alhough I'm sure it is also made into a block like brown palm sugar (gula Melaka).
I made nazook a second time and went with a coconut flavour. I included some coconut cream in the pastry and loving the texture and taste of red palm sugar, I used it in the filling along with grated fresh coconut. This filling was moister, unlike the original sandy-textured vanilla filling. The caramelised sugar made the pastries chewy and the fresh coconut, of course, was irresistible.
I don't know if I can call them nazook any more, but they were certainly inspired by those lovely Armenian pastries.
And this time, I made them daintier. 
The red palm sugar creates a chewy centre
Coconut and Red Palm Sugar Pastries
Inspired by Armenian Nazook. Makes 20 pastries

Pastry dough
210g all-purpose (plain) flour, sifted
4g active dry yeast
80g sour cream
30g coconut cream
80g softened butter, at room temperature

Filling
50g all-purpose (plain) flour, sifted
100g grated fresh coconut
100g red palm sugar
70g softened butter (room temperature)
1 tsp coconut extract, optional  

Wash
1 egg yolk 

Make the Pastry Dough
Mix the sifted flour and yeast in a large bowl. Add the sour cream and mix to form a shaggy dough. Set aside for 10 minutes to activate the yeast. Transfer the dough to a work surface and pat out into a rough circle; spread the butter in the centre. Work it into the flour mixture with your hands to form a dough. Continue to knead for about 10 minutes, or until the dough no longer sticks to the surface or your hands. Place the dough back in the bowl, cover and refrigerate overnight.

Make the filling
Combine all the ingredients and mix until the filling comes together into a rough paste. Set aside.

Make the nazook
Preheat the oven to moderate 175°C. Divide the refrigerated dough into two equal portions. Form them into balls.
On a lightly floured work surface, roll out or pat the dough into a rectangle The dough should be thin, but not transparent. Spread ½ of the filling mixture across the rolled-out dough in an even layer. Try to spread the filling as close as possible to the edges on the short sides, but keep some of pastry dough uncovered 2.5cm along the long edges. From one of the long sides, start slowly rolling the dough across. Be careful to make sure the filling stays evenly distributed. Roll all the way across until you have a long, thin loaf. Pat down the loaf with your palm and fingers so that it flattens out a bit (just a bit).
Apply egg yolk wash with a pastry brush. Use a crinkle cutter to cut the loaf on an angle into 10 equal pieces. Place on an ungreased cookie sheet (or one lined with baking parchment). Place in the preheated oven for about 30 minutes, until the tops are a rich, golden brown.

Seitan Part III: Vegetarian char siu mantou

Wednesday, April 25, 2012

CHINESE STEAMED BUNS WITH BARBECUED SEITAN 
There's something comforting about mantao (Chinese steamed buns that are not filled). It's probably the pillowy puffiness and how simple it looks that makes me want to just take a bite. Mantao is the perfect vehicle for the seitan char siu (Part II) that I made.
The proofed buns ready for the steamer (left); after steaming, the mantao are puffed and ready for filling
Mantou buns
Makes 4 large buns

150g pau flour (Water Lily or Hong Kong flour; low-protein flour)
1 tsp baking powder
½ tsp instant yeast
1 tbsp sugar
½ tbsp oil
A drop of alkaline water (air abu), optional
70ml water, approximate
Neutral-flavoured oil (like corn or vegetable), for brushing

Sift flour and baking powder into the mixing bowl. Add instant yeast, sugar, oil and alkaline water. Mix together with a fork or your hand to combine. Gradually add water and continue to mix until the mixture comes together into a firm ball.
Transfer dough to a work surface and knead until smooth and elastic, 5-8 minutes. Cover dough with a damp tea towel and allow to rise until twice its size. Scale dough into equal pieces of about 55g each and form into balls. Cover with a damp tea towel and set aside for 5 minutes.
With your palm, flatten each piece of dough into a a 9cm disc (it will be about 0.5cm thick). Brush one half of the flattened discs with oil and fold over into a half-moon shape. Place on parchment paper squares and cover with a damp towel. Leave to rise, another 20-25 minutes.
Meanwhile, prepare a tiered steamer.* Steam the buns over boiling water until puffed, 6-8 minutes. Serve while still soft and warm.
To assemble Vegetarian Char Siu Steamed Buns, gently open a mantao bun so there is a pocket (do not separate the two halves). Spread the inside with hoisin sauce if desired. Fill with slices of vegetarian char siu, pickled carrot and green onion. Enjoy!
* Apparently, if you add a little white vinegar into the water in the base of the steamer, this helps to keep the mantao white. I've tried it but I couldn't see much difference in the colour of the buns when I didn't use vinegar.

Seitan Part II: Vegetarian char siu

Saturday, April 21, 2012

EASY CHAR SIU WITH HOMEMADE SEITAN 
Now that I've learnt how to make seitan (Part 1), I went on to use it to make char siu (barbecued meat).
I used the recipe from Amy Beh at Kuali.com. It is straightforward, and although there are a number of steps, they are not difficult to follow.
How to make vegetarian char siu
However, there is no barbecuing involved, or even roasting in the oven. The "meat" gets its look from frying. I thought it was good anyway.
In the next post, I'm making mantao buns to fill with the char siu.

Vegetarian Char Siu
Adapted from Amy Beh at Kuali.com. Serves 4

4 large seitan logs (about 500g)
Oil for deep frying
100ml water

Sauce
1½ tbsp vegetarian oyster sauce
3 tbsp light soya sauce
1 tbsp dark soya sauce
1½ tbsp sugar
1½ tsp salt
1 tbsp tomato ketchup
¾ tsp pepper
¾-1 tsp Chinese five spice powder
1 tbsp hoisin sauce
A little red food colouring

Squeeze the seitan logs in a kitchen towel so they are not too watery.
Mix the ingredients for the sauce in a bowl. Add the seitan logs, turning them to coat well with the marinade; set aside for at least an hour.
Remove the seitan from the marinade (reserve the marinade) and deep-fry the seitan in hot oil until golden brown. Drain.
Place the reserved marinade in a saucepan with the water and bring to the boil. Add fried seitan and reduce the heat; simmer until the sauce has reduced, stirring the seitan strips occasionally to coat them well with the sauce.
If desired, the seitan be placed under the broiler for a few minutes to char them. Keep a close eye on them and keep turning to prevent burning.
Cut the char siu into thin slices before serving.

Next ~ Seitan Part III: Char Siu in Mantao Buns

Seitan Part I: Making it

Tuesday, April 17, 2012

LEAVE THE MOCK MEAT ON THE SHELF ~ MAKE YOUR OWN SEITAN  
In my last post, I described mock meat as nasty, and Indra, the vegetarian, jumped on me for saying that since I had told her I was making seitan, which is essentially mock meat. I did put it together with processed food, which is nasty, but I should have been more specific: I was talking about commercial mock meat, which contains preservatives and artificial flavourings, and usually comes in so much packaging that you would have a smaller carbon footprint if you ate real meat. So, dear Indra, while I apologise for not being specific, I stand by my opinion on commercial mock meat.
I wanted to make seitan not to find a meat substitute, but because I had always wondered what this "wheat gluten" flour that I was seeing in the baking supply shops was. After reading up on it, I found out what it was used for. (Seitan is also made with plain flour and "washed" to remove the starch; fortunately, wheat gluten already has all the starch and bran removed.) Further research showed me how easy it was to turn wheat gluten into seitan.
There are hundreds of thousands of recipes for seitan on the Internet, and the first one I tried produced a rather firm dough with the texture of really well-done meat. But as I watched more videos on YouTube, it looked like the texture and flavour were a matter of preference (I thought these two ladies demonstrated it quite well). The recipe I've given at the bottom of this post is how I made it the second time (a better result than the first attempt), and I can see so many ways to change it and give it another flavour.
The ingredients are combined and mixed together to form a shaggy dough. The dough comes together pretty quickly, but more water can be added if the mixture is too dry and it will be absorbed well. Knead the dough – squeeze it between your fingers! – and after a few minutes it will come together. It will be soft and spongy but will stay together in one piece. Form into a ball, log or even a rough rectangle, and leave to rest in the mixing bowl or on the work surface.
The seitan can then be cut into whatever shapes you want or left in whole pieces before poaching it. Larger pieces will, of course, take longer to cook and may not fit the cooking pot. Remember, once cooked, the pieces expand to twice their size or more!
I cut out cubes and strips, and also used a meat mallet to flatten a piece of the seitan (with gentle pounding!) into a cutlet. Except for the colour, which admittedly wasn't very appealing, I thought it really did look and feel like meat.
Get a nice pot of stock on the boil  here too, the stock can be seasoned however you like. I used some dashi powder along with carrots, onions and celery and seasoned with some tamari sauce as well.
Drop in the pieces of seitan and leave to simmer. The seitan is cooked when it floats to the surface, and this shouldn't take long, but keeping it in the stock for longer will help it absorb more flavour.
Store the seitan with just enough stock to cover it. If using the seitan for a dish that requires sauteeing or frying, squeeze out the liquid before using. This isn't necessary if using for stews or curries.
I made a stir-fry with the cubes, seasoned with ginger and chilli, and with green capsicum and roasted peanuts toss in – let's just call it a chicken dish! In the next post, I'll give a recipe for vegetarian char siu (barbecued meat) using the seitan.
Ginger-chilli seitan with capsicum and peanuts
Homemade Seitan
Makes just over 1 cup

½ cup wheat gluten flour
¼ tsp garlic powder
¼ tsp onion powder
¼ tsp cayenne pepper
½ tsp vegetable stock powder
1 tbsp soya sauce
½ tsp sesame oil
Water

Mix wheat gluten, garlic powder, onion powder, cayenne pepper and stock powder together in a bowl.
Combine soya sauce and sesame oil in a ¼-cup measuring cup and top up with water to get a total of ¼ cup of liquid.
Add the liquid to the wheat gluten mixture all at once and stir quickly with a fork or your hand until all the liquid has been absorbed and the mixture comes away from the sides. Start kneading until the mixture comes together. It will feel wet and spongy and even look like a sea sponge. Knead for 5 minutes, then bring together into a ball or log and set aside for 5 minutes more.
In the meantime, make a stock in a large pot with 4 cups of water and flavour it as desired. Bring it to a boil and let it simmer for about 15 minutes to develop the flavours.

To shape
Cut into chunks or strips. Note that the pieces should be cut smaller than you want them because they will expand quite a lot while they cook. Chunks of seitan can also be flattened with a meat mallet for cutlets or burger patties.

To cook
Bring the stock up to the boil again and drop the seitan pieces into the pot. Cover the pot, turn down the heat and leave to simmer for 20-25 minutes. When the seitan is cooked, the pieces will have expanded and float to the surface.

To store, place the pieces in a container and cover with the stock. Cover the container and refrigerate for up to 4 days.

Next  Seitan Part II: Vegetarian Char Siu

The nasty bits get rice nice and dirty

Sunday, April 15, 2012

OFFAL BRINGS OUT THE BEST IN CAJUN DIRTY RICE 
A lot of people would never go anywhere near offal, let alone eat it. Then there are others who love liver and kidney and gizzard and tripe, as well as other parts I am not familiar with.
Offal is often called the nasty bits (Serious Eats has a section dedicated to animal innards called The Nasty Bits which I find rather informative).
I don't think offal is nasty. You want nasty, just look at items like processed food and mock meat products. No doubt they taste good, what with all the artificial flavourings and salt in them, but these things will remain in your body long after... you know.
However, I don't eat offal all that much. The parts are a little too gamey for me (although I have enjoyed chicken intestine satay). And I've never cooked any of it before. So how did I end up making Cajun dirty rice, which gets its name from its appearance which comes from various innards, and loving it?
A book. And not even a cook book.
Towards the end of the novel The Bad Book Affair by Ian Sansom, the protagonist Israel Armstrong – a vegetarian who lives on a chicken farm in Ireland – smells some chicken livers being prepared by his landlady and they remind him of "a homely smell... it smelt of parents, And Saturday traffic outside. It smelt of north London."
Depending on race and religion, the more popular livers with Malaysians come from cows or pigs; chicken livers don't get much of a look-in in local recipes, so they are quite cheap and the chicken hearts are thrown in as well since they're already attached to the lobes.
Israel Armstrong's recollection of how much he loves chicken livers gets me excited about them as well, so I go get some and pan-fry them in a "Western" style with balsamic vinegar (pictured right). 
Only they are so much more delicious on the page. They didn't bring back nice memories for me.
The next day, I got some chicken gizzards and a few other ingredients, put them together with the cooked chicken livers and made dirty rice. And then, the livers got homely.

Cajun Dirty Rice
Serves 4

1 cup long-grain rice
1 cup chicken stock*
1 tbsp vegetable oil
1 tbsp butter
4 chicken livers
4 chicken hearts
2 chicken gizzards
1 spicy sausage, finely diced
½ large onion, finely chopped
1 celery rib, finely chopped
½ green capsicum, seeded and finely chopped
½ tbsp Cajun/Creole seasoning (ready-made or make your own; recipe follows)
A dash of Worcestershire sauce
Salt to taste
1-2 jalapeños, seeded and chopped
2 spring onions, chopped

Wash rice and cook with the water and chicken stock concentrate in a rice cooker or another way.
While the rice is cooking, mash and finely chop the chicken livers. Finely chop the chicken hearts and gizzards. In a large pan that can eventually hold the rice, heat the oil and butter. Add the liver, hearts, gizzard and sausage and cook over medium-low heat until brown and slightly crisp.
Turn up the heat slightly and add the onions, celery, and bell peppers to brown. If the bottom of the pan gets crusty, add 2-3 tbsp of water to deglaze the pan, scraping the bottom with a wooden spoon. Add the Creole/Cajun seasoning, Worcestershire sauce and salt to taste; turn the heat to high. Boil away most of the liquid and add the cooked rice and jalapeños. Toss to combine.
Turn off the heat and stir in the spring onions. Serve hot.
* Use homemade chicken stock if available, but it can be made by adding a stock cube or ½ tbsp chicken stock concentrate to hot water
Creole Seasoning
Makes about ¼ cup

2½ tsp paprika
2 tsp garlic powder
1 tsp onion powder
1 tsp black pepper
1 tsp cayenne pepper
1 tsp dried oregano
1 tsp dried thyme

Combine all ingredients thoroughly and store in an airtight container.

Dishes that have nothing to do with offal
Fried Fish in Tamarind Sauce
Tali Machee (Spicy Fried Fish)
How to prepare an artichoke

Two-in-one chocolate pie

Thursday, April 12, 2012

TWO-IN-ONE CHOCOLATE PIE 
Everyone thought the chocolate "dust" sprinkled on the top of the pie was Milo. They even thought the filling tasted of the malted chocolate drink powder.
There wasn't any Milo in the pie I used cocoa powder and the dust on top is chocolate shavings, but come to think of it, Milo would actually have been a good idea. Next time...
This pie is made using a combination two recipes -- one used as is, the other one used as an inspiration. The crust is from Momofuku Crack Pie, which lives up to its name because it is addictive. (For the full recipe for Momofuku Crack Pie, go to the Los AngelesTimes.)
The filling was inspired by a recipe I read for Minny's famous Chocolate Pie from the movie, The Help. It contains evaporated milk and cocoa powder, and the custard is made wih eggs, but I used custard powder. (For the full recipe, go to Food and Wine.)
Now, about the pie tin. I bought the 25cm loose-bottom fluted pie tin with high sloping sides last October from a Goodwill store close to my sister's home in San Jose, California. It was such a good buy at US$2.49, but it is bigger than what I would normally use for pies, and I have been wondering about what to use it for for the past six months.
Well, I finally used it for Easter last Sunday.
Make the cookie first for the crust
The pie crust starts off as a superjumbo oatmeal cookie. It's actually enough for two 25cm pies, but because of the high sides of my tin, I had to use all of the cookie for just one pie. The dough is good for little cookies too, by the way.
The filling was still a little jiggly when I served it but none of us minded it. But I think it would make a great mousse. I have adjusted the recipe and added another tablespoon of custard powder so I’ll remember the next time I make the filling.
It's also two-toned and weighs two tonnes!
Two-In-One Chocolate Pie
Serves 10-12

Cookie for Pie Crust
From the recipe for Momofuku Crack Pie

85g all-purpose flour
Scant tsp baking powder
Scant tsp baking soda
¼ tsp salt
120g softened butter
70g light brown sugar
35g sugar
1 egg
100g rolled oats

Heat the oven to 190°C.
Sift together the flour, baking powder, baking soda and salt into a bowl.
In another large bowl, beat the butter, brown sugar and sugar until light and fluffy (do this by hand or with an electric mixer). Whisk the egg into the butter mixture until fully incorporated.
Beat in the flour mixture, a little at a time, until fully combined. Stir in the oats until incorporated.
Spread the mixture onto a large lightly greased baking sheet (as thinly as possible) and bake until golden brown and set, 15-20 minutes depending on thickness. Remove from heat and cool to the touch on a rack (it will crisp further). Crumble the cooled cookie to use in the crust.

Crust
Crumbled cookie for crust
60g butter
1½ tbsp brown sugar
Pinch of salt

Heat the oven to 190°C.
Combine the crumbled cookie, butter, brown sugar and salt in a food processor and pulse until evenly combined and blended (a little of the mixture clumped between your fingers should hold together). Press the crust into a 25cm high pie tin to form a thin, even layer along the bottom and ¾ of the way up the sides of the tin. There may be some left over. Bake the shell for about 10 minutes. Remove from oven and set aside while you prepare the filling.

Filling and Pie Assembly
Inspired by Minny's Famous Chocolate Pie

45g custard powder
100g caster sugar
45g unsweetened cocoa powder
Pinch of salt
1 (400g) tin evaporated milk
150ml water
1 tsp pure vanilla extract
250ml whipped cream 
Chocolate shavings, for serving

Preheat the oven to 180°C.
In a heat-proof bowl, whisk the custard powder, sugar, cocoa powder and salt together. Add a little of the evaporated milk and whisk to get a smooth batter.
Combine the rest of the milk and water in a saucepan and place over medium heat. When bubbles start to appear around the edges, pour milk mixture slowly into custard mixture, whisking all the time until mixture is well combined. Pour mixture back into the saucepan and return to the heat. Change to a wooden spoon and keep stirring until custard thickens and coats the back of the wooden spoon. Remove from heat and add vanilla; leave to cool for 10 minutes.
Pour the filling into the pie shell and bake for about 20 minutes, until the filling is set around the edges but a little jiggly in the centre. Transfer the pie to a rack and let cool completely. At this point, the pie can be refrigerated. Top with whipped cream and dust with chocolate shavings.

Spice up the clam chowder

Saturday, April 7, 2012

COCONUT CLAM CHOWDER WITH PAPADOMS 
I didn't miss meat while I was abstaining during Lent, but when I saw the lovely clams at the market today, the 44 days of eating only vegetables hit me hard.
With almost half a kilo of the mussels in my shopping bag, I knew I was in for a treat. And I knew I wouldn't go wrong with a chowder.
It is like a normal "American" chowder, with potatoes, but instead of milk, I made the stock with coconut milk and added some curry powder. Inspired by these Indian tastes, the saltines are replaced with fried papadoms.

Coconut Clam Chowder
Serves 1

400g clams in their shells
1 tbsp butter
1 tsp oil
½ onion, finely diced
1 russet potato, cut into small cubes
250ml coconut milk
½ tsp curry powder
Salt and pepper
Fried papadoms and coriander leaves to serve

Wash clams and place in a pot with enough water to just cover. Cover pot and bring liquid to the boil. When clam shells open, remove from heat. Drain liquid but reserve. Remove clams from their shells.
Heat butter and oil in a saucepan over medium heat; sweat onions (do not allow to brown). When translucent, add potato and reserved clam stock. Bring to the boil then turn down heat, cover the pot and simmer until potato is cooked. Add coconut milk and curry powder and bring to the boil.
Remove pot from heat and using a hand blender, purée the soup roughly so that it is thick and creamy but there are still chunks of potato. Season with salt and pepper.
Return pot to the heat and add clam meat; cook until clams are heated through. Garnish with coriander leaves and serve with fried papadoms.