The Oven has baked its last loaf. This blog is no longer being updated.

My cooking videos appear at youtube.com/janeragavan

I write on food at star2.com

Tried & Tested: Jacques Pépin's Almond Cake

Monday, April 18, 2011

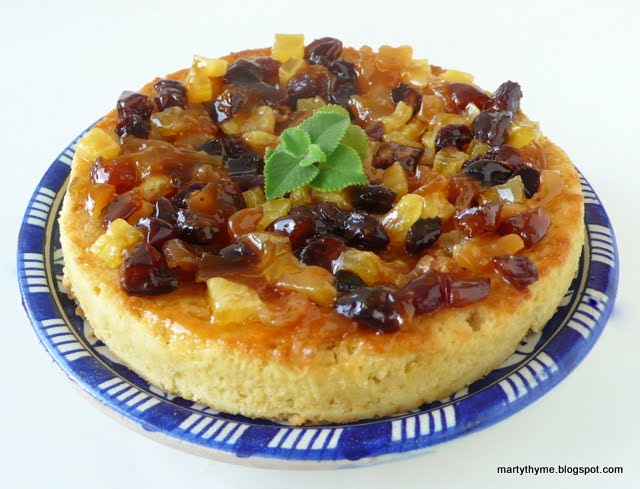
ALMOND CAKE WITH DRIED FRUIT 
It's raining buckets as I write this. I don't think it has stopped raining since yesterday evening. I had wanted to come home after work yesterday and make a cake using almond paste, but traffic had been so bad, I actually had to turn round and go back to the office. When I left two hours later, it still took me 50 minutes to get home on a drive that usually takes 15 minutes. Too late to make the cake.


The recipe is for an Almond Cake With Berries, from Jacques Pépin. It is easily whizzed up in a food processor, but even by hand, it doesn't look like it should take much effort.

I am a big fan of Monsieur Pépin and loved watching him when his cooking show was on TV. He's such a great teacher and makes every dish uncomplicated. No need to be intimidated by French food when Jacques Pépin shows you how to cook it. I  have none of his recipe books but I do have his autobiography, The Apprentice: My Life in the Kitchen, which has a few recipes in it.

When I got some almond paste recently, I looked up some cake recipes and saw this one by Pépin. He uses fresh berries to garnish the cake, but he also suggests dried fruit like currants, peaches and apricots. Fresh berries are so expensive over here and I can't think of any local fresh fruit that would be suitable, so I went with the dried and even managed to find dried peaches and apricots. I also added currants and crystallized pineapple. Dice them so that they are the same size as the currants. They may not look as pretty as fresh fruit, but I think they work just as well.

I also had a little bottle of cognac that someone gave me and that came in handy for this recipe. I think the original recipe makes too much syrup for such a small cake, and instead of adding all water to dilute the apricot jam, I used the leftover syrup for that. This cake has one boozy garnish!

I changed the recipe slightly so if you want the original, please go to the link given above.

Individual serving
ALMOND CAKE WITH DRIED FRUIT
From a recipe by Jacques Pépin
Serves 6-8
115g almond paste
¾ cup sugar
110g unsalted butter + extra to butter the cake pan
1 teaspoon vanilla extract
3 medium free-range eggs
¼ cup milk
Dash of salt
1 cup cake flour
½ teaspoon baking powder


Syrup
2 tablespoons water
2 tablespoons whiskey, rum or cognac
2 tablespoons sugar


Garnish
1½ cups diced dried fruit (currants, peaches, apricots, pineapple)
¼ cup good apricot jam, diluted with 2 tablespoons water
8-10 mint leaves
1 cup Greek yoghurt for serving
  • Butter a 17cm round cake pan (5cm deep) and line the base with greaseproof paper. Heat the oven to 180°C. 
  • Put the almond paste, sugar, butter and vanilla in a food processor and process for about 10 seconds. Add the eggs, milk, and salt and process for 5 seconds. Add the flour and the baking powder and process for another 5 to 10 seconds, or until smooth. Pour the cake batter into the pan and bake for 45 minutes. Cool on a rack.
  • At serving time, place the cake on a serving platter. 
  • Combine the ingredients for the syrup in a small bowl. Using a spoon or pastry brush, moisten the cake with the syrup. Scatter the dried fruit on top of the cake. Brush on the diluted apricot jam and garnish with the mint leaves. Serve with the Greek yoghurt.

In the scone zone

Monday, April 11, 2011

SCONES 3 WAYS: (clockwise from left) cheese and mustard; ginger-spelt; and Cheddar-scallion 
I hadn't even put down my bag when I turned on the oven to heat it up for the biscuits I was going to make. I had read this post on Cheddar-Scallion Biscuits by Donna Currie at Cookistry and couldn't wait to try out the recipe.

I got all the ingredients out and then discovered I didn't have any baking powder. Fortunately, there is a little sundry shop in my apartment complex and I trotted over for a tin of it.

Now, this isn't the first time I am making scones (biscuits in America; over here, we're more familiar with scones), but these were, by far, the best I have made.

Cheddar-scallion biscuits (recipe from Cookistry)
Now, I don't normally praise my own cooking. Dishes by celebrities like Nigella Lawson, Laura Calder and Jamie Oliver always look good on TV and probably taste good too, but I find it off-putting when they have a taste of dishes they have prepared themselves and start making yummy noises. This time, however, I am going to be like them because I think these scones were close to perfect.

They rose beautifully and were tender and fluffy on the inside. They were completely different from the scones I have made before – heavy, hard and suitable only for house-building. This time, I used a light hand, not kneading at all but simply pressing the dough together. Donna's instructions were spot on. Folding the dough like an envelope a couple of times produced layers, like puff pastry, and her advice to gather the scraps and keep the layers together also helped.

By the time I had finished making the scones, the natural light was gone and it was too dark for me to take a picture. But that was a good thing because if I had managed to photograph them, it would have been an excuse for me to eat the whole batch! (In my defence, I made only half the amount specified in the recipe, so there were just five whole scones and a runt-y one...)

Fired up by that success, I went ahead and tried something else, this time with spelt flour and crystallised ginger. I decided to add some coconut oil as I thought it would go well with the flavours. It did, but I might add more coconut oil next time because it wasn't strong enough for my taste (recipe below).

The next day, I went for Scone Number Three­­ – this time, with Parmesan in the topping. Here's the recipe:

CRUSTY CHEESE AND MUSTARD DAMPERETTES
From Australian Women's Weekly Home Library: 
Muffins, Scones & Breads
2 cups all-purpose flour
2 teaspoons baking powder
Pinch of salt
½ teaspoon dry mustard
30g cold butter, chopped
1 cup milk, approximate
Topping (recipe follows)
  • Sift flour and mustard into a mixing bowl; rub in butter. Stir in enough milk to mix to a soft, sticky dough. Turn dough onto floured surface and press together into a large square. Fold the top third onto the centre, and then the bottom third over. Press out again to 1.5cm thick. Now fold the right third to the centre and the left third over it. Press out to 2cm thick. Cut out with a pastry cutter or knife and place on a prepared oven tray. Press the scraps together and cut out more scones. Sprinkle with topping. Bake for about 15 minutes until top is melted and golden.
Topping
1 tablespoon butter
1 tablespoon seeded mustard
¼ teaspoon cayenne pepper
¾ cup coarsely grated fresh Parmesan cheese
  • Melt butter on the stove or in the microwave oven. Remove from heat and stir in remaining ingredients.
PRINTABLE RECIPE
Coconut oil adds flavour to these spelt scones and is said to be good for health as well.
GINGER SPELT SCONES
1 cup all-purpose flour
2 teaspoons baking powder
Pinch of salt
1 cup spelt flour
1 tablespoon cold butter, chopped
1 tablespoon coconut oil (or just use butter)
2 tablespoons finely chopped crystallised ginger
1 cup buttermilk, approximate
  • Preheat oven to 200°C. Grease a baking tray or line with parchment paper.
  • Sift all-purpose flour, baking powder and salt together into a mixing bowl. Stir in spelt flour. Add butter and coconut oil. Using your fingertips, rub the fat into the dry ingredients. Stir in the crystallised ginger. Using a butter knife or fork, stir in enough milk to mix to a soft, sticky dough.
  • Remove the dough from the bowl onto a lightly floured work surface. Pat it together; gently and lightly press out the dough into a 1.5cm-thick square. Fold the top third onto the centre, and then the bottom third over. Press out again to 1.5cm thick. Now fold the right third to the centre and the left third over it. Press out to 2cm thick. Cut out with a pastry cutter or knife. Place on prepared tray. Press the scraps together and cut out more scones. Bake the scones for about 15 minutes until puffed and brown.
PRINTABLE RECIPE

Kitchen kit: Tagine

Monday, April 4, 2011

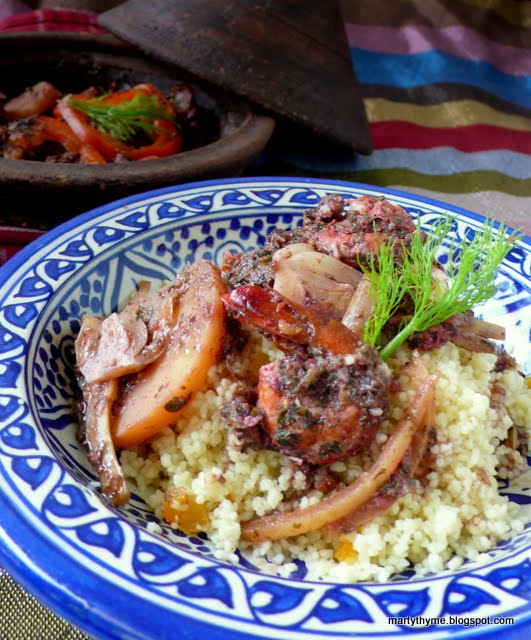
PRAWN TAGINE ON COUSCOUS 
I recently cooked with my Moroccan tagine for the first time. I've had it for almost a year, and I don't know why it has taken me this long.

The cooking vessel is not decorated or glazed, and it is made by hand. It is rough and rustic, and that is why I bought it. It cost something like US$5. I got it from a little shop selling tagines and other clayware on the edge of the Djemaa el Fna in Marrakesh from an elderly gentleman with such an amazing face. He looked at first like a sage spiritual guru, and then as he started talking about his pots, this cheeky man suddenly appeared!

Tagine
The tagine has to be seasoned first and I learnt how to do it with instructions (and pictures) at itagine.com. The tagine is soaked first, then oiled and placed in the oven for about an hour before it can be used. On the stove, it should sit over very low heat or the tagine may crack. I don't know what it's like with a glazed casserole/pot, but for my unglazed clay one, the food isn't browned first (as you might also do if cooking in a skillet or casserole dish). I loved how, when I lifted the cone-shaped lid halfway through cooking the prawns and fennel, the sauce was bubbling and the smell was delicious.

This tagine ­­– or any tagine, for that matter ­­– makes an impressive dish (just like the chocolate éclairs I made for this month's Don't Call Me Chef column ­­– the theme was "dish to impress". The column appears in print today; link to pdf here). The food itself is good, or course, but it will certainly taste better if cooked in an actual tagine, and will look impressive when the vessel is brought directly to the dining table.

My tagine will only make enough for two people but I ate the whole dish by myself, and I can say decisively that I was impressed!

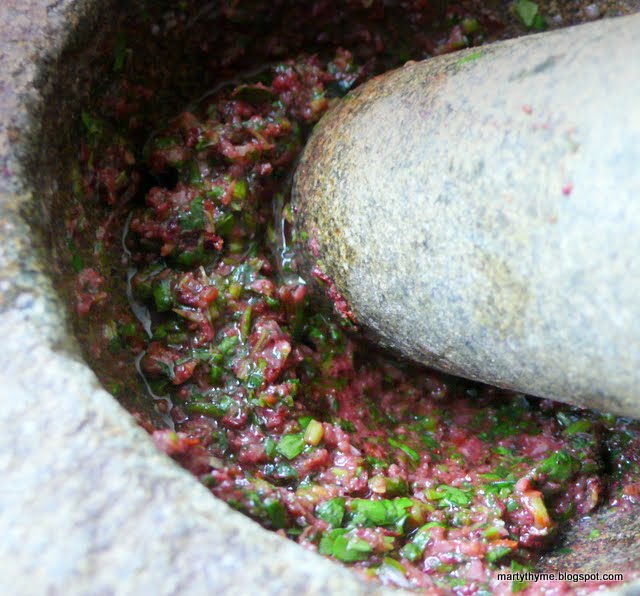
The secret ­­– if you want to call it that ­­– of this dish is the chermoula, a fresh herb mixture used to marinate the prawns. My recipe simply throws things together and I go by taste but if you want some actual recipes, which I think look good, here are three links:
The Epicentre
Herbivoracious
New York Times

Green herb marinade
HERB MARINADE BASED ON CHERMOULA
Makes about 1 cup
2 cups fresh coriander (cilantro)
1 cup fresh Italian parsley
1 lime, zest and juice
2 cloves garlic
¼ teaspoon chilli flakes
1 teaspoon sumac
Salt, to taste
½ cup olive oil
  • Use a mortar and pestle to pound all the ingredients, except the oil, until smooth but not too fine (or do this in a food processor). Taste and adjust seasoning. Add the olive oil gradually and stir in with a fork until an emulsion forms.
Layer the ingredients...
Prawn & Fennel Tagine
Jumbo prawns
Potato, peeled and cut into 2cm-thick slices
Fennel bulb, sliced thinly
Red capsicum (pepper), sliced into rings
Ras el hanout
Fennel sprigs for garnish
  • Peel the prawn, leaving the tailed intact. Cut down the back and remove the dark vein. Marinate with come of the herb marinade for 30 minutes. 
  • Layer the ingredients in the oiled tagine base: First the potatoes, next the sliced fennel bulb, then the prawns (with the marinade) and finally the capsicum rings.
  • Mix ras el hanout to taste with a few tablespoons of water and pour over the layers.
...and all the flavours meld when the dish is cooked
  • Cover the tagine and place it on a low flame. The dish is cooked when the potatoes are soft. Before serving, garnish with a feathery fennel sprig.