Pages

Thursday, October 31, 2013

Black sesame and chocolate twist

BLACK SESAME AND CHOCOLATE TWIST 
I noticed that the black sesame paste (from yesterday's post) that I had made months ago (it keeps well!) was still in the fridge, and I needed to use it up. After weeks of not having much time and only cooking daily meals, I have plunged elbow deep into dough with a vengeance this past week, and so decided to use the sesame paste as a filling for a loaf. 
Since I couldn't leave well enough alone, I added some black-and-white mini chocolate chips to the filling.
The next few posts will be scheduled as I may not be able to blog for some time. And this would be a good time to clean up my Draft folder in Blogger, so these posts will just have a short intro with a picture and recipe. I've had some drafts for over a year!

Black Sesame and Chocolate Twist
Makes 1 large loaf. Serves 10

½ batch basic sweet dough
¼ cup mini chocolate chips

Line base and sides of a large loaf tin with parchment paper.
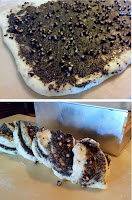
Roll out the dough into a 20cm by 25cm rectangle. Spread with sesame spread and sprinkle the chocolate chips on top.
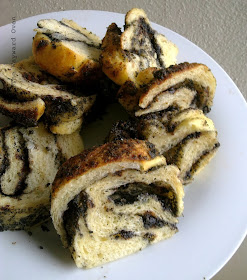
Beginning from one long end, roll up into a tight Swiss roll. Slice through the middle of the roll lengthwise into two. With the cut side up, twist them together into a rope. Place in the prepared tin, cover and leave to rise to the top of the tin.
Alternatively, shape it into a round like this Russian Rose Braid.
Meanwhile preheat the oven to 180°C. Bake the bread, 30-35 minutes.

Wednesday, October 30, 2013

Black sesame spread


BLACK SAND OR DELICIOUS BLACK SESAME SEED PASTE?
This post is a prelude to my post tomorrow, which is for a recipe using this black sesame seed spread. 

Black Sesame Spread

150g black sesame seeds, rinsed and well drained
100g sesame seeds, rinsed and well drained
50g toasted peanuts, skinned
3-4 tbsp soft brown sugar
1 tbsp milk powder
3 tbsp canola oil

Combine both types of sesame seeds in a clean wok. Fry without oil over low heat until fragrant. Dish out and leave to cool.
Place peanuts in a food processor. Blend until fine. Add all the sesame seeds. Continue to process until fine.
Add milk powder and soft brown sugar. Drizzle in oil. Continue to blend until smooth.
Remove and store in a sterilised clean jar. Can keep for several months in the fridge.

Sunday, October 27, 2013

Halloween spider monkey bread bowl

DISEMBOWELLED FRANKENSPIDER ~ IT'S CHEESY ALL RIGHT 
Most of the time, Halloween-themed food isn't scary – it's cute. And that's what my colleagues and I came up with for our newspaper's Halloween photo spread recently – although there was one that I think was a little gorier than others (look at the photos and you'll probably be able to tell. Hint: fingers and eyeballs).
What was disturbing was the fact that grown women had so much fun making the dishes!
I made cheesy monkey bread in the shape of a spider with leggy breadsticks and a built-in cavity for the dip. You can find spider bread bowl dips all over the Internet – I just made mine into bread that you could pull apart into individual cheese-coated pieces.  
Here are my own pictures of the dishes we made for the spread.
Halloween spread
For professionally taken pictures by The Star photographer Yap Chee Hong, go to the link above (the print version of the article was beautifully laid out). Chee Hong really took his time to get the best shot for each dish. The only downside is we had to wait ages before we could get at the food! My "spider gut" cheese dip had congealed by then, but it didn't matter one solid glob.
Spider-shaped Monkey Bread Bowl
Serves 12

1 quantity buttermilk bread dough
150g unsalted butter
1 cup finely grated Parmesan cheese
2-3 tbsp minced fresh parsley
2 tsp garlic powder
1 cup shredded cheese (eg. Mozzarella, Cheddar)

Additional stuff
Toothpicks
Marmite or other black ingredient for decoration
Chilli-cheese dip
Chilli or tomato sauce

Grease a large baking sheet and a medium oven-proof mixing bowl (or use a domed-shaped baking mould). Cover the outside of a small ramekin with foil and grease the foil.
Remove ⅓ of the dough and divide into eight equal portions. Roll each portion into 20cm lengths, tapering the ends if desired. These are the spider's legs.
Melt the butter in a small saucepan. Let it cool slightly (it should still be a little warm).
Combine the Parmesan cheese, parsley and garlic powder in a bowl.
Dip each leg into the melted butter and then coat in the Parmesan-parsley mixture. Lay the leg on the baking sheet in a curvy "V" shape. Repeat with the other legs. Cover the sheet with a clean tea towel.
Remove a small portion from the remaining dough and form into balls for the spider's head and bulging eyes. Dip the top of the head in the melted butter and sprinkle with Parmesan-parsley mixture. Place on the baking sheet with the legs.
In the meantime, preheat the oven to 190°C. Place the foil-covered ramekin upside-down in the middle of the prepared mixing bowl (or domed-shaped baking mould).
Press out the large portion of dough until about 1.5cm thick. Slice into 1.5cm squares. Dunk a few pieces into the melted butter, then coat with the Parmesan-parsley mixture. Put a layer of the dough into the bottom of the mixing bowl around the ramekin and sprinkle with a little shredded cheese. Continue layering the coated pieces of dough and cheese. The final layer should cover the upturned ramekin. Cover the bowl with a tea towel.
By this time, the legs and head will be ready for the oven. Bake until golden and crisp, 10-12 minutes. remove from the oven and cool on a wire rack.
Bake the spider's body until golden. Cool in bowl/mould for 10 minutes, then upturn onto a wire rack. Remove the ramekin. If the body is pale, return to the oven (without the bowl/mould) to brown.
Assembly
Place Spidey's body on a serving platter/board. With a paring knife, make eight slits in the form of a small "X" about 3cm from the top and equal distance apart around the body. Poke one end of the legs into the X's. One or both of the front legs can be in the air for a bit of drama.
Dot Marmite on the eyes for the irises and eyebrows. Carve out sharp teeth on the head and colour with chilli or tomato sauce. Attach head to the body with toothpicks.
Insert a ramekin or other small container into the cavity and fill with dip. Serve the spider.
Note: Next time, I'll try making this free-standing instead of moulding it in a bowl so that the individual dough pieces can puff up and the body of the spider will be knobby instead of smooth.
Friday, October 25, 2013

S-shaped filled loaf

S'WONDERFUL, S'MARVELLOUS, S'AWFUL NICE BREAD 
The Gershwin standard 'S Wonderful was playing in my head the whole time I was shaping this loaf (I love the Ella Fitzgerald version).
Filled and flavoured breads are nice to eat, but they're better – even if it's just psychological! – when they come in unusual shapes. It's like the song says, "S'what I like to see".
I started out having made a buttermilk and egg-enriched bread dough and was going to shape it into a loaf with a spiral of oven-dried cherry tomatoes and cubes of fried eggplant in the centre. It would be baked in a loaf tin. Then I looked around online and saw several loaves in an "S" shape, and the recipes all originated from King Arthur Flour's tomato, basil & garlic-filled pane bianco.
Well, that would be perfect for my loaf!
Fill, roll, shape, slice
Besides the tomatoes and eggplant in my filling, I roasted a whole head of garlic and store-bought salted fish pickle (acar) and both were mashed to smear on the dough.
The dough is rolled out into a rectangle and half of it is smeared with the salted fish, which is mashed into a paste –  I use it as a substitute for anchovy paste or tapenade. On top of that, I sprinkle the eggplant cubes (pic 1).
And then the uncovered half is folded over the filling. It is spread with the garlic paste and chopped oven-dried tomatoes are sprinkled on top (pic 2). Doing the double layer distributes the fillings more evenly, I think.
The rectangle is rolled up (pic 3) before being shaped into an "S". In the King Arthur instructions, the Swiss roll is sliced down the middle lengthwise before the shaping, but after reading the problem this blogger had and how she fixed it, I followed her cue and shaped the loaf (pic 4) before making the parting (pic 5).
I've used the same dough for another shaped bread. Tomorrow, my newspaper will run a photo spread on food as a run-up to Halloween, and a few of my colleagues and I came up with an item or two. A professional photographer took the pictures and the layout in print is really nice, so if you get the chance, do have a look at The Star.
S-shaped filled loaf
S-shaped Tomato and Eggplant Loaf
Makes 2 medium loaves

Buttermilk dough
350g flour
1¼-2 tsp active dried yeast (see note below)
2 tsp salt
1 tbsp sugar
1 tbsp oil
200g buttermilk
1 medium egg

Filling (quantities at one's own discretion)
Fried eggplant cubes
Oven-dried cherry tomatoes
Roasted garlic, mashed into a paste
Salted fish pickle, mashed into a paste

Combine the flour, yeast, salt and sugar in a mixing bowl.
Combine the oil, buttermilk and egg in a jug. Add to the dry ingredients and mix into a dough. Add more water or flour as needed to form a soft dough. Knead with your desired technique to develop the gluten. Set aside to rise.
Divide the dough into two equal portions. Roll out one portion into a rectangle and layer the fillings as desired. Roll up into a Swiss roll and shape into an "S". Slice through the centre of the shape halfway down so the top opens out and the layers can be seen.
Do the same with the other portion of dough, or use it for another kind of bread.
Preheat the oven to 190°C. Bake the bread for 30-35 minutes until nicely golden on top and cooked through.
Note: I use the lesser amount of yeast as the dough is proofed in the fridge overnight. If making the loaf on the same day, you could use up to 2 tsp of yeast.

Saturday, October 12, 2013

Frankenflowers: Cinnamon chrysanthemums

CINNAMON CHRYSANTHEMUMS 
I have been away from this space for a while now. Have had to concentrate on work. Not that I hadn't before; there have just been changes – as many newspaper companies all over the world have been going through lately – and things have been more hectic than usual. Plus my Internet connection at home was down for more than a week because I didn't have time to even call up my provider to see to the problem.
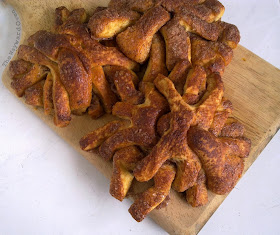
Anyway, I have returned to my wayward oven with a bread roll that I have been meaning to try out for some time. They're made with a sweet dough which I based on a recipe by Peter Reinhart but with changes such as using condensed and evaporated milks – only because I had some sitting in the fridge and couldn't think of what to use them for. The flowers are shaped from 5cm-wide strips of dough. These are dipped into melted butter and cinnamon sugar, and then a deep fringe is cut along the length of the strip before they are rolled up. The "petals" are then splayed out, and left to rise before baking. I saw the instructions here.
I think my chrysanthemums look a little mutated – a Franken version of the flowers. Maybe I should make them for Halloween and call them centispiders or spiderpedes or something else as spooky. Perhaps put in some beady eyes and fangs...