The Oven has baked its last loaf. This blog is no longer being updated.

My cooking videos appear at youtube.com/janeragavan

I write on food at star2.com

The George Clooney of sauces

Tuesday, March 30, 2010

Red (and a little yellow), hot and exciting
I kid you not. The chunk of ice I pulled out of my freezer earlier today could have been used as one block in an igloo. It was – I do not lie – three inches thick. Even with the heat of the day, it took more than an hour to melt away out on my balcony.

Just got me A NEW FRIDGE! That was the reason for defrosting the old one, which, I know, I should have done way before the build-up of Arctic freeze. Oh well, I don't have to worry about that any more. Now that I HAVE A NEW FRIDGE! After 12 years of living with two second-hand fridges, it was about time.

So, while MY NEW FRIDGE! (sorry, last time, I promise) is resting – I can't turn it on for three hours to let the gas settle – the contents of the old fridge are piled up, with various stages of condensation forming on their surface, on the kitchen counter, mobile island, stove top, in the sink, and a few things are even in a couple of basins on the floor. When did I make so many bottles of relishes and sauces? Why haven't I used them up yet? Gosh, a lot of this stuff is headed for the bin.

Well, since I need dinner and don't have anywhere to put a chopping board, nor can I use the stove at the moment, I would have to turn to the microwave oven.

So I threw together some already roasted bell peppers, chillli relish and homemade marinara sauce and the result was hunky, saucy and hot – the culinary version of George Clooney.

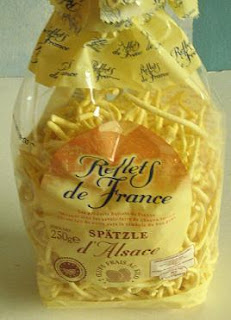
All right, I could have just combined the lot and heated them in the microwave but I have to admit that in the end, I had to clear the things off the stove anyway to cook the spätzle. Now, these noodles may be German in origin, but as you can see from the packaging below, the brand I used (found this at Carrefour, Tropicana City Mall in PJ; there are other shapes as well) is a product of France. It's from Alsace which is located on the German border so that's why it's popular there too.

Spätzle is a bit chewier than your ordinary pasta but that gives it a nice bite. It doesn't puff up much after it's cooked. I like it and will try the other shapes. Perhaps make some authentic German dishes the next time I do.

SPÄTZLE WITH ROASTED PEPPERS AND CHILLI SAUCE
Serves 2

The link to a marinara sauce recipe from the Food Network is provided below, but feel free to use store-bought sauce. I used chipotle peppers, but these can be substituted with local dried chillies.

100g dried spätzle, cooked
2 large bell peppers (capsicum), red and/or yellow
2 tablespoons olive oil
1 chipotle or 3 large dried chillies, soaked in hot water
1-1½ cups marinara sauce, homemade or purchased
Salt and pepper
A few fresh basil or mint leaves
  • Preheat the oven broiler. Cut peppers in half and remove the seeds and membrane. Place, cut side down, on a baking tray and broil until the skins are blackened. Remove from oven and place in a large bowl; cover tightly with cling wrap.
  • When peppers are cool, peel off skin and discard. Do this over the bowl so that none of the juice is wasted. Chop the peppers up into small chunks.
  • Remove the softened dried chillies from the water and chop them up. Over medium heat, fry the chillies in the olive oil until fragrant. Add the garlic, stirring for a minute before adding the marinara sauce (add more if you like a saucy pasta) and peppers together with their juice. turn down the heat and simmer for a few minutes; season to taste. Pour the sauce over the cooked noodles and sprinkle with the herbs before serving.
PRINTABLE RECIPE

Big taste of shrimp

Sunday, March 21, 2010

From the Shoe comic strip
(Perfesser Cosmo Fishhawk is at local diner Roz's Roost, talking to Roz.) 

Perfesser: Did you know the simple act of eating burns calories?
Roz: You live in a world of perpetual hope, don't you?

(Don't we all? To view the strip, click here.)

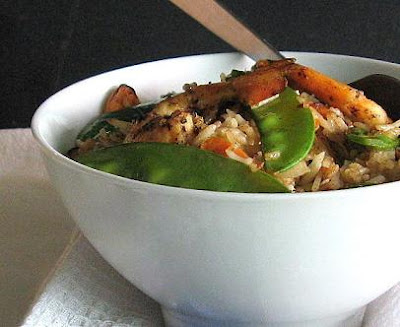
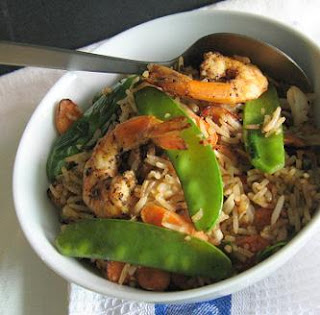
Prawn on prawn action. Fresh and preserved ones marry, and the diner is the one who ends up with a big belly!
I don't know if big prawns eat little prawns in nature but in the fried rice dish pictured above, small fries rule – and it's all down to cincalok. 

Cincalok are krill or tiny shrimp ­­– the same kind used to make belacan ­­– fermented whole in brine. It's a speciality of Malacca, and is used mostly as a condiment combined with fresh chillies or in a sambal and served with fried fish, or used as a sauce for stir-frying­­ – chicken, fried rice and omelettes are some of the dishes that incorporate cincalok.

If wine grapes benefit from noble rot, then krill in cincalok undergo a controlled rot that leaves them salty, flavoursome and with a pungency that is not for timid noses! The taste and aroma are glorious to those used to it though and it adds another level of flavour to dishes that cannot be achieved with common seasonings alone. 

Don't let their size fool you; these babies pack a punch
While cincalok is Malay in origin, it is now used in other cuisines as well. The Peranakan (Straits-born Chinese) are famous for their stir-fried belly pork with cincalok, and you can get Hainanese beef noodles with a cincalok sambal on the side.

Some people prefer to rinse off cincalok before using it as they find it too salty, but if you are, as my mother calls me, a salty mama, then having it at full strength won't be a problem. The simple fried rice recipe that follows takes most kinds of vegetables and the prawns can be substituted with chicken; only the cincalok has to stay.


CINCALOK FRIED RICE WITH PRAWNS
Serves 3-4

200g medium-sized prawns
100g snow peas, fibrous strings removed
1 small carrot, halved lengthways and thinly sliced on the diagonal
2 cups cooked rice, preferably day-old
2 cloves garlic, minced
1 tablespoon cincalok
Salt and pepper
1 tablespoon soya sauce
Vegetable oil for frying
2 stalks spring onion, chopped

To serve: Sliced bird's eye chillies mixed with a little soya sauce.
  • Shell (but keep the tails on, if desired) and devein the prawns. Season them with a sprinkling of salt and pepper and set aside for 10 minutes.
  • Heat a little oil in a wok over high heat and fry the prawns until golden brown. Add garlic, snow peas and carrots and stir-fry for a minute.
  • Stir in cincalok and about 2 tablespoons of water. Turn down heat to medium and add rice. Stir-fry for a few minutes until all the grains are well coated and the water is absorbed. Add spring onion and mix well. Taste and adjust saltiness with soya sauce if necessary. Serve with the bird's eye chilli condiment.
PRINTABLE RECIPE

Ode to the juniper

Friday, March 19, 2010

Juniper, you lovely, you; how well you flavour my stew.
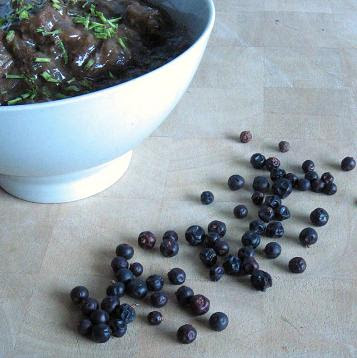
I've wanted to cook with juniper berries for a while now, but I've never seen it on Malaysian store shelves. If you've tasted gin, you'll know what juniper berries taste like since they are the predominant flavour in the spirit. Conversely, if you've tasted a juniper berry, you'll know what gin tastes like.

When a colleague went off to London on assignment a month ago, I asked him to get some for me. He came back with a couple of bottles and immediately, I looked up some recipes that utilised the berries. Many of the recipes are for strong-flavoured meats such as venison, lamb and wild boar as the "fresh" flavour of juniper berries cuts through the gaminess.

I had a bit of beef left over from when I made a beef sandwich, so I would use that. I also had a can of stout that I had been saving for a chocolate cake but that would have to wait. For some added heat (as if we need more of that with the heatwave we've been experiencing here in Malaysia!), green chillies and Szechuan peppercorns.

I made this stew earlier this month, but I have to admit, I've only tasted the sauce – during Lent, I stay off meat (not difficult for me at all since my diet is predominantly meatless anyway) – and the dish is now sitting in my freezer, waiting to be thawed after Good Friday. Even with just six juniper berries, the taste is strong but very pleasant. I liked it a lot.

Note that the taste of stout also features prominently, so use one that you actually like to drink. Maybe I should have used gin instead. On second thought, that may have been overkill. 

BEEF WITH STOUT AND JUNIPER BERRIES
Serves 2

250g beef, cut into 2.5cm cubes
Salt and pepper
All-purpose flour
1 medium onion, sliced
1 clove garlic, minced
1 green chilli, seeds removed and diced (optional)
185ml stout
1 beef stock cube
6 juniper berries, crushed
½ teaspoon Szechuan peppercorns, toasted and crushed
2 tsp chopped chervil
  • Season beef with salt and pepper to taste; dredge in flour and shake off excess. Heat 1 tablespoon cooking oil in a saucepan; brown the beef cubes on all sides, working in batches so that you do not crowd the pan. Set aside.
  • In the same pan, fry onion until translucent. Add garlic and chilli, if using, and fry briefly before adding the stout. Make sure you scrape up all the drippings in the base of the pan. Bring to the boil, then turn down heat to a simmer. Add stock cube, juniper berries, crushed peppercorns and beef; cover and simmer until beef is tender, about 20 minutes.
  • Remove lid and turn up the heat slightly so that sauce bubbles for 5 minutes and thickens slightly. Take off heat and stir in half the chopped chervil. Sprinkle with the remaining chervil just before serving. Good with mash potato.
PRINTABLE RECIPE

Kneading Mr Hook

Sunday, March 14, 2010

The arched brow, the smirky grin, the competitive glint in the eye... Game on, Mr Hook!
While I am normally so involved in the home breadmaking process and love the result of it, I felt a disconnection with my recent buns. I got my first stand mixer ­­– no wait, a Kenwood Prospero Mixer ­­– a few days ago after years of coveting that shiny red one from another brand that was way beyond my budget. Since I was going to make bread, I thought I would try the dough hook attachment first.

Well, it performed well, making quick work of getting the dry and wet ingredients to come together. But as I watched the hook turn, I started to feel restless. Without the mixer, this would be the time that I put the mixture on my marble block (the top of an old side table that once belonged to an aunt) ­­– great for doughs and pastries because they don't stick to the cool, smooth surface ­­– and kne-e-e-e-ead away, firmly but lovingly, till it turned into a smooth, soft and elastic dough. Instead, I stood by and just watched the dough being mechanically twisted into submission.

Well, the buns came out nice and fluffy. But for six pieces, made from 375g (about 2½ cups) of flour, getting the heavy machinery out may be unnecessary. However, for those who are intimidated by kneading or don't like the process, the mixer is really a good gadget to have. And not just for kneading, of course. There are other tools as well and I see myself getting well acquainted with mine.

NEXT UP: Using the whisk attachment for homemade marshmallows.

Eats shoots and leaves

Wednesday, March 10, 2010

Lynne Truss would have no bone to pick with me for leaving out a comma in the title of my post. (For those who are curious and interested, here's the explanation for the title of her book, Eats, Shoots and Leaves, and a review.) It is a little predictable but in this instance, the title is so appropriate because here are three recipes for kerabu or Asian salads. I presume the pandas would like it too (again, a reference to her book.)

In kerabu, sambals or chilli-based pastes are used as dressings. Kerisik (pounded toasted grated coconut) too is often included.

There are, of course, as many ways to make these kerabu as there are edible plants and vegetables. These are three dishes that I put together one day when I was in the mood to toss things and to use my store cupboard and refrigerator staples like dried prawns, chillies, lime juice and kerisik. I was looking for a balance of sweet, sour and salty and I certainly got that delicious tanginess with these salads.

All recipes serve four.

KERABU KACANG BOTOL
Also called winged bean in English, the raw vegetable is often eaten with a sambal belacan (chilli and shrimp paste) dip.

200g four-angled beans
2 shallot, thinly sliced
2 bird's eye chillies, finely diced 
1 tablespoon dried prawns, washed and pounded
2 tablespoons grated coconut, toasted
2 tablespoons lime juice
1-2 tablespoons palm sugar
Salt to taste
  • Pick off the ends of the four-angled beans. Blanch in boiling salted water, about 30 seconds, then run under cold water to stop the cooking process. Cut on the diagonal into 2cm-wide pieces. Toss with the sliced shallots and chillies; set aside.
  • Combine the remaining ingredients and dress the vegetables.

GREEN PAPAYA KERABU
This salad is loosely based on the Thai som tam. I am in awe of those lady hawkers who make this dish by the roadside in Bangkok. Green papaya has pale flesh; I didn't take a picture of the one I used in the kerabu. The half you see in the picture with the orange-coloured flesh has started to ripen. After peeling the skin, I only used the pale outer part of the flesh. The rest of the fruit can be eaten as is.

1 small green papaya (about 400g), peeled, cut into half and seeds removed
1 cup long beans, cut into 3cm lengths
1 tablespoon palm sugar
Juice of 2-3 limes, or to taste
2-3 tablespoons fish sauce
6-8 bird's eye chillies, thinly sliced on an angle
1 tablespoon dried prawns, washed and pounded
6-8 cherry tomatoes, halved and seeds removed
2-3 tablespoons chopped toasted peanuts
  • Grate papaya coarsely and into long strips.
  • To make the dressing, dissolve palm sugar in the lime juice. Add the fish sauce.
  • In a mortar and pestle, bruise the long beans. Add the chillies, dried prawns and some of the dressing. Toss well and add the papaya. Bruise the papaya so that it is mixed with the dressing. Add more dressing as needed.
  • Add the tomatoes and bruise them lightly, blending them with the rest of the ingredients. Serve sprinkled with chopped peanuts.
PRINTABLE RECIPE 
 
KERABU PUCUK PAKU (FIDDLEHEAD FERN SALAD)
The fern shoots are usually blanched, but I didn't do that with my own dish as I thought they were tender enough. The option is, however, included in the recipe.
300g pucuk paku
50g fresh prawns, shelled and deveined
2 tablespoons ready-made kerisik
2-3 tablespoons coconut milk
2 large red chillies, pounded
2 tablespoons lime juice
2-3 teaspoons palm sugar
Salt to taste
3 tablespoons toasted peanuts, coarsely pounded
  • Pick off the tendrils and tender part of the stalks from the pucuk paku. Cut into 6cm pieces. If desired, blanch in boiling salted water, about 30 seconds, then run under cold water to stop the ferns cooking further.
  • Blanch the prawns until pink but still firm. Combine with the ferns.
  • Combine the rest of the ingredients and toss with the greens.
PRINTABLE RECIPE

Turn over for the surprise

Monday, March 8, 2010

Bottoms up: Made to share... yeah, right!  
Dieters look away now! These buns are full of sugar and butter, and it's made with white flour. There's no getting around that. For those of us who don't care, we ask why would we want these buns with less sugar or butter?

I've been telling Veggie Chick that I wanted to make cinnamon buns for some time now, but since I still hadn't got round to it, she said she would make them herself since she has a new-found interest in breadmaking (I think she got fed up with my constant gushing about my love for breadmaking that she wanted to see what all the fuss was about). Well, that sounded like a challenge and that's why we both decided to make the buns, post our recipes and compare notes and bread – when we meet at work later today.

I decided to go with sticky buns, which are a variation on those regular buttery rolls with the swirls of cinnamon-sugar mixture in the middle (sometimes with dried fruit and nuts as well) with their sticky caramel and nut topping. Instead of making a caramel sauce, however, I simply rubbed butter and sugar together. Because the mixture was in the base of the tin when the buns were baking, it melted anyway. It's not as heavy or gooey as your usual sticky bun caramel sauce, which would drip all over the buns when you flip them over after baking, but it's just as good. (Ooh, I think I hear the dieters getting interested again...)

If you didn't already know, here's a tip on how to cut the dough without squashing it, as would normally happen when you use a knife: Dental floss. Pull off about 30cm of floss, slide it under the roll of dough, cross the ends over above the dough, hold the ends and pull quickly but smoothly. You should have a perfect spiral. Just remember to use unwaxed dental floss!

NUTTY CINNAMON STICKY BUNS
Makes 9 large buns

3 cups all-purpose flour plus extra for dusting
⅓ cup milk powder
1 teaspoon salt
1 teaspoon instant yeast1 cup warm water
2 tablespoons honey
1 medium egg, beaten

¼ cup + 1 tablespoon butter (divided), melted
¼ cup packed brown sugar
2 teaspoons ground cinnamon 

Topping  
½ cup brown sugar
2 tablespoons cold butter, chopped
¾ cup chopped hazelnuts, pecans or walnuts
  • Sift flour, milk powder and salt together in a large bowl. Mix in yeast. Add honey to water and stir to mix. Pour into flour mixture; blend together with a wooden spoon (if using a food processor, whiz together until just blended). Mix in ¼ cup melted butter and add the beaten egg a little at a time until the dough starts to leave the side of the pan or food processor bowl. You may not need to use all the egg.
  • Knead dough on a lightly floured surface for 10 minutes until smooth, elastic and no longer sticky. Shape into ball; place in large greased bowl. Turn to grease top. Cover; let rise in warm place 30 to 40 minutes or until doubled in size. 
  • Meanwhile, make the topping: Rub the butter and sugar together so that they form coarse crumbs. Mix in the nuts and spread the mixture evenly in the bottom of a 25cm square baking pan; set aside.
  • Punch dough down; turn out onto a lightly floured surface. Pat or roll dough into a 30x25cm rectangle. Brush dough with remaining 1 tablespoon melted butter. Mix brown sugar and cinnamon together and sprinkle over the butter. Roll dough from long side into a log; pinch edge to seal. Cut into 9 equal slices.
  • Arrange in the prepared pan on top of the nut mixture; cover and let rise 25 minutes.*
  • Preheat oven to 180°C. Bake buns 30-35 minutes or until golden. Cool slightly; invert onto a plate.
* If you don't have time, after arranging the spirals in the prepared pan, cover with cling film and put in the refrigerator to rise slowly overnight. The next morning, remove from fridge and allow to come to room temperature, 30-45 minutes. The dough will rise some more and fill the tin.

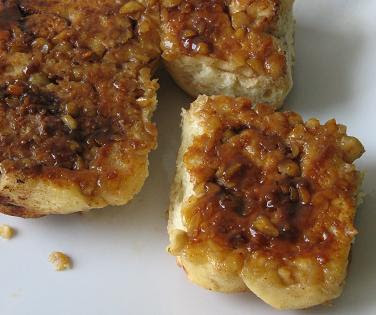
The picture on the right shows what will become the underside of the buns – like an upside-down cake, the bottom is the pretty side. The tray had just come out of the oven and the smell of caramelised sugar and cinnamon was too much; I couldn't wait and scoffed that piece in the corner!

PRINTABLE RECIPE

I heart breadmaking

Friday, March 5, 2010

Too much bun, but still fun.
I never tire of reading about breadmaking. The New York Times recently ran an article by the brilliant Harold McGee entitled, "Better bread with less kneading", which gave me a refresher course on my beloved hobby as well as quite a bit of new information. You can never learn too much about breadmaking.

There's a simple white bread I make so regularly, I don't need to look at the recipe anymore. It's the bread I make when I want something reliable and with a tender closed crumb that's suitable for sandwiches but don't want store-bought "plastic" sliced bread. This time, I wanted to make buns for a project that Veggie Chick and I are currently preparing for.

So easy I can make this bread with my eyes closed? Don't trust me on that. I should have had them wide open when reaching for my flour.

For a person who bakes so often, it is with a sense of embarrassment that I admit to using the wrong type of flour for the bun you see in the picture above. Instead of all-purpose, I used cake flour. Granted, all my flour containers are alike but they are labelled – not very well, it would appear.

Cake flour is soft and has little gluten-forming proteins and is not used in breads. According to baking911 (lots of interesting flour information on this site, even if the layout is a bit hard on the eyes), this will cause the bread to fall because it requires a stronger structure that can trap the gases created by yeast, allowing the bread to rise.

As you can see from the picture, however, my buns still rose – but that could have been because of the tin I had used. It was a little too small for the amount of dough I had made and probably forced the dough upwards. Notice, though, how the base is a little too dense and somewhat gummy looking? I actually had to put the bread back into the oven, upside-down, after I removed it from the baking tin so that the bottom could cook properly.

But I'm still happy since I used my new digital scale for the first time – wonderful contraption that. Try weighing 10g of yeast with my old scale, one of those plastic things – it wouldn't even have registered!


Shredded chipotle roast beef on white bread with macerated cherry tomatoes, pineapple salsa and butterhead lettuce.

Herb garden on a plate

Thursday, March 4, 2010

A mountain of herbaceous bounty
My 10-year-old godchild, my nephew, draws very well. The only problem at the moment ­­– and I hope it's just a phase ­­– is he will make a very nice portrait of someone and then make funny additions to it like a goatee, twirly moustache, caterpillar eyebrows and mole with a long hair growing out of it! Perhaps the psychologists among you can explain this.

He's also a finicky eater. For a recent family gathering, my mother and aunt cooked up an array of wonderful dishes but his mum had to buy a packet of restaurant food for him just to get him to eat something.
 

My sister-in-law also got a few pieces of fried fish to share with everyone, but because there was so much food, the dish was practically ignored. The restaurant fish really didn't stand a chance against anything the two mothers had prepared, so when it was time to pack up the food, I decided to take the fish home with me and use it along with tons of herbs in a Nasi Ulam (herbed rice).
 

Nasi Ulam is a mixture of white rice, salad greens, herbs and edible wild plants, sambal and grated coconut. I first ate this dish as a youngster in my hometown in the north of Peninsular Malaysia. It was delicious, and I would pester my mother for it all the time. Unfortunately, it was only available during the Muslim fasting month of Ramadan at the market set up just for this period before the celebration of Eid.

Well, I finally learned how to make it some years ago and while the different ulam or green herbs are not always easy to get and the preparation is a little time-consuming because of all the shredding and toasting ­­– now I understand why the dish wasn't always available ­­– I don't mind the work because it is so tasty (the recipe below serves four, but believe me, I can finish it myself in two sittings!) Except for the rice and fish (and this makes good use of leftovers), everything is raw.

Two of the ingredients that go into Nasi Ulam
The quantity of each ingredient really depends on individual tastes. I have given approximations here but please adjust accordingly. Personally, I like my Nasi Ulam with a lot of kaffir lime leaves, lemongrass and kerisik (pounded toasted grated coconut), balanced with salty, sweet and sour dressing. This is a main dish that can hold its own without additional side dishes. 

NEXT UP: Kerabu!

NASI ULAM 
Serves 4

2 cups cooked white rice
250g grilled or fried fish, remove bones and flake the flesh

2 tablespoons dried prawns, soaked to soften, then finely pounded
3-4 tablespoons ready-made kerisik
3 shallots, thinly sliced
3-4 stalks lemongrass (white part only) shredded
1 ginger flower (bulb section), shredded


1-1½ tablespoons palm sugar
¼ cup lime juice, or to tasteSalt and pepper to taste

Sambal Belacan
2 large red chillies, roughly chopped
1 teaspoon dried shrimp paste
  • Pound both ingredients together into a fine paste.
Ulam (Green herbs)
Most, if not all, these herbs can be bought at the market. They're said to have medicinal properties. Shred all the leaves finely. As an approximate, use about 2 tablespoons of each of the shredded leaves.

Daun kesum (Vietnamese mint leaf or laksa leaf)
Daun kunyit (turmeric leaf)
Daun limau purut (kaffir lime leaf)
Daun kaduk (wild betel leaf or wild pepper leaf)
Daun pegaga (pennywort)

  • Once all the ingredients are prepared, mix them together in a large bowl. Don't forget to season to taste. This is best eaten as soon as possible. Out of the refrigerator, the herbs lose their colour and freshness when heated up and the oil from the kerisik hardens.
PRINTABLE RECIPE

The humble root

Monday, March 1, 2010

Speak softly and carry a big stick. Okay, this supposedly African proverb attributed to Theodore Roosevelt may not actually fit here... Here's a paraphrase: Cook this big stick and you'll hear no noise from everyone enjoying it. 
My mother must have loved having cheap child labour when I was little. I couldn’t stand cooking but if she needed to clean squid or pluck feathers off a chicken, I would be up to the task (picking the tail off bean sprouts and peeling onions, however, bordered on child abuse).

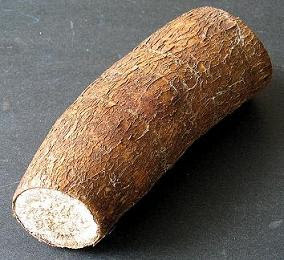
I really liked peeling tapioca. My mother would run the tip of a knife lengthways down the root and leave me to get my little fingers under the thick pink skin with its papery outer bark-like layer (no wonder it's called ubi kayu, or wood potato, in Malay) and pull it off. How happy I would be to keep as much of the peel unbroken so that it would come off in one curved piece.

Perhaps learning at that young age that during the Japanese Occupation in then-Malaya (and in Singapore) in World War II, people survived on tapioca and other root vegetables like sweet potato and yam made me appreciate it more.

We only ever had steamed tapioca, which I love to this day, but if my mother had made bengkang or baked tapioca cake, I probably would have enjoyed grating the tapioca – although I'm sure she would never have let me anywhere near a sharp knuckle-scraping kitchen implement.

Since I had never made bengkang before but chose to do it for the March issue of "Don't Call Me Chef" (see tab above), I started reading up to find out about the tuber. In the book Introduction to Jaffna Cookery by Sathanithi Somasekaram, the author cautions in her recipe for Tapioca Curry never to eat the vegetable with ginger as she says the combination is poisonous, but does not elaborate. I looked for more information online, but although certain varieties of tapioca are known to be toxic, especially when eaten raw, I couldn't find anything about the reaction with ginger. (I found an interesting article on cassava, another name for tapioca, but lost the link so I apologise for not being able to provide it here.)

Note: The "chunky" in the name of the recipe comes from additional grated coconut and the texture of the tapioca. I prefer this to the bought bengkang with its oily, gelatinous texture. 

Bengkang with a bit of robustness
CHUNKY TAPIOCA CAKE
Serves 8

1kg tapioca root
200g caster sugar
100g grated coconut (white part only)
200ml thick coconut milk (from 2 coconuts)
2 tbsp plain flour
Pinch of salt
2 medium eggs, beaten
Vegetable oil
Banana leaf (optional)
  • Peel and clean the tapioca, removing the tough fibre in the centre. Finely grate the tapioca or put into a food processor and pulse to chop; the tapioca should be fine but not puréed. Preheat the oven at 200°C.
  • Place tapioca in a sieve over a bowl; squeeze out the juice. Let the juice sit undisturbed for 10 minutes ­­– it should separate, with the starch sinking to the bottom. Pour off the liquid on the top and add the starch to the grated tapioca along with the sugar, grated coconut and milk, flour, salt and most of the egg (leave about 1 tbsp for later).
  • Lightly brush the inside of a shallow 20cm square cake tin with vegetable oil and line the base with a piece of oiled banana leaf, if using. Pour in the tapioca mixture and level the top. Bake for 45 mins until quite dry; brush the top with leftover egg and bake a further 15-20 mins until crusty and golden brown.
  • Cool before cutting in squares.
PRINTABLE RECIPE