The Oven has baked its last loaf. This blog is no longer being updated.

My cooking videos appear at youtube.com/janeragavan

I write on food at star2.com

Cooking from the WWW*

Sunday, February 24, 2013

MEJADRA, WHERE HAVE YOU BEEN ALL MY LIFE? 
* A few dishes I have cooked lately, using recipes off the World Wide Web.

The more I read about Jerusalem, the cookbook by Yotam Ottolenghi and Sami Tamimi, the more I want to get it. All the recipes I have seen so far on newspaper websites have looked delicious and easy to do. The latest one I read, in the Los Angeles Times, is mejadra, a dish of rice and lentils topped with crisp fried onions.
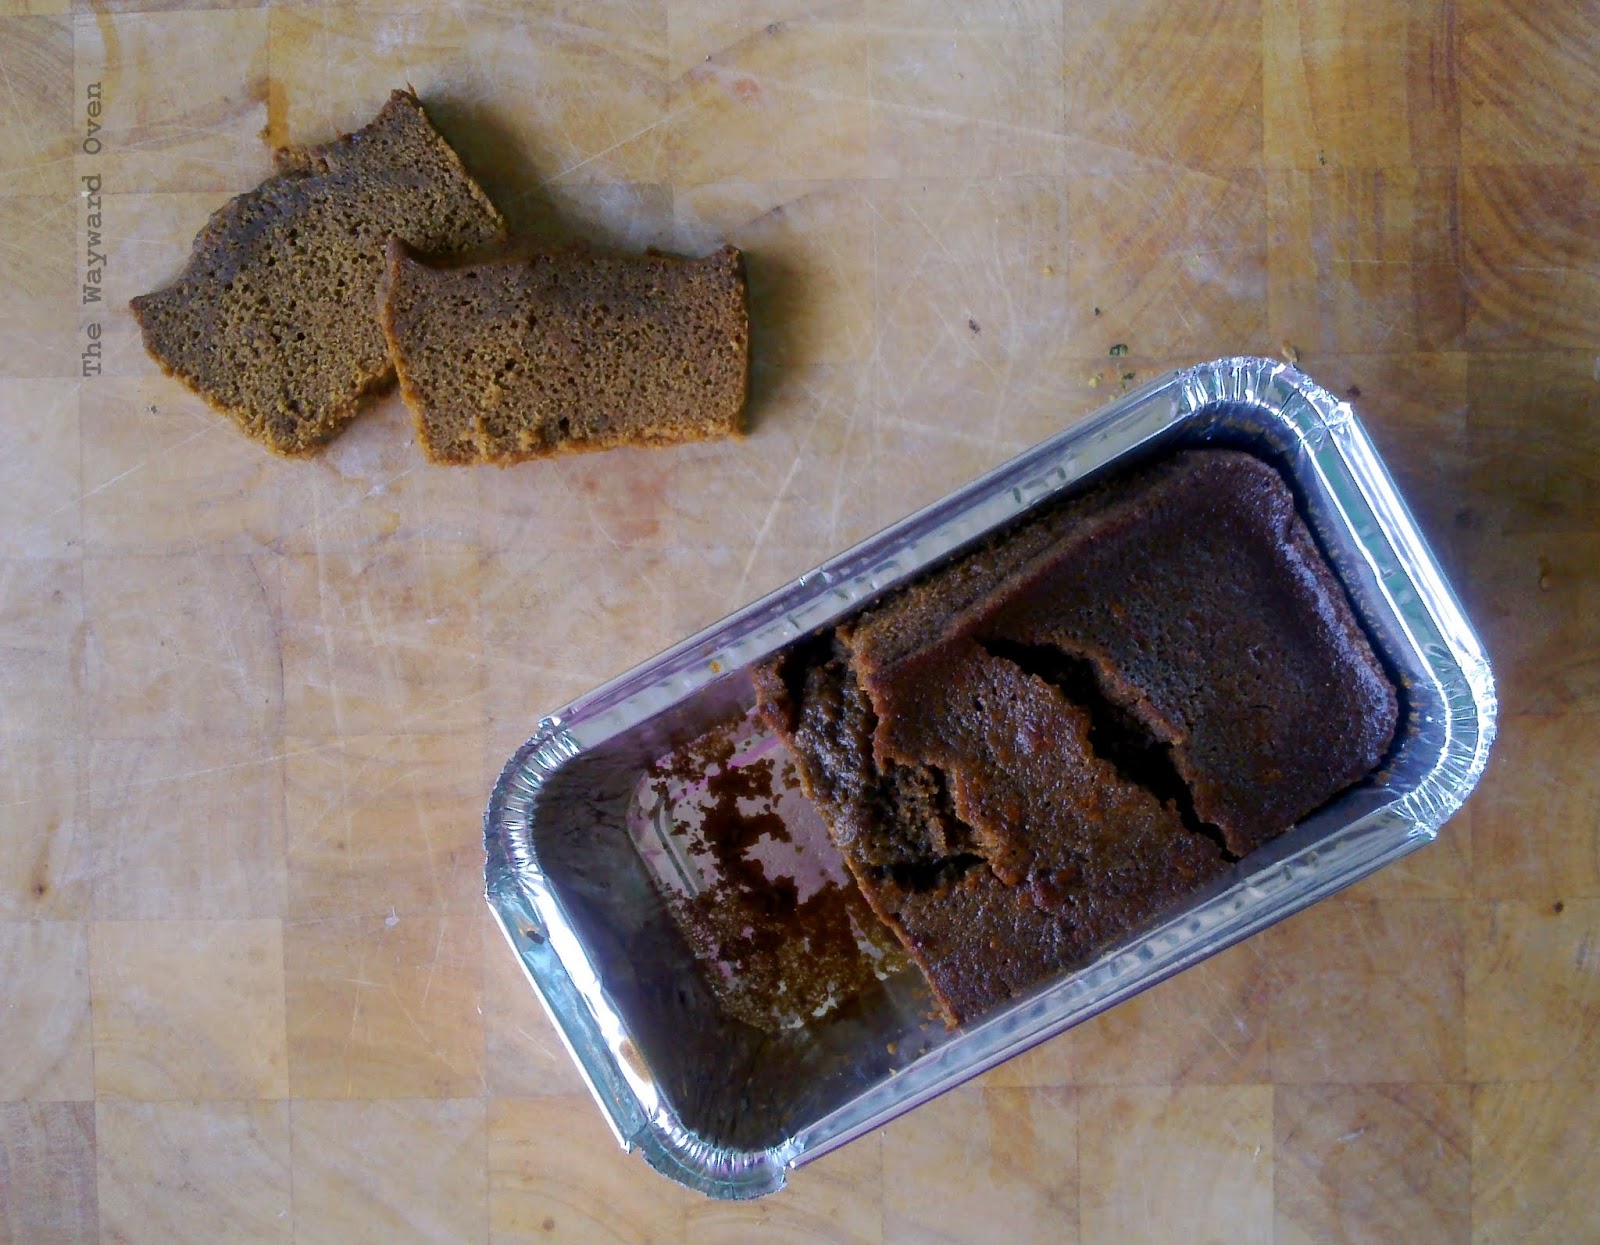
Sticky ginger cake
I never pass up Sticky Ginger Cake and the recipe from The Guardian was one to try. It's from the book Cherry Cake and Ginger Beer: A Golden Treasury of Classic Treats by Jane Brockett. Although I was anxious to have a slice straight out of the oven, I restrained myself and followed the instruction to wrap the cake in greaseproof paper and foil so that it would get an more sticky and gingery. It is a suggestion that should always be heeded. Yum. 
Emily Dickinson's coconut cake
Emily Dickinson's Coconut Cake from The History Kitchen. The Emily in question is the American poet. This is a good full-flavoured, moist cake. Fresh grated coconut gives it a rich coconut flavour. I was surprised to learn that fresh coconut was used in cooking in Massachussetts in the 19th century. I thought coconuts were just targets to knock down in old-time fairground games (very often rigged!).

Sourdough Surprises: Flatbreads - Thosai

Thursday, February 21, 2013

THOSAI, A DELICIOUS SOUTH INDIAN FLATBREAD 
Thosai (also spelled tosai and dosa) is an Indian crepe-like bread I grew up eating. It's one of the staple dishes served in south Indian restaurants in Malaysia, especially at breakfast time, quite often on a banana leaf. The bread is so popular that there are instant mixes that you just add water to, but really, it's not difficult to make from scratch.
The Sourdough Surprises challenge for this month is flatbreads which is defined as "a soft, pliable bread that is cooked on a griddle or stovetop". One of the flatbreads I usually make with my sourdough discard is the Indian chapati, made with a soft wheat flour called atta.
Thosai doesn't actually contain sourdough starter (made with wheat/rye flour), so perhaps it doesn't fulfil the requirements of the challenge. But the batter – made with raw and cooked rice and black gram lentils – is left to ferment overnight, and the whole thing is basically a sourdough. It even has a naturally sour taste and will rise slightly. Some recipes call for rice flour instead of raw rice. It does simplify the process, especially if you don't have a blender strong enough to make a smooth purée.
Thosai is often served plain with a selection of dhall curries and chutneys – coconut chutney is a must, and that is the only condiment I like with my thosai. But thosai can also be filled, usually with spicy mashed potatoes, turning it into masala thosai.
The thosai that I have made here is soft and spongy. For a crisper thosai, the batter is spread very thinly, and is about 45cm (18 inches) in diameter or more! It's usually only found in restaurants with huge griddle plates on the burners. The thosai is then rolled up like a large cigar or a cone shape. It's called "paper thosai".
I have posted a day late because I just wasn't able to get to the shops for grated fresh coconut to make my favourite coconut chutney. In the end, I didn't make it, after all. I do, however, have a tomato chutney and spinach with dhall as side dishes.
In restaurants, the server may bring along a spoon and fork with the order, but the best way to eat thosai is with the fingers!
Thosai
Makes 6 medium thosai

½ cup raw white rice
¼ cup skinless black gram lentils (ulunthu)
Large pinch fenugreek seeds
2 tbsp cooked white rice
½ tsp salt, or to taste
Vegetable oil

Wash the raw rice, dhall and fenugreek seeds and soak them separately in water for about six hours (overnight is fine).
Drain and rinse the soaked ingredients. Blend them together until very smooth with enough water to turn the blades of the blender. Transfer to a large bowl. Blend the cooked rice with a little water and stir into the bowl. The batter will be fluid but quite thick (pic 1). Cover and set aside at room temperature, preferably overnight, to ferment.
Thosai batter: before and after overnight fermentation
When fermented, the batter will have domed slightly with tiny bubbles on the surface (pic 2). Stir in salt. The batter should have the consistency of pancake batter so if it too thick, add a little water.
Heat a tava or crepe pan or large non-stick frying pan. Dip a crumpled up piece of kitchen paper into some oil and rub it on the surface of the pan.
Use a metal ladle or similar implement (a metal measuring cup, for example) to scoop up about ¼ cup of batter and pour it onto the pan. Using the bottom of the ladle/cup, quickly spread out the batter into a thin circle but with slightly raised "ripples" (pic 3). Turn down the heat.
The first thosai never turns out well! This one stuck to the pan.
For crisper edges, dribble a little oil around the thosai.
Bubbles will form all over the surface like a pancake. The thosai is not flipped so leave it until the top is no longer wet and the bottom is a light brown, about 30 seconds. Fold the thosai in half and serve.
(For crisper thosai, spread the batter thinner and more evenly. The thosai is then usually rolled up like a large cigar or even into a cone shape. It's called "paper thosai".)
Make only as many thosai as will be eaten. Store uncooked batter in an air-tight container in the fridge. It can be used straight from the fridge.

Barley: The biga the better

Sunday, February 17, 2013

IT'S A BIGA DEAL WITH BARLEY 
The biga blew the lid off ... literally.
There was a loud pop and I looked over to the plastic bucket that was holding the preferment and found the cover on the floor. In hindsight, I shouldn't have pressed the lid on so tightly. Those organisms in fermenting bread doughs are mighty powerful!
The next time I made the bread, I used a bowl and just covered it with a tea towel.
The recipe was the white bread with 80% biga from Ken Forkish's Flour Water Salt Yeast. I followed it exactly, baked it in a Dutch oven and it turned out to be the tastiest and best-looking plain bread I had made in a while. It had a wonderful aroma and the crackling as it cooled was so loud I could – no exaggeration! –  hear it across the room. Although it didn't have the crack on the top like the loaf on the book's cover (the breads in Ken Forkish's book are not scored but baked seam side up so the crust opens up naturally), I thought it still looked pretty.
The crumb was springy and airy and when I bit into a slice, I knew that this was the gold standard by which I would have to judge all my breads henceforth.
Ken Forkish's white bread with 80% biga
But it is made with 100% white flour and if I wanted to eat more healthily I needed to use "browner" flours.
I have added barley flour to bread dough before but in very small amounts. Then I read about how The Vicar Died Laughing uses up to 20% barley flour in his sourdough bread (it looks great!). Since Ken Forkish's recipe had worked so well, I thought I might substitute a fifth of the white flour with barley.
I shaped the dough into a batard and proofed it in a rectangular basket, then baked the loaf using an improvised "hearth" baking method (a preheated upturned tray in the oven with a steam tray below it).
The oven spring came 15 minutes into baking. The crust didn't get as brown or as crusty as the all-white bread but I put that down to the oven not being steamy enough. The bread had a slight tang which I think is because of the slow rising overnight, and a hint of nuttiness from the barley, which also gave the crumb a yellow tinge.
Overall, a very nice bread. It's going to YeastSpotting.
Barley gives the crumb a yellow tinge
20% Barley Bread with 80% Biga
Makes a 750g loaf. Adapted from Ken Forkish's white bread with 80% biga

Biga
400g strong white bread flour
Pinch of instant yeast
272g water

Final dough
100g barley flour
103g water
9g salt
1g yeast
All the biga

Combine the ingredients for the biga and mix well. Place in a container and cover but not so that it is air-tight. Set aside to ferment until it has risen and the top is slightly domed and bubbly, 8-12 hours (depending on room temperature).
Combine the barley flour, water, salt and yeast in a bowl and mix well. Incorporate the biga and mix into a dough.
Develop the gluten using whatever method is comfortable (I did three stretch-and-folds over 1½ hours), then bulk proof (total time: about three hours at a room temperature of 27°C).
Shape and place into a proofing basket. Place basket into a food-grade plastic bag and leave to rise in the refrigerator overnight.
Do a poke test to determine if the loaf is ready for baking (this loaf was baked straight from the fridge). Preheat the oven to 225°C. If using a Dutch oven, preheat in the oven. Or put a steam tray in the oven for hearth baking.
Slash the loaf and bake until the crust is a deep brown and the loaf feels light for its size, 35-40 minutes, rotating the loaf halfway through the cooking time. The internal temperature should be around 95°C. Cool on a wire rack.

Love letter to gnudi

Wednesday, February 13, 2013

SPINACH RICOTTA GNUDI 
It's easy to wax lyrical about the food we love. Poems have been written about everything from almonds to zucchini, songs have been sung about fried fish and bananas, and, well, cooking blogs only exist because food is never the last thing on our minds.
Last week, in our Don't Call Me Chef recipe column in The StarIndraIvy and I paid tribute to the fattening dishes or ingredients we love so much that even if they gave us love handles, we would continue to cook and eat them. Indra is besotted with butter, Ivy can't stay away from any kind of fried chicken, and I love cheese and pasta. My recipe was for spinach ricotta gnudi and I wrote a soppy love letter to the cheese dumpling.
Gnudi is made with ricotta cheese. Spinach, however, is not what defines gnudi although Google images show these to be the most popular kind.
Recipes for spinach ricotta gnudi are quite straightforward  most advise to keep a light hand and to not overmix. Some dumpling mixtures are stiff and can be rolled out into ropes then cut, while others are pipeable or shaped into little ovals with teaspoons. Most instruct to cook the dumplings immediately after they are mixed, but I like the guidance given in April Bloomfield's recipe at Serious Eats that has one extra step: drying out the gnudi before cooking to prevent them from getting soggy.
It apparently takes her three days to make her famous Ricotta Gnudi which she serves at The Spotted Pig restaurant in New York. That may be a little too long for most of us, including me, but there was one time when I left the uncooked dumplings covered in semolina for two days in the fridge and they did taste a little lighter after they were cooked. Most times, I leave them to dry for just a day.

Spinach Ricotta Gnudi
Makes two generous servings

1 tub (250g) ricotta cheese
½ cup steamed spinach, finely chopped
¼ cup grated Parmigiano-Reggiano cheese
2 egg yolks
½ tsp flaky salt
½ cup plain flour, approximate
½ cup semolina flour (optional)
2 cups tomato (pasta) sauce (preferably homemade)
Parmigiano-Reggiano cheese, to serve

Remove ricotta cheese from the tub and place in three or four layers of kitchen paper on a sieve over a bowl. Leave for 20 minutes to drain. Discard the whey or reserve for another use (for example, add to soups or use in bread doughs).
In a large bowl, stir together the ricotta, spinach, Parmigiano-Reggiano and egg yolks until blended. Stir in salt to taste, then gently stir in the flour, mixing just enough so the mixture comes together. It will have the texture of a creamed cake batter (pic 1).
This next step is optional but it will prevent the gnudi from becoming soggy. (Proceed to cooking the gnudi if omitting this step). Line a large plate with parchment paper. Sprinkle the semolina flour on it. Using two teaspoons, shape and compact the ricotta mixture into ovals. Dredge them in the semolina flour and leave them on the plate (pic 2). Place the plate in a large plastic bag and chill overnight or up to three days.
Bring a large pot of salted water to a boil. Heat the tomato sauce in a sauté pan on another burner and keep it over low heat.
Drop the gnudi directly into the boiling water in batches; do not crowd the pot. The gnudi will float to the surface when done, two to three minutes.
Using a slotted spoon, transfer the gnudi to the tomato sauce (pic 3). When all the gnudi are cooked, transfer to individual bowls. Shave Parmigiano-Reggiano over the top and serve at once.
Note: The cooked gnudi can also be frozen. Place in the fridge to thaw and heat up in the tomato sauce.

New year cherry blossom

Sunday, February 10, 2013

CHERRY CHOCOLATE KUCHEN 
I had intended to post today on a loaf of bread decorated with a stencil of Chinese characters that read "good fortune". Good intentions, unfortunately, don't always pan out, and so I am posting on something else but still on bread.
But before that,
HAPPY LUNAR NEW YEAR
GONG XI FA CAI
HAPPY SPRING FESTIVAL
to all who celebrate and wishing you Good Fortune this Year of the Snake!
It's good to have a sweet yeast dough in one's baked goods repertoire. The dough can be filled or topped or layered with fruit and streusel, and even made into plain rolls or a loaf.   
This kuchen resembles cake in taste – and a little in looks too. Cakes may be quicker to whip up, but I prefer this bread topped with cherries, chocolate and crumb topping. It isn't as rich or high in fat, but it still tastes fantastic.
The dough doesn't take long to mix. It doesn't have a high hydration and is easy to knead by hand.
Incorporating the butter with the 'clothes wringing' kneading method
To incorporate the butter, I use a "clothes wringing" method which I read about in The River Cottage Bread Handbook. The pictures above show the process done with only one hand – the left is holding the camera – but both hands are actually necessary! This kind of simulates the movement  of the dough hook of a stand mixer.
For this, the kneading is done in the mixing bowl. Hold the dough at opposite ends and then wring it as if you are wringing out wet washing so that the dough is twisted (left pic). Then, fold the dough in half so that the two ends meet, holding both ends in one hand (right pic). Hold on to the midsection that is folded (it's now the opposite end) and twist the dough again. Repeat until all the butter is incorporated.
I must say it's very therapeutic. Try humming along with the movement.
This is submitted to YeastSpotting.
Russian Rose Braid made with this basic sweet dough
Basic Sweet Dough
Adapted from Baking Artisan Pastries & Breads by Ciril Hitz

350g full-fat milk, cold is fine
1 medium egg
1 tsp lemon essence
Seeds from 1 vanilla bean
660g bread flour
7g malt powder
13g instant yeast
70g caster sugar
13g salt
70g cold unsalted butter, cut into cubes

Combine the milk, egg, essence and vanilla seeds.
In a mixing bowl, combine all the other ingredients except the butter.
Add the liquids to the dry ingredients and mix to incorporate. The dough will be a little dry at this time. Set aside for 10 minutes.
Add the butter in three batches, incorporating it well after each addition. By this time, the dough will come together in a ball.
Knead the dough to develop the gluten using whichever method is comfortable. Cover and set aside at room temperature to bulk ferment, 1-2 hours.
Transfer the dough to a lidded plastic container sprayed with oil and store in the refrigerator overnight.
This makes a large amount of dough (about 1.4kg) and it can be divided into two or three portions. These can be stored in separate containers in the refrigerator for up to four days. For longer storage, wrap portions in cling film, place each one in a plastic bag and store in the freezer for up to two weeks. Thaw frozen dough in the fridge overnight before using.
What's kuchen?
Cherry Chocolate Kuchen
Serves 8-10
½ batch Basic Sweet Dough
½ a 425g tin of pitted cherries, drained
1½ tbsp medium chocolate chips

Crumb Topping
From Baking Artisan Pastries & Breads by Ciril Hitz. Makes 2½ cups. Use half batch for the kuchen. Store the remainder in a lidded container in the fridge.

160g all-purpose flour
⅛ tsp baking powder
120g light brown sugar
 tsp table salt
¾ tsp ground cinnamon
115g cold unsalted butter, roughly chopped

Make the crumb topping: Combine the flour, baking powder, sugar, salt and cinnamon in a bowl. Add the cold butter and cut into it with pastry cutter or rub in with fingertips until the mixture looks like sand with a few larger clumps.
Assembling the kuchen
Assemble the kuchen: Lightly oil a 28cm x 24cm baking pan (or equivalent size). Press the dough into the pan. If it resists and springs back, set aside to relax for about five minutes, then continue. Dimple the dough with the fingertips.
Break the cherries into two and spread them over the dough. Sprinkle with chocolate chips and then with half the crumb topping.
Cover the tray with cling film and leave to rise, about 1 hour. Alternatively, the tray can be placed in the refrigerator overnight to rise slowly.
Preheat the oven to 165°C. Bake the kuchen for 30 to 35 minutes, rotating the tray halfway through the cooking time. The top will be nicely golden and the bottom a light brown.
Place tray on a wire rack to cool for 20 minutes. Eat warm or cool further before serving.

Over the top brownies

Sunday, February 3, 2013

DARK AND MYSTERIOUS: CHOCOLATE KAHLÚA SOURDOUGH BROWNIES 
After one of my classmates brought minced pies to class before Christmas, my tap instructor casually mentioned the brownies I once brought to one of his year-end parties. Well, I can take a hint, so I said I would make him some for Chinese New Year, which is next Sunday. But since I had some time last week and didn't know if I would have any this week, he got his gift a little early.
These are rich Kahlúa brownies, but what's good about them is that they are sourdough brownies.
The brownies are a little extravagant in that they contain a little more Kahlúa than necessary (I found out that you can have too much!), and they have several types of chocolate in them, but I call them Over The Top after a tap step we were taught a couple of weeks ago. Clumsy me kept tripping over my own feet in the beginning but I'm getting the hang of it now. 
Though he liked them, the brownies did not make my instructor lighten up on us. He still drilled us until we flopped down in exhaustion. Not complaining, just saying.
Cut brownies when cold but eat them when they are at room temperature
I started out with the sourdough brownie recipe from Wild Yeast by way of The Gingered Whisk and then made a few changes along the way to incorporate the flavours I wanted. Some are just simple substitutions, like dark palm sugar for caster (granulated sugar), while the other changes are additional ingredients. Also, I mixed the batter in just one saucepan, so less washing up. 
As for the Kahlúa, I used two tablespoons at first but after tasting the batter, I didn't think there was enough and added another scant tablespoon. That took it over the top though, so next time, I will use the lesser amount.
Some brownies are good eaten cold, but I found these too dense and quite bland straight out of the fridge. They're easier to cut when cold, but wait till they come to room temperature to eat. The texture is much more desirable and the flavour certainly comes through better. I also think the flavour develops over a few days, which is usually the case with anything sourdough. 
Dust the tops with cocoa powder if desired
Over The Top Chocolate Kahlúa Sourdough Brownies
Makes 20 brownies

130g baking chocolate, chopped
110g unsalted butter, cut into pieces
200g palm sugar
½ tsp salt
1 tsp instant coffee
1 tsp vanilla extract
2 tbsp Kahlúa
1 egg, at room temperature
30g cocoa powder, sifted
110g refreshed 100% hydration sourdough starter
2 tbsp all-purpose flour (approximate)
2 tbsp medium chocolate chips

Preheat oven to 170°C.
Line an 18cm square cake pan with foil. Grease the foil.
In a saucepan, melt the chocolate and butter, stirring (use a whisk) the mixture constantly. This will take a minute or so. Take the pan off the heat.
Add sugar, salt and instant coffee. Stir until sugar dissolves. By this time, the mixture will have cooled slightly.
Add vanilla extract and Kahlúa.
Whisk in the egg until well blended. Add the cocoa powder and starter and stir gently until everything is completely incorporated. The batter should have the texture of soft pancake batter. If it seems too runny, add all-purpose flour a little at a time.
Stir in the chocolate chips.
Pour batter into the prepared pan and bake for about 40 minutes, turning the pan halfway through, or until a toothpick inserted into the centre comes out with just a few crumbs on it.
Cool in the pan, 20 minutes. Lift the foil out and allow to cool completely on a wire rack. If desired, brush Kahlúa on the brownies and/or dust with cocoa powder. Cut into 20 pieces. Refrigerate for about 30 minutes to make slicing easier. Allow to come to room temperature before eating. Best eaten a day later.