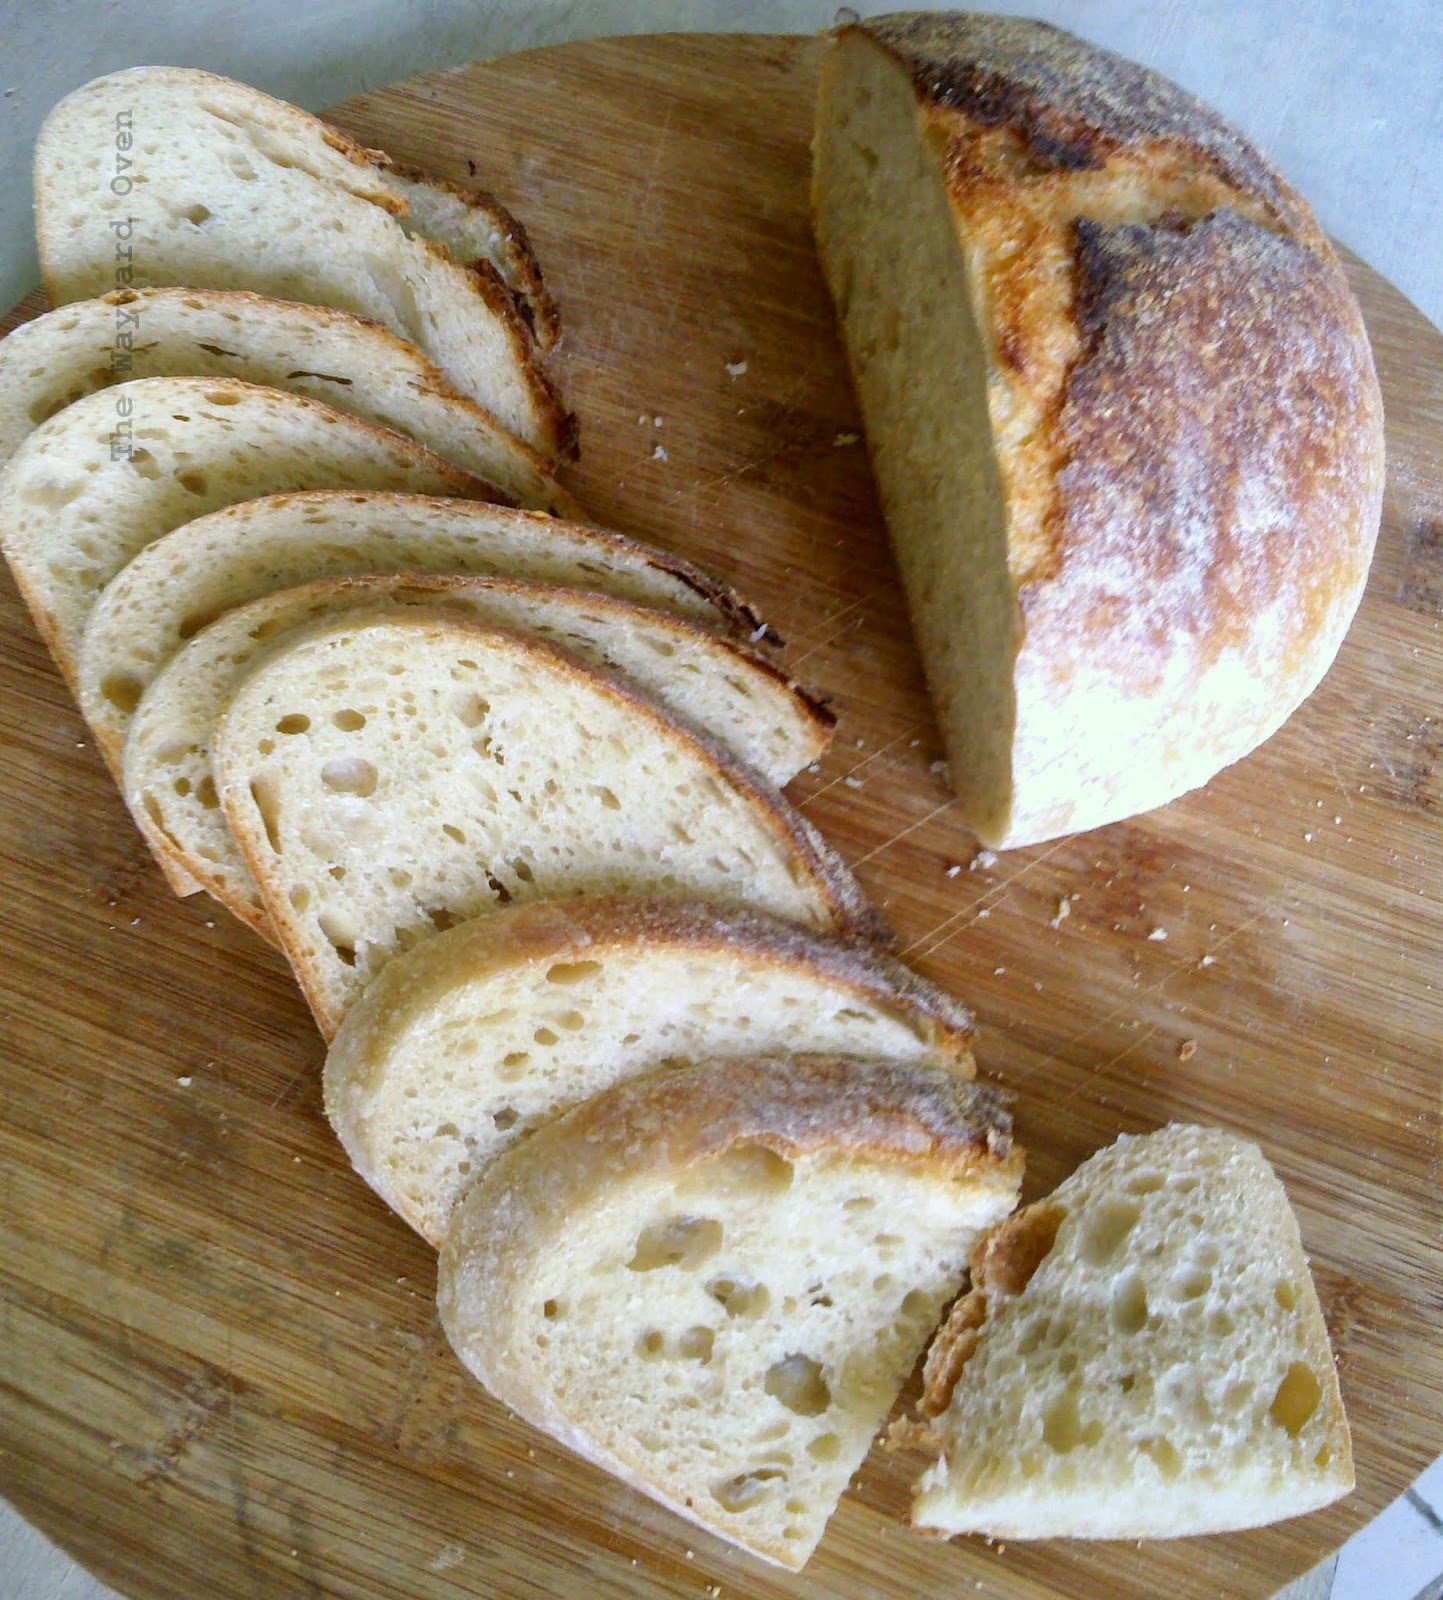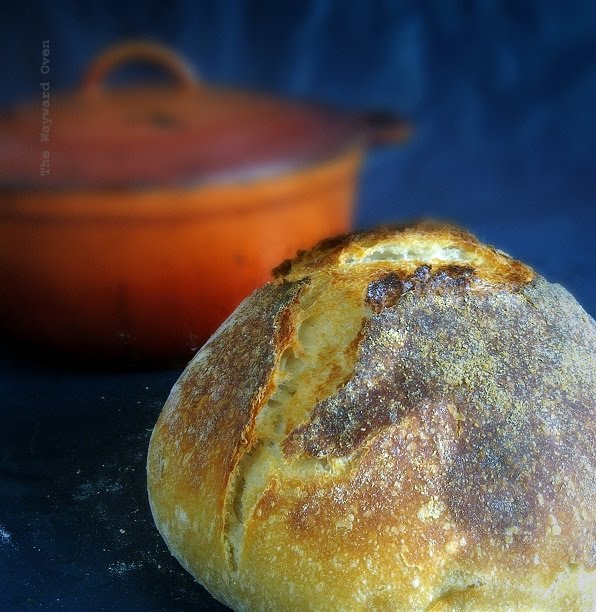
The Oven has baked its last loaf. This blog is no longer being updated.

My cooking videos appear at youtube.com/janeragavan

I write on food at star2.com

Showing posts with label method. Show all posts

Asian-style braised beef with orange and yam

Wednesday, July 2, 2014

I made this dish months ago. It was for an article on how to use up Mandarin oranges left over from Chinese New Year ~ which was in January. Since I had the picture, recipe and a blog that hadn't been updated in a while, I thought why not plonk this in.

Asian-style Braised Beef With Orange
Serves 5-6
2 medium oranges
15 cloves
450g braising steak, cut into 3cm cubes
1 tbsp all-purpose flour
2 tbsp black vinegar
2 tbsp soya sauce
1 tbsp Chinese rice wine (optional)
1 tsp whole Szechuan peppercorns, ground
1 1/2 tbsp tomato purée
1 large clove garlic, minced
2 medium onions, peeled and cut into wedges
2 cinnamon sticks
4 whole star anise
1 beef stock cube
300g yam (taro)
Cooking oil
Celery leaves (daun sup), finely chopped

Wash the oranges well. Dry them and stud with the cloves.
Dab the beef cubes with paper towels to dry them. Dredge them in the flour.
In a bowl, combine the vinegar, soya sauce, rice wine (if using), ground peppercorns and tomato purée.
Heat two tablespoons of cooking oil in a large heavy pot. Fry the beef cubes so they are brown all over. Do this in batches and do not crowd the pan. Remove beef from the pan and set aside.
Drain most of the oil from the same pan and add the garlic and onions. Sauté briefly, then add the combined sauce, cinnamon and star anise. Let it come to a boil and return meat to the pot; add just enough water to cover the cubes.
Stir in the stock cube and drop in the two clove-studded oranges. Cover the pot, bring to the boil, then turn down the heat to low and simmer, covered, until the meat is tender and the sauce has thickened, 60 to 90 minutes. Scrape the bottom of the pot now and then so there’s no sticking.
Meanwhile, peel the yam and cut into 1cm-thick wedges.
Scoop out the oranges into a large sieve placed over the pan. With the back of a wooden spoon, press them to extract the juice. Discard the mashed oranges. Taste the sauce and adjust seasoning.
Add the yam to the pot, cover and cook until tender, another 10 to 15 minutes.
Sprinkle beef with celery leaves and serve with steamed rice.

Custard-based buttercream

Sunday, June 8, 2014

This German-style buttercream, based on a recipe from Cook's Illustrated, starts out with a custard made from egg yolks. It is then added to whipped butter. It is not as light as a Swiss or Italian meringue buttercream, but there's no need to make a sugar syrup as in those. If you're making a dacquoise (nutty meringue layers sandwiched with buttercream), this is a great way to use both the egg whites and yolks. The buttercream can be flavoured as desired ~ my recipe here is a coffee flavour.This buttercream remains stable for quite a while, which is great for our very warm room temperature. I have also tried making this style of buttercream with custard powder instead of eggs. Both recipes follow.

German-style Coffee Buttercream
Makes about 2 cups. Based on a Cook's Illustrated recipe.

120g egg yolks (about 4 large)
60g sugar
1 tbsp cornstarch
1/4 tsp salt
175ml full-cream milk
2 tbsp water
1-1/2 tbsp instant coffee
225g unsalted butter, softened

Whisk egg yolks, sugar, cornstarch and salt in a bowl. 
Place milk in a small pot and bring to a simmer over medium low heat. Pour half the hot milk into the yolk mixture, all the while whisking until smooth, then add this to the milk in the pot. Return the pot to the stove and continue whisking until the mixture bubbles and thickens. Transfer custard to a bowl, cover and refrigerate until set, about two hours. Before using, let custard warm up a little.
Stir water and instant coffee together; set aside.
Using electric beaters or a stand mixer, beat the butter until light and creamy. Beat in the custard in three batches until just combined. Add coffee mixture and continue to beat until mixture is light and fluffy, 3-4 minutes.

With custard powder
Place 175ml milk in a small pot and stir in 3 tablespoons custard powder, 60g sugar and a pinch of salt until well mixed. Bring to a simmer over medium low heat, whisking until  the mixture bubbles and thickens. Transfer custard to a bowl, cover and refrigerate until set, about two hours. Before using, let custard warm up a little. Using electric beaters or a stand mixer, beat 225g softened unsalted butter until light and creamy. Beat in the custard in three batches until just combined. Add flavouring to taste and continue to beat until mixture is light and fluffy, 3-4 minutes.

Halloween spider monkey bread bowl

Sunday, October 27, 2013

DISEMBOWELLED FRANKENSPIDER ~ IT'S CHEESY ALL RIGHT 
Most of the time, Halloween-themed food isn't scary – it's cute. And that's what my colleagues and I came up with for our newspaper's Halloween photo spread recently – although there was one that I think was a little gorier than others (look at the photos and you'll probably be able to tell. Hint: fingers and eyeballs).
What was disturbing was the fact that grown women had so much fun making the dishes!
I made cheesy monkey bread in the shape of a spider with leggy breadsticks and a built-in cavity for the dip. You can find spider bread bowl dips all over the Internet – I just made mine into bread that you could pull apart into individual cheese-coated pieces.  
Here are my own pictures of the dishes we made for the spread.
Halloween spread
For professionally taken pictures by The Star photographer Yap Chee Hong, go to the link above (the print version of the article was beautifully laid out). Chee Hong really took his time to get the best shot for each dish. The only downside is we had to wait ages before we could get at the food! My "spider gut" cheese dip had congealed by then, but it didn't matter one solid glob.
Spider-shaped Monkey Bread Bowl
Serves 12

1 quantity buttermilk bread dough
150g unsalted butter
1 cup finely grated Parmesan cheese
2-3 tbsp minced fresh parsley
2 tsp garlic powder
1 cup shredded cheese (eg. Mozzarella, Cheddar)

Additional stuff
Toothpicks
Marmite or other black ingredient for decoration
Chilli-cheese dip
Chilli or tomato sauce

Grease a large baking sheet and a medium oven-proof mixing bowl (or use a domed-shaped baking mould). Cover the outside of a small ramekin with foil and grease the foil.
Remove ⅓ of the dough and divide into eight equal portions. Roll each portion into 20cm lengths, tapering the ends if desired. These are the spider's legs.
Melt the butter in a small saucepan. Let it cool slightly (it should still be a little warm).
Combine the Parmesan cheese, parsley and garlic powder in a bowl.
Dip each leg into the melted butter and then coat in the Parmesan-parsley mixture. Lay the leg on the baking sheet in a curvy "V" shape. Repeat with the other legs. Cover the sheet with a clean tea towel.
Remove a small portion from the remaining dough and form into balls for the spider's head and bulging eyes. Dip the top of the head in the melted butter and sprinkle with Parmesan-parsley mixture. Place on the baking sheet with the legs.
In the meantime, preheat the oven to 190°C. Place the foil-covered ramekin upside-down in the middle of the prepared mixing bowl (or domed-shaped baking mould).
Press out the large portion of dough until about 1.5cm thick. Slice into 1.5cm squares. Dunk a few pieces into the melted butter, then coat with the Parmesan-parsley mixture. Put a layer of the dough into the bottom of the mixing bowl around the ramekin and sprinkle with a little shredded cheese. Continue layering the coated pieces of dough and cheese. The final layer should cover the upturned ramekin. Cover the bowl with a tea towel.
By this time, the legs and head will be ready for the oven. Bake until golden and crisp, 10-12 minutes. remove from the oven and cool on a wire rack.
Bake the spider's body until golden. Cool in bowl/mould for 10 minutes, then upturn onto a wire rack. Remove the ramekin. If the body is pale, return to the oven (without the bowl/mould) to brown.
Assembly
Place Spidey's body on a serving platter/board. With a paring knife, make eight slits in the form of a small "X" about 3cm from the top and equal distance apart around the body. Poke one end of the legs into the X's. One or both of the front legs can be in the air for a bit of drama.
Dot Marmite on the eyes for the irises and eyebrows. Carve out sharp teeth on the head and colour with chilli or tomato sauce. Attach head to the body with toothpicks.
Insert a ramekin or other small container into the cavity and fill with dip. Serve the spider.
Note: Next time, I'll try making this free-standing instead of moulding it in a bowl so that the individual dough pieces can puff up and the body of the spider will be knobby instead of smooth.

S-shaped filled loaf

Friday, October 25, 2013

S'WONDERFUL, S'MARVELLOUS, S'AWFUL NICE BREAD 
The Gershwin standard 'S Wonderful was playing in my head the whole time I was shaping this loaf (I love the Ella Fitzgerald version).
Filled and flavoured breads are nice to eat, but they're better – even if it's just psychological! – when they come in unusual shapes. It's like the song says, "S'what I like to see".
I started out having made a buttermilk and egg-enriched bread dough and was going to shape it into a loaf with a spiral of oven-dried cherry tomatoes and cubes of fried eggplant in the centre. It would be baked in a loaf tin. Then I looked around online and saw several loaves in an "S" shape, and the recipes all originated from King Arthur Flour's tomato, basil & garlic-filled pane bianco.
Well, that would be perfect for my loaf!
Fill, roll, shape, slice
Besides the tomatoes and eggplant in my filling, I roasted a whole head of garlic and store-bought salted fish pickle (acar) and both were mashed to smear on the dough.
The dough is rolled out into a rectangle and half of it is smeared with the salted fish, which is mashed into a paste –  I use it as a substitute for anchovy paste or tapenade. On top of that, I sprinkle the eggplant cubes (pic 1).
And then the uncovered half is folded over the filling. It is spread with the garlic paste and chopped oven-dried tomatoes are sprinkled on top (pic 2). Doing the double layer distributes the fillings more evenly, I think.
The rectangle is rolled up (pic 3) before being shaped into an "S". In the King Arthur instructions, the Swiss roll is sliced down the middle lengthwise before the shaping, but after reading the problem this blogger had and how she fixed it, I followed her cue and shaped the loaf (pic 4) before making the parting (pic 5).
I've used the same dough for another shaped bread. Tomorrow, my newspaper will run a photo spread on food as a run-up to Halloween, and a few of my colleagues and I came up with an item or two. A professional photographer took the pictures and the layout in print is really nice, so if you get the chance, do have a look at The Star.
S-shaped filled loaf
S-shaped Tomato and Eggplant Loaf
Makes 2 medium loaves

Buttermilk dough
350g flour
1¼-2 tsp active dried yeast (see note below)
2 tsp salt
1 tbsp sugar
1 tbsp oil
200g buttermilk
1 medium egg

Filling (quantities at one's own discretion)
Fried eggplant cubes
Oven-dried cherry tomatoes
Roasted garlic, mashed into a paste
Salted fish pickle, mashed into a paste

Combine the flour, yeast, salt and sugar in a mixing bowl.
Combine the oil, buttermilk and egg in a jug. Add to the dry ingredients and mix into a dough. Add more water or flour as needed to form a soft dough. Knead with your desired technique to develop the gluten. Set aside to rise.
Divide the dough into two equal portions. Roll out one portion into a rectangle and layer the fillings as desired. Roll up into a Swiss roll and shape into an "S". Slice through the centre of the shape halfway down so the top opens out and the layers can be seen.
Do the same with the other portion of dough, or use it for another kind of bread.
Preheat the oven to 190°C. Bake the bread for 30-35 minutes until nicely golden on top and cooked through.
Note: I use the lesser amount of yeast as the dough is proofed in the fridge overnight. If making the loaf on the same day, you could use up to 2 tsp of yeast.

Pan-fried steamed buns

Tuesday, September 17, 2013

PAN-FRIED STEAMED PAU 
The chilli sauce in the picture looks like a Chinese character, doesn't it? I just hope I haven't scribbled (more like dribbled) a bad word!
And the chopsticks? They're obviously a prop since I can't pick up anything as big as the steamed buns with chopsticks. 
I am no expert maker of pau or steamed buns, but if I'm feeding myself, these are good enough. I like these two-in-one pan-fried and steamed buns – they are placed in a little oil to brown the bottom and then water is poured into the pan so the pau are steamed until done.
Filling ingredients for pan-fried steamed pau
I use a mushroom filling with lots of different vegetables thrown into the mix for taste and texture.
What's important is the type of flour that is used. Water Lily or Hong Kong flour is a fine, low-protein flour which makes the pau fluffy. It's also bleached, however. With buns that are only steamed, apparently if you put a few drops of white vinegar in the steaming water, it keeps the buns white.
After the bottom is fried, water is added to the pan to steam the buns
Pan-fried Steamed Buns
Makes 6 medium buns

Filling
1 tbsp sunflower oil
1 tsp sesame oil
2 cloves garlic, minced
4-5 shiitake mushrooms, thinly sliced
¼ cup julienned carrot
½ cup shredded cabbage
¼ cup thinly sliced snow peas
1 spring onion, white part, chopped
2 tbsp oyster sauce

Buns
150g pau flour (Water Lily or Hong Kong flour; low-protein flour)
1 tsp baking powder
½ tsp instant yeast
1 tbsp sugar
½ tbsp oil
A drop of alkaline water (air abu), optional
70ml water, approximate
Neutral-flavoured oil (like corn or vegetable), for brushing

Assembly and cooking
1½ tbsp hoisin sauce
1 tbsp sunflower oil
1 tsp sesame oil
1 tbsp sesame seeds, optional
1 tbsp all-purpose flour mixed with 1 cup water
1 spring onion, green part, chopped
Chilli sauce, to serve

To make the filling, heat oil and sesame oil in a frying pan. Sauté the garlic briefly and then add the other ingredients. Toss briefly and then remove to a plate to cool.
To make the buns, sift flour and baking powder into a mixing bowl. Stir in instant yeast, sugar, oil and alkaline water. Gradually add water and continue mixing to form a firm ball.
Transfer dough to a work surface and knead until smooth and elastic, five to eight minutes. Cover dough with a damp tea towel and allow to rise until twice its size.
Scale dough into six equal pieces and form into balls. Cover with a damp tea towel and set aside for five minutes.
To assemble, roll out each ball into a circle about 8cm wide. Brush the centre of the circle with a little hoisin sauce and place a mound of filling on it. Gather up the edges and pleat neatly (or just press together and twist!). Press the bottoms of the buns in the sesame seeds, if using.
To cook, heat the oil and sesame oil in a large lidded pan. Place the buns in the pan and cook until the bottoms are crisp and a deep brown. Pour in the flour solution and cover the pan to steam the buns. Leave until puffed up and water has evaporated, six to eight minutes. Sprinkle with chopped spring onion and serve immediately with chilli sauce.

1:2:3 sourdough

Wednesday, July 17, 2013

A RATIO TO REMEMBER: 1:2:3 SOURDOUGH
The 1:2:3 Sourdough formula has been around for a while and it's one that's worked very well with the breads I've made – as long as I don't confuse the components. The ratio refers to the dough mix: 1 part starter to 2 parts liquid to 3 parts flour by weight (plus about 2% salt). 
This means that if I start off with 100g of refreshed starter, I just add 200g of water, 300g of flour (sometimes just white; other times a mixture) and 6g of salt. The percentage of water is only 66%, which makes the bread far from wet and very easy to knead completely by hand. I often use the stretch-and-fold method, but sometimes it's good to get back to basics and go through the full-on "traditional" hand-kneading process.
Airy and creamy crumb
The bread is well-aerated, even though the dough isn't that highly hydrated, with a creamy crumb and good chewy crust. I have baked it freestanding on an upturned preheated baking tray with steam from ice cubes, and also in a Dutch oven.
With the Dutch oven, I use a method I learnt from Ken Forkish's book Flour Water Salt Yeast. He lets the loaf proof seam side down in the bread proofing basket and then flips it into the preheated pot so the seam is on the top. As the bread bakes, the crust cracks open naturally. Almost all the breads I've baked this way have come out with a three-point crack. And as the bread cools right out of the oven, there's always a loud crackling! 
The loaf is baked seam side up in a Dutch oven and cracks naturally
I often just tear off a hunk of bread and eat it on its own because it tastes good, but I have also used the same 1:2:3 formula and added fried onion to the dough. Another time, I made a grated potato and spring onion version, so the dough is quite versatile that way. The crumb on those "flavoured" breads was slightly tighter, but the loaves were still springy and delicious.

Sourdough Surprises: Create waves with cake

Wednesday, March 20, 2013

TOPOGRAPHIC MAP SOURDOUGH CAKE 
When it comes to making sourdough cakes, many recipes say to just add unfed starter straight from the fridge. It's certainly as quick a method as making any creamed cake.
But from experience, I've found that a well-fed bubbly starter gives cakes better rise and lightens them. It takes at least two days to make the cake, but I think it's worth it.
So when Sourdough Surprises suggested cakes this month, I got started immediately. I've made chocolate, banana, and carrot sourdough cakes before and it would be a different flavour this time – I decided on matcha – but I also wanted an interesting appearance.
At first glance, this looks like any layer cake, but the design is actually made in an unusual way. I'd seen this cake with the wavy pattern on a few blogs and was intrigued. The original cake is just a rich butter cake and in Malay, it's called "Kek Alunan Kasih" – which leads me to believe that it may be a Malaysian invention – and this is translated as Waves of Love Cake. "Alunan" is also the word for "melody", which makes sense too since the pattern does look like sound waves. (Or perhaps something you might see on a heart monitor?) I didn't do the effect so well, but take a look at these better examples.
One blogger mentioned that it looked like a topographic map – as in geography – and that's the description I like best.
The outside of the cake (left); the waves in the crumb 
The process of creating the strata and waves is not difficult, but it is a bit fiddly. The cake batter – which has a dropping consistency – is divided and coloured, and after each layer, cocoa powder is sifted on top before another layer of cake batter is put on. The difficulty is in trying to level the batter over the cocoa powder without disturbing it. However, you don't want to make the layers too smooth because then the wavy effect would be lost. You can taste the cocoa but it's not very prominent.
Even without the strata, the cake is good on its own. The layers can be any colour (and from that link I provide above, you can see some kooky tie-dye combinations!) and the cake can be any flavour (the matcha powder is my cake provides the flavour and colour). I based it loosely on the sourdough chocolate cake from King Arthur Flour which I made some time ago, replacing the cocoa powder in the batter with all-purpose flour. This is a good basic recipe, and lends itself to other flavours.


Create waves with this cake
'Topographic Map' Sourdough Matcha-Vanilla Cake
10-12 servings. Cup measures are approximate.

Preferment
90g (½ cup) refreshed 100%-hydration sourdough starter
110g (½ cup) whole milk
150g (1 cup) all-purpose flour

Final batter
60g (6 tbsp) all-purpose flour
½ tsp salt
½ tsp baking powder
½ tsp baking soda
140g (¾ cup) caster sugar
110g (½ cup) butter, softened
1 medium egg, at room temperature
1 tsp vanilla extract
1½ tsp matcha powder, mixed with 1 tbsp of water into a paste

Wave pattern
2½ tbsp unsweetened cocoa

Combine the starter, milk and flour in a large mixing bowl. Cover and store in the refrigerator overnight or let rest at room temperature for 2-3 hours. If chilled, take it out of the fridge an hour before proceeding with the final batter.
Preheat the oven to 170°C. Lightly grease and base line a 20cm by 11cm (8"x4½") loaf pan.
Sift the flour, salt, baking powder and baking soda together in a bowl. Set aside.
In a large bowl, beat together the sugar and butter until light and fluffy.
Cut the preferment into four or five pieces. Beat one piece at a time into the butter mixture, blending well each time. Beat in the egg and vanilla. Fold in the flour mixture. The batter will have a soft dropping consistency.
Divide the batter into two equal portions and place in separate bowls. Take about 2 tablespoons from one portion and mix with the matcha paste. Blend this mixture into that same half-portion of cake batter.
How to create the layers
Spoon half of the white batter into the prepared cake pan and smooth the surface (1). Sift one-third of the cocoa powder evenly over the top of the batter (2). Using half of the green matcha batter, distribute small dollops all over the cocoa powder (3) and then spread them out without disturbing the cocoa powder (4). Sift another third of the cocoa powder over this batter. Repeat the layering process with the white batter, then the remaining cocoa powder (5) and finish with the matcha batter on top (6).
Bake the cake for 30 to 40 minutes, until the top springs back when lightly pressed in the centre, and a toothpick inserted into the centre comes out clean.
Remove the cake from the oven, and set it on a rack to cool for 10 minutes, then remove from tin and cool completely on the rack. Best to allow a day before eating.

Love letter to gnudi

Wednesday, February 13, 2013

SPINACH RICOTTA GNUDI 
It's easy to wax lyrical about the food we love. Poems have been written about everything from almonds to zucchini, songs have been sung about fried fish and bananas, and, well, cooking blogs only exist because food is never the last thing on our minds.
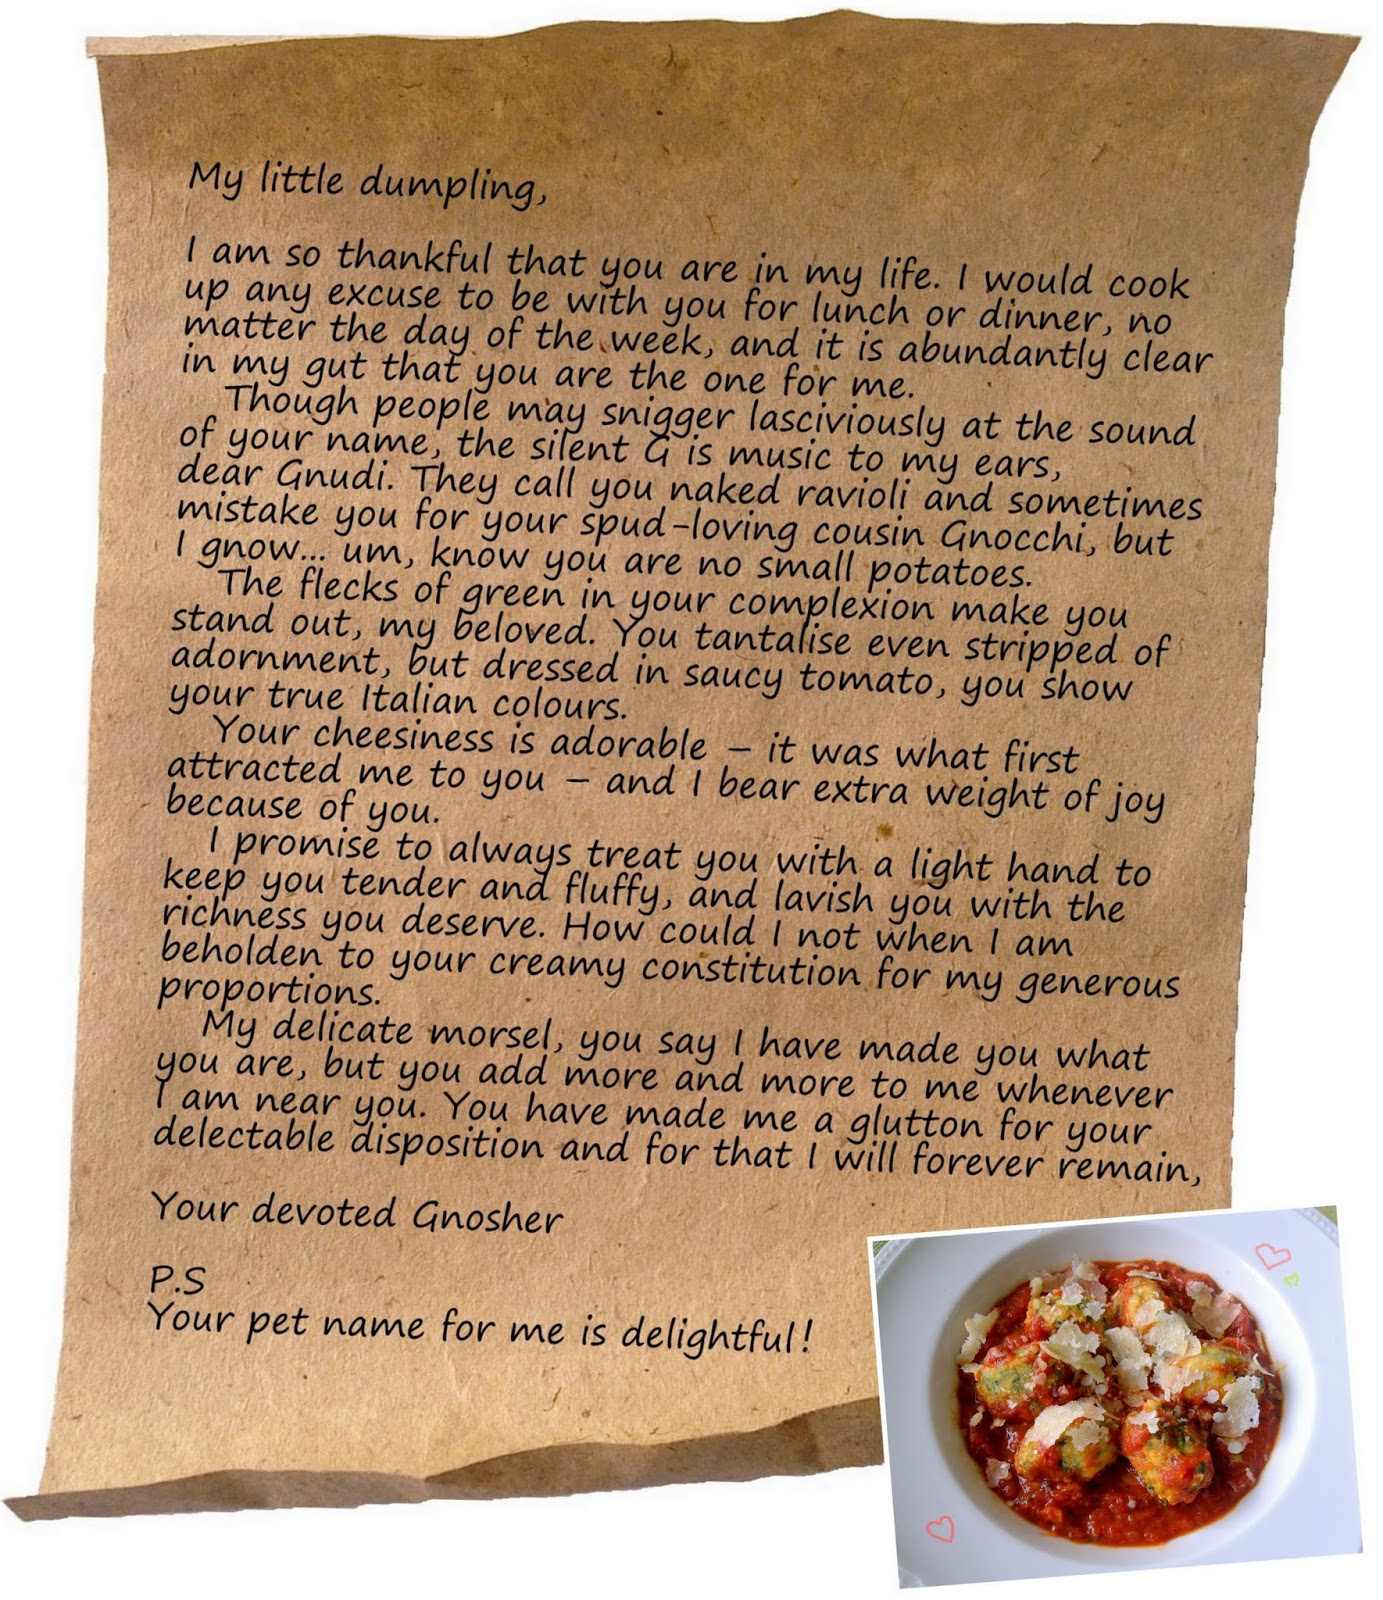
Last week, in our Don't Call Me Chef recipe column in The Star, Indra, Ivy and I paid tribute to the fattening dishes or ingredients we love so much that even if they gave us love handles, we would continue to cook and eat them. Indra is besotted with butter, Ivy can't stay away from any kind of fried chicken, and I love cheese and pasta. My recipe was for spinach ricotta gnudi and I wrote a soppy love letter to the cheese dumpling.
Gnudi is made with ricotta cheese. Spinach, however, is not what defines gnudi although Google images show these to be the most popular kind.
Recipes for spinach ricotta gnudi are quite straightforward – most advise to keep a light hand and to not overmix. Some dumpling mixtures are stiff and can be rolled out into ropes then cut, while others are pipeable or shaped into little ovals with teaspoons. Most instruct to cook the dumplings immediately after they are mixed, but I like the guidance given in April Bloomfield's recipe at Serious Eats that has one extra step: drying out the gnudi before cooking to prevent them from getting soggy.
It apparently takes her three days to make her famous Ricotta Gnudi which she serves at The Spotted Pig restaurant in New York. That may be a little too long for most of us, including me, but there was one time when I left the uncooked dumplings covered in semolina for two days in the fridge and they did taste a little lighter after they were cooked. Most times, I leave them to dry for just a day.

Spinach Ricotta Gnudi
Makes two generous servings

1 tub (250g) ricotta cheese
½ cup steamed spinach, finely chopped
¼ cup grated Parmigiano-Reggiano cheese
2 egg yolks
½ tsp flaky salt
½ cup plain flour, approximate
½ cup semolina flour (optional)
2 cups tomato (pasta) sauce (preferably homemade)
Parmigiano-Reggiano cheese, to serve

Remove ricotta cheese from the tub and place in three or four layers of kitchen paper on a sieve over a bowl. Leave for 20 minutes to drain. Discard the whey or reserve for another use (for example, add to soups or use in bread doughs).
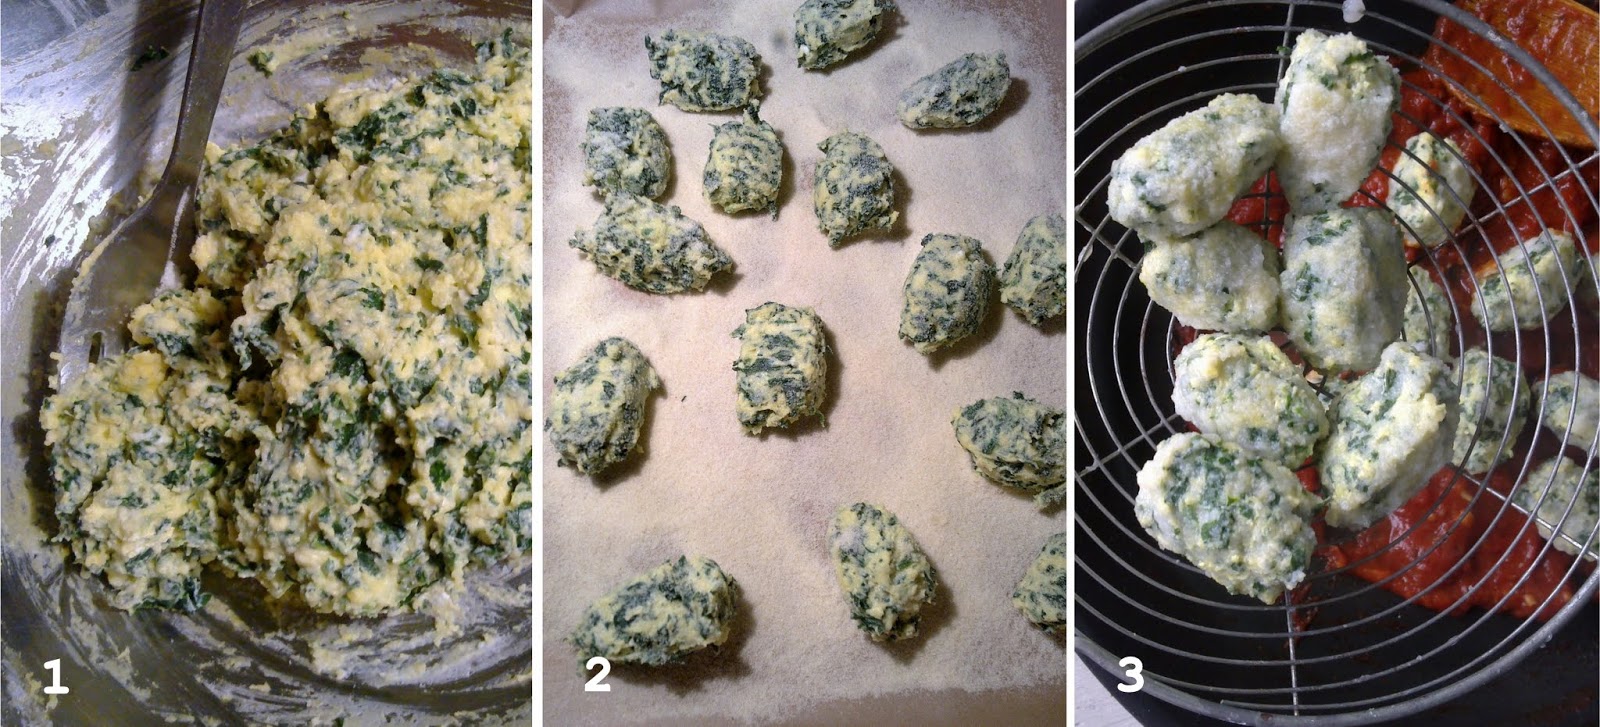
In a large bowl, stir together the ricotta, spinach, Parmigiano-Reggiano and egg yolks until blended. Stir in salt to taste, then gently stir in the flour, mixing just enough so the mixture comes together. It will have the texture of a creamed cake batter (pic 1).
This next step is optional but it will prevent the gnudi from becoming soggy. (Proceed to cooking the gnudi if omitting this step). Line a large plate with parchment paper. Sprinkle the semolina flour on it. Using two teaspoons, shape and compact the ricotta mixture into ovals. Dredge them in the semolina flour and leave them on the plate (pic 2). Place the plate in a large plastic bag and chill overnight or up to three days.
Bring a large pot of salted water to a boil. Heat the tomato sauce in a sauté pan on another burner and keep it over low heat.
Drop the gnudi directly into the boiling water in batches; do not crowd the pot. The gnudi will float to the surface when done, two to three minutes.
Using a slotted spoon, transfer the gnudi to the tomato sauce (pic 3). When all the gnudi are cooked, transfer to individual bowls. Shave Parmigiano-Reggiano over the top and serve at once.
Note: The cooked gnudi can also be frozen. Place in the fridge to thaw and heat up in the tomato sauce.

New year cherry blossom

Sunday, February 10, 2013

CHERRY CHOCOLATE KUCHEN 
I had intended to post today on a loaf of bread decorated with a stencil of Chinese characters that read "good fortune". Good intentions, unfortunately, don't always pan out, and so I am posting on something else but still on bread.
But before that,
HAPPY LUNAR NEW YEAR
GONG XI FA CAI
HAPPY SPRING FESTIVAL
to all who celebrate and wishing you Good Fortune this Year of the Snake!
It's good to have a sweet yeast dough in one's baked goods repertoire. The dough can be filled or topped or layered with fruit and streusel, and even made into plain rolls or a loaf.   
This kuchen resembles cake in taste – and a little in looks too. Cakes may be quicker to whip up, but I prefer this bread topped with cherries, chocolate and crumb topping. It isn't as rich or high in fat, but it still tastes fantastic.
The dough doesn't take long to mix. It doesn't have a high hydration and is easy to knead by hand.
Incorporating the butter with the 'clothes wringing' kneading method
To incorporate the butter, I use a "clothes wringing" method which I read about in The River Cottage Bread Handbook. The pictures above show the process done with only one hand – the left is holding the camera – but both hands are actually necessary! This kind of simulates the movement  of the dough hook of a stand mixer.
For this, the kneading is done in the mixing bowl. Hold the dough at opposite ends and then wring it as if you are wringing out wet washing so that the dough is twisted (left pic). Then, fold the dough in half so that the two ends meet, holding both ends in one hand (right pic). Hold on to the midsection that is folded (it's now the opposite end) and twist the dough again. Repeat until all the butter is incorporated.
I must say it's very therapeutic. Try humming along with the movement.
This is submitted to YeastSpotting.
Russian Rose Braid made with this basic sweet dough
Basic Sweet Dough
Adapted from Baking Artisan Pastries & Breads by Ciril Hitz

350g full-fat milk, cold is fine
1 medium egg
1 tsp lemon essence
Seeds from 1 vanilla bean
660g bread flour
7g malt powder
13g instant yeast
70g caster sugar
13g salt
70g cold unsalted butter, cut into cubes

Combine the milk, egg, essence and vanilla seeds.
In a mixing bowl, combine all the other ingredients except the butter.
Add the liquids to the dry ingredients and mix to incorporate. The dough will be a little dry at this time. Set aside for 10 minutes.
Add the butter in three batches, incorporating it well after each addition. By this time, the dough will come together in a ball.
Knead the dough to develop the gluten using whichever method is comfortable. Cover and set aside at room temperature to bulk ferment, 1-2 hours.
Transfer the dough to a lidded plastic container sprayed with oil and store in the refrigerator overnight.
This makes a large amount of dough (about 1.4kg) and it can be divided into two or three portions. These can be stored in separate containers in the refrigerator for up to four days. For longer storage, wrap portions in cling film, place each one in a plastic bag and store in the freezer for up to two weeks. Thaw frozen dough in the fridge overnight before using.
What's kuchen?
Cherry Chocolate Kuchen
Serves 8-10
½ batch Basic Sweet Dough
½ a 425g tin of pitted cherries, drained
1½ tbsp medium chocolate chips

Crumb Topping
From Baking Artisan Pastries & Breads by Ciril Hitz. Makes 2½ cups. Use half batch for the kuchen. Store the remainder in a lidded container in the fridge.

160g all-purpose flour
⅛ tsp baking powder
120g light brown sugar
⅛ tsp table salt
¾ tsp ground cinnamon
115g cold unsalted butter, roughly chopped

Make the crumb topping: Combine the flour, baking powder, sugar, salt and cinnamon in a bowl. Add the cold butter and cut into it with pastry cutter or rub in with fingertips until the mixture looks like sand with a few larger clumps.
Assembling the kuchen
Assemble the kuchen: Lightly oil a 28cm x 24cm baking pan (or equivalent size). Press the dough into the pan. If it resists and springs back, set aside to relax for about five minutes, then continue. Dimple the dough with the fingertips.
Break the cherries into two and spread them over the dough. Sprinkle with chocolate chips and then with half the crumb topping.
Cover the tray with cling film and leave to rise, about 1 hour. Alternatively, the tray can be placed in the refrigerator overnight to rise slowly.
Preheat the oven to 165°C. Bake the kuchen for 30 to 35 minutes, rotating the tray halfway through the cooking time. The top will be nicely golden and the bottom a light brown.
Place tray on a wire rack to cool for 20 minutes. Eat warm or cool further before serving.

Sourdough Surprises: From brioche to babka

Sunday, January 20, 2013

MOCHA-CINNAMON SOURDOUGH BABKA
Who would have thought that you could have too much chocolate. Being generous was certainly detrimental this time.
Sourdough Surprises had a double challenge this month: use our starters to make sourdough brioche, and then use the brioche dough to make babka. I kept to the traditional flavours of chocolate (grated) and cinnamon for the filling.
The dough I made was a little too wet and so I added a lot more flour to firm it up. I took about a third of it and made panettone, and the rest, I filled, rolled and formed into a babka. The loaf was quite heavy and didn't look like it would rise much, so I placed it in a small cardboard loaf case (great for gift loaves). In the oven, however, the loaf expanded and the box looked like it might burst its seams! (The panettone turned out well because they were baked in cupcake-size boxes.)
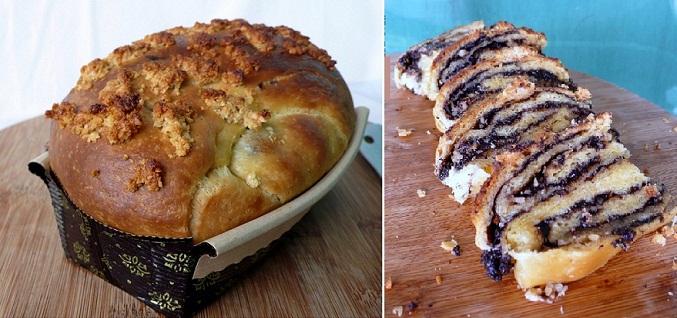
Babka 1: Bursting out of the cardboard loaf case; and too much chocolate
This was like trying to encase my wobbly bits in Spanx, only I used a pair that were a tad small so that the lower part was compressed and the upper part was pushed upward and outward like a muffin top. Add to that too much filling and the result was a very close crumb and oozing chocolate. The loaf was still a little undercooked, I felt, even though I had baked it for longer.
Okay, first time, not good, so I tried again. This time I didn't add extra flour (but with a tiny bit of instant yeast just for insurance) and instead of kneading the "usual" way, I used a kind of slapping and folding technique shown by Richard Bertinet in this video (I did it in a less professional manner, of course). I kneading directly in the large ceramic mixing bowl and with just one hand. 
It was amazing how that sticky slack dough was transformed and though it took me about 20 minutes, it did lose its stickiness.
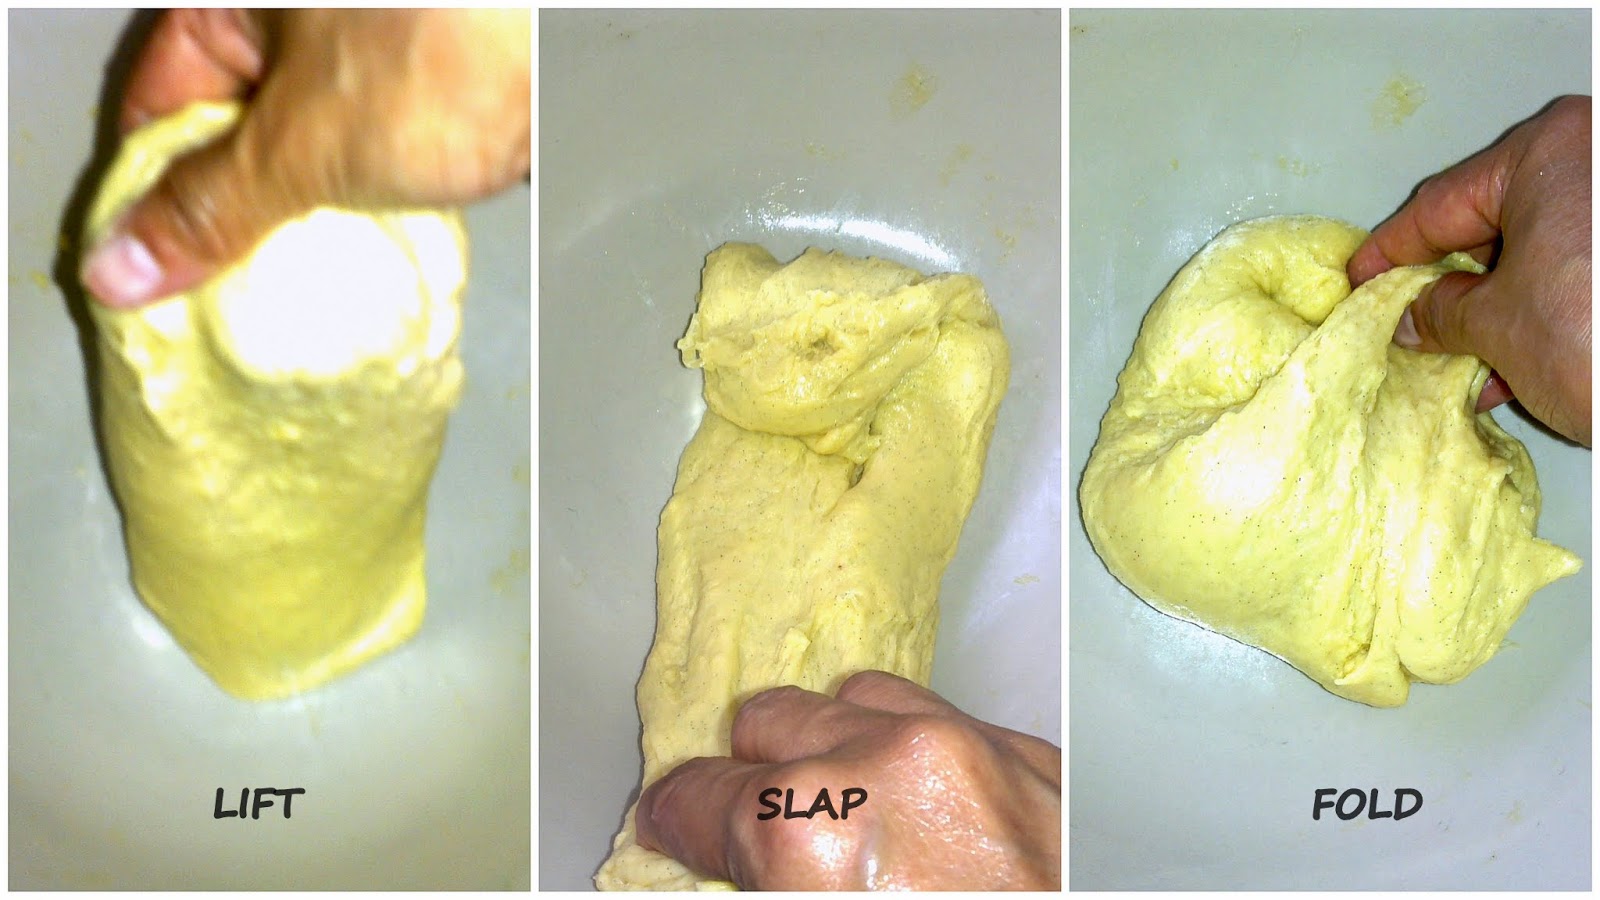
The slap-and-fold method of kneading dough in a bowl
When you first start to knead, there is a dull thud as the heavy dough hits the bottom or side of the bowl. As it gets more elastic, the sound transforms from a plop to a thwack and finally a slap. You can feel the texture changing as well. It's all very exciting!
The pictures are a little lemony-green because I was doing the kneading at night when the light wasn't good. When the dough was slapped against the bowl, it sometimes caused the bowl, heavy though it was, to clatter against the counter-top. If any of my neighbours could hear all the noises, they must have wondered what the heck was going on in Apartment 12!
For the second loaf, I looked up some Jewish babka recipes. This one has an interesting filling of  instant coffee, cocoa powder and cinnamon, and I mixed up the filling to my own taste. There's only a little coffee but it boosts the flavour of the chocolate.
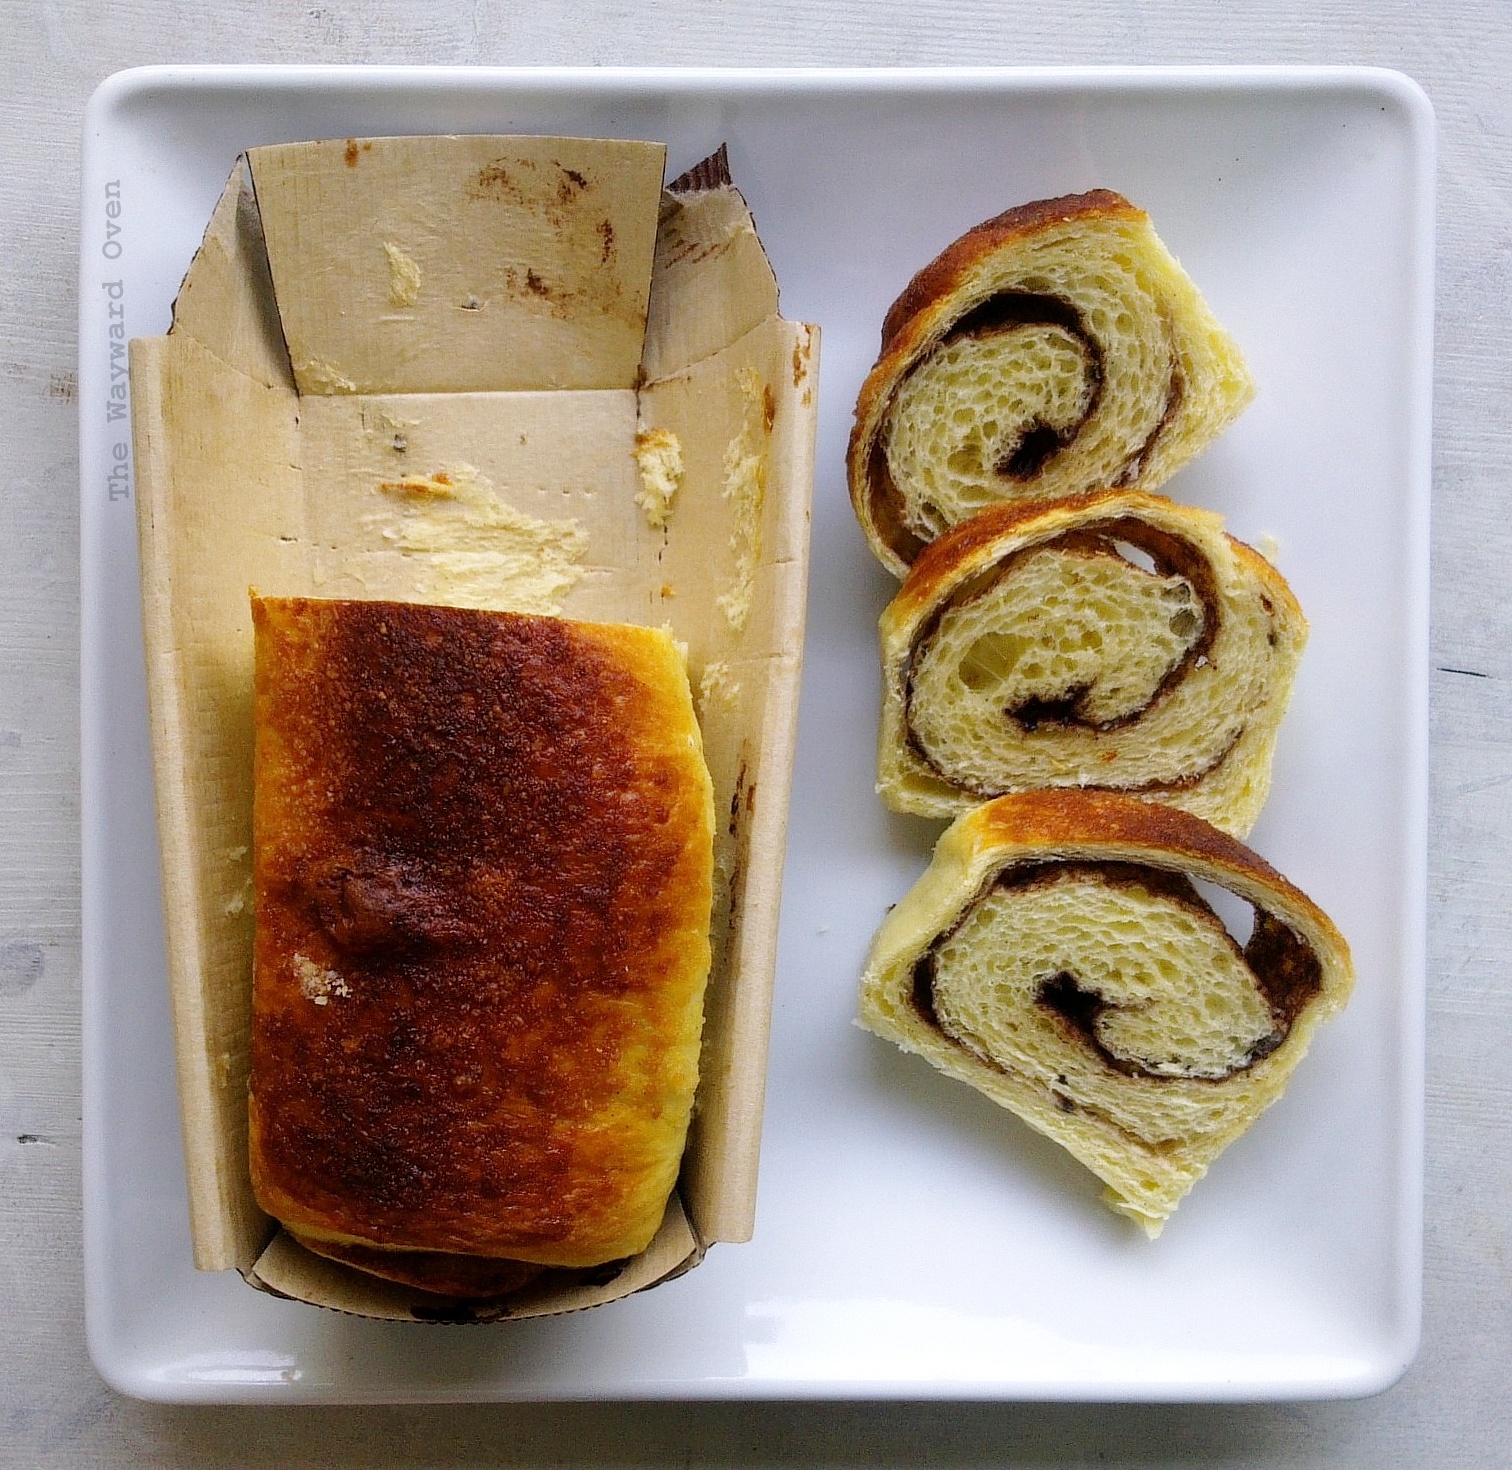
This time the loaf rose during proofing (and I didn't overfill the cardboard box!) and it had a nice open crumb. Peter Reinhart's advice is to use a toothpick to poke a few holes into the loaf to burst the air bubbles before baking, but I forgot and that's why there is a separation between the filling and the dough (see opening picture, top). Anyway, it proves how light this babka is so I am not  complaining.
See what the Sourdough Surprises baking group came up with:

Babka 2: This time it fits the cardboard box perfectly
Mocha-Cinnamon Sourdough Babka
Makes 2 medium loaves + a few buns
Without the filling, the dough can be baked as brioche.

Levain
50g mother starter (at 80% hydration)
65g water
100g flour

Dough
All the levain (about 217g; it is quite stiff)
56g water
21g honey
⅛ tsp instant yeast (optional)
1 whole medium egg
2 egg yolks
Seeds from 2 vanilla pods or 1 tsp pure vanilla extract
315g bread flour
4g salt
49g caster sugar
150g butter, at room temperature

Filling and topping
20g soft brown sugar
5g icing sugar
5g cocoa powder, sifted
1g instant coffee granules
¼ tsp ground cinnamon
1 egg white
2 tbsp caster sugar
1-1½ tbsp almond meal (ground almonds)

Make the levain: Combine all the ingredients, cover and set aside for 12 hours. If it is not bubbly at this time, remove half and feed it again. Leave for another eight to 12 hours.
Make the dough: Place the levain in a large mixing bowl. Combine the water, honey and yeast (if using); stir into the levain. Leave for five minutes.
Combine whole egg, yolks and vanilla seeds. Stir into levain mixture.
Combine flour and salt and stir into levain mixture. Stir in sugar.
Add butter in three batches, stirring together well each time to incorporate completely. The dough will be slack.
Knead the dough using whatever method you are comfortable with until the dough holds together well. It will be elastic and leave the side of the bowl.
Line a baking tray with parchment, with two sides overhanging. Spread dough onto tray, place tray inside a food-grade plastic bag and proof overnight in the refrigerator. The tray "shapes" the dough into a rectangle and makes it easier to roll out when ready to fill.
The next day...
Lightly grease two loaf pans.
Make the filling: Combine brown sugar, icing sugar, cocoa powder, coffee granules and cinnamon in a small bowl. Set aside.
In a medium bowl, mix egg white with 1 tsp water.
Assembly
Transfer cold dough rectangle to a lightly floured surface. Roll out to a 5cm-thick rectangle. Brush egg white over the dough, then sprinkle the cocoa-coffee mixture on top. Reserve the remaining egg white. Roll up jelly roll style. Cut dough to a length that will fit the loaf pans, and twist each half three times. Place in the loaf pans. Slice any remaining dough for cinnamon rolls. Cover with cling film and leave to rise.
Preheat oven to 180ºC.
Make the topping: To the remaining egg white, add sugar and almond meal. Brush the mixture over the top of the loaves. Using a toothpick, poke a few holes into the loaves to burst the air bubbles. Place loaves in the oven. If the tops brown too quickly, cover with foil. Bake until a toothpick inserted in the centre comes out clean, 40-50 minutes.

Whole bread kit and caboodle

Saturday, January 12, 2013

WONDER BREAD 
If I'm going to make new year resolutions, I'd rather they be something I already do and enjoy doing... and just aspire to do them better and/or more often.
Well, it's no secret that I like baking and most of all, I like making bread.
I haven't actually resolved to bake bread more often, but if I had, I have so far stuck to it. In the first two weeks of 2013 alone, I have made more varieties of bread than I have in any one month last year.
This enthusiasm actually started a few days before Christmas when my leave started, but continued even when I had to go back to work a few days ago. I've made sweet, savoury and everyday breads with both wild yeast and commercial and I'm happy that, except for one loaf, every attempt has turned out well, and a couple that surprised me because they were so good.

References
There is still much to learn in breadmaking, but the little success I have today I owe to some excellent reference material.
Read, read, read
First and foremost, my bread books. All have benefitted me tremendously since I bought them, but the four at the bottom were especially helpful when my baking blitz started. I still have Jeffrey Hamelmann's latest book to add to this stack.
And when it's difficult to visualise a technique from the written word, I turn to YouTube. I've learned a lot from watching demonstrations by both professional and home bakers alike. Trying our different methods has also helped me develop my own way of doing things, for example, kneading and shaping.

Raising agents
I bake bread with wild as well as instant yeast, and they both have their merits. Sometimes, I make hybrid doughs, with a touch of instant yeast. I don't apologise for it because in the end, this is bread that I want to eat and it's still so much better than the commercial varieties.
Leaveners: wild yeast mother starter and instant yeast
My mother starter (I use Peter Reinhart's term because it helped me understand the different "roles" of a leavener) is made from the recipe from Dan Lepard. It was originally made with rye flour. I keep the mother at 80% hydration and feed it weekly – if I remember; sometimes there's a 10-day break between feedings – and lately, it has been with atta (chapati) flour. When I refresh a portion for a loaf, I always make it into a white leaven by adding natural bread flour.

Tools
I do like gadgets, and sometimes I give in to temptation but most times, I resist the urge since I don't have much room in my apartment to store everything.
I did buy a good electric stand mixer a couple of years ago though, but I find myself using my hands to mix and knead bread dough.
Helpful and essential utensils
There are only a few trusty tools for the task: A dough whisk starts off the mixing and then dough scrapers help during the kneading process.
A digital scale, knives for scoring and baking parchment are essential and thermometers have been invaluable. The instant read thermometer tells me whether a loaf is cooked through and I don't have to rely on my own judgement of whether a loaf sounds hollow or not. But the one for the oven has saved my baked goods. As my oven got older, it was taking longer to warm up. My cakes used to come out with the centre still soupy, so I would bake them longer and then the crust would dry out. I only found out after I got the thermometer that the oven is off by about 40ºC! 
An upturned oven tray simulates hearth baking 
Speaking of that wayward oven, I've tried to simulate hearth baking in it not with a baking stone but with an upturned tray. The oven came with a heavy metal tray and I slide bread (that has proofed on parchment paper) directly onto the preheated tray. My "peel" is an old cake board. I put another tray on the wire rack below and fill it with water to create steam.  
Dutch oven
Like many people, I learnt about baking bread in a Dutch oven from Jim Lahey's no-knead method. I have to admit, however, that while I was fascinated with how it worked in the beginning (and there have been times when the bread came out like a dog's chew toy!), the fascination wore off since, besides having bread to eat, I enjoy the whole hands-on breadmaking process.
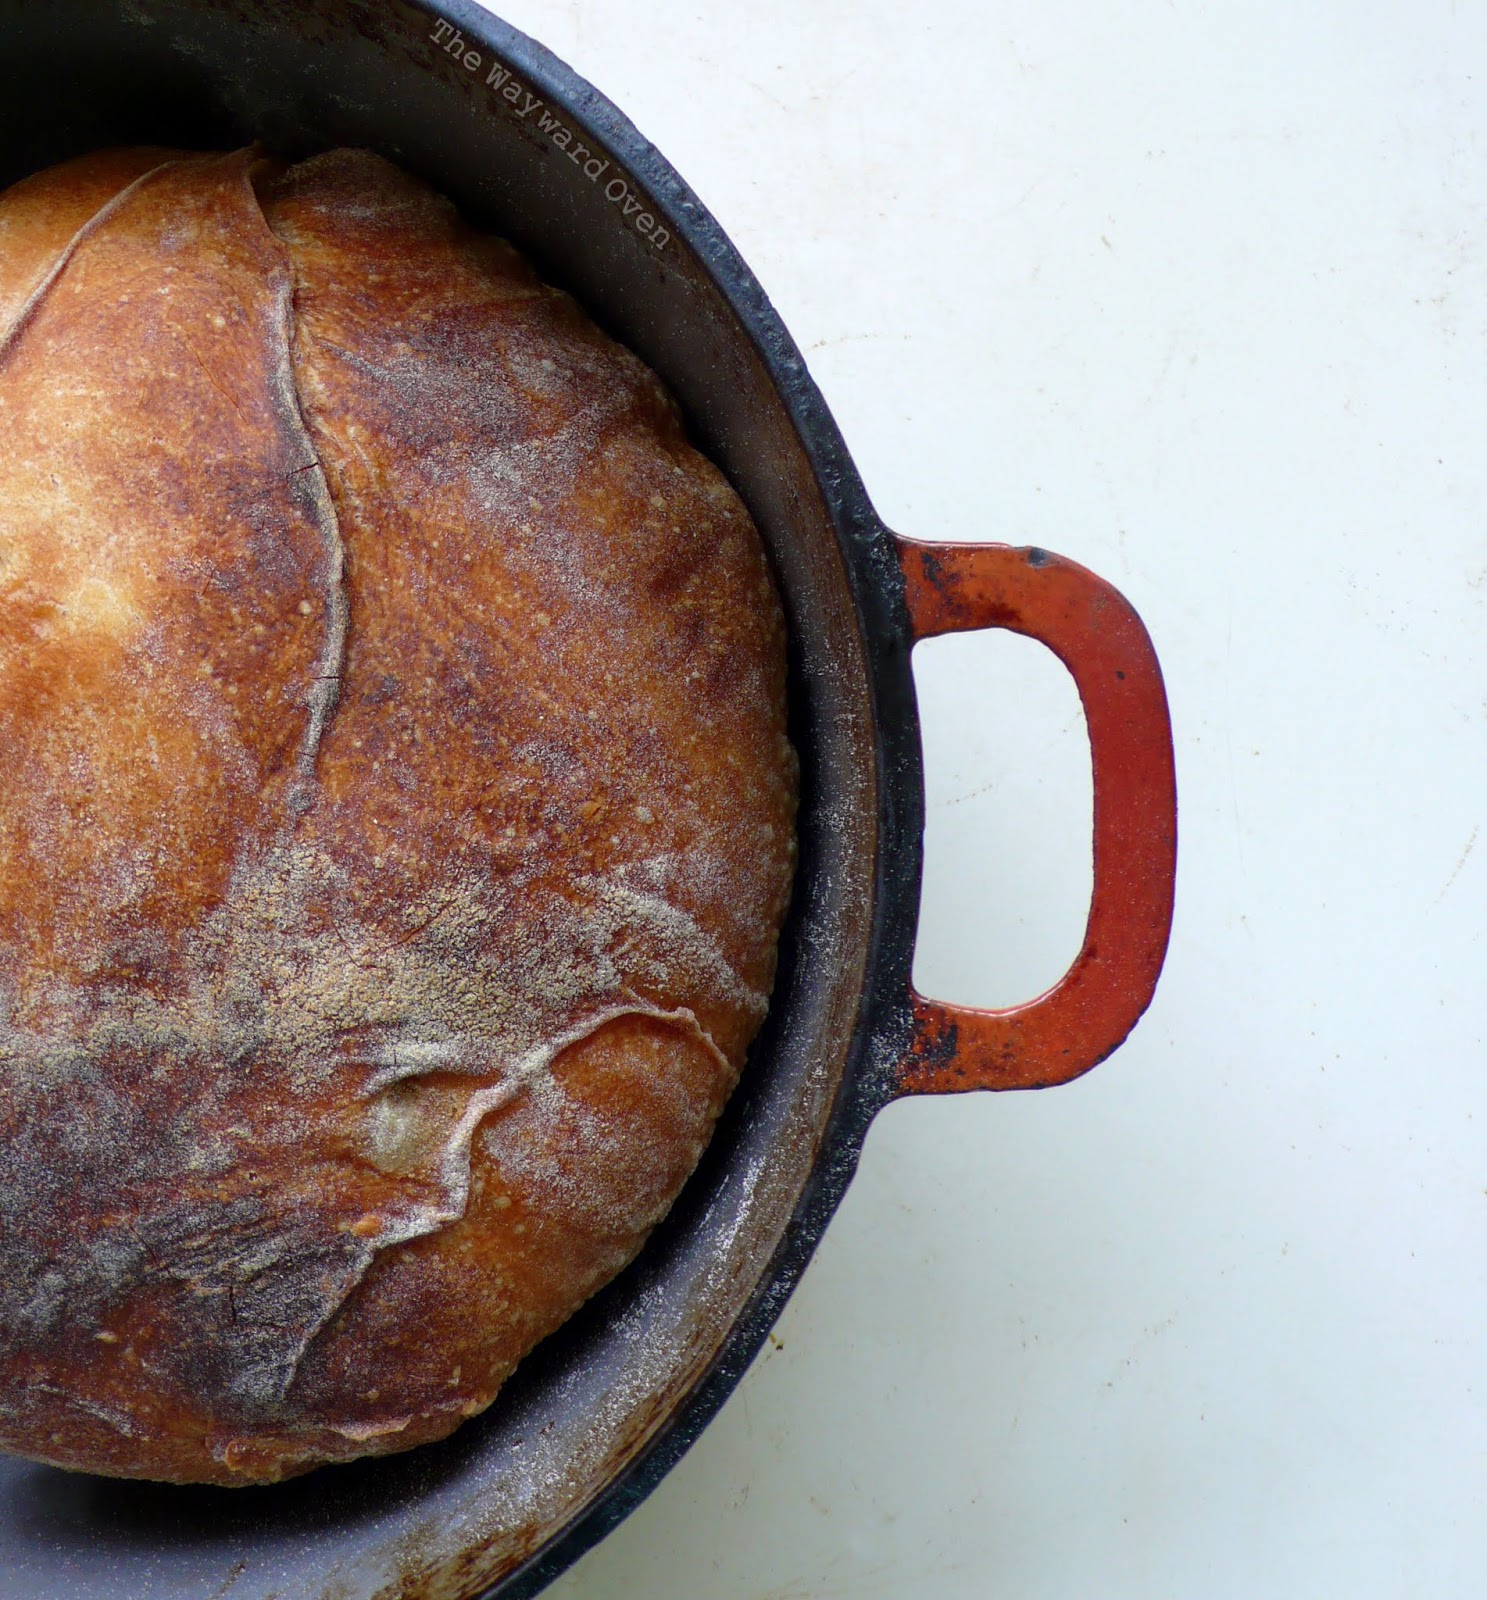
And then I got Ken Forkish's Flour Water Salt Yeast (my latest book), which uses the Dutch oven in all the recipes. He also uses his hands to do all the mixing right from the start! So I have fallen back in love with using the pot for breadmaking. The picture at the top of the post, by the way, is Ken Forkish's White Bread with 80% Biga. Why would I not want to make more bread in the Dutch oven when it comes out looking like that! More on it in a future post.
And now on with the show!