The Oven has baked its last loaf. This blog is no longer being updated.

My cooking videos appear at youtube.com/janeragavan

I write on food at star2.com

Showing posts with label Daring Bakers. Show all posts

Daring Bakers: Beautiful breads

Sunday, March 2, 2014

A LOVE FOR BREAD ART 
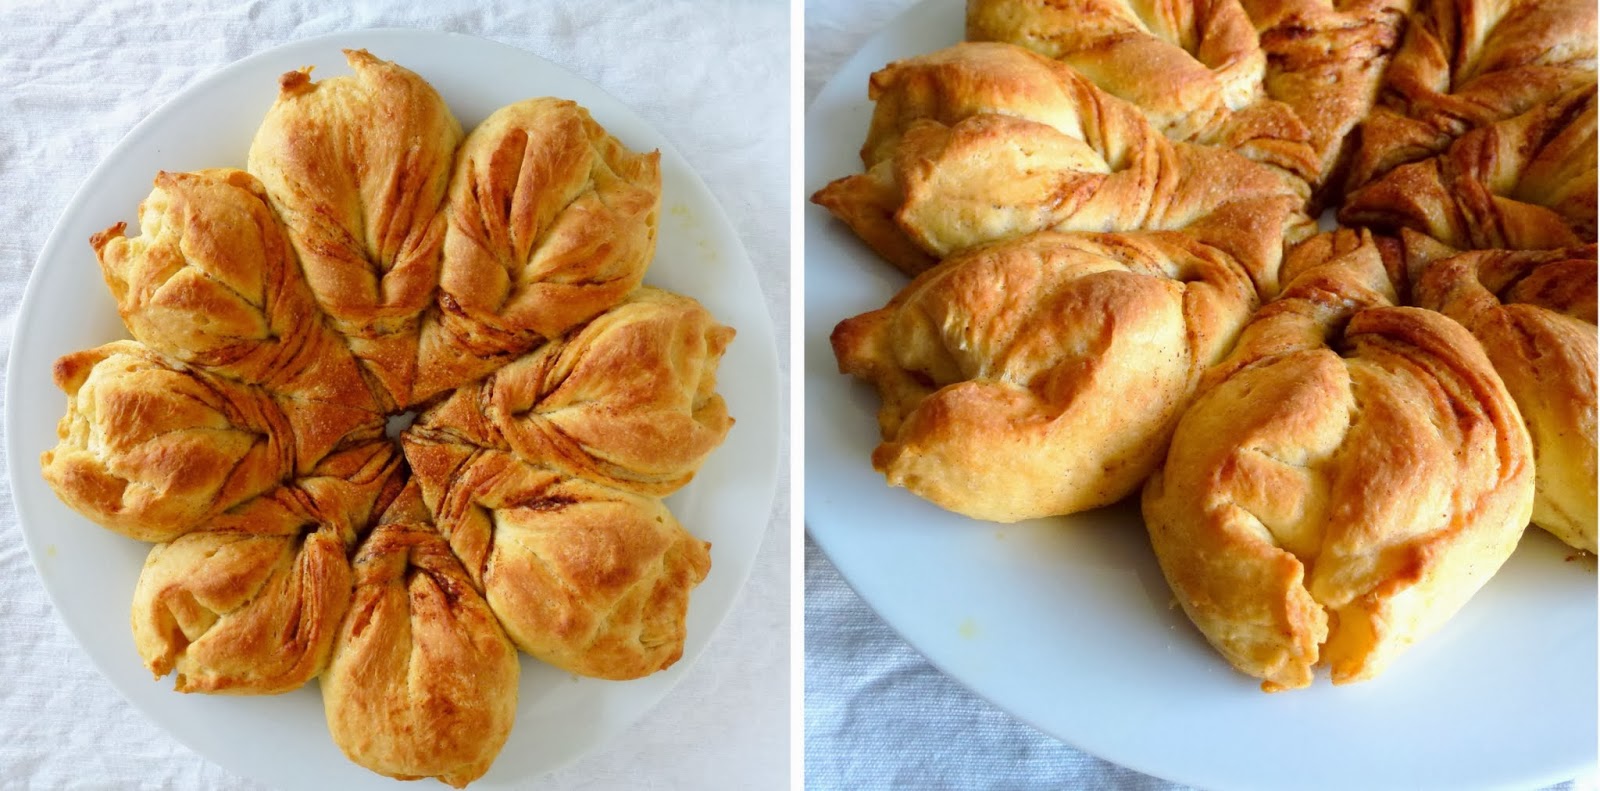
Beauty surrounded the Daring Bakers this month as our host, Sawsan, of chef in disguise, challenged us to make beautiful, filled breads. Who knew breads could look as great as they taste?
This was the brief for the February challenge and it was a challenge I really enjoyed. I still like the whole breadmaking process even after making breads for so long, but I have wanted to it to be a little "different" and bread art is the perfect way to liven it up a bit.
Cinnamon sweet bread
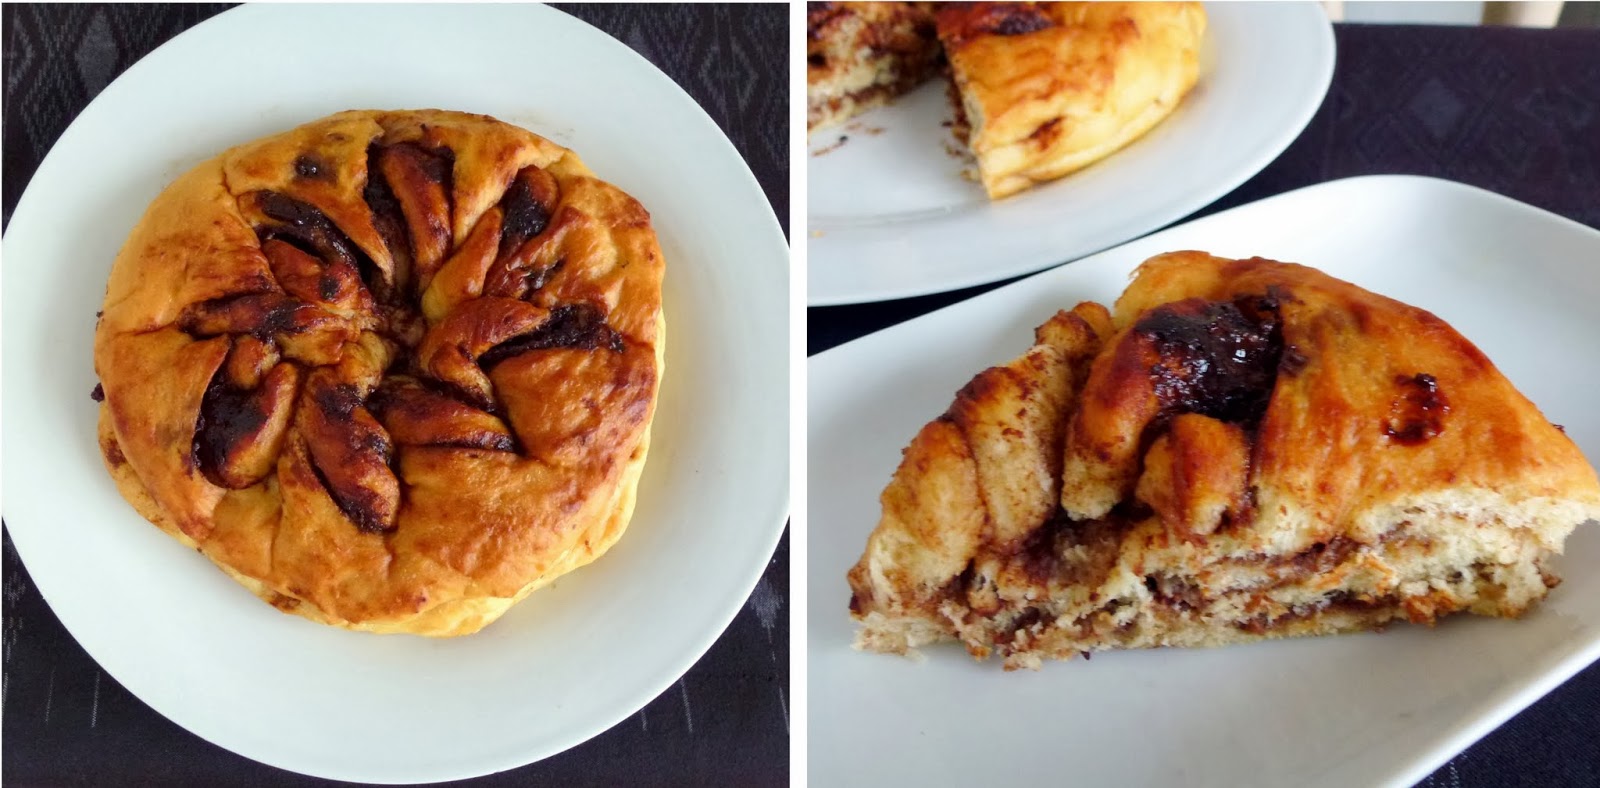
Sawsan gave recipes and showed us how to shape two breads: one is a cinnamon sweet bread and the other a Nutella twist. I used my own recipe for the dough but filled and shaped them as suggested. Because my loaves were smaller, I couldn't make enough slits in my Nutella bread (pictured below) to get properly shaped twists. But even with a less elaborate pattern, I still liked how the bread turned out.
Nutella twist
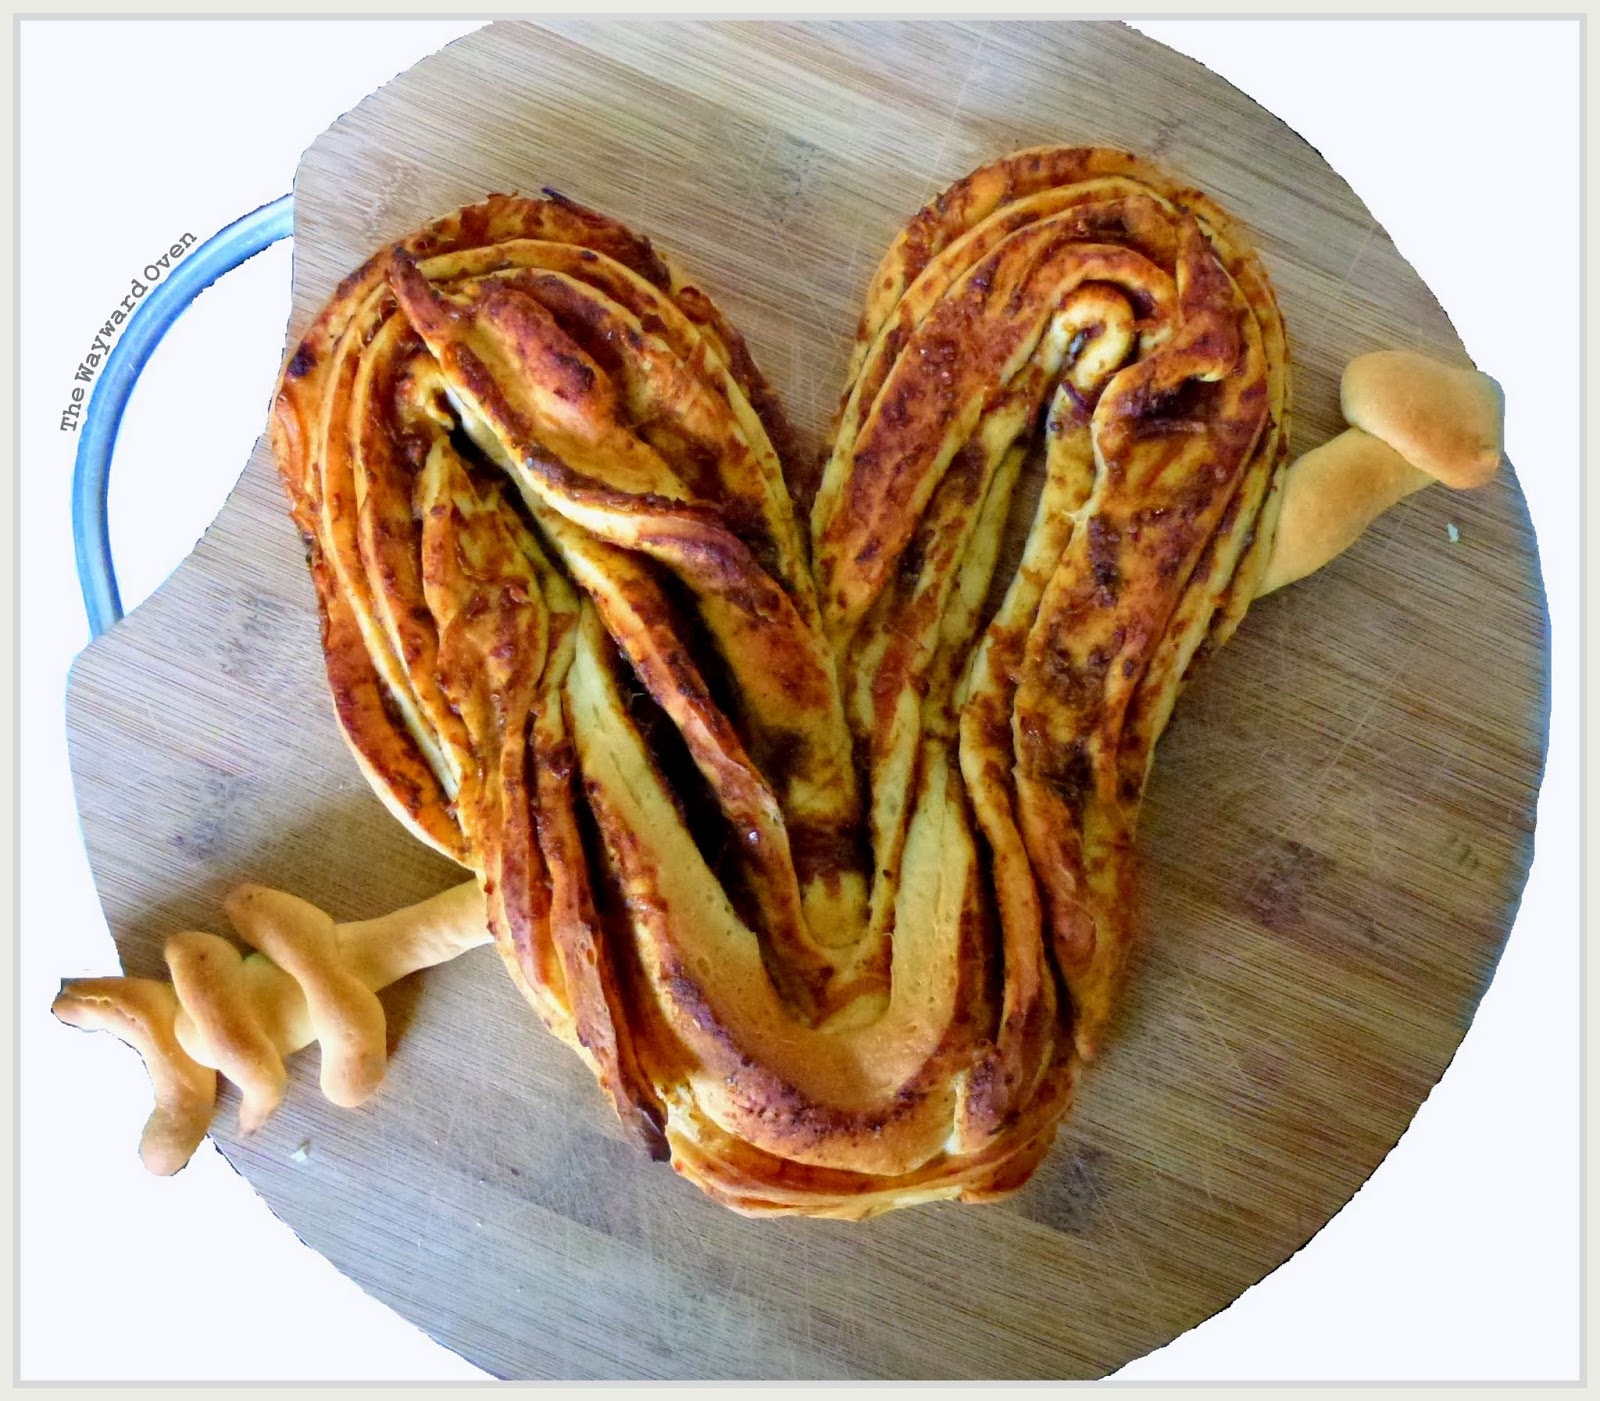
This year, Valentine's Day coincided with Chap Goh Meh (lovers' day in Chinese custom) and my section head decided we would have an office party to celebrate it. With the love theme, how could I not come up with a heart-shaped item?
Of course, it had to be bread. It's filled with a savoury chilli-date paste and shaped using instructions from this site. I added Cupid's arrow, although it is a little misshapen!
I will definitely be trying out more bread art from now on.

Year-end baking disasters

Sunday, December 29, 2013

PEPPERMINT MERINGUE MICE ~ THE ONES THAT SURVIVED 
Unless my oven goes completely kaput, I see my baking in the last few days of 2013 to be mishap-free – although for my own self, I foresee hands and arms with inevitable burns due to my inherent ability to get into accidents.
My last few baked dishes, however, have been quite terrible. The peppermint meringue mice in the picture above received some compliments, but these were the ones that survived the journey from my home to the office where we were having a Christmas pot luck. Most had cracked or lost their ears and tails. But that probably saved everyone from eating them because they were so tooth-achingly sweet!
I only made them to use up the leftover egg whites after using the yolks for a turkey-shaped challah I was determined to make.
Shaping the turkey-shaped challah
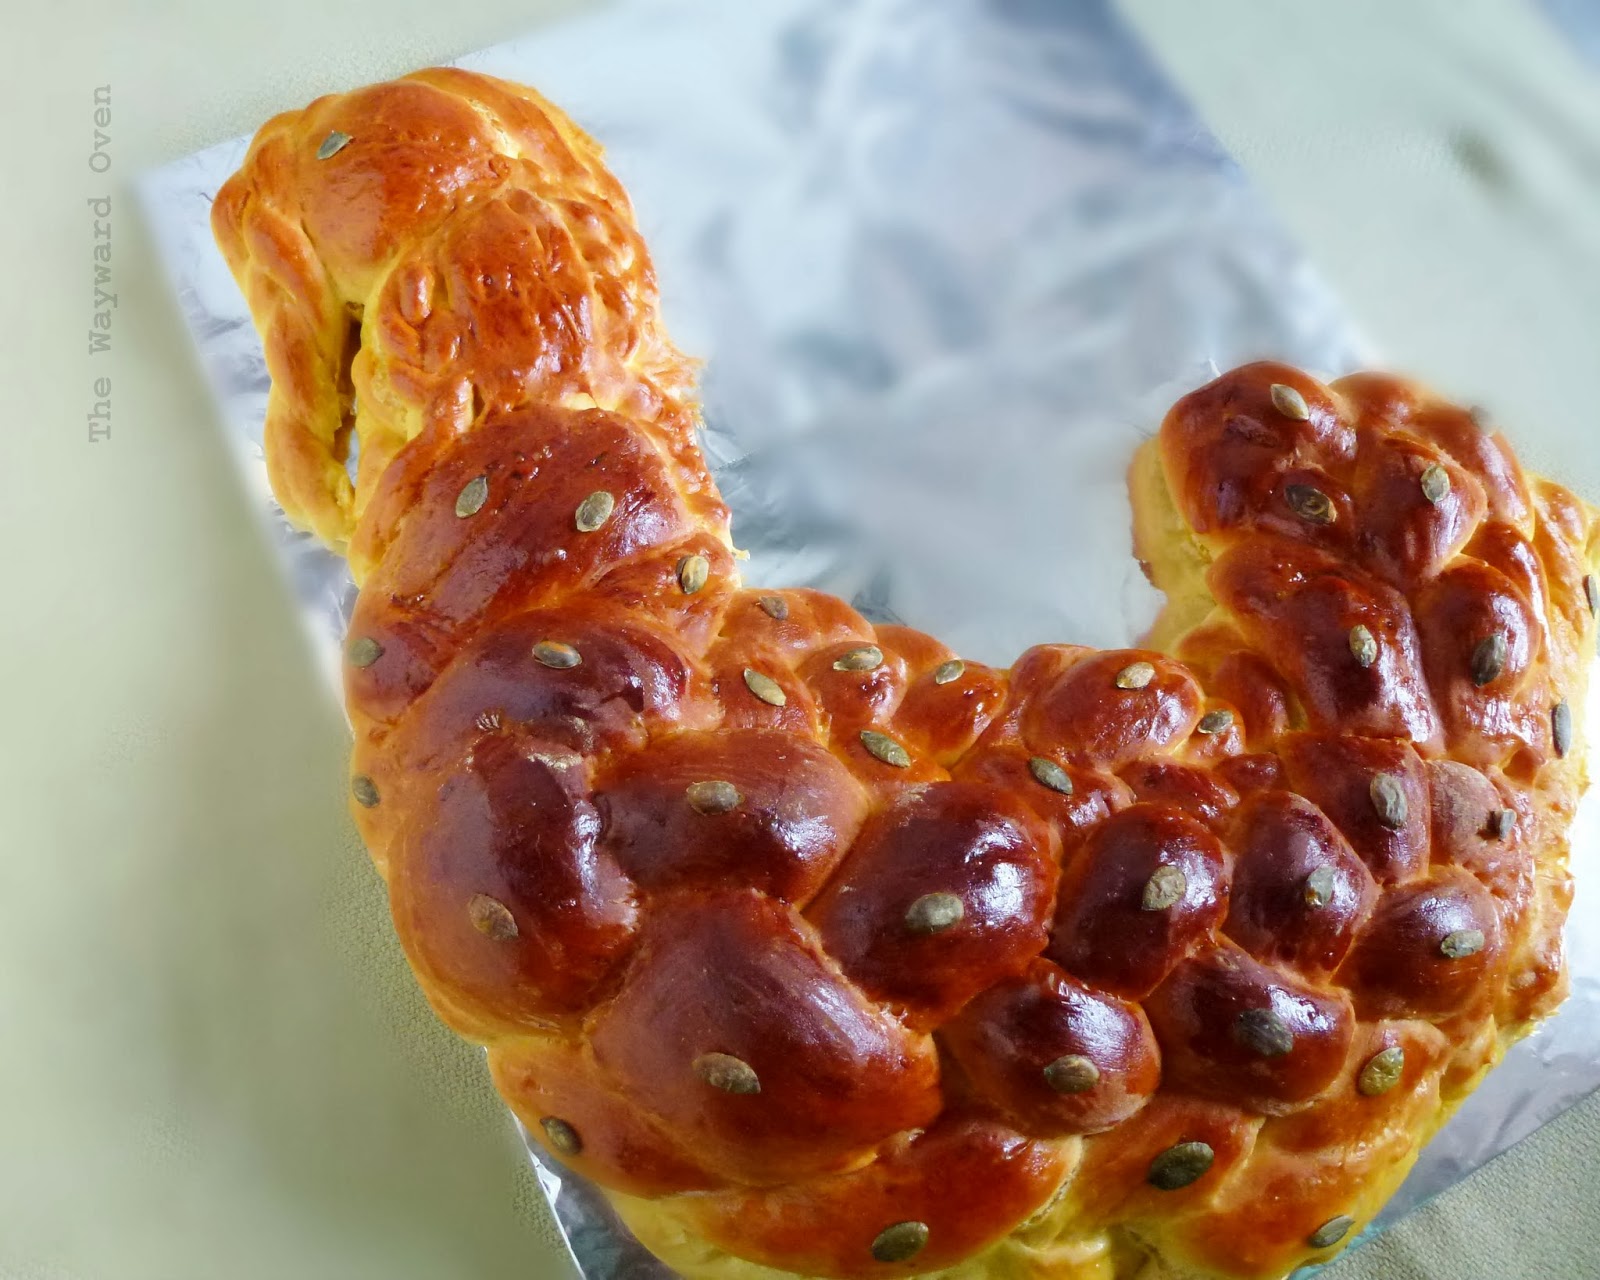
The loaf started out fine. I followed the instructions for what this site called the "Turkallah" although I changed a little of the head and neck. 
The problem started when the loaf was ready for the oven. I normally bake free-standing loaves directly on a heavy upturned baking tray that I place in the oven when I am preheating it. This is how I was going to bake the turkey loaf as well. 
But then, I clumsily slid the loaf into the oven and part of it hit the side and was distorted. I tried my best to reshape it on the hot baking tray, but unfortunately, the turkey lost its beak.
The turkey loses its beak.
I took the loaf to the office pot luck and no one could figure out what it was. One colleague said it looked like a dragon and another thought it was a Christmas stocking. Thank goodness, it was cooked well and tasted good.
But the worst was yet to come.
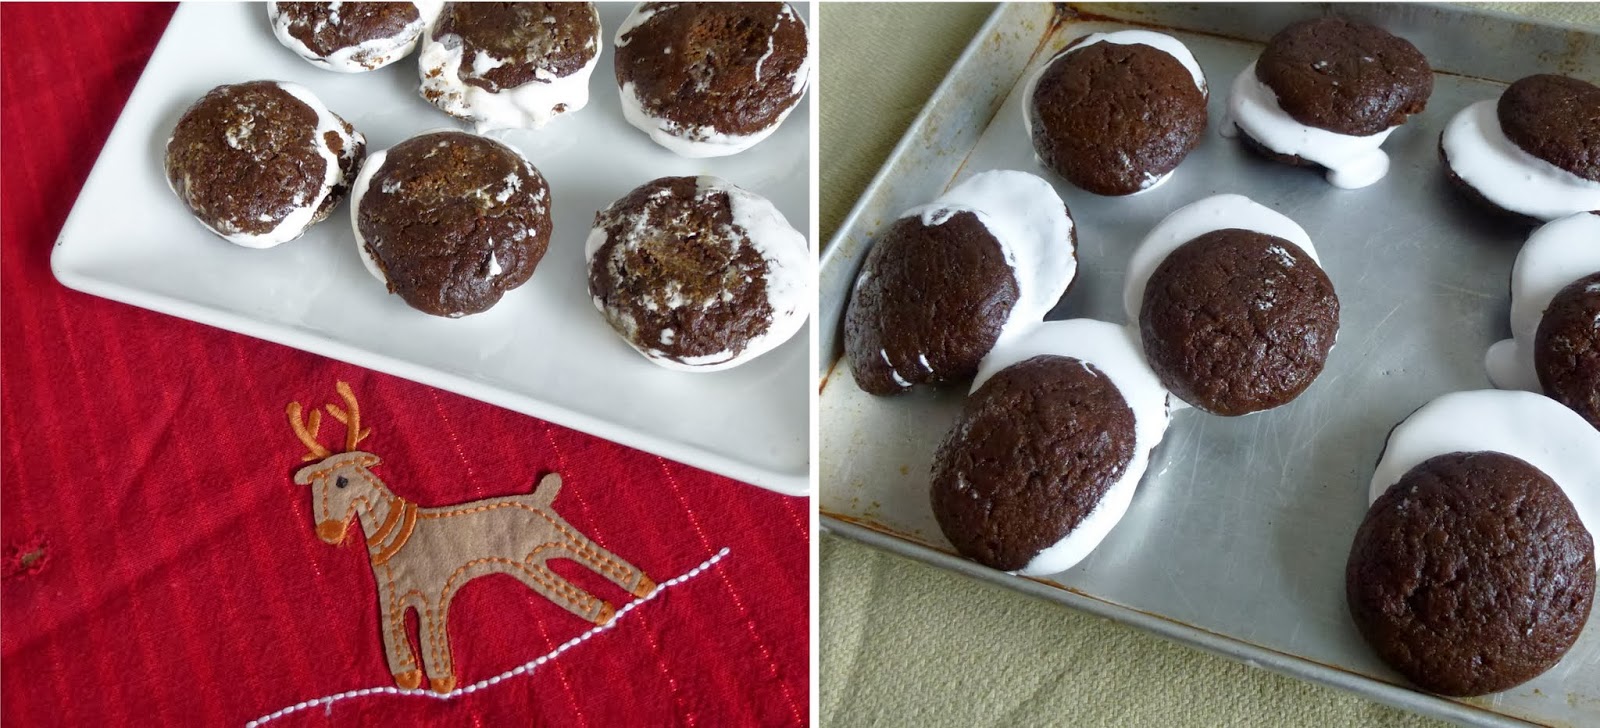
The whoopie pies disassembled themselves after sitting for a while (right).
The gingerbread whoopie pies with marshmallow fluff filling I made for the Daring Bakers challenge were a disaster. The marshmallow fluff was stiff enough after I had made it, but it turned liquid a few minutes after the cookies were sandwiched together. Refrigeration didn't help. So just for the picture, I squeezed them into shape. Shortly after the picture was taken, they slid apart again.
Here's wishing everyone a Happy New Year, and may all your baking be excellent!

Daring Bakers: Pastel de Tres Leches

Friday, September 27, 2013

THREE MILK CAKE WITH COCONUT 
I have wondered what a tres leches cake would taste like ~ actually it was more the texture that I was worried about. Would it be soggy? Would it be too sweet with all that condensed milk in it? So although I was curious, I never really wanted to find out and perhaps waste a cake. Until this Daring Baker's challenge.
Inma of la GalletIKA was our September 2013 Daring Bakers’ hostess and wow, did she bring us something decadent and delicious! Pastel de Tres Leches or Three Milk Cake: creamy yet airy, super moist but not soggy ... just plain delish!
According to Inma, her recipe was slightly adapted from the one given by one of Mexico's best pastry chefs, Paulina Abascal, to the magazine Revista Secretos de la Pastelería Caserais.
Being the coconut fiend that I am, of course I made the coconut tres leches cake variation that Inma provided. I changed the recipe slightly, scaling it down by about half (using three medium eggs instead of five large ones), including some rice flour in the mix and adding coconut extract for flavour. This was certainly a light, airy sponge.
The cake was baked in a log shape in what is called a "half roll bake pan". I saw it one day and bought it thinking I would use it all the time, but haven't. It does make a nice looking cake with the fluted top, which also makes dividing the cake very easy. However, after spreading the topping on, that was all lost. (A week later, I made the cake again, this time in a rectangle baking tin.)
Looking at Inma's recipe, I thought there was just too much leche, so I used just a quarter of what was called for in her original recipe. Maybe the larger amount was necessary, but I really didn't want to end up with too much extra milk. Having said that though, the mixture was absolutely delicious! I bet it would make superb ice cream. (And I used the leftover as a topping for butterscotch banana sourdough pancakes.) 
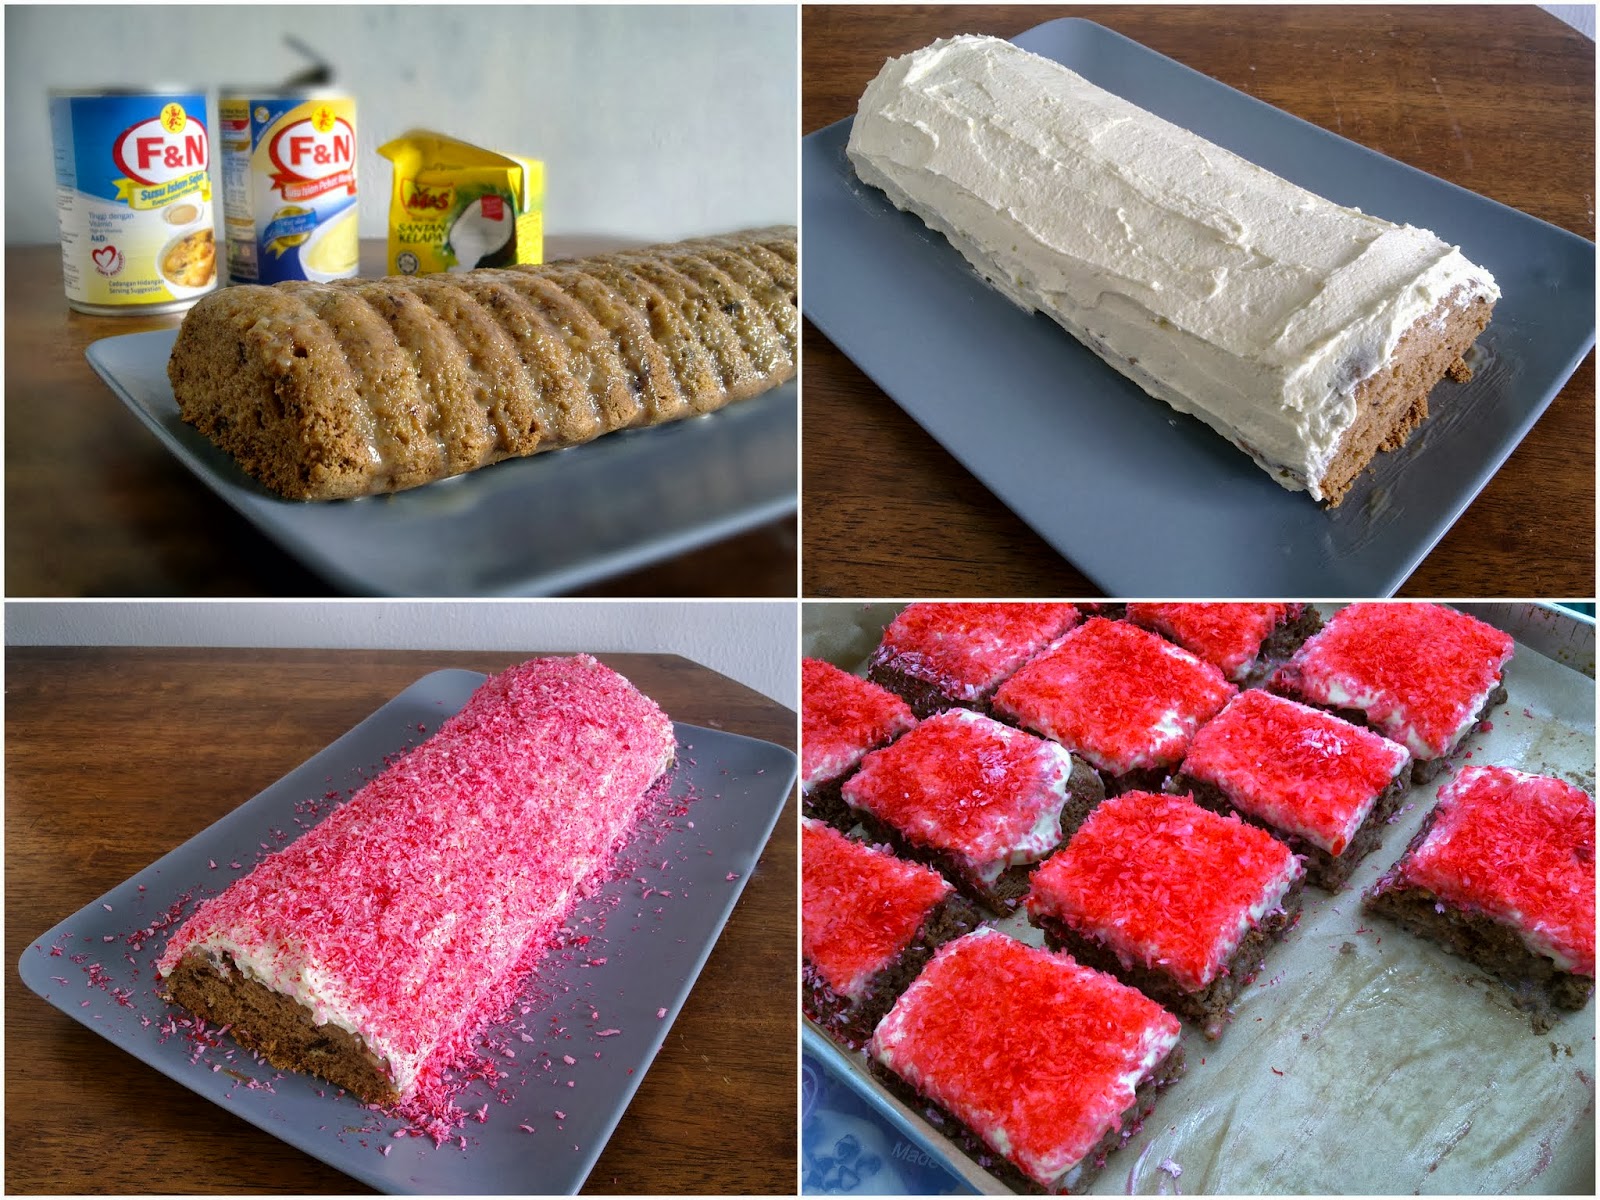
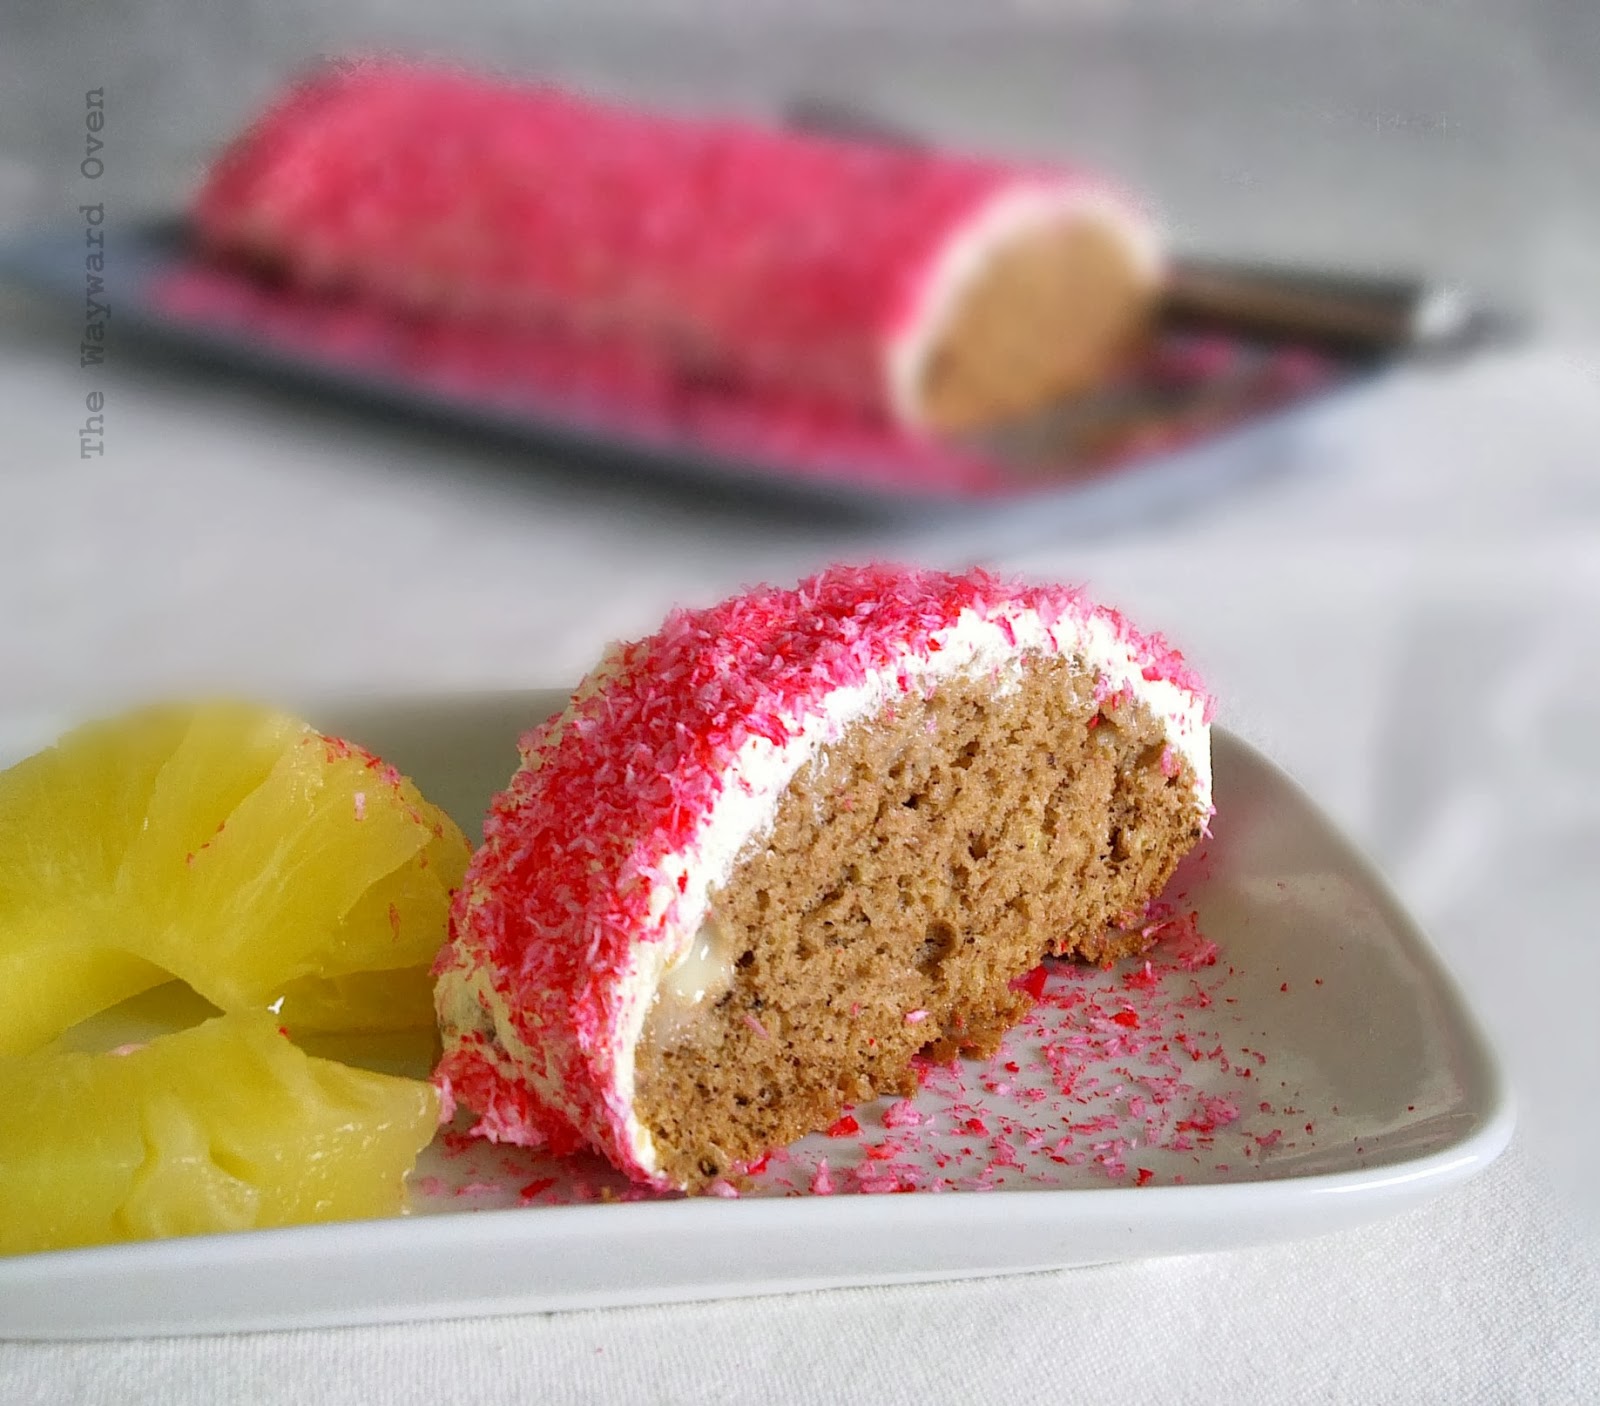
A cake filled with three kinds of milk, and decorated with pastry cream and coloured dessicated coconut
Coconut Pastel de Tres Leche
Three-milk cake with a touch of chocolate. Serves 10-12

3 medium eggs, separated, at room temperature
Pinch of salt
60g caster sugar
½ tsp each vanilla extract and coconut extract
65g all-purpose flour
1 tbsp rice flour
1½ tbsp cocoa powder mixed into a paste with 2 tbsp water

Filling
100ml condensed milk (or condensed filled milk)
90ml fresh coconut milk (or a good quality canned or boxed one)
60ml evaporated milk (or evaporated filled milk)

Topping
Whipped cream or pastry cream
Toasted shredded or dessicated coconut

Preheat oven to 180°C. Grease a half roll bake pan (or similar sized pan) well.
Beat the egg whites with the pinch of salt until they form soft peaks, about 2 minutes. Gradually add the sugar and beat on medium high speed until they form stiff peaks, 3-5 minutes.
Beat the egg yolks until they are pale and thickened, and leave ribbons when the whisk is lifted, 3-5 minutes. Quickly beat in the extracts.
Add the beaten yolks to the whites and fold together with a large rubber spatula. They do not have to be completely blended at this time.
Stir the flours together and sift over the eggs. Fold in quickly but gently to keep the mixture from deflating. Fold in the cocoa paste (it's okay of it's streaky).
Transfer to the prepared tin, level the top and bake until risen and and springy, and a toothpick inserted in the centre comes out clean, 20-25 minutes.
Cool in the pan, then invert onto a wire rack. Place rack over a large baking pan. With a skewer or fork, poke holes all over the cake right down to the bottom.
For the filling, heat the three milks together with a pinch of salt until the mixture comes to a boil. Lower the heat and simmer for a further 3 minutes. Take off the heat and leave for 5 minutes.
Spoon a third of the warm milk over the cake and leave for 10 minutes. Repeat this two more times. (As the milk sits, it will thicken, so after the third application, it will leave a sticky topping on the cake.) Don't forget to spoon the milk that drips down into the baking tray below the wire rack back onto the cake.
Refrigerate the cake overnight for the milk to soak in thoroughly.
Spread whipped cream or pastry cream over the cake, and decorate with toasted coconut.

Daring Bakers (from the archives): August 2010 ~ Pierogies

Saturday, July 27, 2013

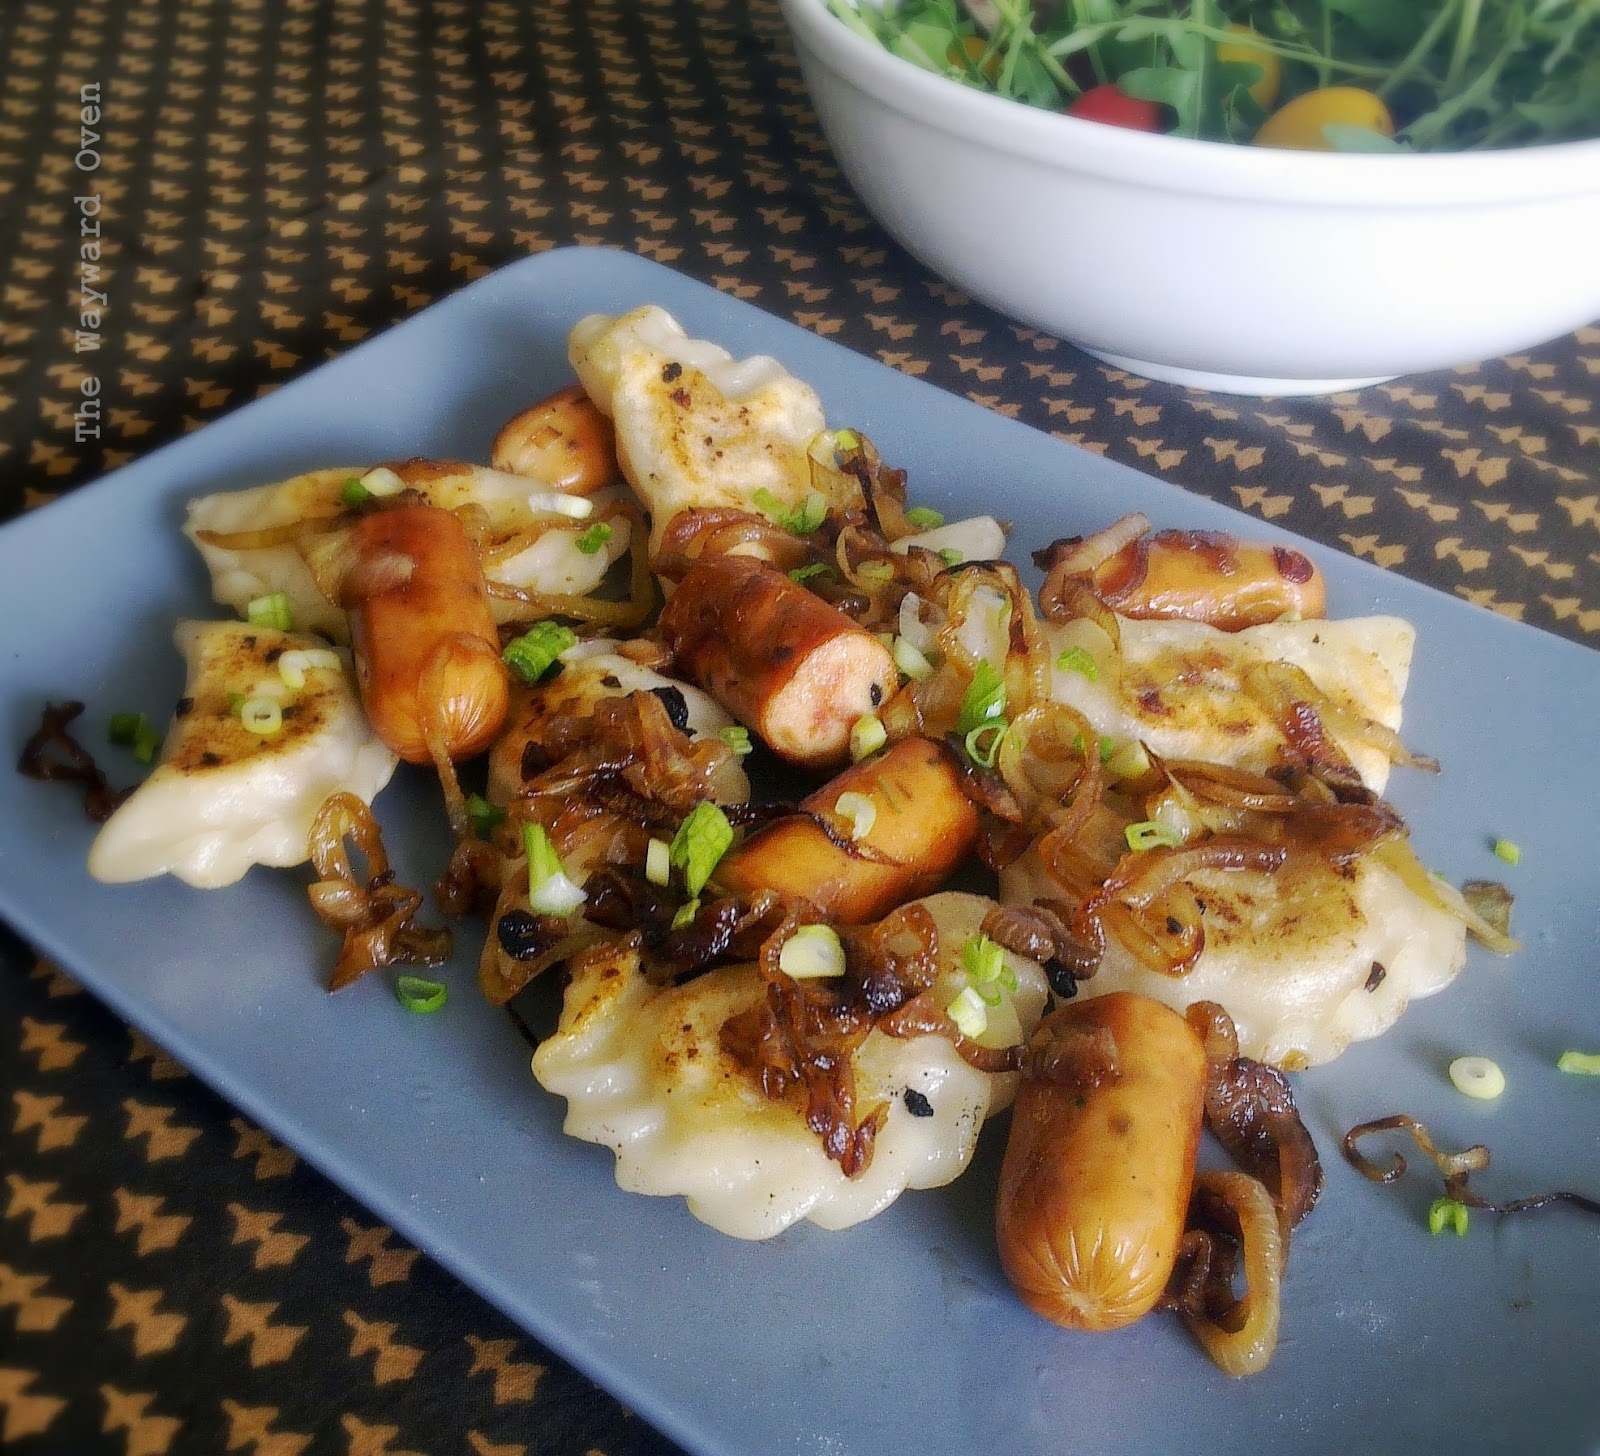
POTATO-CHEESE PIEROGIES WITH SAUSAGES AND FRIED ONIONS 
In a "celebration" of past Daring Baker and Daring Cook challenges, Lisa challenged all of us to search through the Daring Kitchen archives and pick any one we'd like! The REAL challenge was picking which delicious recipe(s) to try! 
Now, I have been a Daring Baker for a few years now and the reason I chose to be a baker and not a cook was because I could not resist making all those sweet baked goods. I have participated almost every month since I started – some dishes have come out well, others were excellent, and there were a few miserable failures as well. But I've learned many new things.
So for the challenge, I could have tried out a bake I had never done before, or gone back to one that had failed. But I decided to put aside the sweets this time and try out a Daring Cooks challenge. 
So I am making pierogies (August 2010 challenge hosted by LizG of Bits n' Bites and Anula of Anula's Kitchen) for the first time and after the whole process, which has several steps, I ask myself, "Why?" Why is this the first time I am making pierogies?! They're wonderful!
 Use the water after boiling the potatoes for the filling to make the dough
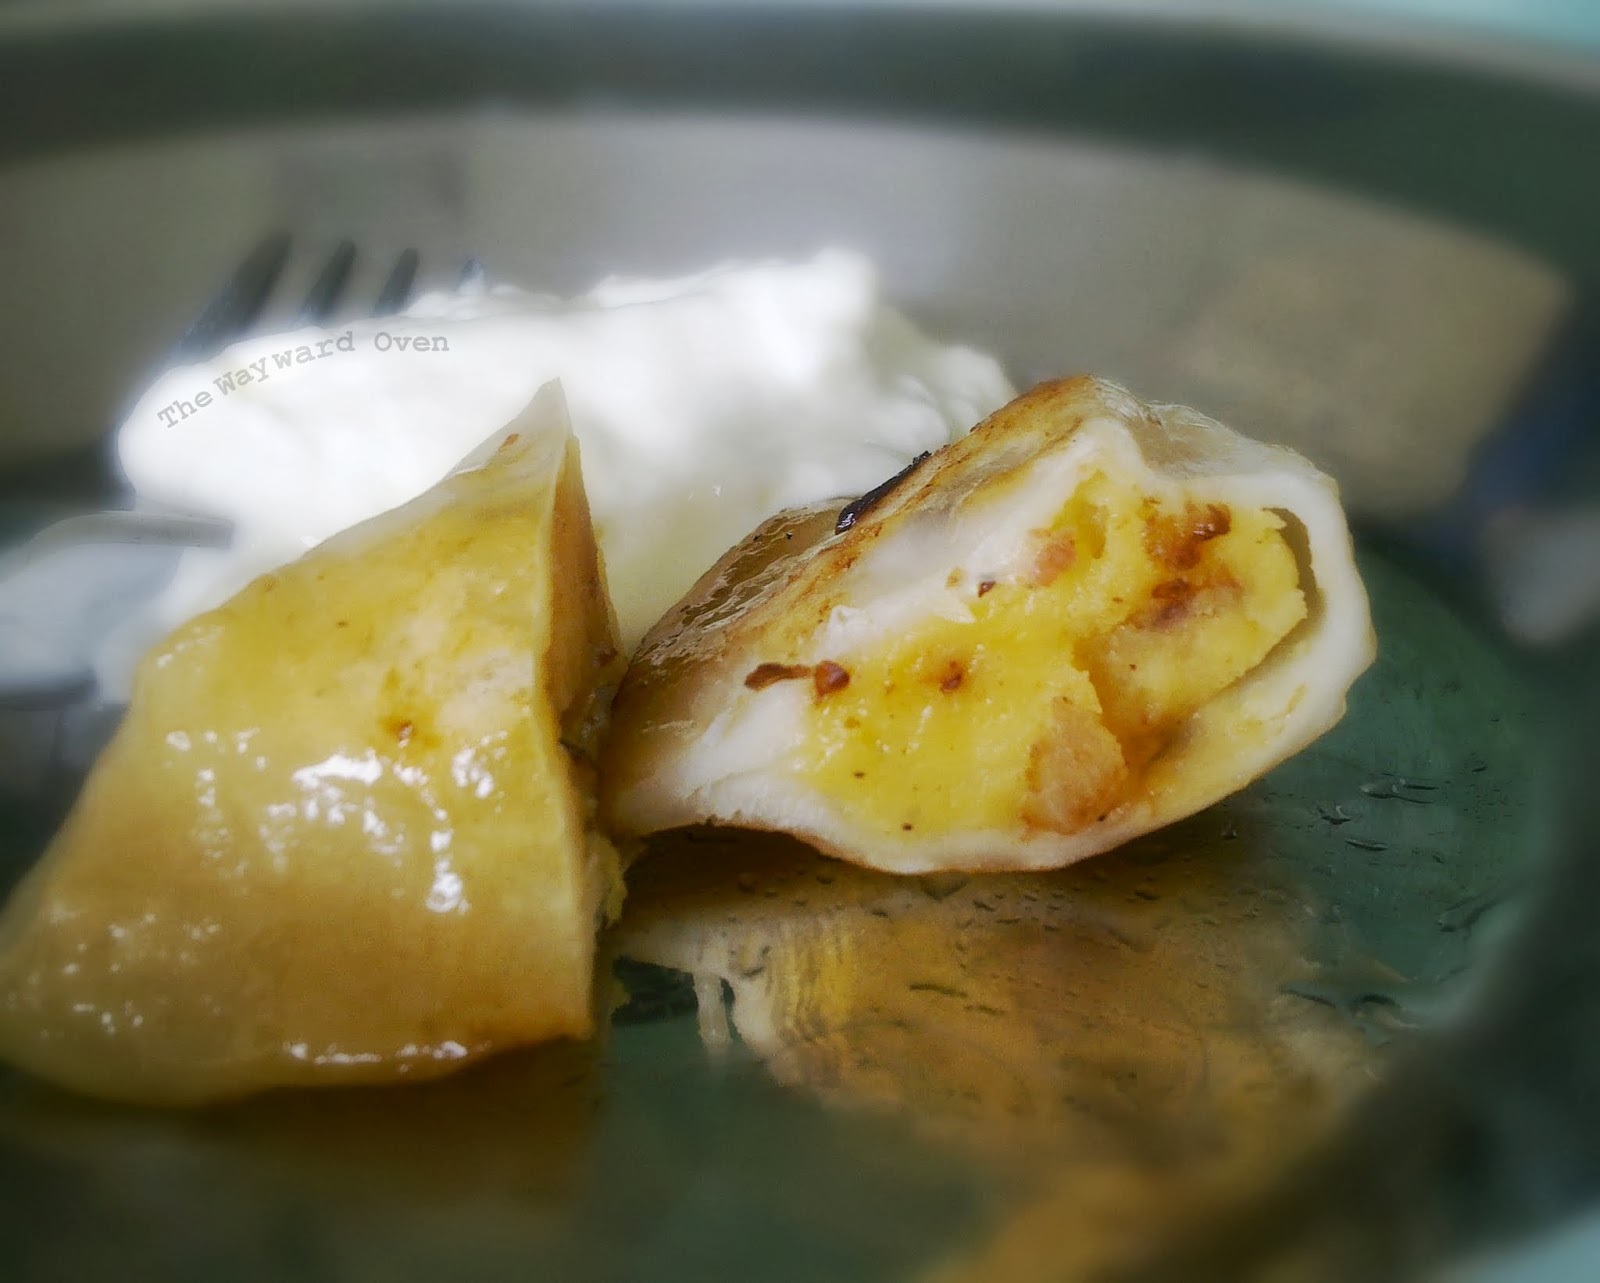
For the filling, I went with a traditional Polish/Russian one of potato and cheese. With the dough, I'd read that the water used to boil the potatoes is a good binder instead of eggs, and I also used sour cream. Apparently, low-protein flour makes a softer dough, so I used Chinese pau/bao flour. I like the texture of the dough, and it is easy to work with.
No doubt about it, pierogies are stodgy, so don't eat too many of these before doing something that requires moving about a lot. I had seven in one go – couldn't resist! – and had to have a lie-down after that.
Fry the onions, then brown the boiled pierogies in the same pan
Potato-Cheese Pierogies
Makes 30 pieces

Filling
300g potatoes, (about 4 medium) peeled and halved
4 rashers streaky bacon (optional)
1 medium (about 70g) white onion, finely chopped
1 clove garlic, minced
50g (about ½ cup) shredded sharp cheddar (or other cheese)
Salt and pepper, to taste

Dough
300g (about 2 cups) pau/bao flour (low-protein flour; or use all-purpose)
2 tbsp sour cream
175ml (about ¾ cup) warm potato water, plus extra

To make the filling, heat a pan and fry the bacon without any oil. Once the bacon is crisp and the oil is rendered, remove the bacon and crumble or chop. Sauté the onions in the bacon grease and cook until golden. Add the garlic and fry briefly. Set aside.
Boil the potatoes in plenty of lightly salted water until tender. Drain, retaining about 1 cup of the water.
Return the cooked potatoes to the pot over low heat to dry out slightly, 1 minute. Take pot off the heat and add the crumbled bacon, onion mixture and shredded cheese. Mash the potatoes, then let the mixture cool.
To make the dough, place the flour in a bowl. Stir in the sour cream. Make a well in the centre and add almost all the potato water. Bring the mixture together, adding more water a tablespoon at a time if necessary, until a soft dough forms. It should not be sticky. Cover and rest for 15 minutes.
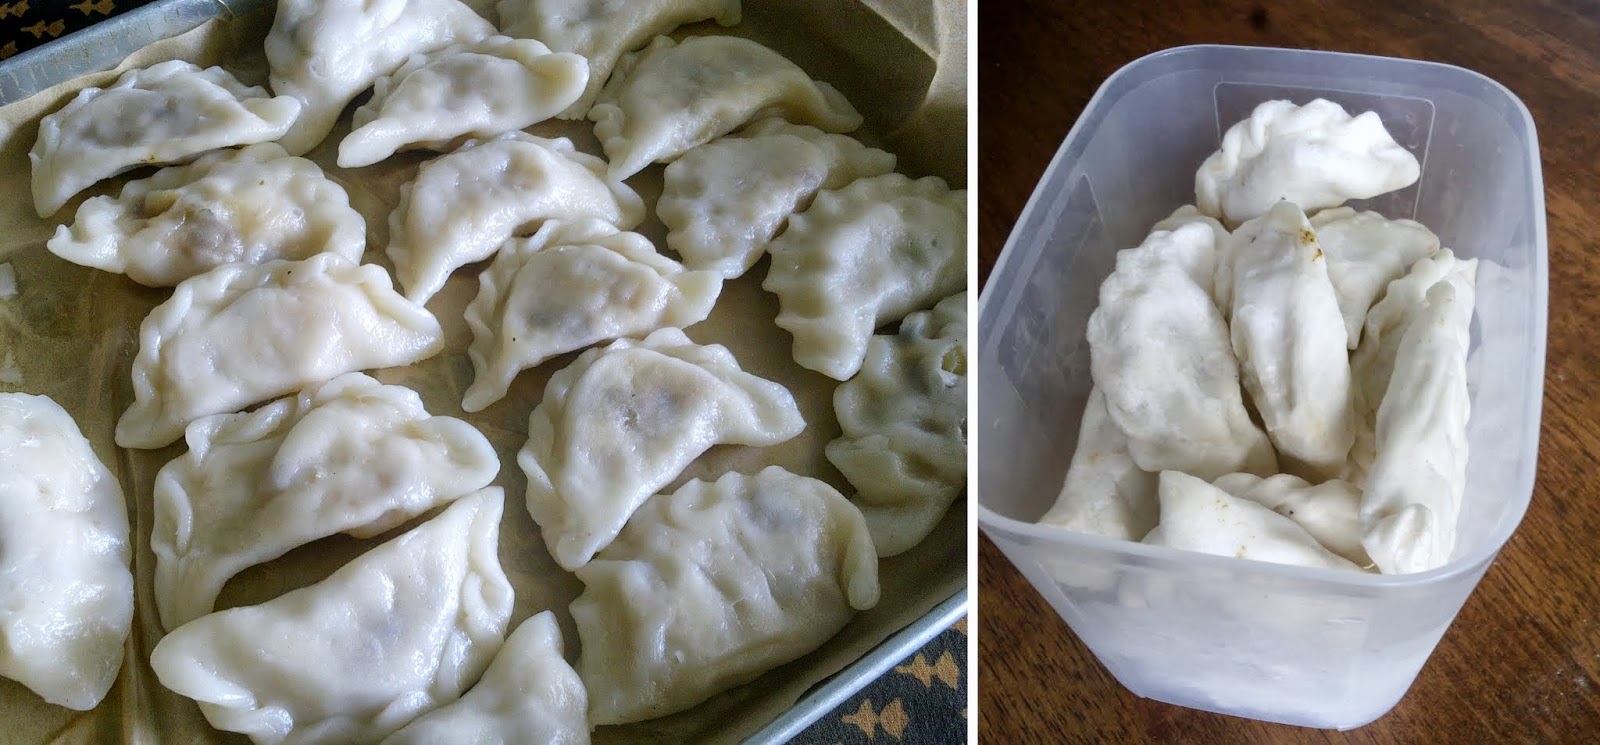
Pierogies: boiled and frozen. They may look bland, but these little half-moons pack flavour - and comfort.
To assemble, roll out the dough to about 2mm and stamp out 7cm circles with a plain cookie cutter or drinking glass. Turn a dough circle over so the moister side will now be on top, and place a teaspoon of filling in the centre; press the opposite edges together firmly to form a semi-circle. The edges do not need to be crimped as they stick together well but for a bit of decoration, crimp away! Place the half-moons on a lightly floured plate.
Bring a large pot of water to the boil; salt lightly. Boil the pierogies in batches. When they float, leave them in for 1-2 minutes longer, then transfer to a tray lined with greaseproof paper. If desired, the pierogies may be frozen after they cool. Freeze them in one layer, then transfer to a freezer-proof plastic bag. 
Serve them with sour cream, or lightly fry them on each side and serve with fried onions and good-quality sausages.
* * *
And on the Bakers' side...
The August 2010 Daring Bakers challenge was pound cake. I chose to use it in a Baked Alaska.

Daring Bakers: Savarin

Saturday, April 27, 2013

LIME SAVARIN WITH COCONUT CUSTARD AND GRILLED PINEAPPLE
Every step of the process of making savarin is rather enjoyable! The dough is very sticky, and developing the gluten by hand takes a while, but I really liked it. And when the outcome is as delicious as it was, well, all that effort was worth it.
Natalia of Gatti Fili e Farina challenged us to make a traditional Savarin, complete with soaking syrup and cream filling! We were to follow the Savarin recipe but were allowed to be creative with the soaking syrup and filling, allowing us to come up with some very delicious cakes!
I made mini savarins with half the recipe provided by Natalia. Almost all the liquid in the dough comes from the eggs which I thought was unusual since water is usually one of the components of bread. I didn't follow the instructions as given though and made the dough with much fewer steps.
I mixed and kneading the dough completely by hand, so I know this can be done without a machine.
Here's a video of how I kneaded the sticky dough (or view it on YouTube). This was after about 25 minutes, and the dough was already getting stronger. It was my first attempt at filming anything with my phone camera (the DSLR is being serviced) and I was holding it in my left hand so the video is a little shaky.

My kitchen is not the brightest spot in the flat so I had to take the mixing bowl to a table by the door to the balcony, and there are sounds of cars passing by outside. In between, when the dough plops against the bowl, there's a squelching sound of air bubbles popping. Also, the dough starts coming away from the sides of the bowl and takes scraps sticking there along with it. Another eight minutes of this and the dough had become nice and elastic, and was ready for the proofing stage.
Pipe savarin dough into mini bundt moulds
To get the dough into the mini bundt moulds, I used a piping bag, pressing out three blobs to fill the holes, then cutting the dough with oiled scissors. With a wet finger, I smoothed out the surface. Unfortunately, the pattern doesn't really show up on the mini savarins (the grooves are too shallow). And I probably could have got one or two extra savarins if I hadn't overfilled some of the moulds.
Mini savarin with lime syrup, coconut custard and grilled pineapple
Mini Lime Savarin
Makes 10-12. Find the original recipe here.

175g bread flour, divided
2 tsp sugar
¾ tsp instant yeast
1 tbsp water
3 medium eggs, separated
½ tsp table salt
40g butter, softened
Lime syrup (recipe follows)

To serve
Coconut custard pudding
Grilled pineapple rings
Toasted dessicated coconut

Place 2 tbsp flour, sugar, yeast and water in a small bowl. Blend into a paste and set aside for 10 minutes.
Put the remaining flour in a large mixing bowl with the egg whites. Stir together to form a batter. Set aside for 10 minutes.
Add yeast mixture to the egg white mixture along with the egg yolks and salt. Mix to blend.
Add butter in three batches and stir well to blend well after each addition.
Knead the dough until elastic (see video above). Place dough in a lightly oiled bowl and cover with cling film. Set aside until tripled in size.
Lightly oil a 10-hole mini bundt pan and scoop savarin dough into a piping bag. Pipe dough into the moulds (or use two teaspoons), cutting the portions with oiled kitchen scissors. Smooth out the surface with a wet finger. Cover the pan and set aside until dough reaches near the top of the moulds.
Meanwhile, preheat oven to 180°C. Bake mini savarin until golden and cooked, 18 to 20 minutes. Cool in tin, 10 minutes, then completely on a wire rack. Dunk into warm syrup. Pipe coconut custard into the centre of the ring, sprinkle with toasted coconut and serve with grilled pineapple rings.

Lime Syrup
½ cup caster sugar
100ml water
Large pinch of salt
2 tbsp lime juice
½ tbsp rose water

Put sugar, water and salt into a saucepan and bring to the boil, stirring constantly until sugar dissolves. Lower heat and simmer syrup for 10 minutes until slightly reduced and thickened. Take off the heat and stir in lime juice and rose water. Use while still warm.
* * *
Traditional savarin ring
Earlier, 
I used the recipe from this video to make a savarin in my new 24cm classic savarin mould.
It rose very high and emerged from the tin looking like an inner tube!
Not your traditional savarin
I diverted from tradition by slicing the savarin in half  and brushing on an orange-pomegranate syrup. There were pockets of dry crumb though, because they didn't get enough syrup.
The savarin was filled with pastry cream, then the topped was glazed with salted brown sugar toffee.
Pastry cream-filled savarin with salty toffee glaze 
This savarin was all right but I definitely prefer the mini ones since they're much easier to eat.
Check out other savarins in the slideshow on The Daring Kitchen.

Daring Bakers: Hidden veggies in sweet bakes

Wednesday, March 27, 2013

EDAMAME WHOOPIE PIES WITH MUNG BEAN FROSTING 
Ruth from Makey-Cakey was our March 2013 Daring Bakers’ challenge host. She encouraged us all to get experimental in the kitchen and sneak some hidden veggies into our baking, with surprising and delicious results!
Being sneaky when it comes to food is always exciting – whether it's trying to fool children or cheating on your diet. I don't have children and I never diet (although I should refrain from eating too much of a good thing... Butter, mmmm) but this challenge is about creativity and that's always good.
I reviewed Harry Eastwood's Red Velvet & Chocolate Heartache for work a couple of years ago and tried out the Sunken Apricot and Almond Cake (made with pumpkin), the Courgette and Camomile Cupcakes and the Heartache Chocolate Cake made with aubergine/eggplant (I read on the DB forum that a few others have also made this cake successfully). They all turned out well and produced very moist bakes.
I knew I wanted to make whoopie pies and I thought of using frozen spinach, but when I checked my freezer, I realised I had used it all up. I noticed there was a packet of edamame though (there are times when we all forget what we have in our freezers, don't we?). These beans are nutritionally rich, but more important, to me, is they are sweet and chewy, and they taste good even without seasoning. I had my veg. 
Springy and well-risen
The first thing that appealed to me about the cookies was their natural pastel green colour thanks to the edamame. I had kept some plain and had added a little chopped fresh mint and grated chocolate to another portion of the dough. Oddly, although I used the same amount of dough (with an ice cream scoop) for all the cookies, the mint-chocolate ones baked up larger!
To sandwich the cookies together, I used leftover cream cheese frosting that I had made for another cake – but with a few additions. To up the vegetable content, I added some mashed mung beans (another healthy food item), cocoa powder and a touch of wasabi since it goes well with  edamame.
I liked the whoopie pies, but I have to admit I couldn't taste the edamame – though that clearly fulfils the requirements of this challenge: hiding a vegetable in a sweet. The mung beans in the frosting, however, could be detected – mainly because I couldn't get them really smooth in my mini food processor. Mung beans are used in a lot of Asian sweet dishes anyway so I'm used to them. I actually liked the textural feel of the frosting.
Do stop by at The Daring Kitchen for a slideshow of other ways to sneak vegetables into sweets!
Fill 'em up
Edamame Whoopie Pies with Mung Bean Chocolate Frosting
Makes 8 whoopie pies

1 cup all-purpose flour

½ tsp baking powder
½ tsp baking soda
¼ tsp fine salt
Scant ¼ cup coconut oil
½ cup caster sugar
1 egg
½ tsp vanilla extract
½ cup edamame purée*

Mint and Chocolate variation

1-1½ tbsp finely shredded (chiffonade) fresh mint
1-1½ tbsp grated or finely chopped chocolate

Mung Bean Chocolate Frosting
1 cup skinless split mung beans, soaked overnight
1 tbsp cocoa mixed with 2 tsp water into a paste
100g cream cheese, softened
50g unsalted butter
75g icing sugar
¼ tsp wasabi paste, or to taste (optional)

Sift the flour, baking powder, baking soda and salt together. Set aside.
In a large mixing bowl, beat the coconut oil and sugar together until blended. Add the egg and beat until the mixture is pale and light. Beat in the vanilla extract.
Fold in the dry ingredients, then the edamame purée. For the Mint and Chocolate variation, fold ingredients into the dough together with the edamame purée. Place dough in the fridge for 15 minutes.
Meanwhile, preheat the oven to 170°C. Line two baking sheets with greaseproof paper.
Using a one-tablespoon capacity ice-cream scoop, place dollops of dough 5cm apart on the baking sheet. Bake for 12-15 minutes, rotating the pans halfway through, until the cookies are risen and springy in the centre. 
Remove from oven and transfer cookies to a wire rack to cool completely before sandwiching two together with frosting.
Mung Bean Chocolate Frosting: Drain mung beans and steam until soft. The frosting uses ½ cup so purée enough in a blender or mini food processor and freeze the rest for another use.
Beat the cream cheese and butter together, then stir in the mung bean purée and cocoa paste. Beat in the icing sugar and wasabi until smooth and soft.
* To make edamame purée, steam about 200g of edamame bean pods until soft. Shell them and remove the skin from the beans. Place beans in a blender or mini food processor with about ½ tbsp of water. Pulse to purée. Add a little more water if necessary to get it smooth.

Daring Bakers: Gevulde Speculaas

Sunday, January 27, 2013

SPICY DUTCH PASTRY: GEVULDE SPECULAAS 
Francijn of Koken in de Brouwerij was our January 2013 Daring Bakers’ Hostess and she challenged us to make the traditional Dutch pastry, Gevulde Speculaas from scratch! That includes making our own spice mix, almond paste and dough! Delicious!
Francijn was right – the Gevulde Speculaas was indeed delicious, and fun to put together too. At first, it was daunting to see the number of different spices used in the mix – nine in all! – but when combined, every one of them was essential: cinnamon, cloves, mace, ginger, white pepper, cardamom, coriander, (star) anise, and nutmeg.
I had all the spices in my pantry as many of them are used in curries. While I am not a big fan of cloves, I did not omit them from the mix. After tasting the pastry, I was glad I didn't.
Most of the spices I stock are whole – the only ground ones I have are cinnamon, ginger, white pepper and nutmeg in ground form. I chose to use the whole ones and proceeded to toast them separately, then pound (with a mortar and pestle) each one into a powder, and finally to sift them! That was the most elaborate part of the challenge for me, but I was getting pure spices and didn't mind the extra work.
Here's the recipe in PDF. In it, Francijn writes about the history of Dutch spice trading and the background on this lovely pastry. Malaysia, or Malaya at the time, was of course part of the spice route, and there is a history of the Dutch in this country too. 
Gevulde Speculaas is two layers of dough with another layer of homemade almond paste (pictured right) sandwiched between them. I used ready ground almonds which I get from the baking supply shop over here. The paste also consists of sugar, and lemon zest and the binding agent is an egg. I had read that flax seed paste can be used as a substitute for egg so I toasted and ground flax seeds and mixed the powder with water. After sitting for a while, the mixture has a gel-like consistency. In place of one egg, use 1 tablespoon of whole flax seeds, grind them and then mix with 3 tablespoons of water. The flax seeds give the almond paste a light brown hue, which is perhaps why the middle layer is not so distinct in the pastry.
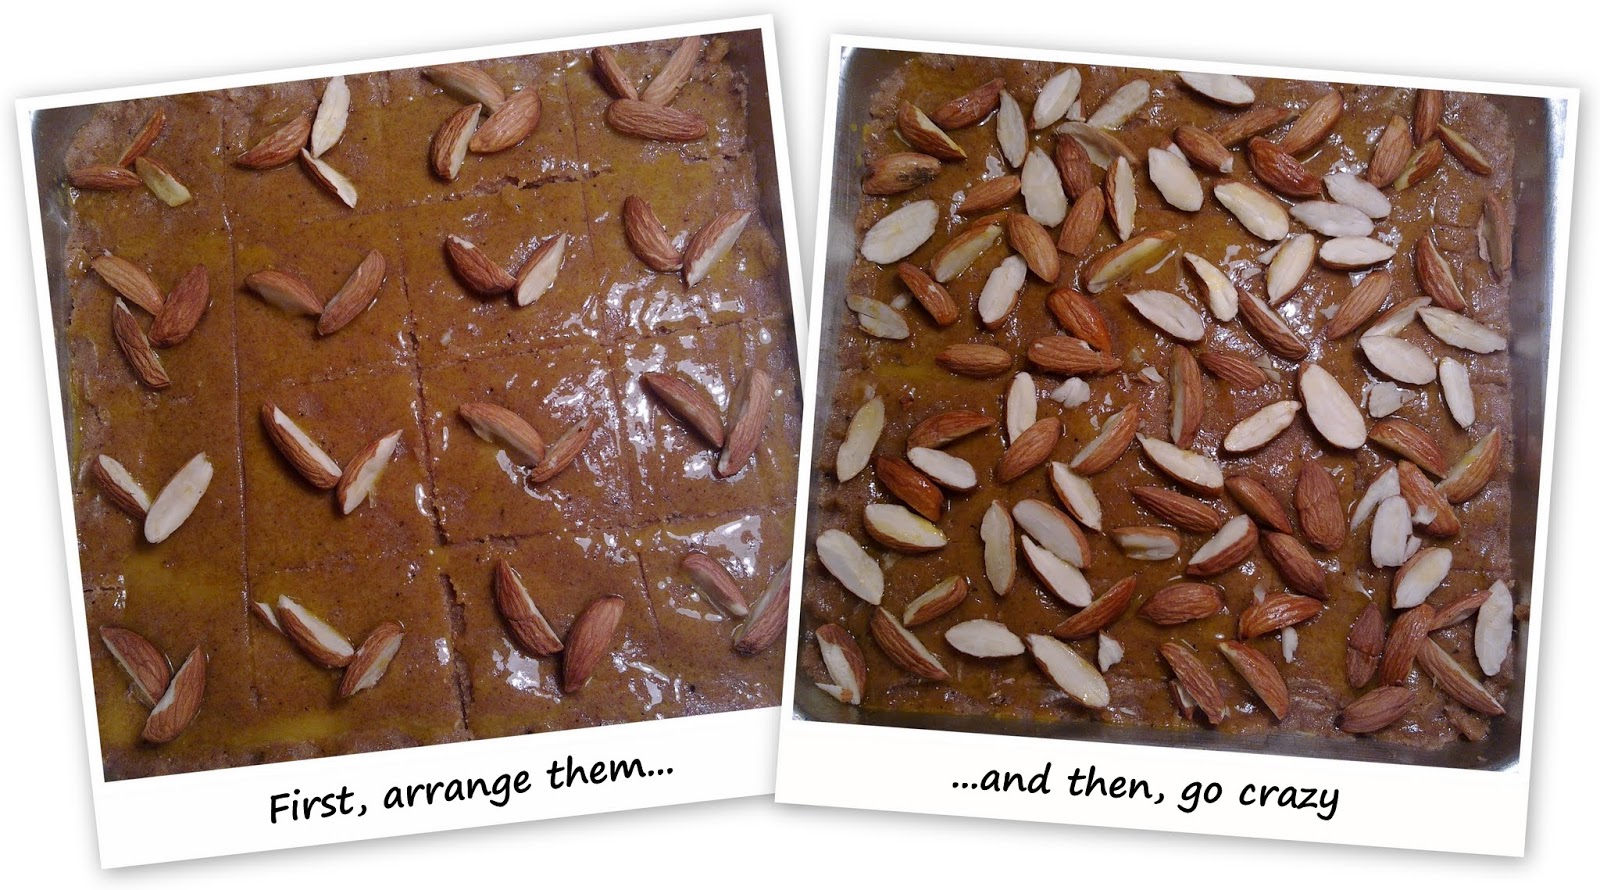
I only strayed from Francijn's recipe in one respect, and that was to use almonds with their skin on for the decoration on top. I think they taste better after they get toasted in the oven. They are halved to offer some contrast in colour.
After seeing the finished pastry from some of the Daring Bakers on the DB forum (see the pictures in a slideshow at the site), I was keen to try the beautiful patterns made with slivers of almonds, but I knew it would be too much to handle since I only made the gevulde speculaas last night. I started out with a simple arrangement, and then decided to just sprinkle on a whole lot of the halves. More crunch to enjoy!

Daring Bakers: Panettone

Sunday, December 30, 2012

The Wayward Oven
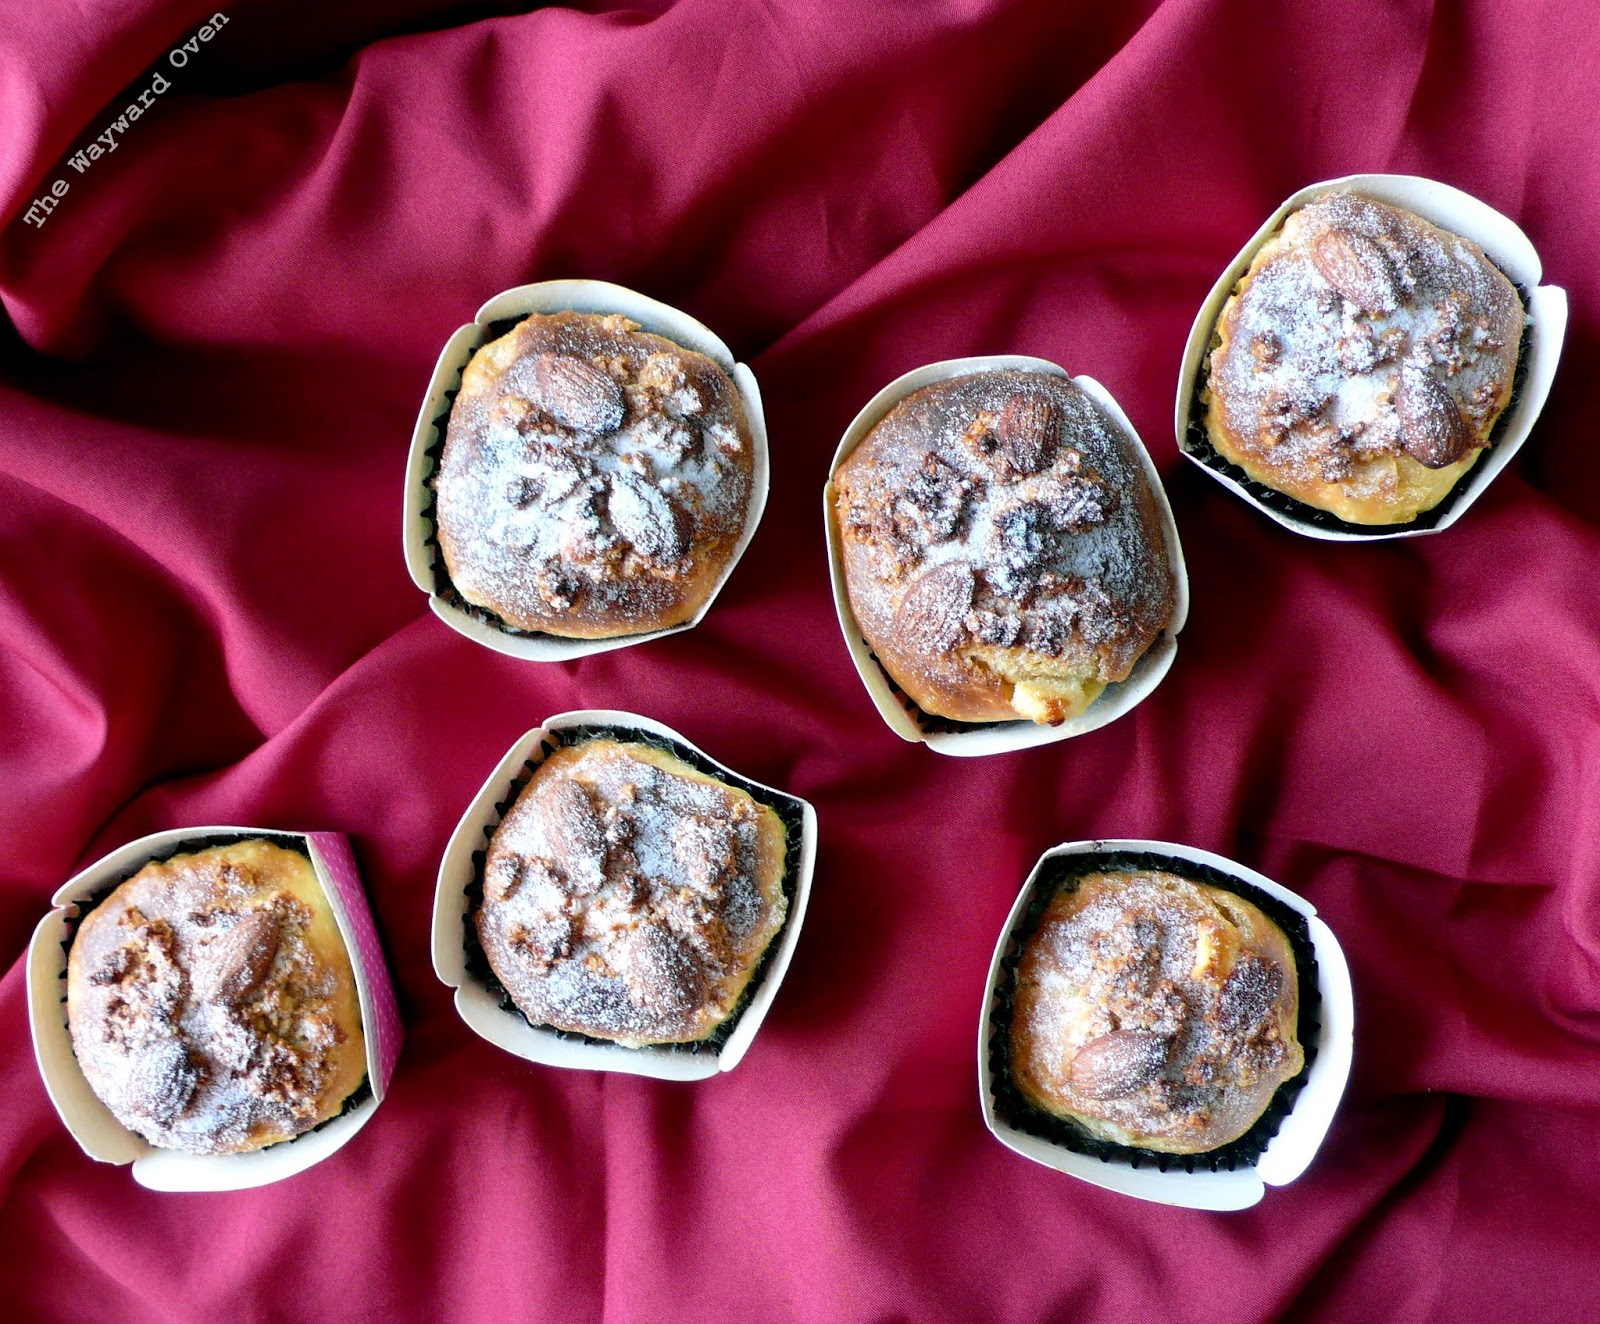
MINI PANETTONE 
The December 2012 Daring Bakers’ challenge was hosted by the talented Marcellina of Marcellina in Cucina. Marcellina challenged us to create our own custom Panettone, a traditional Italian holiday bread.
I was all ready to participate when the challenge was announced, but as the posting date got closer, my enthusiasm started to wane.
The process of making the panettone, according to the recipe Marcellina provided, is long and with several steps to the process. Now, although I would usually attempt any recipe that interests me no matter how complicated or time-consuming, I just couldn't get my head into the game this time. Until Saturday – two days after the posting date. 
I made mini panettones (panettoni) but I have to admit that they were an afterthought. See, I had made some rich sweet, eggy, buttery dough for a loaf that is based on the panettone recipe in Peter Reinhart's Artisan Breads Every Day. The dough was meant for a bread for another baking group I participate in, but there was a lot of it, so I took part of it, mixed in the glacé/dried fruit I had and baked the panettoni in mini cake cardboard liners.
The Wayward Oven
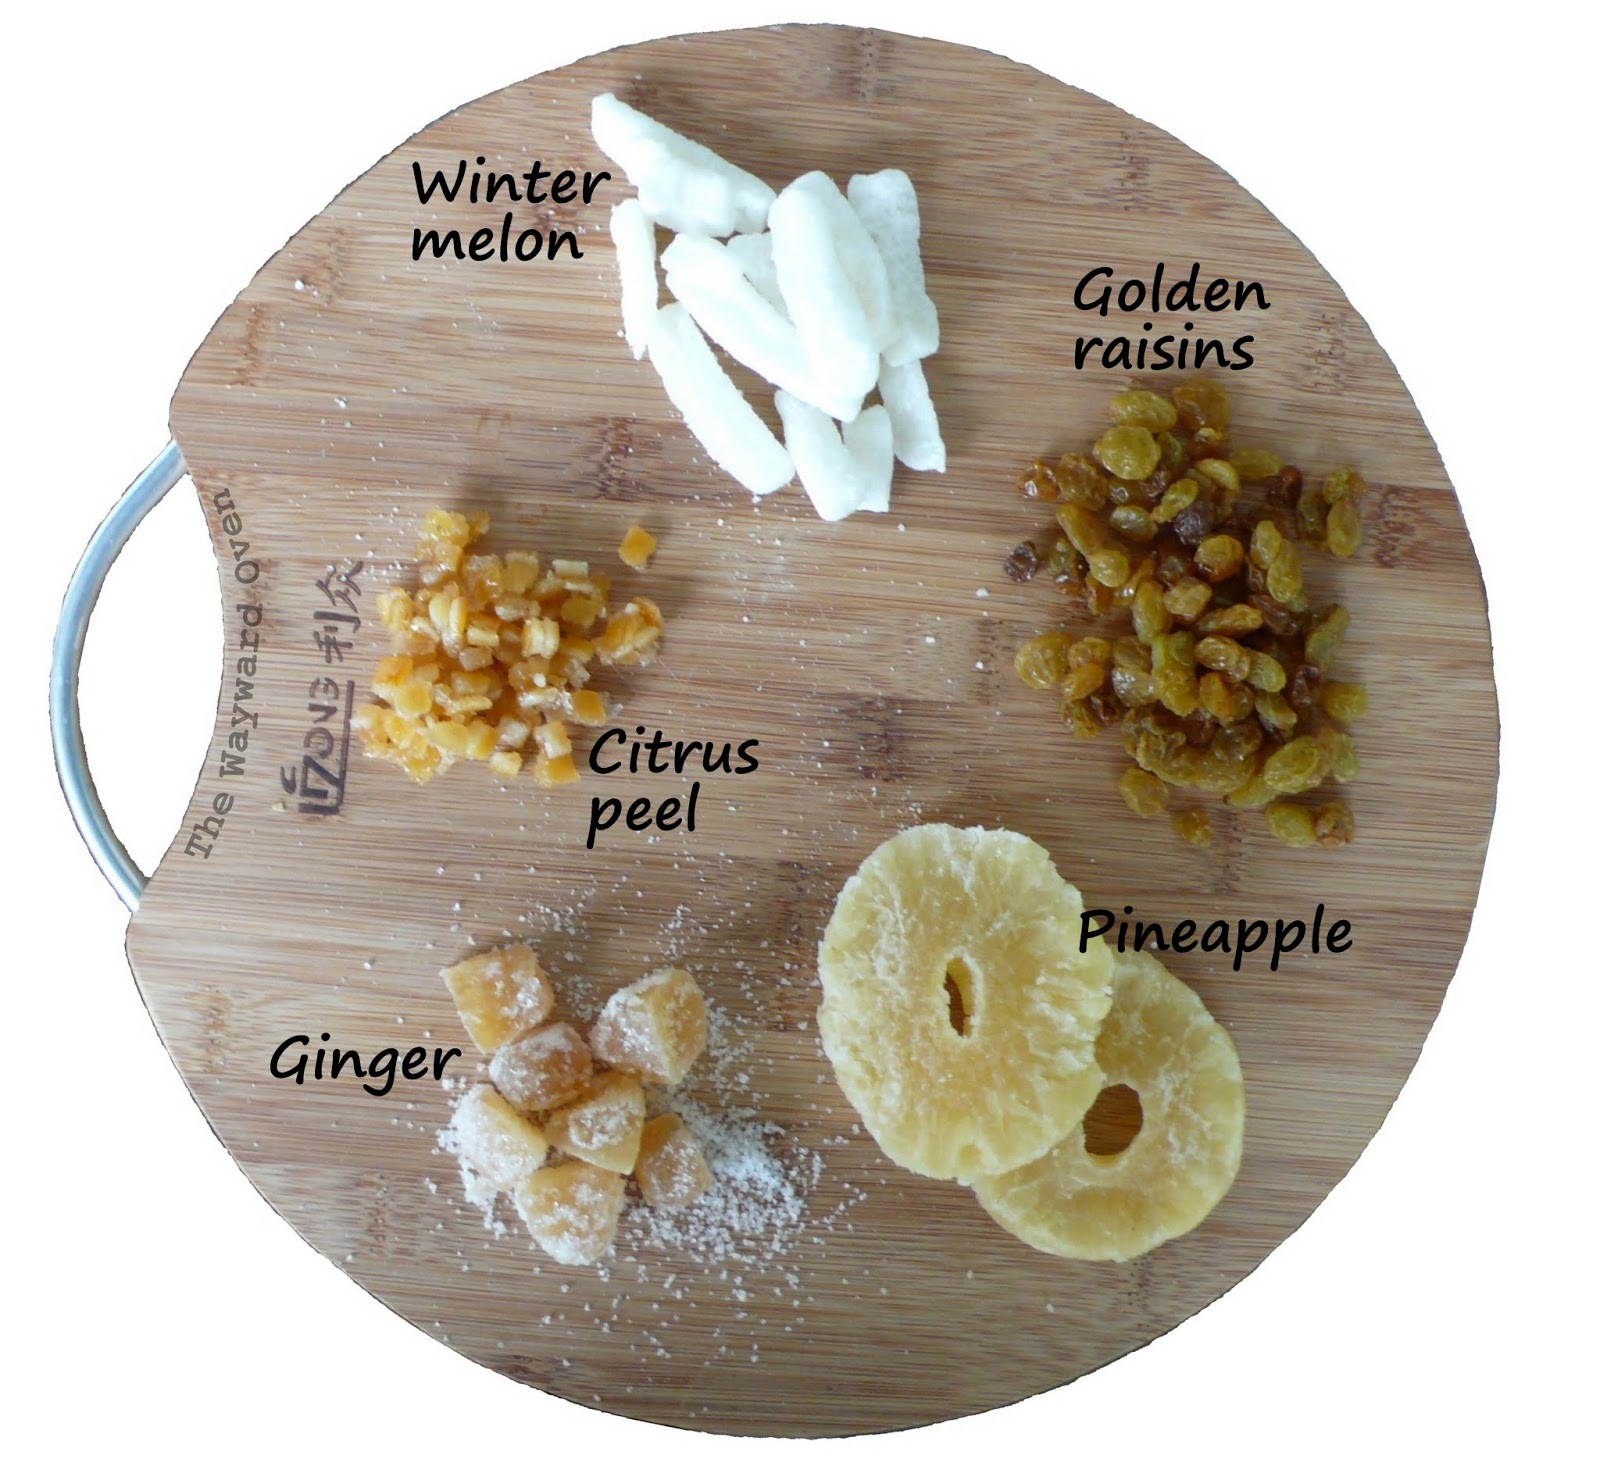
Not everyone will be familiar with winter melon. The gourd has a green skin and looks like a cucumber except it's fatter on one end. As a fresh vegetable, it's used a lot in soups; in candied form, it is one of the main ingredients in sugee (semolina) cake.
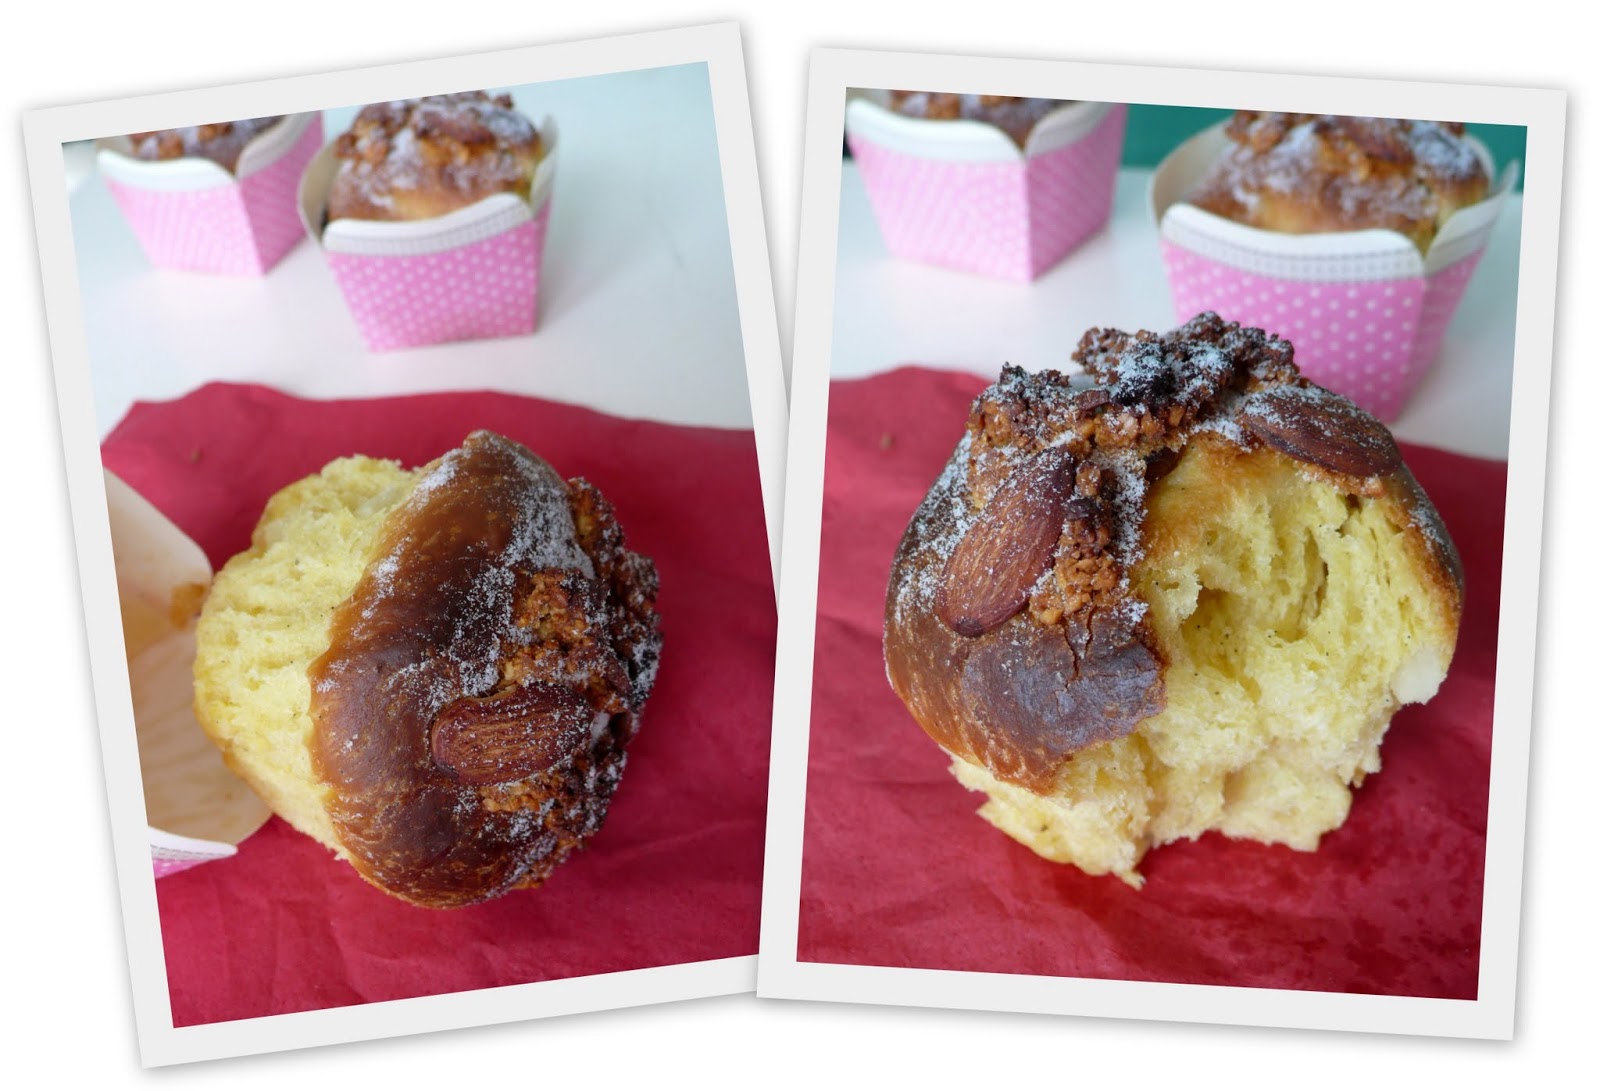
These glacé fruits are some of my favourites, but the downside is that the colours are quite pale so they don't show up well in the buns. The pop of flavours makes up for the lack of colour though. You would think that there was too much going on in the taste – the heat from the ginger, the sourness of citrus and pineapple, a honey sweetness from the winter melon, the brightness of the raisins – but it works. The only complaint I got was that there was too much fruit. I'll remember that next time. The sugar crust, from Dan Lepard's recipe in The Guardian but with an added touch of corn syrup, got the thumbs up. There's a good crunch to it.
The Wayward Oven
Oh, did I mention that the panettoni are leavened with sourdough starter? The dough came together easily, but took a long time to rise and only slightly at that. I was disappointed but baked them anyway.
And what a surprise I got when the buns plumped up in the oven! The dough wasn't evenly distributed between the boxes so there is a difference in sizes but the bigger ones can serve two.
The recipe for the sourdough-leavened dough will be posted on Jan 20 with the other bread I made.

Daring Bakers: Twelve Days of Cookies

Tuesday, November 27, 2012

BISCUIT TIN BONANZA 
Holiday season is the time for sharing and Peta of Peta Eats is sharing a dozen cookies, some classics and some of her own, from all over the world with us.
When the November Daring Bakers challenge was announced, I of course imagined myself making all 12 cookies. In reality, however, that was never going to happen. But while expecting to make two kinds of biscuits, at the most, I was pleasantly surprised to find myself with more than that in the end. (Well, I couldn't have a bonanza in my biscuit tin if it were filled with only one type of cookie now, could I?)
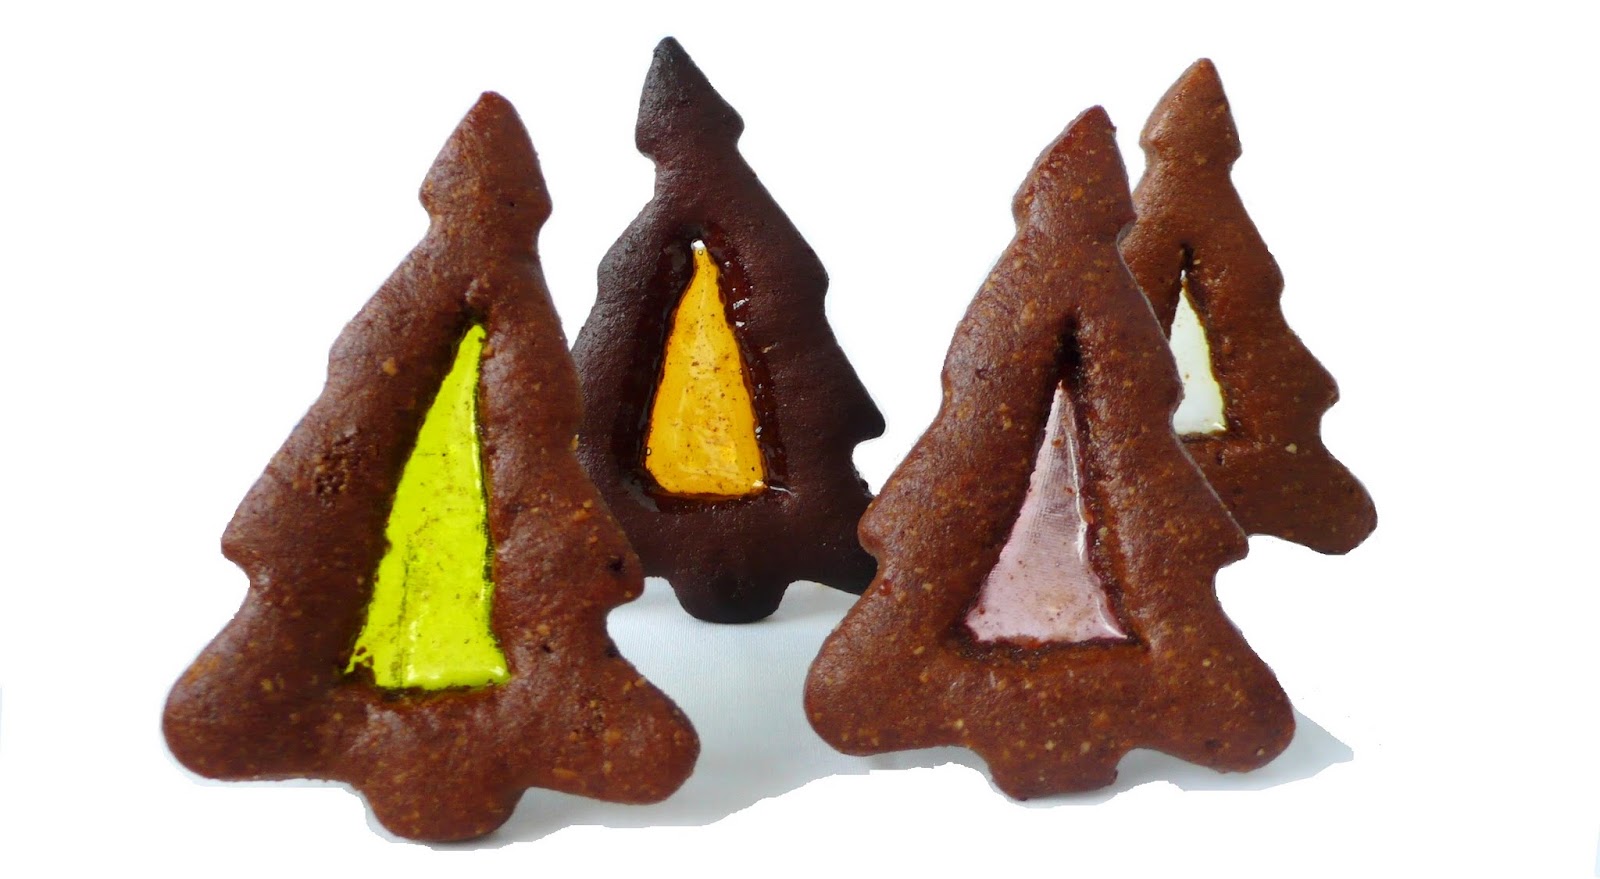
From Peta's recipes, I made the Lebkuchen but with a couple of substitutions: The recipe calls for honey but I was forced to add molasses and agave syrup as well as I didn't have the amount needed of any single one of those ingredients. By choice, I replaced the brown sugar with red palm sugar for a richer flavour. And I added allspice to the list of spices. The raw cookie dough was like fudge and tasted very good and if not for the raw egg in it, I would have eaten it without baking the cookies! The ones shaped like Christmas trees have a "glass window" (couldn't get a stained effect, unfortunately), made by filling cutouts in the cookies with crushed clear coloured hard sweets before they are baked.
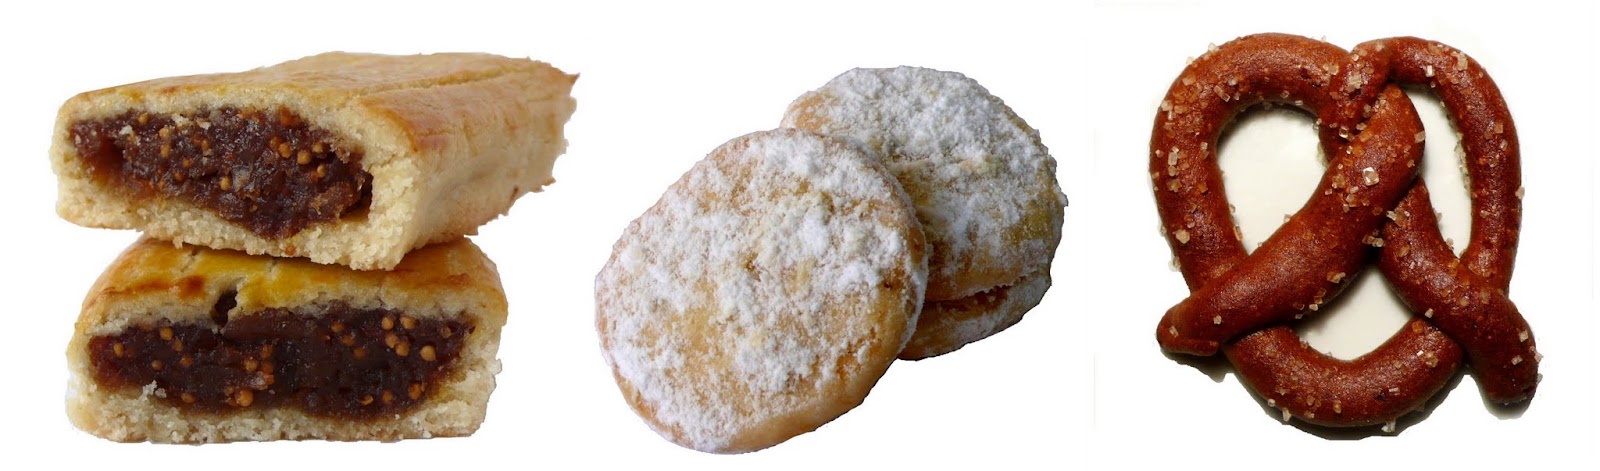
I made three other biscuits as well. The Fig Bars (my favourite biscuit) are based on the Date Pillows I posted on a while ago, while the Lime Meltaways (for the tang) and Chocolate Pretzels (for the shape) are from Martha Stewart's Holiday Cookies, a 2006 special issue magazine.
After all the biscuits were made, I happened to have an egg white left over and decided to use it for Fortune Cookies (I halved the recipe from about.com and managed to make seven cookies) – they just add interest to the biscuit tin! (And the fortunes will cheer me up after my heart fails from all the butter and sugar I've had!)
Many thanks to Peta for all her hard work, her tips in her Food Talk article on making piped short bread and especially her lebkuchen recipe! And check out what the Daring Bakers made in the slideshow at the site. There are so many varieties, colours and shapes. Lots of ideas for future cookie bakes.
Here are few other items that I think would be perfect for any festivity:
Red Velvet Whoopie Pies (with recipe link)

Daring Bakers: Mille Feuille/Napoleon

Saturday, October 27, 2012

NO NEED TO SPELL IT OUT: MAGNIFICENT MILLE FEUILLE 
Our October 2012 Daring Bakers’ challenge was hosted by Suz of Serenely Full. Suz challenged us to not only tackle buttery and flaky puff pastry, but then take it a step further and create a sinfully delicious Mille Feuille dessert with it!
(I have to say I didn't feel any guilt creating – or eating – this dessert!)
Suz provided an excellent recipe and step-by-step instructions for the mille feuille, from the pastry to the filling and assembly. I followed the recipe for the puff pastry exactly and didn't have any problems.
To make a small mille feuille, I only needed half of the pastry and used the other half for some old-school cream horns which took me back to my childhood.
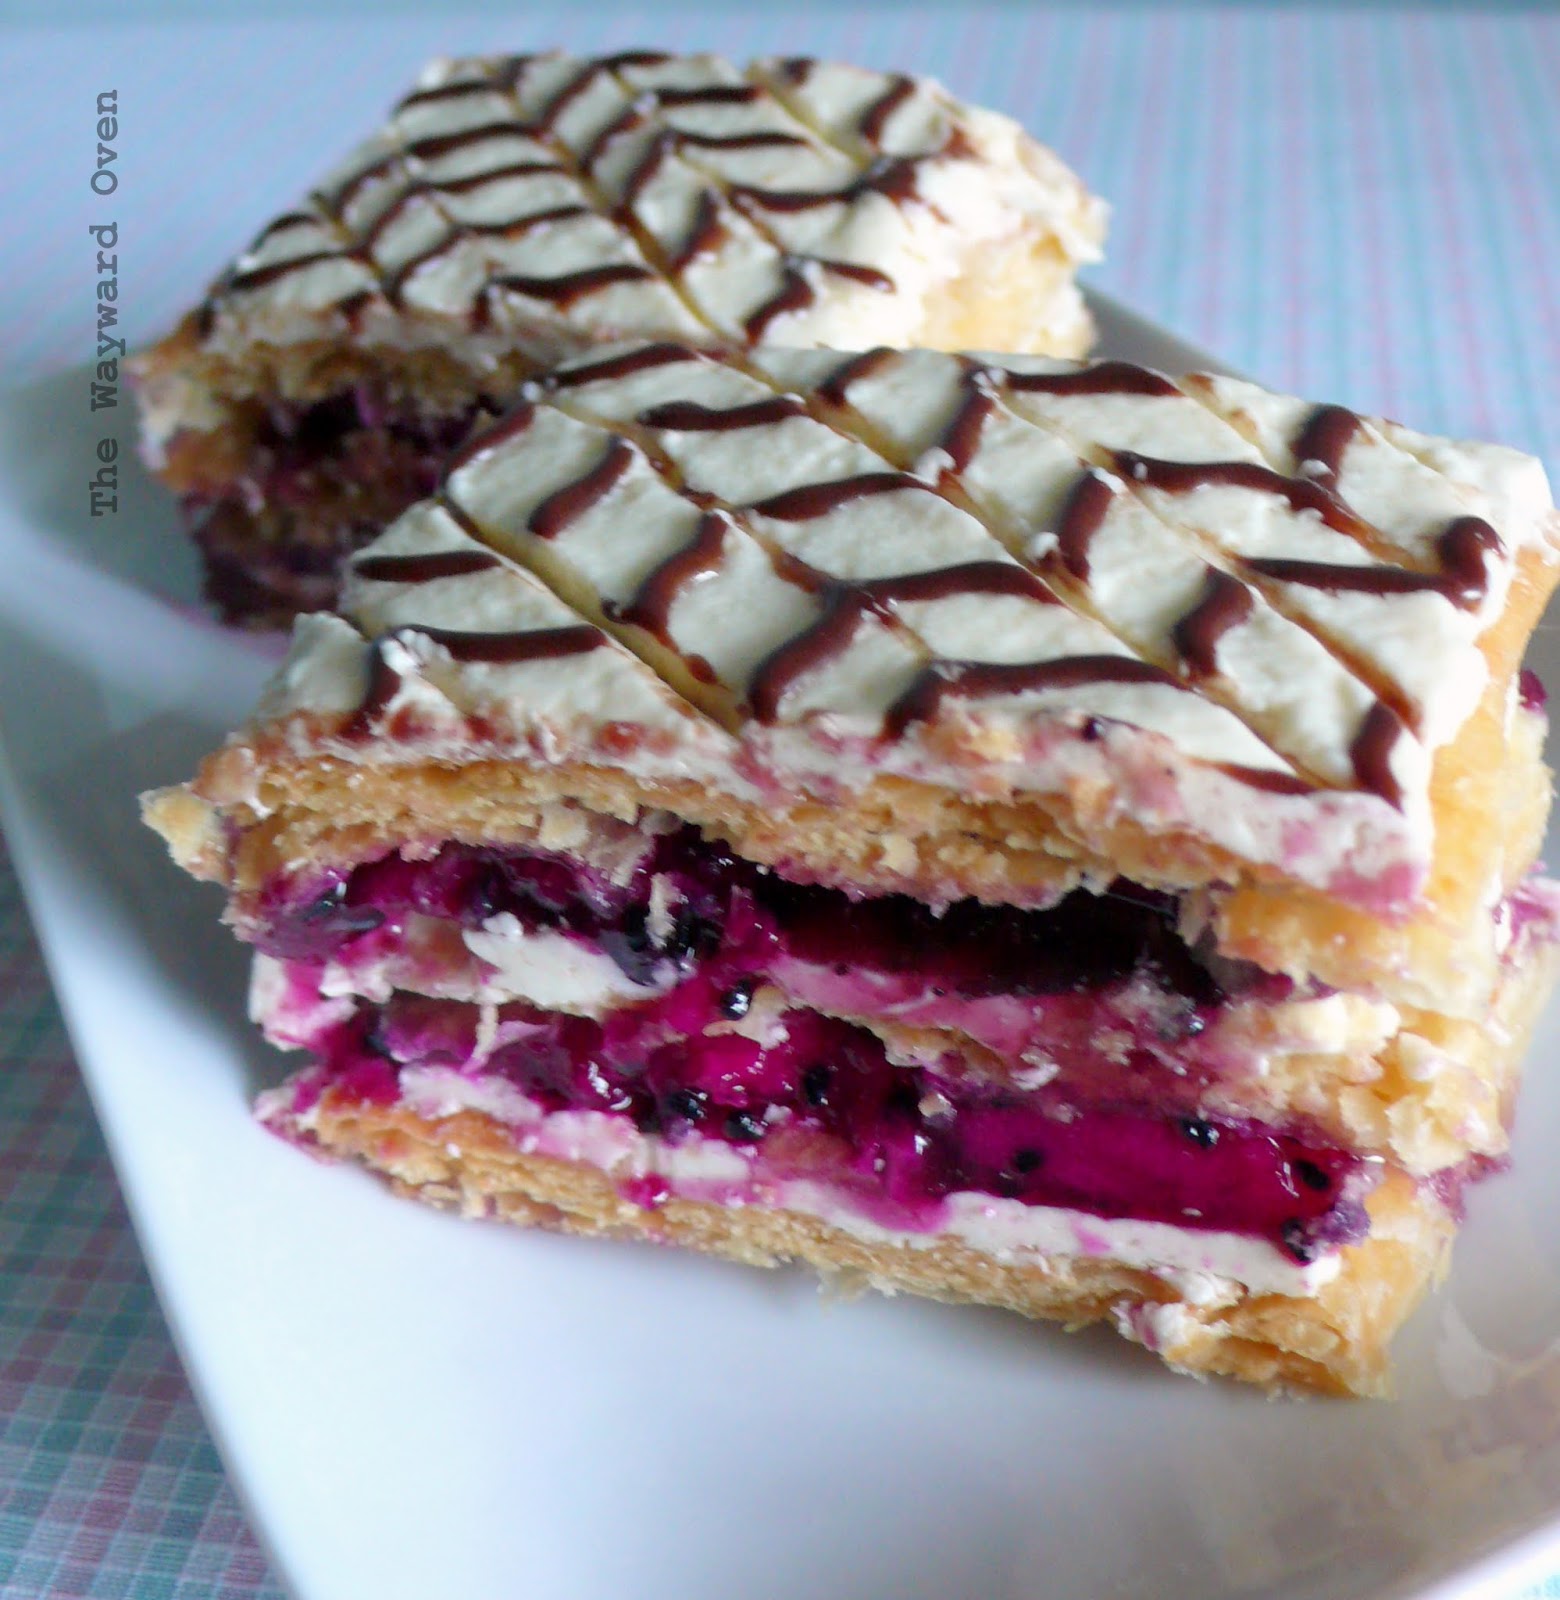
Suz wrote that the traditional mille feuille is filled with a vanilla pastry cream (crème pâtissière). It is also known as a Napoleon (thought to refer to Naples in Italy rather than the diminutive French emperor), a custard slice or a vanilla slice. It’s often topped with royal icing and distinctive chocolate squiggles.
Succulent and sweet red dragon fruit
Well, my strips of pastry were a little burnt and so I thought I would draw attention away from that by building the layers up with slices of fruit. I've read that strawberries are commonly used, but I stayed local and used red dragon fruit. Instead of a custard-based pastry cream, my mille feuille has a filling of whipped cream and jam – it takes less work but is no less delicious, I think. The vanilla icing for the top is also much easier to make and doesn't contain raw egg whites as in a royal icing. The chocolate icing for the feathered effect is a paste of cocoa powder, powdered sugar and water.
French for "thousand sheets", the mille feuille gets its name from the multi-layered puff pastry which expands when cooked. However, the pastry layers of the mille feuille are actually pressed down while baking to prevent this from happening and I've always wondered why. None of my reference books nor online searches has an explanation. I posed this question on the Daring Bakers forum and Heather, Renata and Suz had thought about it too. Renata and Suz suggest it might be for texture since puffed up, "bumpy" pastry isn't very neat or flat. That's certainly plausible.
A thousand visible sheets or not, no one can say this dish wouldn't be the high point of any high tea.
The slicing could be a little less messy :-p
Mille Feuille with Dragon Fruit
Serves 6

325g puff pastry, preferably homemade (here are the recipe and instructions)

Vanilla Icing
125g (1 cup) icing sugar, sifted
¼ tsp vanilla extract

Chocolate Icing
30g (¼ cup) icing sugar, sifted
½ tbsp cocoa powder

Filling
110g raspberry jam
160ml cream, whipped
½ large red dragon fruit

On a lightly floured surface, roll the pastry out to about 30cm x 24cm. Cut the rectangle into three equal pieces (10cm x 24cm).
Place the pastry on a large baking sheet lined with grease-proof paper. Prick the pastry strips all over with a fork. Place another sheet of grease-proof paper over the top and then a heavy baking tray.
Preheat the oven to 200°C. Bake the pastry for about 25 minutes, removing the top layer of grease-proof paper and tray 10 minutes before the end for the tops to brown. Keep an eye on them and lower the temperature if they are browning too much. Cool on a wire rack.
To make Chocolate Icing: Mix the icing sugar and cocoa with ½ tbsp hot water to get a smooth paste like melted chocolate, adding more water if necessary. Spoon into a paper icing bag.
To make Vanilla Icing: In a heatproof bowl, mix the icing sugar and vanilla with 1-1½ tsp hot water. Stand the bowl over a pan of simmering water, stirring until the icing is smooth and glossy. Spread icing on one of the cooled pastry strips. Pipe diagonal lines with Chocolate Icing. Drag a skewer along the icing at intervals in alternate directions to give a feathered effect. Leave to set on a wire rack.
To make the filling: Peel the dragon fruit and cut the half into four wedges. Cut each wedge into thin slices. Spread jam over the two un-iced pastry strips and top with slices of dragon fruit, overlapping them slightly. Cover the fruit with whipped cream. Finally, sandwich the three layers together with the iced strip on top.
Cut into six slices with a serrated knife and serve.

Daring Bakers: Empanadas

Thursday, September 27, 2012

CHILLI TUNA & EGG EMPANADA IN CORNMEAL DOUGH  
Patri of the blog, Asi Son Los Cosas, was our September 2012 Daring Bakers’ hostess and she decided to tempt us with one of her family’s favourite recipes for Empanadas! We were given two dough recipes to choose from and encouraged to fill our Empanadas as creatively as we wished!
Patri's recipes and instructions were certainly helpful, as were her filling suggestions. But most importantly, I learnt from her that empanadas aren't formed only as individual hand pies, as I thought, but can also be made family-size!
For a slide show of some of the empanadas made by the Daring Bakers, go to the homepage of The Daring Kitchen.
I was very curious about the cornmeal dough that Patri provided, especially after I saw the picture she posted. She had cautioned that the dough is difficult to spread and you need a little patience rolling it out. The dough doesn't come together like a yeasted bread dough. It's grainy and reminds me of a sandy cookie dough. However, it is soft and does rise.
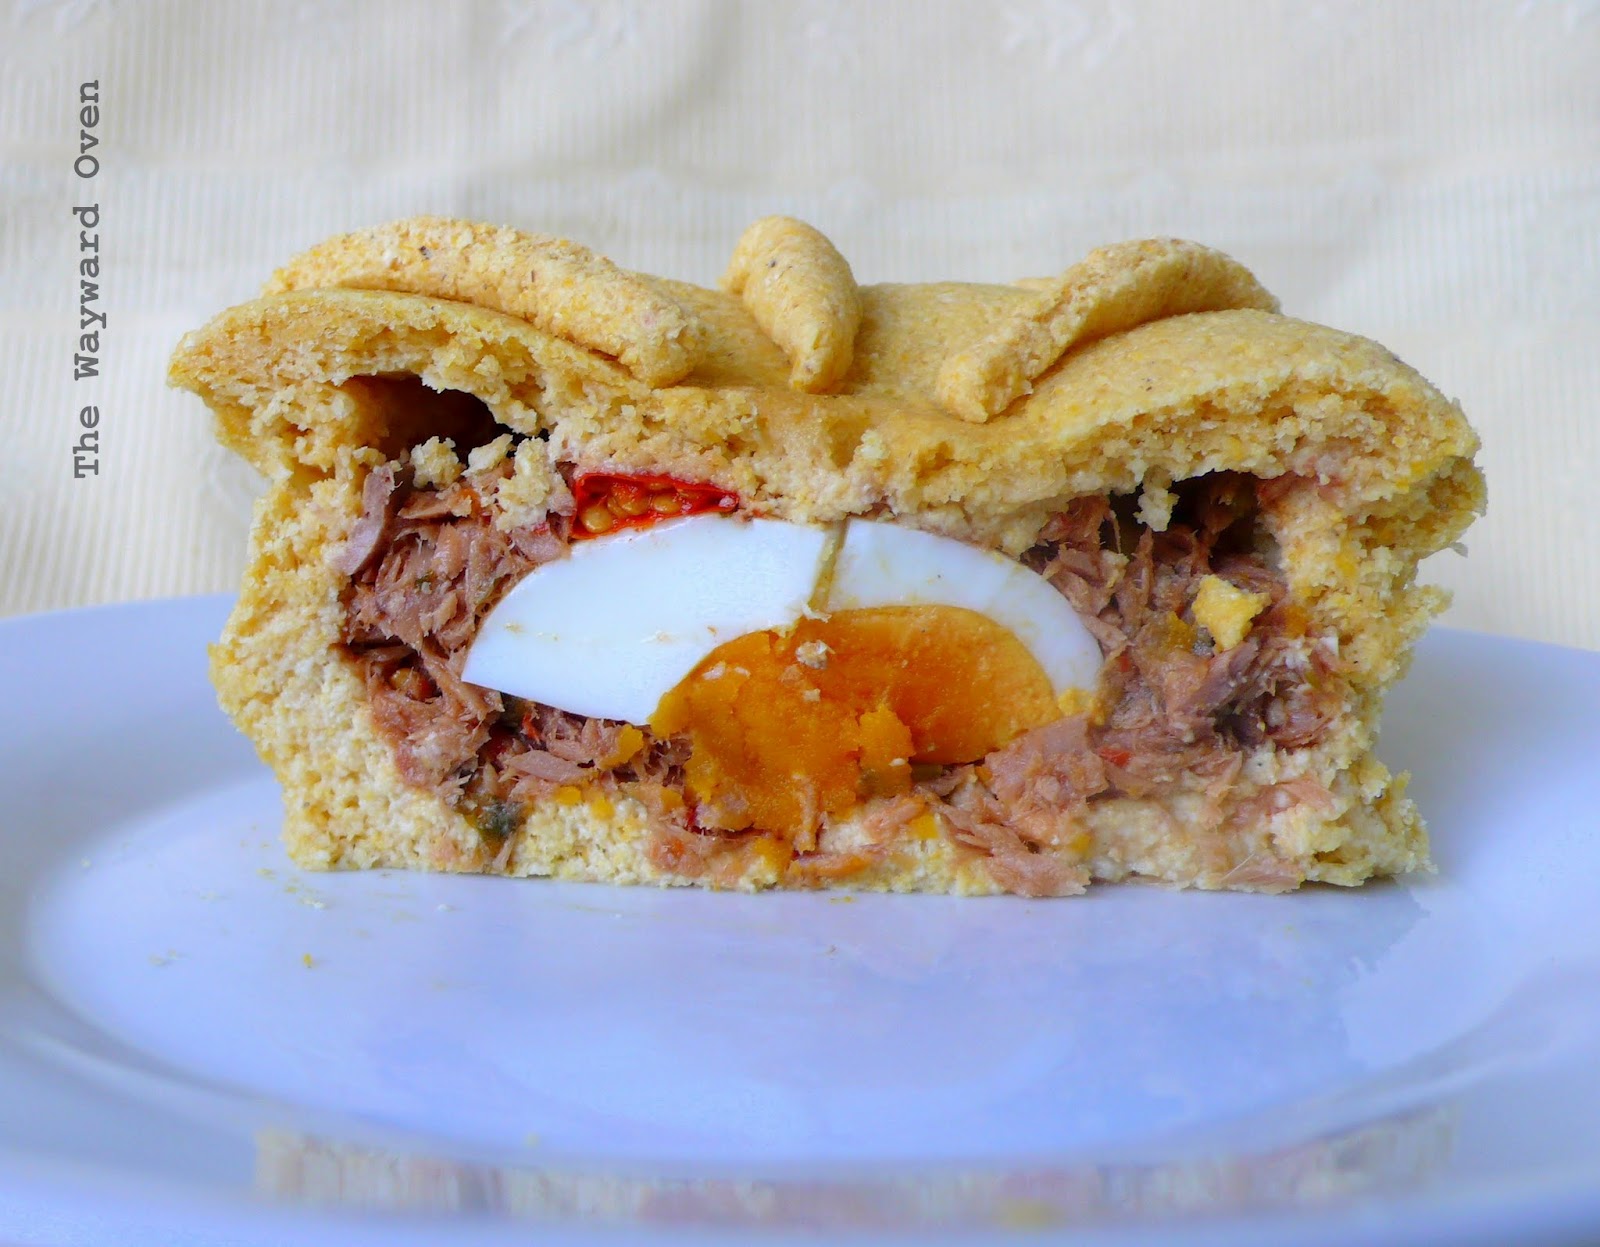
I have no idea if the dough turned out the way it was supposed to but this is how I would describe it: after it bakes, it is slightly crumbly and similar to a buttery shortcrust pastry. Perhaps the picture above shows what I mean. The taste is good. Patri recommends a filling of fish or seafood for this dough and I can see why. Because the dough is biscuity, it works better with a delicate filling. However, I think the empanada has to be served immediately – once the base gets soggy, it is no longer as delightful.
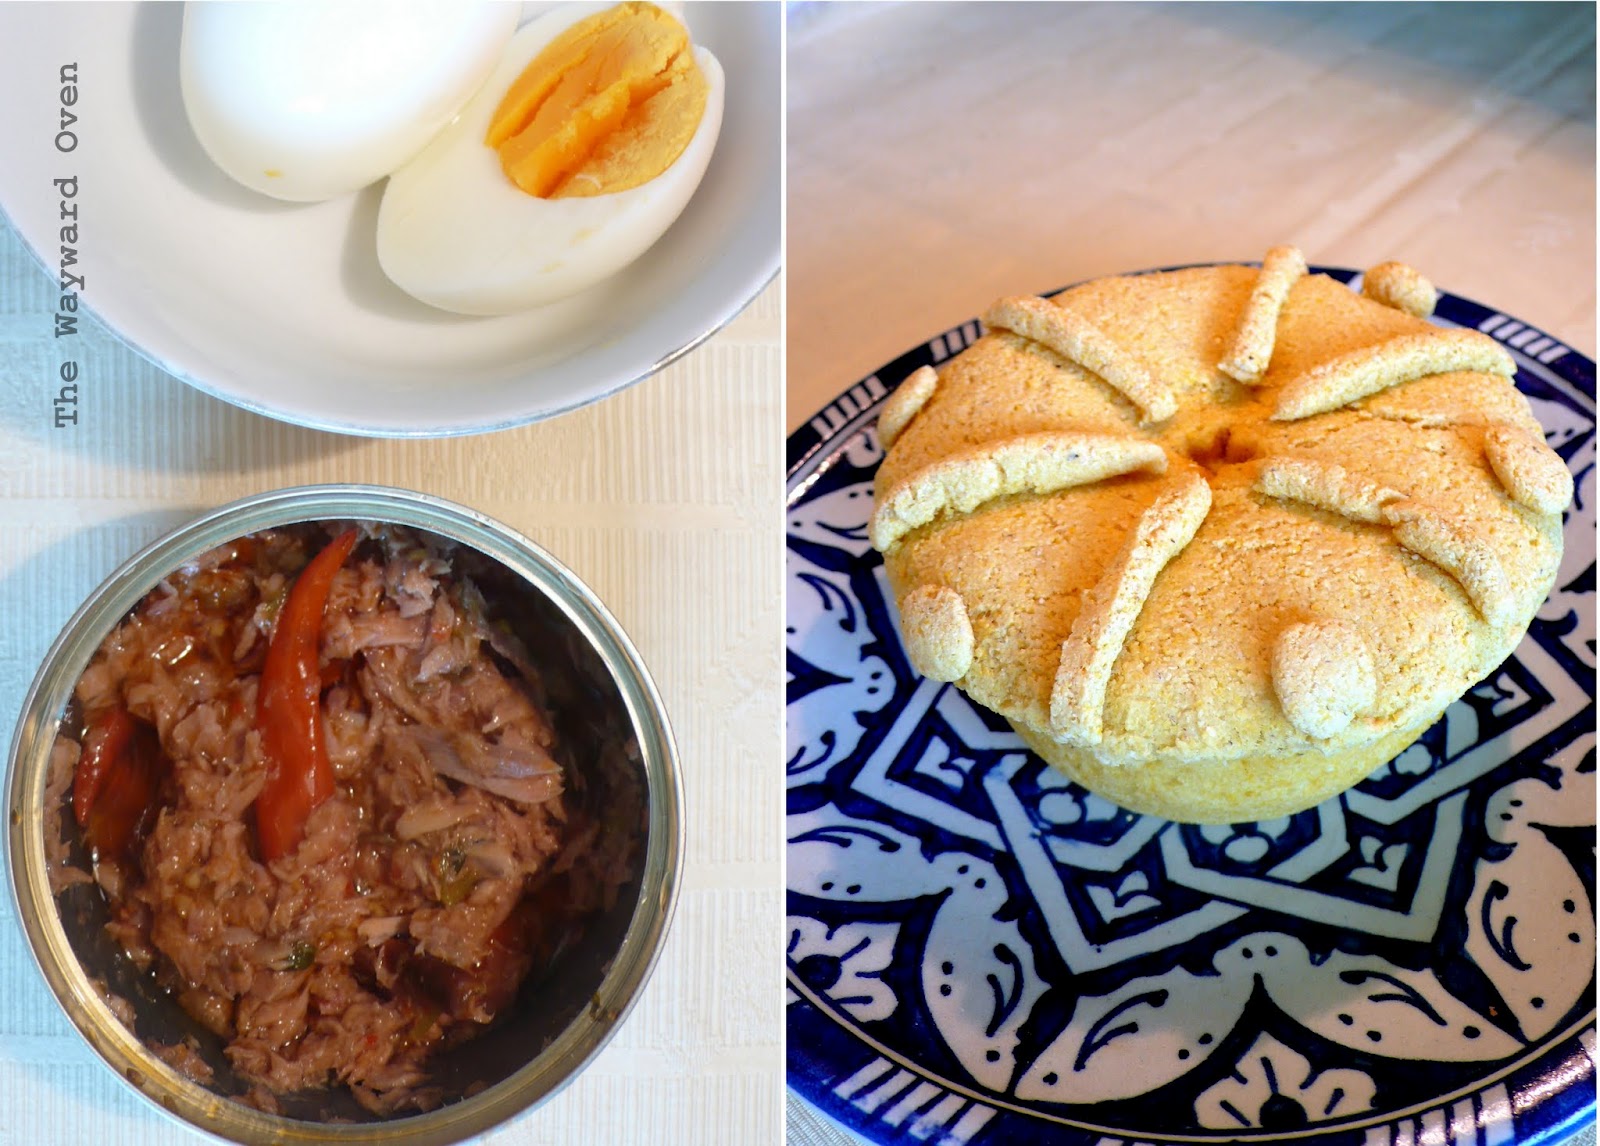
I chose tuna and egg as the filling. I don't know if it's available elsewhere, but here in Malaysia, we have a tinned tuna in oil that is already mixed with herbs and spices and has two or three little bird's eye chillies in the tin as well! I didn't have to do anything else but cook a hard-boiled egg, which is put in the centre of the tuna in the empanada case.
I made only half the dough, enough for two small individual empanadas. I also tweaked the recipe slightly. As cornmeal is low-gluten, I added some wheat gluten to the dough.
The chilli tuna comes with a few bird's eye chillies in the tin!
Chilli Tuna & Egg Empanada
Serves 2

1 tin (250g) chilli tuna
1 hard-boiled egg, halved
1 egg, beaten (optional)

Cornmeal Dough
200g cornmeal
50g all-purpose (plain) flour
1 tsp wheat gluten
½ tsp salt
1 tsp active dry yeast
125ml warm water + extra
60g butter, softened

Combine the corn meal, all-purpose flour, wheat gluten and salt together in a mixing bowl. Stir to mix well. Stir in the dry yeast. Make a well in the middle and add the water; stir well to moisten all the dry ingredients. If there are stll dry bits of flour, add extra water, a few drops at a time, so that everything is moistened. Form into a rough ball and set aside for 5 minutes.
Spread the butter on the dough, and then knead it into the dough. Place dough on the work surface and keep on kneading until you have a soft dough that doesn’t stick to your hands. Form a ball and return to the bowl. Cover the bowl with a tea towel and leave to rise until doubled in size, about 1 hour.
Preheat the oven to 180°C.
Divide the dough into 4 portions. Lightly oil 2 (8m) deep pie tins. Pat a portion of dough out with your hands to fit a pie tin. This dough is very difficult to spread, so push it gently against the base and sides to thinly cover the inside. Do the same with another portion of dough.
Fill the empanada with half the chilli tuna and embed half a hard-boiled egg in the centre.
Pat out the other two pieces of dough thinly to form lids for the pies. Press the edges together to seal. Use leftover dough to make a design on the top. Cut an 'X' in the centre of the lid. Brush with egg wash if desired and bake until the bottom is cooked and the top is golden, 20-25 minutes.

Daring Bakers: Crazy for crackers

Friday, July 27, 2012

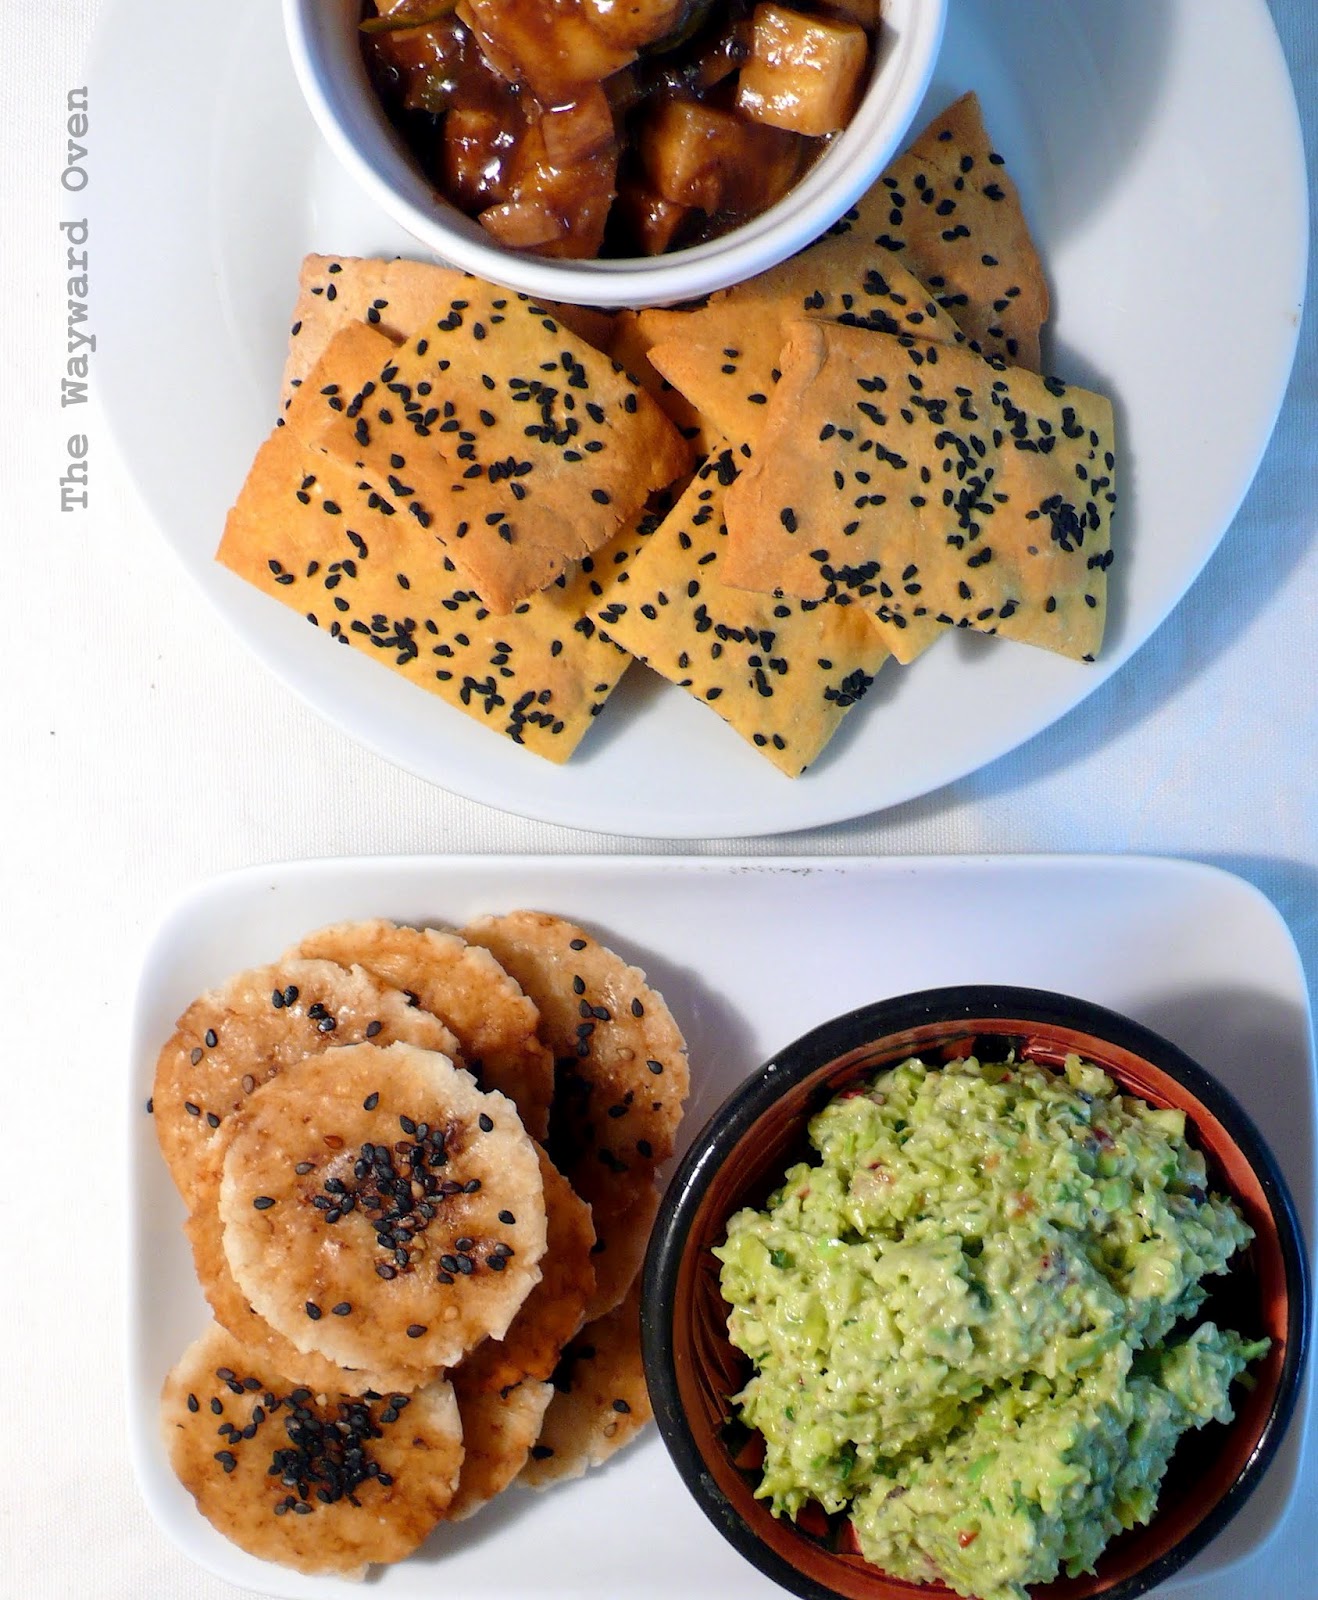
THEY CRACK ME UP: CHICKPEA AND RICE CRACKERS  
Our July 2012 Daring Bakers’ Host was Dana McFarland and she challenged us to make homemade crackers! Dana showed us some techniques for making crackers and encouraged to use our creativity to make each cracker our own by using ingredients we love.
Dana provides several recipes for crackers, all of which inspired variations for my own two. And she inspired the other Daring Bakers as well, as evidenced by the slide show at The Daring Kitchen.
It was mandatory to prepare two different crackers using two different methods of forming. Both of my crackers are formed by hand, but one is rolled out with a rolling pin, and the other is shaped into a ball and then flattened with the base of a glass into disks. I hope those two methods are sufficiently different and meet the spirit of the challenge.
I am not gluten-intolerant, but decided to make some Japanese-style rice crackers called senbei, and some seeded chickpea crackers inspired by Indian papadums that have a cheese flavouring thanks to nutritional yeast.
I only made a small number of each, but the recipes are easily scaled up. They're nice to eat on their own and go well with dips too: rice crackers with edamame pesto, and chickpea crackers with mango chutney. Switching them is an option, though I'd personally stick to the original pairings. 
(I have to admit though that I made the dips primarily because the crackers looked so sad on their own. The dips are easy to make and online recipes abound. I actually ate most of the chutney – the sourness comes from tamarind paste – on its own!)
These crackers will make good TV-watching snacks during the Olympics. Go-o-o-o-o Teams!
Rice crackers with edamame pesto
Japanese Rice Crackers (Senbei)
Makes 12. Easily scaled up.

50g white rice flour (not glutinous)
30g cooked sushi rice
1 tbsp vegetable oil
Pinch of salt
2-3 tbsp warm water

Cracker topping
½ tbsp shoyu (Japanese soya sauce)
½ tbsp honey
Black sesame seeds

In a (mini) food processor, blend the rice flour, cooked rice, oil and salt together until fine. Add water a little at a time until the mixture comes together into a soft dough. Place in a mixing bowl and knead until smooth and elastic, about 2 minutes.
Preheat the oven to 180°C. Divide the dough into 12 portions. Roll each one into a ball. Place a ball of dough in between cling film. Using the base of a glass, flatten the ball into a thin disk. The edges may be a little uneven. Place the disks on a lightly greased baking tray. Bake for 5 minutes, then flip with a spatula and bake the other side until the edges look dry (the crackers may start to brown too), another 4-5 minutes. Turn off the oven.
Meanwhile, combine the shoyu and honey. Remove the crackers from the oven and brush one side with the sauce. Sprinkle with sesame seeds and return to the turned-off oven to dry, 5-7 minutes (not too long or the crackers will get too hard!). Cool on a wire rack. Store in an airtight container.

Chickpea crackers with mango chutney
Chickpea 'Cheese' Crackers
Makes about 20 medium crackers. Easily scaled up.

50g chickpea flour, sifted
50g rice flour
15g nutritional yeast (tastes like cheese!)
½ tsp baking powder
Pinch of salt
¼ tsp chilli powder
2 tsp vegetable oil
3-4 tbsp hot water

Cracker topping
Nigella seeds

Stir all the dry ingredients together. Stir in the oil. Add water a tablespoon at a time until the mixture comes together into a soft dough. Knead gently for a minute until the dough is smooth and firm. Cover and set aside for 10 minutes.
Preheat the oven to 180°C. Roll out the dough on a thick piece of aluminium foil into a rough rectangle or square about 1.5mm thick. Sprinkle the seeds on and press them down lightly into the dough. Score the dough into squares or rectangles with a pastry scraper, crinkle cutter or the blunt edge of a knife. Place the whole sheet of foil with the crackers onto the baking tray and place in the oven. Bake for 12-15 minutes until the tops are brown. Cool and separate along the scored lines. Store in an airtight container.