The Oven has baked its last loaf. This blog is no longer being updated.

My cooking videos appear at youtube.com/janeragavan

I write on food at star2.com

Play nice with rice

Tuesday, December 29, 2009


Onigiri is one of my favourite rice dishes and I like making it too. I have a little plastic rice ball "shaper", which of course, is one of those things that isn't necessary but one has to have anyway. I smoked a salmon fillet recently for a recipe in the "Don't Call Me Chef" column (see sidebar) that will be out this Monday (there'll also be a blog post on it and instructions for smoked tofu) and have used some of the fish for these salmon onigiri. Quite often, the salmon is flaked and tossed through the rice before shaping but that feels like baby food to me and I prefer the fish on top. And because of that I still season the rice with the sushi vinegar, although I just mix it through without fanning the rice as the Japanese would do.

When I have onigiri for lunch on a workday (I'm still on holiday now), I usually make it part of a bento box and use a partitioned container which includes fruit and perhaps a little sweet thing. I can get quite fancy with my packed lunches, you know. After all, one needs something to look forward when one has to drag oneself to a cold, uninspiring office space.

I cook one cup of raw rice, and that's too much for me to eat in one sitting, but since I use a rice cooker, it's just more efficient with that amount (the rice can also be cooked on the stove, of course). If each ball is a tablespoon of rice, I can probably get around 15 servings.

After the rice is cooked, I leave it covered in the pot for about 10 minutes. In the meantime, I heat up about 2 tablespoons of rice vinegar and dissolve 1/4 teaspoon of salt and 1.5 teaspoons of white sugar in it, then mix the vinegar through the warm rice.

I make balls using my plastic contraption, but it can be done by compressing the rice with the hands (wet them first so the rice doesn't stick). Oh, I also cut nori into strips (I simply cut along the perforated lines in the seaweed sheets) and wrap those around the balls, then place the salmon on top. Serve with Japanese soy sauce and wasabi.

A fool for yoghurt

Sunday, December 27, 2009

I've been straining yoghurt I get from the shops. This removes the liquid, leaving a thick curd with bite. It adds volume and flavour to things like dips and I eat it on its own as well. It seems more satisfying in a way.

All I do is pour the yoghurt into the middle of a piece of muslin cloth, place that inside a sieve and leave to drain into a bowl. When the yoghurt can be folded back on itself (to do this, lift one side of the muslin slightly), scoop it out of the muslin and place in a clean container. For every 150ml tub, you may lose about a quarter but you can use that liquid - the whey - in curries or sauces.

This afternoon, I felt like having a pudding and since I had some passion fruit, I thought of making a fool. For the uninitiated, a fool is a classic English dessert of crushed fruit (traditionally gooseberries) folded into whipped cream or beaten egg white. But since strained yoghurt is a good substitute, I didn't have to bother with any whisking. 

Passion fruit fool
Serves 1

Strained yoghurt from a 150ml tub pot
1/2 teaspoon icing sugar
2 teaspoons pina colada mix or orange liqueur (optional)
1 ripe passion fruit

Combine yoghurt, sugar and mix or liqueur. Cut the passion fruit in half and scoop out the pulp and seeds. Fold half into the yoghurt mixture, and spoon into a glass. Top with the rest of the passion fruit and enjoy.

Oh Martha, why hast thou forsaken me?

Thursday, December 24, 2009

I've had a candy thermometer (Taylor brand) for a year now but have never used it because I hadn't figured out how to clip it to the side of the pot. I imagined that one would need a really high pot since the clip of the thermometer was right at the top of the instrument when I took it out of the package. I didn't realise until just now (1.58pm Malaysian time on Dec 23, 2009) that the clip could slide up and down! Silly me.

Now, I got Candy Making for Dummies around the same time as the thermometer because I had visions of myself as this candy lady covered in powdered sugar and happily making all manner of confectionery to feed the sweet tooths (teeth?) of the world. Then the December 2008 issue of Martha Stewart Living came out with recipes for old-time candies and so I got that too, hoping to be like the supreme home-style authority after whom I have named my alter ego. But still, nothing happened.
Another excuse I had was I didn't have the right pan. Until recently, the only saucepan I had that was large enough for the job was one with a black interior, and when I melted sugar before, I could never gauge the colour of the syrup because of that. But now I have a new stainless steel saucepan, and so coupled with my new-found knowledge of the tricky clip, I thought it was about time I actually made some candy. Just in time for Christmas too.

But first, I had to test the thermometer for accuracy. I put some freshly boiled water from the kettle into a jug, put in the gadget and waited for it to register 100 degrees Celsius. The mercury never rose above 80! (More on this after the jump.)

The instructions on the packaging say to make adjustments after testing the thermometer, but 20 degrees off was way too much and there was little point in using it. Fortunately, fudge is fairly forgiving since the sugar isn't heated to a very high temperature, as for hard sweets and toffees where the exact temperature is crucial. I would go by timing, colour and texture, and use the cold water test.

I decided to try Martha Stewart's penuche (pronounced per-noo-chee) fudge only because I already had almost all the ingredients at home (her recipe, also available on her website, includes walnuts; I didn't have any so left them out). And how could anyone go wrong with Martha, right?

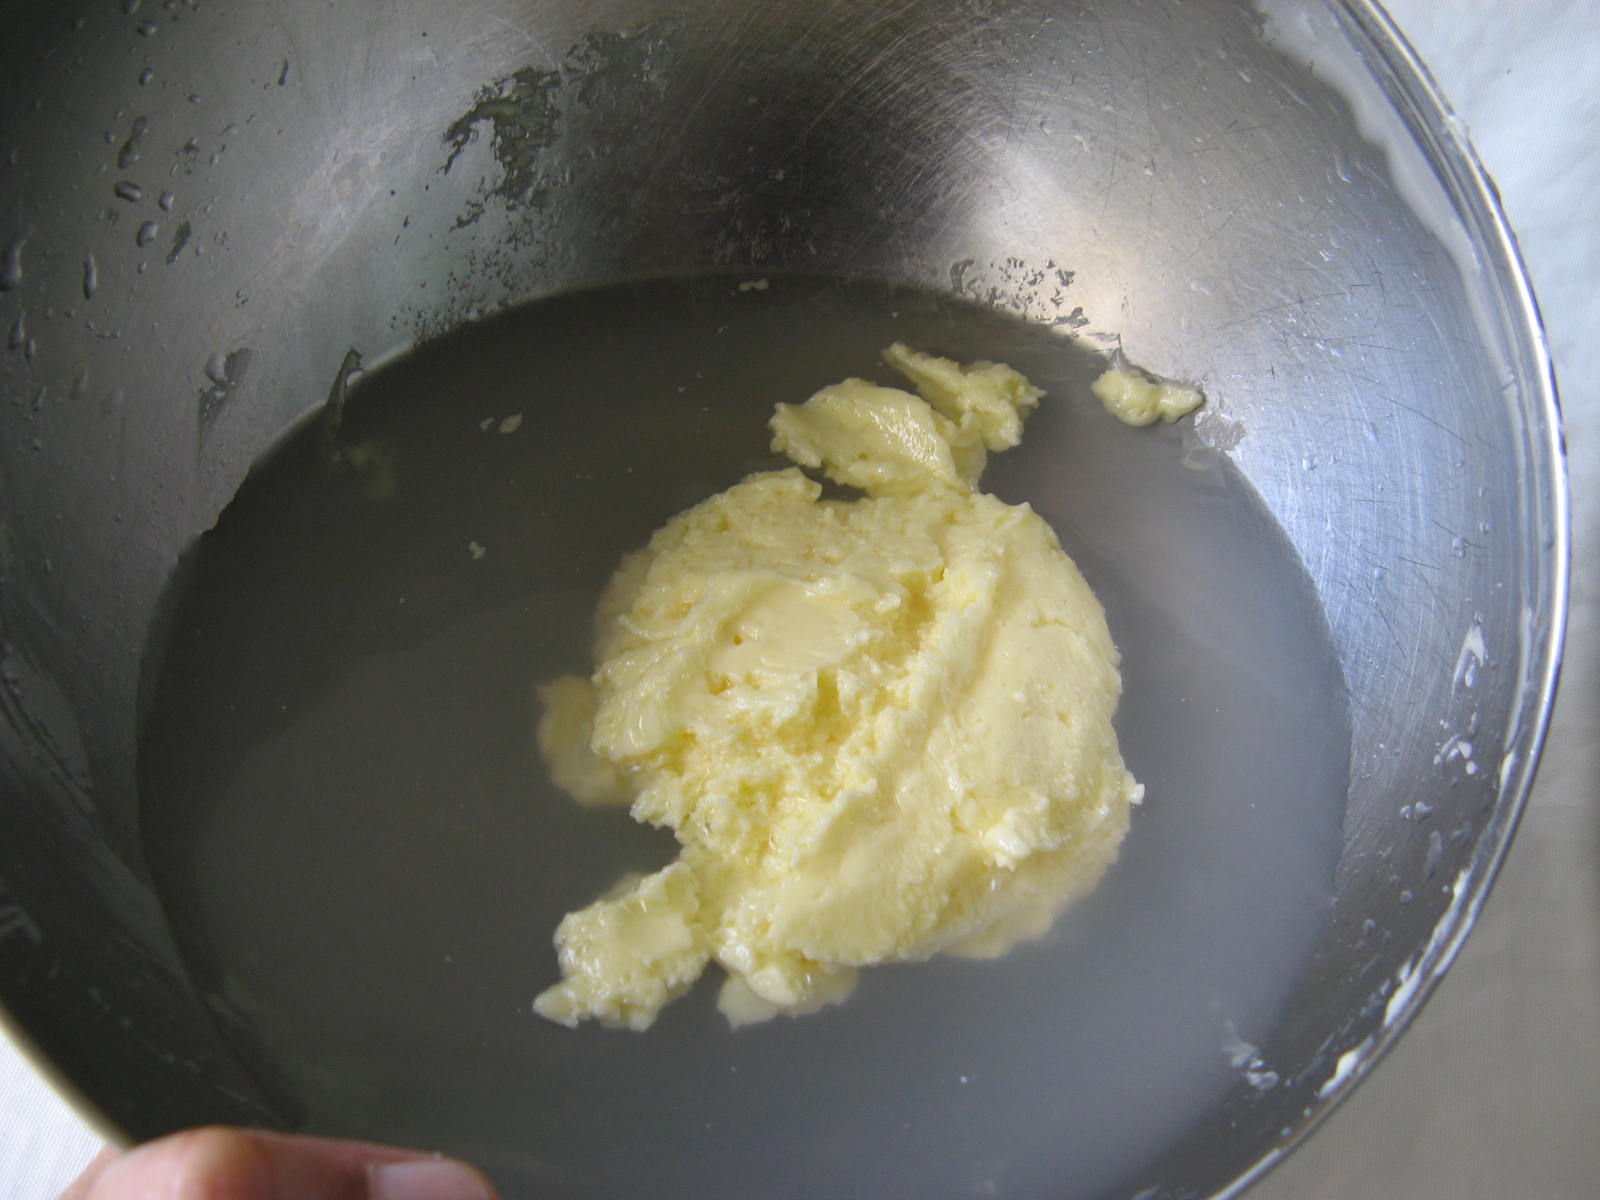
Hrmmph... The ingredients looked good together in the pot but they started to fight each other once the mixture boiled and I turned down the heat to allow the mixture to simmer.

I decided to clip on the thermometer anyway for... no good reason, really. Just one of those things the desperately hopeful do.


I had read elsewhere that once sugar has boiled, it shouldn't be stirred. In this recipe, you're asked to stir frequently as the mixture simmers. The butter had started to curdle but after stirring vigorously, it smoothed out.

At its highest, the thermometer only registered 90 degrees. I figured since it was 20 degrees off, that would make the actual temperature 110 degrees, close enough to the soft-ball stage of 115 required in the recipe. So I tried the cold-water test but all I got - and I tried this three times over 10 minutes - was an oily film on top of the water.
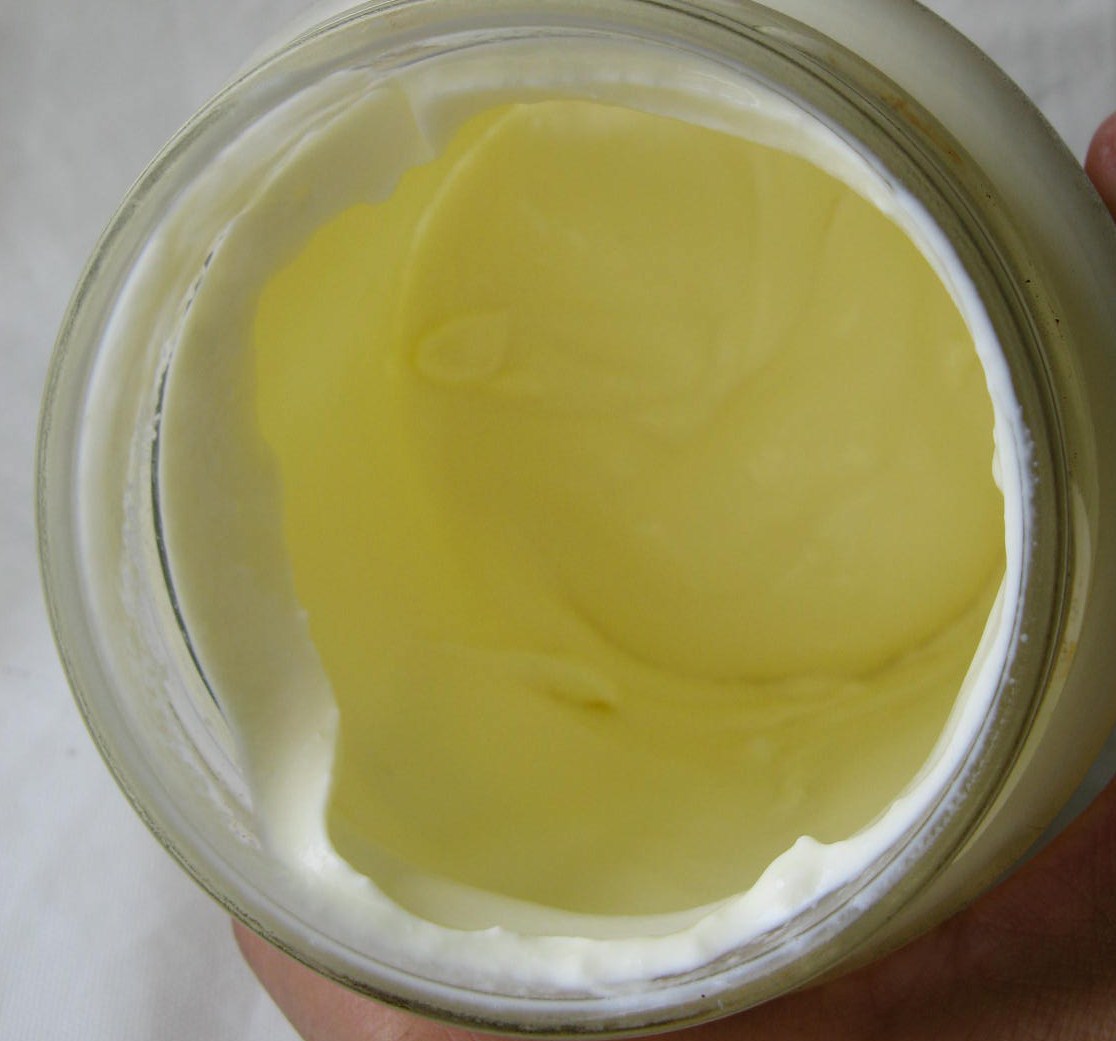
Oh well, this could still work, so I poured out the mixture which looked like it had separated, and started to whisk it. Martha says to beat two to four minutes, but it didn't thicken and still looked like a mess. So I went on for another 15 minutes until the mixture started to cool down and the beaters left a ribbon in the mixture. Still, it would not thicken beyond that. It remained fluid and I could actually pour it out when it should have been firm enough to spread into the pan and to smooth the top.

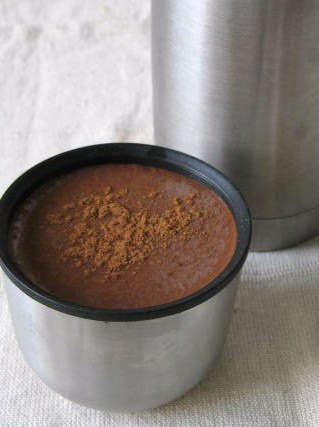
It went into the fridge, and then into the freezer because it just wouldn't firm up. But as you can see from the picture (which I've cropped really close so that it doesn't look as gross to you as the real goo does to me), it remained soft even after a night in cold storage. And the taste? Grainy (the consequence of overstirring, I'm told), too sweet, and - this will sound odd - too buttery (there's 150g of butter in this). Chalk this down as an "interesting" failure.

On a happier note, I tested the thermometer again, this time in water boiling on the stove, and the reading is slightly more dependable - it's only 5 degrees off.

Next time, marshmallows.

Penuche Fudge on Foodista

Think of us for your next event

Tuesday, December 22, 2009

The culinary version of the Italian flag
The picture shows the first course Veggie Chick and I sent out at our first catering gig last night. It's three kinds of dips - (from left) marinated tomato, chickpea and yoghurt, and green pea with cheese. Since the culinary theme was Italian food, VC came up with the brilliant idea of copying the colours of Il Tricolore. The crisps as the top of the picture aren't Italian though - we briefly toasted Iranian flat bread and then broke them into shards. In food, we can take liberties as long as it tastes good, don't you agree?

In all the excitement, I forgot to photograph the rest of the food before sending it out (but my partner did, so go to her blog to see what we made), which irks me because I just figured out how to change the camera settings to take indoor shots!

After the dips came spaghetti and chicken meatballs in a tomato sauce, followed by a number of appetizers (this was a sort of a cocktail party, by the way, but we decided to include a main course). Here's what we served:
  • Roasted sweet onion and yellow pepper crostini;
  • Marinated red pepper crostini;
  • Tuna puffs (in choux pastry); and
  • Falafel (again, not very Italian, but those chickpea balls went down well with the guests).
To end the meal, there were mocha truffles, similar to the kind I wrote about some time ago, only this time, instead of using leftover store-bought cake, this was homemade using an easy brownie recipe with a little coffee extract added and it was much cheaper too - we were, after all, working on a tight budget. (You know, Veggie Chick's blog is called NoDessert, but I saw her sneaking one of these little bites at the end of the night!)

She and I wanted to start a small catering venture after reading about pop-up restaurants and because we love to cook. It is an interesting concept and for much less than a visit to a real eatery, one can get a good meal even if it's not by a Michelin-starred chef, and homemade at that.

I came home after the party dead tired, but the whole experience was enjoyable and we learned a thing or two about organisation - the food preparation is probably the easiest part of the whole venture. All the way home, I was thinking of all the food themes we could do. A host of appetizers are great, but it would also be interesting to make a three course meal as well. Hopefully, we get more clients, because - and I think I speak for Veggie Chick as well - we're hooked!

Come in, sit down, eat!

Sunday, December 20, 2009

It's been 10 years since I had a catering gig. It was for a student film my friend was making in London. I was on the job for a week and cooked for about 30 people in this tiny kitchen that - I kid you not - was just wide enough for me to stretch our out my arms in. It was a good, if new experience, one that I had thought of trying again since then but never got round to doing.

In about 36 hours, I'll be doing that. While I did the cooking alone that first time, I'm teaming up with Veggie Chick for the upcoming EXTRAVAGANZA! (Well, it's actually a quiet affair but it's kind of a big deal for us and I can't say EXTRAVAGANZA! without capitalising the word and giving it an exclamation mark.) And while cooking for people acting and working on a set simply required making a lot of edible food to nourish and sustain them through the day, this gig is for a dozen people in a cosier, less energy-packed situation and with more poncey food.
The menu is Italian(ish), with one entree and a lot of bite-sized morsels in between. Being the inaugural attempt in our partnership, the Chick and I have been really excited and might have been a little too enthusiastic about the menu although we're working on a tiny budget. But we've ironed things out and have already started preparing the food. More on the night - hopefully with all the thrills and none of the spills - when it's over. Wish us luck!

Tapping peanuts for a treat

Friday, December 18, 2009

My tap dance instructor threw his year-end party today. It was a potluck which started at around 3pm with tap videos and tea and led on to dinner. I was assigned a teatime snack and after thorough discussions with my classmates (we take our food assignments seriously; something that we should do with our tap drills as well, but... you know...), one of them, Chak, suggested peanut butter brownies.He was supposed to make Soda Gembira (Malay for Happy Soda) - a red syrup drink (Malaysians know it as Air Bandung) with ice cream soda, Kahlua, Malibu and another liqueur which I forget now - as the welcome drink, but he couldn't make it to the party at the last minute so we didn't get quite as happy as we could have been. Sigh...


The brownie was supposed to come out stripier but I guess I zagged when I should have zigged (see recipe). Don't worry, that won't stop anyone from eating it.

I have provided a recipe for the base of this brownie, but you can use any plain brownie recipe (I really shouldn't say "plain" because a brownie is never plain) for it. Use a box mix if you want - some of them are really good - though with this recipe, the only extra effort you need to make is sifting the dry ingredients together.

For the recipe...


PEANUT BUTTER FUDGE SWIRL BROWNIES
Makes a 25cm square pan

¾ cup all-purpose flour
¼ teaspoon baking powder
¼ teaspoon salt
¾ cup caster sugar
2 medium eggs*
⅓ cup vegetable oil
½ cup unsweetened cocoa
1 teaspoon vanilla extract
⅓ cup buttermilk
¾ cup peanuts, toasted and coarsely chopped (optional)

Peanut Butter Swirl
1 cup creamy peanut butter
⅓ cup caster sugar
4 tablespoons vegetable oil (or melted butter)
2 tablespoons all-purpose flour
1 teaspoon vanilla extract
1 medium egg*
  • Preheat oven to 180°C. Grease and line a 25cm square baking pan with baking paper. In a medium bowl, combine all the ingredients for the peanut butter swirl, mix well, then set aside. Sift the flour, baking powder, salt and cocoa powder together.
  • In a large bowl, beat the sugar, eggs and oil together until light (I use a manual whisk but feel free to use a power tool). Stir in the vanilla extract until blended. Stir in the flour mixture and buttermilk just until combined. Stir in the nuts if using.
  • Turn ⅔ of the batter into prepared pan and smooth the top. Spoon dollops of peanut butter mixture on this layer. Drop spoonfuls of the remaining brownie batter in between. Do not smooth out. Using the tip of a table knife, make a zigzag through the layers to create a marbled effect. Bake in preheated oven until the centre of the brownie appears set and the sides just start to pull away from the pan, about 28 to 30 minutes.
  • Cool brownies in the pan on a rack, then refrigerate until firm before cutting into squares.
* I use medium eggs for ethical reasons. In this recipe, the smaller size doesn't effect the brownies. In fact, I find they add to the chewiness.

PRINTABLE RECIPE

Coffee in styrofoam is against my religion

Wednesday, December 16, 2009

The title of this post is attributed to Betsy Canas Garmon, who writes at wildthymecreative.com. (That there's a "thyme" in her site name is purely coincidental. We're not related.)

Above is a picture of the mug my morning coffee is made in. It holds 400ml - 14oz for those of you who don't use the metric system. It's quite a big mug but that's all the coffee I usually have in one day. (Despite being in the press, I don't have copious amounts of joe at work like some of the other journalists.)

Here's how I make mine: 1 heaped teaspoon of Indocafe instant coffee - no contemptuous snorts from you connoisseurs, now - and the same amount of demerara sugar topped with just-boiled water to about an inch from the brim of the mug, which is then filled with full-cream milk. Very simple, but I can't do without it first thing in the morning.

On weekends, I might make a latte using this simple method with brewed coffee. I've never been able to form that nice pattern on top of the foam though; mine always comes out wonky, if it works at all. Never mind. I keep a bottle of Kahlua on the top shelf of my kitchen cabinet and that saves the day!

I peel for you

Monday, December 14, 2009

SUNNY ORANGE
Oranges and lemons, so full of pennies
All the school girls are so many...

That's how I used to sing the nursery rhyme when I was a child, not knowing the actual words - citrus fruit stuffed with money? Ooh gimme! And with one sen coins out of circulation, 10 or 20 sen would be nice. (The first line is actually, "Oranges and lemons, SOLD FOR A PENNY". Yeah, that's more believable.)

I just looked up the nursery rhyme, and some of the words have been changed - political correctness and all that, I suppose. The last few lines are now: "The grass is green and the rose is red/ Remember me when you are sad." Originally, it ended, "Remember me WHEN I AM DEAD." Sad? Red?... er, doesn't rhyme.

Now, if you have a bag of Valencia oranges, like I did recently, and they're not very nice to eat ­­– the ones I bought weren't very sweet ­­– you might want to turn them into...

Chunky cupful
I chose the firmer, thicker-skinned ones for the jam. The recipes I have in my cookbooks are a bit complicated but I found a simple recipe online and have tweaked it slightly. The original one is smooth because the orange skin is zested and the flesh pulverised in the food processor. I decided to add a little extra peel to give it a bit more body and texture.

One thing to remember is to taste the fruit before making the marmalade. The amount of sugar you use is approximately ½ cup to every orange but that depends on how sweet the fruit is.


EASY MARMALADE WITH BITE 
Makes 1 cup

2 medium oranges (the original recipe calls for Navel; I used Valencia)
1 cup sugar (approximate; depending on sweetness of fruit)
4 tbsp water
  • Wash the orange well. Cut off the ends. Zest 1 orange; peel off the skin (without the white part) from the other one and dice quite fine. If you want the smooth marmalade, zest both oranges.
  • Cut off the skin from both oranges. Cut the flesh into quarters and remove any large seeds (some seeds are necessary as they provide the pectin that helps the marmalade gel). Place the flesh into a food processor and blend to a relatively fine pulp.
  • In a medium saucepan, combine zest, dice, orange pulp, sugar and water. Bring to a boil. Reduce heat and simmer 10-15 minutes until mixture becomes thick and sticks to your spoon. Pour into small jar or covered container. Keep refrigerated. 
PRINTABLE RECIPE

Mash and roll

Friday, December 11, 2009

Cake truffles
I resolved to bake more often until the new year, but I didn't have to do that with these confections. If these truffles had a subtitle, it would be Dessert Part II since their prequel was a chocolate cream cake - well, that's as far back in this cake's life as I can go because it's from a bakery chain and I don't know what kind of synthetic stuff goes into their cake mix.

These truffles are made from the leftover cake plus the last few pieces of pecan shortbread I had made a week ago. ("Real" chocolate truffles are made from chocolate ganache, a combination of chocolate and cream.) All it takes to make them is to crumble the cake and shortbread (can be done with forks, fingers or in a food processor), refrigerate the mixture for a bit, roll into balls and then coat them with either cocoa powder or dessicated coconut. Gussy them up by placing each one in a nice mini paper cup. Easy, right?

Here are some recipes for cake truffles from
group recipes
bakespace
and here's an interesting one from the popular site, The Kitchn.

As the binding agent - the thing that holds the crumbs together - some recipes use frosting, others use cream cheese. My cake already came with the cream between the layers so I didn't have to add anything else.

The most important thing to remember is to ensure that the texture of the cake crumbs isn't too wet or dry. Minced nuts or coconut add bulk, firmness and taste, or add more of the binding agent to moisten the truffles up. Whatever it is, you need to get your hands into the mix and feel it to know what to do to get the right texture. Then, even store-bought cake won't leave a bad taste in the mouth the second time around.

Dirty job? Bring it on!

Tuesday, December 8, 2009

I have no problem getting my hands dirty (though nothing like Mike Rowe's dirty jobs!). Prawns to shell and devein? No worries. Fish to scale? Sure. A whole chicken to cut up? Em, okay, but only if it's free-range because unlike industrial chicken, it doesn't smell and it's not slimy.

Not that all things slimy gross me out. In fact, I find cleaning and skinning squid - already, some people are repelled, but call it calamari and they start licking their lips - quite relaxing. There's something about detaching the head, feeling for and removing the hard beak from the centre of the tentacles, getting rid of the innards and cartilage, and peeling off the mottled red skin that makes cooking and eating the squid later so much more satisfying. Unfortunately, I almost always puncture the ink pouch, and my sink is black after I clean squid, but that's what soap and water are for.

Speaking of ink, Alan Davidson's magisterial The Penguin Companion to Food states that squid is found in all oceans and seas, except the Black Sea. Ironic, isn't it? Here's a little bit of what he writes:
"All squid are remarkable in one aspect. The processes of natural selection have operated on them in a manner which suggests that fitness for being stuffed by cooks in kitchens was a criterion for their survival... Alternatively, the body can be sliced across to form rings, which... can be deep-fried..."
Or simply grilled and mixed with some raw greens like this:

I saw a picture in Donna Hay (Issue 13: Summer) for barbecued lemon and mint squid salad and liked it (of course I would; the magazine has fantastic pictures!) but I changed the recipe slightly, substituting 1 clove of garlic (crushed) with Szechuan peppercorns in the marinade, and using lime juice instead of lemon. Donna Hay had styled its plate with an equal amount of squid and leaves, but as you can see from my picture, I like my greens.

For the recipe...

GRILLED SQUID WITH SPINACH AND MINT
Serves 2

4 large squid hoods (about 250g)
2 cups baby spinach leaves
1/2 cup mint leaves

Marinade (combined)
1/2 tsp Szechuan peppercorns, toasted and ground
2 tbsp lime juice
2 tbsp oil (olive, vegetable, sunflower)
  • Make a cut down one side of each squid hood to open out flat. Lightly score hoods using diagonal cuts (take care not to cut all the way through the flesh). Place squid in a non-metallic bowl and pour over half the marinade (reserve the remaining half). Cover and refrigerate for 30 minutes.
  • Heat a grill pan and cook squid for one minute on each side or until cooked through. Slice into bite-sized pieces and toss with spinach and mint. Spoon over remaining marinade.
PRINTABLE RECIPE

Bet this butter's better

Monday, December 7, 2009

For this month's Don't Call Me Chef newspaper column, we wrote about our favourite things. Mine is eating a slab of rustic bread ­­– homemade if possible ­­– slathered with butter. What I like is homemade butter, and since I found out how easy it is to make, this is the only kind I will spread on my toast.

I make only a small amount, about a week's worth, since homemade butter doesn't keep for long. But making it is an enjoyable process so I do this about once a week. It's not the cheapest butter around, but there are some things in life I don't mind spending a little extra money or time on.

Because of space constraints in the newspaper, I've posted step-by-step instructions here with pictures.

HOMEMADE BUTTER
Double cream, removed from the fridge and allowed to sit at room temperature for 30 minutes 

Equipment
Large mason jar

  • Pour cream into the jar to come a third of the way up the sides. Screw on the lid tightly and shake the jar up and down so the cream sloshes around. Do not stop shaking until the butter starts to form. During the process, you can tell which stage you are at by the sound.

  • First there will be a lot of sloshing. Then it will suddenly stop. This is when whipped cream has formed. For the small amount of cream that I used here, it took only about 7 minutes to turn to whipped cream.

  • Keep shaking and the cream will start to separate into curds that form into a big lump -- this is the butter. It will sit in a thin liquid ­­– the buttermilk. This may take 10 minutes, or it may take 30 mins. If you have small children around, let them earn their keep and get them to take turns shaking the jar. Pour the buttermilk into a clean container and reserve for another use. It is delicious and you can use it in all sorts of dishes. (Here's a link to recipes using buttermilk.)

  • Put the butter into a clean bowl and cover with cold water. Swirl it around, then pour away the liquid. Continue rinsing the butter until the water runs clear. This shouldn't take very long ­­– 5 minutes or so.

  • Place butter on a chopping board and press with a rubber spatula to remove all the buttermilk ­­– it's the milky white droplets in the picture. Any remaining buttermilk will spoil the butter.

  • Transfer butter to a clean container; press out air bubbles with a spatula. Keep covered in the refrigerator. The unsalted butter and buttermilk will keep for about a week.
  • If desired, knead sea salt (to taste) into the butter. This will help preserve the butter. But for this small amount, there's really no need to. Instead of salting the butter, spread it on bread, then sprinkle some sea salt over it for taste and that pleasant crunch. 
PRINTABLE RECIPE

Too afraid of deep-frying

Friday, December 4, 2009

I am... I am terrified of deep-frying. I've had a lot of accidents with boiling oil but the worst one happened a few months ago when I was making churros for the chilli challenge in the Don't Call Me Chef column. One of the Mexican doughnuts exploded, shooting both ends out of the pot in opposite directions and spattering hot oil onto the right side of my face (I quickly turned my face to the left at the sound of the explosion but still caught the impact), neck and part of my chest (I have a photograph and contemplated posting it here but I think it may be inappropriate in a food blog, even if it has everything to do with cooking. Anyway, only faint scars remain on my face, but the invisible ones that I bear are more permanent).

 Oven-fried chicken and stuffed potatoes

So I avoid this cooking method for my safety but there's something to be said about the flavour and texture you get from deep-frying. However, you can get almost the same effect in the oven. For those who think oil is bad (not me), this chicken recipe will suit you since the only fat in it is in the chicken skin (and even that can be removed... but let's live a little, yes?) 

I have to admit I was inspired to make this after watching Nigella Lawson (she does get on my nerves sometimes -- no one is THAT goddess-y in the kitchen!) prepare her Ritzy Chicken Nuggets and Blood and Guts Potatoes on one of her cooking shows. However, I left out the tomato ketchup in and on the potatoes -- because I am not a child and don't need "blood" to tempt me to eat -- and added za'atar to the chicken marinade. I also used two free-range chicken legs (cut into three) with skin on and bones left in instead of breast fillets.

You can get the za'atar spice blend from Middle Eastern grocers but I make my own (the amounts are mostly to taste, but it's about a large pinch of each spice):

Sumac
Dried thyme
Toasted cumin seeds
Toasted sesame seeds
Paprika
Salt

Here's are two more recipes, but with slightly different ingredients.

Little pearls, big taste

Tuesday, December 1, 2009

 
Pearls of infinite flavour
I forget now where I first read about Israeli couscous, but ever since then, I've wanted to get some. I didn't make a serious effort to go looking for it, but out of the blue, I see it on the shelves at my local neighbourhood grocery store! Compared to semolina couscous, which we're probably more familiar with over here in Malaysia, these pearls cost almost five times more. But I couldn't resist.

(As an aside, anyone who knows a little bit about Malaysia's foreign policy will understand why anything with "Israeli" attached to it may not be publicised!)

I made a salad with the couscous. It contained chickpeas fried with chilli flakes, cubes of grilled eggplant, orange pepper/capsicum, cucumber, red chillies, and loads of fresh mint. The dressing was a vinaigrette of balsamic vinegar, honey and olive oil -- nothing fancy. I thought the grilled eggplant was a standout ingredient and there should be plenty of that as well as the mint, which, for me, is a must in every fresh salad.

I didn't use a recipe, but if you need one, here are some that I looked up: 

Israeli Couscous with Mixed Mushrooms by Ruth Reichl
Chicken and Israeli Couscous with Tomato and Lemon from The Bitten Word (taken from Martha Stewart Living)
Israeli Couscous with Caramelised Onion, Eggplant and Feta from Nibbledish

The toast with the most

Sunday, November 29, 2009

It's not burnt! Those are the delicious parts!
Right, I've finished Kafka's Soup, written and illustrated by Mark Crick, which I first mentioned in a previous post. The book is subtitled: "A Complete History of Literature in 17 Recipes" and what fine recipes they are. Crick is a "literary ventroloquist", writing in the voices of famous authors, including Jane Austen, Marcel Proust, Gabriel Garcia Marquez, John Steinbeck and Charles Dickens. You don't have to have read books by those writers but being familiar with how they write, I think, makes reading Kafka's Soup more enjoyable.

Each story starts with a list of ingredients, but the instructions must be garnered from the narrative that follows. Very clever. And the recipes seem highly workable.

I tried the cheese on toast because I like cheese, grilled or otherwise, and sandwiches. Now, I have to admit I didn't have any pesto, which was called for in the recipe, nor any of the ingredients to make it. But I did have some leftover olive paste and used that instead. I didn't have any fresh oregano either so I left it out ­­– I don't think dried would have worked as well.

Also, while "Harold Pinter" presents his recipe in a short one-act play, preparing the actual sandwich takes awhile since there are a few things to prepare and to be grilled.

This literary sandwich is prepared by a young man who lives in a rather shabby dwelling and shared with an older man with a tramp-like appearance ­­– one may presume they aren't well off, even if the young man wears a leather jacket. Yet this is a meal whose ingredients they can afford. Over here in Malaysia, most of the items are imported and considered "premium" ingredients and they wouldn't be everyday cooking items.

But so what if this sandwich cost me the price of three normal rice-meat-and-two-veg meals. It was delicious!


CHEESE ON TOAST À LA HAROLD PINTER
Makes 2 large open-faced sandwiches

1 loaf of ciabatta, cut in half lengthwise
1 aubergine, finely sliced
Extra virgin olive oil
Pesto
200g mozzarella, sliced
2 teaspoons fresh oregano, chopped
  • Put ciabatta under the grill to warm.
  • Heat some oil in a skillet; put in the aubergine slices. Remove slices when they are golden.
  • Spread a thin layer of pesto on the cut side of the warmed ciabatta. Lay the aubergine slices on top of the pesto. Lay the mozzarella slices on top, drizzle with olive oil and  sprinkle with oregano. Place ciabatta back under the grill until the mozzarella has turned brown and golden in places. Cut each half into pieces and serve.
PRINTABLE RECIPE

Knife+clod=(almost) disaster

Thursday, November 26, 2009

This is the story of a clumsy knife-wielder whose guardian angel must have been working overtime to prevent her toe(s) from being sliced off.

My latest acquisition for the kitchen was a 15cm (6-inch) Tescoma AZZA chef's knife made from Japanese stainless steel.You can see it at the top of the picture. It has a good weight and fits well in my hand.

Since its steel, I assumed only the mightiest sledgehammer could do it damage. But all it took was a fall from the kitchen counter to turn the tip of the knife at a 90-degree angle. I do not lie -- the last 1cm was bent at a right angle, which was terribly upsetting, as you can imagine. A wonky knife can't be much good in the kitchen, plus it could even be dangerous.

So I got my hammer out and tried to knock out the crook, but as you can see in the other pictures, the tip is not perfectly straight, boo-hoo.

But that's not the whole story.When the knife was falling, I reacted by putting my foot out to stop it from hitting the ground -- a reflex action that works for falling cushions; for sharp objects... er, not so much. Fortunately, I wasn't quick enough.

When I told this story to Veggie Chick, colleague and co-producer of the Don't Call Me Chef cookery column (see link above), and that I was happy I managed to somewhat repair my new knife and avert disaster, she gave me a horrified look, and asked, "That's what you're happy about?" Well, when your face has been splashed with boiling oil, your finger cut almost to the bone, and burning yourself is a regular occurence in the kitchen, NOT slicing off a toe isn't a catastrophe.

I hope my mother isn't reading this...
Posted by Picasa

Raw and waiting to be ravished

Tuesday, November 24, 2009


Some of the ingredients that go into spring rolls 

The plate above was the biggest one I had but that was all I could fit on it for the picture. I left out the ingredient that makes a spring roll for me -- fresh mint leaves. And there also needs to be lettuce. This time I used lollo rosso; they have a nice round shape and fit perfectly on the circle of rice paper.

I also usually put in crushed toasted peanuts but having just got over a cough, I'm staying away from things that irritate my throat for a while. Those sleepless nights were not funny.

A lot of recipes tell you to rehydrate rice paper by dunking it in hot water or wiping it with a hot damp towel. All I do is run the whole disk under the cold water tap for a second or two and leave it on a large plate. In just a minute, it's soft and ready to be filled.

Of course, the dipping sauce -- fish sauce, palm sugar, sesame oil, rice vinegar and that not-so-secret ingredient, wasabi -- just makes a fresh spring roll all that much better. Here's how it looked after the rolling.

Now, this is the kind of food that I like -- one that requires no recipe!

With pom(p) and ceremony

Sunday, November 22, 2009


To make up for that atrocious picture I took for my last post, I thought I would use pomegranate seeds in another recipe. This time they're baked into muffins and because of that, they've lost a bit of their lovely ruby colour but the crunch and taste remain.

For the uninitiated, there are a number of ways to de-seed a pomegranate.You could score the rind, soak it in water for a bit, then remove the seeds, or simply cut open the fruit and scoop out the seeds or use the water method, or hold each half over a bowl and knock out the seeds. The latter method is my favourite because none of the juice is wasted and it's fun to do. You need to protect your clothes though because if that juice gets on them, it won't be easy to get the stains out.


Savour the seediness
POMEGRANATE GINGER MUFFINS 
Makes 9 (1/2 cup) or 12 small (1/3 cup) muffins

2 cups all-purpose flour
1 tbsp baking powder
1/2 tsp salt
2/3 cup caster sugar
1/2 cup minced crystallised ginger
3/4 cup milk
1 medium egg
1/4 cup butter, melted and cooled
1/4 cup buttermilk
Seeds from one pomegranate (about 1 cup)
Soft brown sugar
  • Preheat oven at 200°C. Line a muffin pan with paper cups.
  • Sift flour, baking powder and salt together. Mix in sugar and ginger. Make a well in the centre
  • Mix milk, egg, melted butter and buttermilk together. Pour into dry ingredients with the pomegranate seeds and mix with a fork until combined. Batter will be lumpy.
  • Spoon batter into prepared pan, filling to the rim. Sprinkle each muffin with with 1 tsp brown sugar.
  • Bake until lightly browned, about 16 minutes for large muffins and 13 minutes for small ones. Test for doneness with a skewer. Remove muffins from pan immediately and set on a rack to cool. Store in an air-tight container. Best eaten the next day.
PRINTABLE RECIPE

Too much yum-yum

Friday, November 20, 2009

Whatever's been said about TV chefs -- they're only on TV because of the way they look, etc -- they obviously can cook. But when they go weak at the knees and make all those appreciative noises while eating food they've cooked themselves... now, that's narcissism.

Nigella Lawson does it all the time and so do a few other ladies, but recently I watched Roger Mooking eating his meatloaf with a bit too much relish -- and I don't mean the condiment. A bit unusual for a guy.

I have to say, however, that  I am hankering for some of his Coriander Meatloaf. It looks good and will make a good dish for Christmas lunch with my family.

On a different note, here's a picture I took of some potato and pomegranate salad I made. It looks terrible, doesn't it? It was taken under those awful fluorescent lights at the office. I tried to doctor it but wasn't able to do much to improve it. At least you know there's no photographic trickery involved.

The dish was tasty though -- like a potato salad with a mayonnaise dressing and with delicious ruby pomegranate seeds thrown in. Perhaps another new addition to the Christmas lunch menu.

From wilted to wonderful

Tuesday, November 17, 2009

In the November edition of Don't Call Me Chef, we wrote about using whatever was in the fridge or pantry to make a dish. I actually do that a lot at home. Yesterday, I noticed a couple of carrots that were already sprouting new babies and some wilted coriander (cilantro) in my vegetable crisper. So I threw them together, added some spices and made a sauce for rigatoni (regular visitors will notice I eat a lot of pasta). The root ginger adds a soothing heat (I have a cough and it was good for my throat) so I did not add any pepper. The carrots don't need to be peeled and except for the root part of the coriander, everything was used. Economical, delicious and, if this is your thing, healthy too.

Rigatoni with Carrot-Coriander Sauce
Serves 2

2 medium carrots, finely diced
1 tablespoon red lentils
2cm piece fresh root ginger, shredded

Large pinch of cumin seeds
1 small bunch fresh coriander
Large pinch of dried rosemary
1/2-3/4 cup vegetable or chicken stock Salt to taste
3 handfuls of dried rigatoni, cooked

Tear off the leaves from the coriander and roughly chop. Mince the stalks.
Heat a little oil in a medium saucepan and add the carrot to sweat. Add lentils, root ginger and cumin seeds and stir for 1 minute. Add coriander stalks and rosemary, and enough stock to cover the carrots. Put on the pot lid and simmer until carrot and lentils are soft, about 15 minutes.

Take off heat and blend till smooth. Return to heat and bring to the boil; season to taste. Toss in rigatoni and sprinkle with coriander leaves.

Existentialist cooking

Tuesday, November 10, 2009

Pages from Kafka's Soup: A story 'written' by John Steinbeck with a recipe for Mushroom Risotto.
 
Some years ago, in my cookery column at another publication I worked at, I imagined Meurseult, a bachelor and the anti-hero of Albert Camus' The Outsider (here's an interesting article about the book), cooking a meal for one when he decides, "I thought maybe that I ought to have some dinner."

Not much is said about the actual meals Meurseult eats - although he has lunch at Celeste's almost every day - but there is mention of him frying some eggs and eating them straight out of the pan because he has run out of bread. Also, on the Sunday after he buries his mother, he buys some bread and pasta for dinner, does his cooking and eats standing up.

I'm reading Kafka's Soup by Mark Crick now (the book has received some favourable reviews and here are a couple from The Independent and Curled Up), and it reminded me of the dish I imagined Meurseult preparing. Living in a dive, probably with just a small prep area, one hob and no refrigerator, he wouldn't bother with too many ingredients or carefully chopping things up. Mushrooms would be easily available and he would always have some cheese and wine on hand, so all he would need to get was a can of beans, using half now and the rest for another meal, probably eating them straight out of the can.

PASTA WITH MUSHROOM AND BEANS
Serves 1

2 tbsp olive oil
1-2 cloves garlic, crushed
A handful of mixed fresh mushrooms (do not used canned!), thickly sliced
2 tbsp dry white wine or water
½ can black beans, drained
Salt and freshly ground black pepper
Freshly cooked pasta to serve
Grated Parmesan cheese and chopped fresh parsley
  • Heat oil in a frying pan and fry garlic and mushrooms for 3-4 minutes.Pour in the wine and season with salt and pepper to taste.
  • Stir in the beans until warmed through. Toss in the pasta and sprinkle with Parmesan and parsley. Eat straight from the pan if desired, and standing up if you must.
PRINTABLE RECIPE

Salmon? Aye, mon!

Monday, November 9, 2009

Salmon and vegetable mash in a Thai sauce from The Mash Tun Whisky Bar in Abelour, Scotland.

Even with my amateur photography skills, this dish has to look appetising. Salmon on vegetable mash in a Thai coconut sauce was one of the items on the menu at The Mash Tun Whisky Bar, a traditional pub in Aberlour, Scotland. I took a pamphlet but now can't find it and must have left it, along with a pair of little silver hoop earrings, in Scotland. Some people leave their heart in places they visit, I leave jewellery. Oh well. Fortunately, the pub has a website.

The pub is of course named for a mash tun, the container in which the ingredients used to make whisky are allowed to ferment. I got to see the whole process recently on a press tour of a couple of Chivas Brothers distilleries in Speyside, where much of Scotch whisky is produced. And that is also where I had my first real taste of the drink.

Now, I am not a drinker. I don’t stand up well against any sort of alcohol, metaphorically or literally.

But to better understand whisky – and it’s more than just about having a tipple on special occasions, as a nightcap, or to yam seng (a Chinese ‘Cheers’) with (I should mention that what we were dealing with here was a PREMIUM brand) – there would be quite a bit of drinking involved and I sat facing the ‘fire water’ with great trepidation at the two tastings.

The first tasting session was of blended whiskies and the second, single malts. But the procedure was the same: look at the colour, smell it, and finally taste it, neat and with water added. I took the tiniest of sips from each glass (there were five at each tasting, of different age), and while everyone was ooh-ing and aah-ing, I was trying hard not to cough or show disgust on my face.

At the end of the two tastings, I still had no clue about the drink. What was so great about whisky that singers sing about it, TV shows have it as product placement and connoisseurs have lengthy discourses on it? Where were the floral and woody notes? Why didn’t I taste vanilla or hay?

And then, on our last night in Scotland when everyone dressed up in kilts for dinner and haggis, I got it.

There was a ceremony to go with the haggis course and it involved drinking whisky from a small metal goblet. Now, you had to down the whole thing – and really, it was only about 30ml of 12-year-old whisky – because you would then have to upturn the vessel and place it on your head.

So down it went in one gulp. And that was when I realised why good whisky was appreciated the way it was. It did not tickle my nose or burn my throat as those tiny sips had. In a complete reversal, drinking the whisky was pleasurable it warmed me up, but more importantly, it was heartwarming, which is an odd thing to say about a drink, but I can’t think of a better description for the feeling I got.

Take that, airline food!

Friday, October 30, 2009

Airline food isn't great at the best of times, but the worst meal I've had on board was flying out of Hong Kong yesterday. Chicken and pasta was what I had -- the chicken had a soy sauce-based gravy and the pasta was orzo, the rice lookalike. When you fly coach, you never expect the meal to be fantastic but it should at least be edible. This was awful, even for someone who attended local boarding school for seven years and has eaten chicken with feathers still attached to the skin.

Having been away, my fridge didn't really have a lot, but there was some leftover cooked vermicelli, vegetable stock and tomato salsa. Just a little bit of each but with the baked patties in the freezer, they would make a nice pasta and meatballs for one.

There's no meat in the meatballs actually; they're made of cooked buckwheat (which is a fruit rather than a cereal), and if you toast them before cooking, they could pass off as meat (...if you really, really believe).

In the picture, the cooked patties are reheated in a sauce that's just a couple of tablespoons each of the stock and salsa, tossed through the vermicelli and topped with crushed potato chips.

I don't have an exact recipe -- I just threw a bunch of ingredients together -- and I'm really loath to provide one here but those of you who are skilled at cooking will be able to adapt it to your needs.

Buckwheat 'Meat'-balls
Makes about 12 patties

½ cup dried hulled buckwheat, toasted
½ cup toasted breadcrumbs
3-4 tbsp minced onion
2 tbsp chopped spring onions
2 tbsp chopped coriander
2 tbsp chopped chillies (any colour) or to taste
1 medium egg
Salt and pepper to taste
Plain flour
Tasteless oil (like sunflower. grapeseed or corn oil)

Cook the buckwheat. There are several ways to do this: you could cook it like pasta (in a lot of salted water, then drained) or like rice (the absorption method: twice the amount of water to buckwheat and cooked over low heat) or even in a rice cooker.

Let the cooked buckwheat cool slightly (or store it in the fridge), the mix all the ingredients except the flour. If it is too wet, add a little flour. Shape into small balls and place on an oven tray. Refrigerate for 30 minutes.

Turn on oven to 180°C. Drizzle the patties with oil and bake for about 30 minutes, turning them halfway through.

Lame attempt to impress

Monday, October 26, 2009

I was surfing around and came across allyoucaneatforfree -- which I will now regularly visit, I'm sure -- and saw a post that brought back memories. The writer provides an "I want this girl to like me" recipe, which reminded me of the time I cooked a chicken roulade, kind of like the one I posted on recently, to impress this guy I used to go out with a lifetime ago. This was long before I actually got into cooking and depended solely on recipes and more importantly, the pictures that went with them. The only cookbooks I had access to at the time were written in the 80s, and not wise to what would later be referred to as gastroporn, I thought the pictures in those books were the height of artful food photography. (Nowadays, we laugh at them as we do of those dresses with the pouffy sleeves.)

I remember there was tinned pineapple rolled inside the chicken, and I tried to make a sauce with the syrup that came with the fruit together with tomato puree and I don't know what else. It didn't taste right but I couldn't place my finger on it and kept adding more and more of the syrup and then more and more of the puree until there was nothing left and I convinced myself that everything was good.

Well, I finally served dinner, hoping my nice table arrangement would score me brownie points and watched the guy as he took his first mouthful. He didn't say anything as he took another bite and then I couldn't stand it any longer and asked, "Is it okay?"

"There's no taste," he said, rather too quickly.

Then it finally dawned on me -- I'd completely left out the salt.

Shake, shake, shake

Thursday, October 22, 2009

Banana mochaccino
After using one banana for the brownies that I posted about in the previous blog, there was still one more in the fridge, all black and smelling faintly alcoholic.

Feeling I would need a pick-me-up at around 11am since I was going to deal with some rather unstimulating work that morning, I made myself a banana latte that my stainless steel water bottle would keep cold for a few hours. I should have added an ice cube or two though because I didn't drink it until after lunch and it was no longer as frosty.

BANANA MOCHACCINO 
1 serving

1 ripe banana
½ cup strong black coffee
¼ cup milk
1 tbsp cocoa powder
Sugar to taste
Ground cinnamon, to garnish
  • Blend all the ingredients, pour out and dust with cinnamon. Shake container before drinking.
Note: When not at work ­­– or if you absolutely must ­­– splash in some Kahlúa!

PRINTABLE RECIPE

Stretching the banana

Wednesday, October 21, 2009

Bananas are great but sometimes, even the smallest combs have too many fruit that you can’t eat them all before they start turning soft and spotty.

The two that remained from my last buy were put in the fridge where they turned black. According to my favourite banana brownie recipe, I could have used both, but something’s wrong with my oven and when I bake an eight-inch cake, the centre doesn’t cook properly. I could use a ring mould but then the pieces wouldn't look like traditional brownies. So I halved the recipe, using one banana, and made the brownies in a loaf pan. Twelve good-sized pieces came out of that quantity.

CHOCOLATE BANANA BROWNIES 
Makes 1 loaf pan

½ cup (70g) all-purpose flour
¼ tsp baking powder
1 tbsp cocoa powder
Pinch of cinnamon powder
Pinch of salt
¼ cup (55g) unsalted butter, softened
¼ cup + 1 tbsp (75g) firmly packed soft brown sugar
1 medium egg
30g chocolate (at least 70% cocoa), melted and cooled
1 medium ripe banana, mashed (about 85ml)
¼ tsp vanilla extract
½ cup (55g) coarsely broken walnuts (optional)
½ quantity Quick Chocolate Glaze (recipe follows)
  • Preheat oven to 190°C. Grease the bottom and sides of a loaf pan.
  • Sift together the flour, baking powder, cocoa powder, cinnamon and salt. Set aside.
  • In a large bowl, beat butter until creamy. Add sugar and continue beating until light and fluffy. Beat in the egg and mix well. Beat in chocolate until blended, then beat in the banana and vanilla. Beat in the flour mixture until just combined. Stir in the walnuts, if using.
  • Scrape the batter into the prepared pan and spread evenly. Bake for 25-30 minutes or until brownies are just starting to pull away from the sides of the pan.
  • Cool brownies in pan, set on a wire rack. When completely cool, spread with glaze. Refrigerate before cutting into bars.
Quick Chocolate Glaze
Makes about ½ cup

60g semi-sweet chocolate, coarsely chopped
2 tsp unsalted butter
⅔ cup sifted icing sugar
2 tbsp boiling water (approximate)
2 tsp glucose syrup (substitute with golden or corn syrup)
½ tsp vanilla extract
2 tsp rum (optional)
  • Melt chocolate and butter in a glass bowl over simmering water or in the microwave. Off the heat, stir in sugar and water alternately, beating well (you may not need to use all the water). Beat in glucose syrup, then the vanilla. Stir in the rum, if using. The glaze should be glossy and pourable. If it is too thick, beat in drops of hot water to thin.
PRINTABLE RECIPE

Bowl me over

Sunday, October 18, 2009

Often associated with cold, wet nights in the West and that thin flavoured water that one has as a side dish to rice over here, soups are often cast in a supporting role in a meal. Sure they are ideal for leftovers and odd bits, but that doesn’t mean they are simply a dumping ground for the unimaginative cook or need to play second fiddle to the meat and two veg.

You can easily tote soup over to the office for lunch in a good quality wide-mouth thermos flask. The soup keeps warm for several hours and sustains me through the afternoon without making me drowsy.

Today, I packed an onion and lima bean soup. It starts from a recipe by Jacques Pépin for Onion Soup Gratinée, but I leave out the cheese, bread slices and baking. I also used homemade vegetable stock as I was giving some of the soup to a vegetarian friend.

The onions needs to be sliced a little thinner than they appear in the picture, but this is what happens when you’re in a hurry because you’ve already turned on the stove and the oil/butter in the saucepan has started to smoke.

Also, you can’t just put the onion slices in and then forget about them. Read that new cooking magazine with all the lovely Italian recipes if you must but try to remember to look into the pot now and then or you’ll end up with burnt onions and a dark broth. Not that the soup was ruined, though it could have tasted less scorched.

In ‘The Soup Nazi’ episode, Jerry Seinfeld was referring to a bisque, if I’m not mistaken, but he could have been talking about this soup too when he said, ‘You can’t eat this soup standing up, your knees buckle.’


Onion and Lima Bean Soup
2 servings

1 tbsp butter + 1 tbsp vegetable oil
170g white onions, sliced into thin half moons
100g baby lima beans, soaked for at least 6 hours
3½ cups stock (use a beef stock cube if desired)
1 dried bay leaf
Salt and freshly ground black pepper to taste

In a large saucepan, sauté the onions in the butter/oil over medium heat until lightly brown, about 8 minutes. Add the rest of the ingredients and boil gently for 20 minutes or until beans are tender but still firm. Remove bay leaf before serving.

Bacon is a spice

My last meal, if I found myself about to be executed, would be scallops wrapped in lobster wrapped in bacon.

But if the prison couldn't get the scallops and lobster, crispy fried bacon on its own would be fine.

Bacon is a great freezer standby. I divide a packet into groups of two and store them to use whenever I make soup or to use in a stir-fry and just a couple of rashers add depth to the dish I'm cooking.
This time, I had a leftover breast from a whole free-range chicken, some cream cheese that was beginning to smell a little funky and a couple tablespoons of homemade olive spread, so I thought, like my last meal, it could all be rolled up together and bunged in the oven.

Deserving of a last meal
CHEESY CHICKEN ROLLUPS
2 servings

2 chicken breast fillets (preferably free-range organic), pound flat
4 tbsp cream cheese, softened
2 tbsp olive spread (recipe follows; store-bought tapenade is fine)
6 slices bacon
  • Combine cream cheese and olive spread. Chill for 30 minutes.
  • Preheat oven at 190°C. Lay chicken breasts on a cutting board. Spread half the cream cheese mixture on each breast. Roll breasts up, tucking sides in, and place seam side down on board.
  • Wrap each breast in 3 slices of bacon. Place rolls into an oven-proof pan and bake for 30-35 minutes or until chicken is cooked. Turn broiler on and crisp bacon about 10 minutes more, turning over half-way through. 
Olive Spread 
Makes about ½ cup

1 bottle pitted black olives (140g), drained and finely chopped
1 tin anchovies (100g), mashed together with the oil
2 tbsp chopped fresh coriander
  • Mix all the ingredients together and store in a clean jar in the fridge for up to 3 weeks.
PRINTABLE RECIPE

Filling the hole

We don’t get good handmade bagels here in Malaysia so the next best thing is the brand Bagels Forever. They come frozen, four in a pack and in quite a number of flavours; my freezer staples are poppy seed, onion and plain.
I’ve tried making bagels many times and with various recipes but they never seem to come out the way they should – puffy yet firm and chewy. But I shall persevere and one day, I know, I will successfully produce a bagel that will not have people chewing on it like taffy.
In the meantime, a slice of French Emmental cheese slapped inside an onion bagel gets me through the afternoon when I have no time to prepare a meal.

Eating alone isn't sad


Laurie Colwin writes in the foreword of Home Cooking: A Writer in the Kitchen:
“One of the delights of life is eating among friends; second to that is talking about eating.”
I would agree about the second thing, but eating alone needn’t be sad. Eating and reading at the same time may be frowned upon by Emily Post types, but really, a good book can add more value to your life than a real person and idle chit-chat.
I bring a packed lunch to work almost every day. Some colleagues think I’m vegetarian because I prepare my own food; others think I’m a snob, or worse, cheap (!) for not eating food from the cafetaria.
That’s just silly. I make my own lunch because I like doing it and I know exactly what goes into it. Believe me, organic meat and vegetables are not cheap but we all deserve to eat the healthiest food we can get. You go ahead and spend RM300 on that designer handbag, I’ll take RM30 free-range chicken any day.