The Oven has baked its last loaf. This blog is no longer being updated.

My cooking videos appear at youtube.com/janeragavan

I write on food at star2.com

Year-end baking disasters

Sunday, December 29, 2013

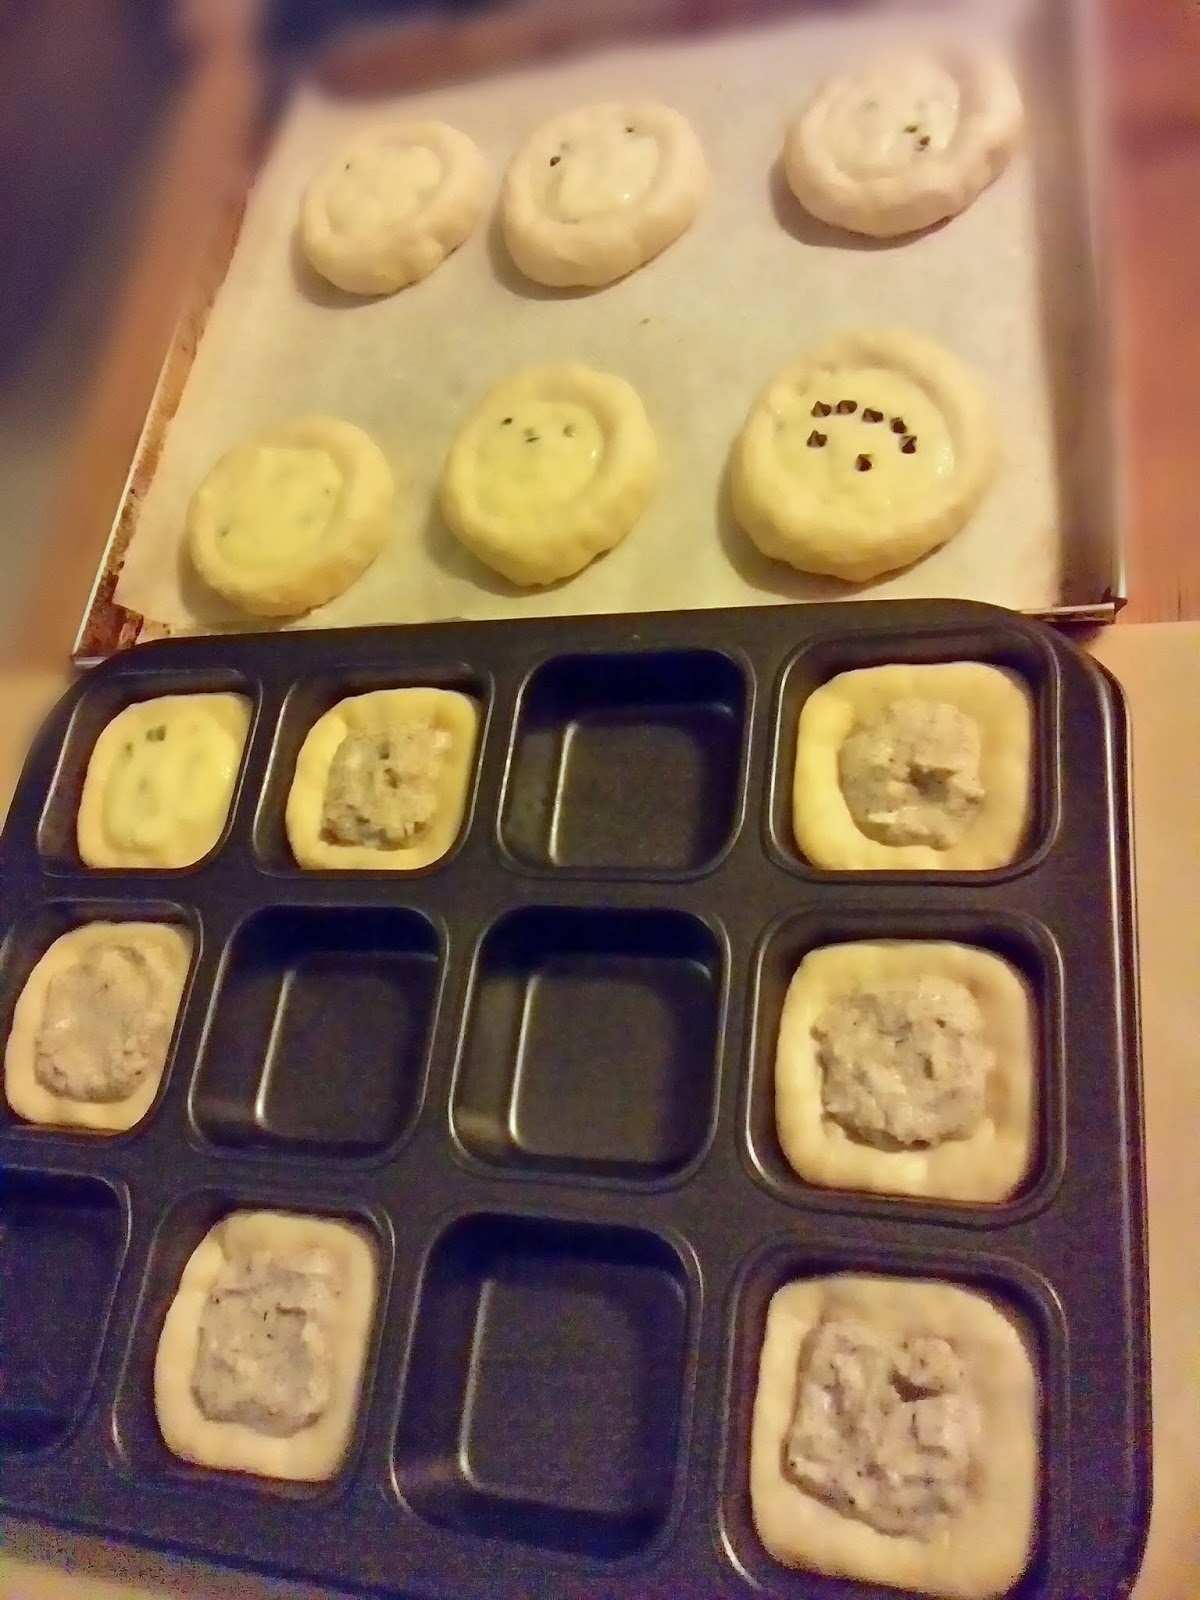
PEPPERMINT MERINGUE MICE ~ THE ONES THAT SURVIVED 
Unless my oven goes completely kaput, I see my baking in the last few days of 2013 to be mishap-free – although for my own self, I foresee hands and arms with inevitable burns due to my inherent ability to get into accidents.
My last few baked dishes, however, have been quite terrible. The peppermint meringue mice in the picture above received some compliments, but these were the ones that survived the journey from my home to the office where we were having a Christmas pot luck. Most had cracked or lost their ears and tails. But that probably saved everyone from eating them because they were so tooth-achingly sweet!
I only made them to use up the leftover egg whites after using the yolks for a turkey-shaped challah I was determined to make.
Shaping the turkey-shaped challah
The loaf started out fine. I followed the instructions for what this site called the "Turkallah" although I changed a little of the head and neck. 
The problem started when the loaf was ready for the oven. I normally bake free-standing loaves directly on a heavy upturned baking tray that I place in the oven when I am preheating it. This is how I was going to bake the turkey loaf as well. 
But then, I clumsily slid the loaf into the oven and part of it hit the side and was distorted. I tried my best to reshape it on the hot baking tray, but unfortunately, the turkey lost its beak.
The turkey loses its beak.
I took the loaf to the office pot luck and no one could figure out what it was. One colleague said it looked like a dragon and another thought it was a Christmas stocking. Thank goodness, it was cooked well and tasted good.
But the worst was yet to come.
The whoopie pies disassembled themselves after sitting for a while (right).
The gingerbread whoopie pies with marshmallow fluff filling I made for the Daring Bakers challenge were a disaster. The marshmallow fluff was stiff enough after I had made it, but it turned liquid a few minutes after the cookies were sandwiched together. Refrigeration didn't help. So just for the picture, I squeezed them into shape. Shortly after the picture was taken, they slid apart again.
Here's wishing everyone a Happy New Year, and may all your baking be excellent!

Sigara böreği: Turkish cigar-shaped snacks

Wednesday, December 18, 2013

SIGARA BÖREĞI OR CIGARETTE BÖREK 
I didn't get the chance to try cigarette börek or sigara böreği in Istanbul. This pastry, shaped like a Turkish cigar, is made with a phyllo-like flaky dough called yufka and filled with ingredients like feta, parsley and sometimes potato or meat.
I saw other kinds of börek though – made in the larger pie-like shape and snail shell, but not the cigars.
Yufka pastry apparently comes in various thicknesses. The thicker ones are eaten like flatbread and used for wrapping meats and to scoop up dips (like the one in the picture below). The thinner ones are used for pastries like the börek. A lot of recipes say to use phyllo pastry if yufka is not available. Phyllo is thinner though, so about three leaves need to be layered together.
A thicker version of yufka is the flatbread seen in the background. Chicken doner with rice and (inset) pickled chillies. 
I decided to make my own pastry, based on the type you might use for a strudel. The dough is elastic so it can be stretched until quite thin. I've used this recipe for a strudel before, but this time, I left out the egg yolk.
The filling is a mixture of mashed potato, shredded cheddar, a Turkish hard cheese and snipped spring onions (green onions). I don't know what the Turkish cheese is called; it has the crumbly texture of parmigiano-reggiano and tastes like a sharp blue cheese – very sharp, in fact, which I only realised after the börek were cooked. 
I bought the cheese at a grocery shop in the northwest quarter of Istanbul where hardly any English is spoken, but it's where the locals shop. One of the delightful shopkeepers saw me looking at this variety and cut off a piece for me to taste. I liked it and chose a chunk that was already portioned. He weighed it and it cost 11 Turkish lira (about RM17.50), which is a really good price for organic, unprocessed cheese.
Turkish spice mix
The filling is seasoned with a spice mix that I got in Kadıköy, a town on the Asian side of Istanbul. This is one of the residential areas of the city but again, not much English is spoken. There are some shops catering to tourists but the prices are not inflated because it's also where the locals shop. 
According to the tube, the mix has eight type of spices. The names are all in Turkish, though, so I had to do some Googling to find out the English names. Except for one spice (poy), I found out (if I've correctly identified them) that the others are mint (nane), fenugreek (çemek), white pepper (toz biber), Greek oregano or wild thyme (kekik), sumak (no English name), coriander (kişniş) and red pepper flakes (pul biber). 
Make the sigara böreği in advance and store in the fridge or freezer.  
My börek are fried, but they can also be baked. I'm hopeless at frying but since I made only six this time, this was quicker and I got to eat them sooner!

Cigarette Börek (Sigara Böreği)
Makes 6

95g bread flour
Pinch of salt
50ml water, plus extra if needed
1 tbsp vegetable oil, plus extra for brushing and frying
½ tsp apple cider vinegar
Filling*, about 1¼ cups

Combine flour and salt in a bowl. Combine the liquids and add to the bowl. Bring everything together to form a soft dough, adding more water if necessary. Set aside for 30 minutes.
Divide dough into six equal balls. Roll out the dough into an elongated oval until very thin. Then, using the back of your fists, slowly stretch out the oval into a rough triangle until you can see through it (a few small holes are okay).
Brush the surface with oil. Place a row of filling at the wider end, fold in the lower points of the triangle and roll up towards the upper point. Make the rest of the börek.
At this stage, the börek can be stored in the fridge or freezer.
Heat up a large frying pan and add about 2 tbsp of oil. Fry the börek until brown on all sides. Serve with a dip.
* The filling is a mixture of mashed potato, shredded cheddar, a Turkish hard cheese and snipped spring onions (green onions), and seasoned with a Turkish spice mix. 

Simit: Turkey in a roll

Saturday, December 14, 2013

SIMIT, A GREAT BREAD ROLL 
I could eat one simit a day every day for the rest of my life. This is one of the best bread rolls I have ever had. (Why only one? It's huge!)

Before visiting Istanbul, I did some research on the breads that I could get here, and the simit most interested me. I liked the twisted ring shape and heavy sesame seed coating.

I looked up some recipes and made what I imagined simit to be based on pictures I had seen. The dough is a simple one, quite firm, which is rolled out into snakes, twisted, formed into rings, dunked in date syrup and encrusted in sesame seeds before being baked.

What I made tasted all right, but they were not simit. Nothing close to the real thing as I found out when I got here and had my first bite.

So, now that I have fallen in love with authentic Turkish simit, what am I going to do when I get home? :-(

Peacock-shaped bread

Monday, December 2, 2013

WHITE CHOCOLATE AND ORANGE PEACOCK BREAD 
I set out to make The Great British Bake Off Series 4 contestant Ruby Tandoh's white chocolate and orange peacock bread from Episode 2 for yesterday's Don't Call Me Chef column. Here are the links to the episode on YouTube and the recipe from the series website.
I knew I would make a bread and when I saw the peacock-shaped bread, that was the recipe I wanted to try.
Shaping and decorating the peacock
I had to watch bits of the episode a few times to understand how the peacock was shaped. It wasn't complicated but because of the large amount of instant yeast in the dough, it got puffy too quickly in our warm weather. You can bet that I completed this bread way before the show's alloted four hours was up. However, I only managed to fit eight feathers on the body although the recipe called for nine. (The last feather got baked on its own and eaten almost as soon as it came out of the oven.) 
Screen grab of Ruby's peacock bread
Still, I think the peacock didn't turn out too badly. Comparing it against Ruby's (pictured above), it looks almost alike. I probably adorned it more than I should have, and it could have done with a little more browning on top. But all in all, I'm happy with it.

Lunch: Deconstructed sushi

Sunday, November 24, 2013

DECONSTRUCTED SUSHI 
I was going to make sushi rolls for lunch today and then decided to try Ivy's deconstructed sushi (mixed sushi platter), which she wrote about for our newspaper column.
Of course, Ivy uses salmon in her dish and I just have surimi or imitation crabsticks (though they're a good quality variety) – the poor (wo)man's version, I suppose.
I can't believe I actually faffed about with the shredded omelette though. Normally, I would just pour beaten egg into a pan, give it a swirl, then just dump it on a plate. Here, I actually took the time to season the egg and water combination with instant dashi, cooked it over a low heat in a covered pan, rolled it up and sliced it thinly. I have to admit though that the egg had a much better taste and texture.
(I didn't plan it, but doesn't the composition of the photo look like Mickey Mouse falling over after being speared in the ear ?)

Sourdough Surprises: Kolaches

Wednesday, November 20, 2013

SOURDOUGH KOLACHES WITH PASSION FRUIT CUSTARD AND COFFEE-HAZELNUT CREAM FILLINGS 
I don't know if you would call what I made kolaches. The round ones (pictured above) – filled with passion fruit custard – were humungous! I've seen pictures of authentic kolaches and they certainly weren't as big as a newborn baby's head.
That aside, I loved this month's Sourdough Surprises baked goods. I made the kolaches twice, first filling them with a poppy seed-date paste that I had coincidentally made just a few days prior to the announcement of the challenge, and the second time with passion fruit custard and a hazelnut cream.
I also got to use my new brownie/lamington mould. (Seriously, how hard is it to cut out squares from cake? But it's one of those unnecessary things I had to get when I saw it.) I baked those a little too long though so they were a little firmer than I liked.
But what I was happiest about this challenge was that I challenged myself to develop a sourdough sweet enriched dough that I like. I have been working on a naturally raised dough for a while, changing the percentage of the components each time, and I hit the right formula with this one. It has a touch of saffron and cardamom in it 
Kolaches baked in a brownie/lamington mould. These are filled with poppy seed-date paste and topped with cream cheese.
Saffron Sourdough Kolaches
Makes 15


Sponge
45g mother starter (100% hydration)
75g bread flour
75g water

Mix the sponge ingredients in a jug, cover with cling film and set aside until well risen and bubbly, about 8 hours.

Final dough
Pinch of saffron threads (about ½ tsp)
¾ tbsp boiling water
250g bread flour
25g sugar
¼ tsp salt
½ tsp cardamom powder
⅛ tsp active dry yeast
All the sponge (about 180g)
1 medium egg
½ tsp vanilla extract
60g butter, cubed and softened

Fillings and toppings
Date poppy seed paste
Cream cheese, passion fruit custard, nut creams, etc
Jams

Place the saffron threads in a small bowl and pour in the boiling water. Set aside for 10 minutes.
In a large bowl, stir the bread flour, sugar, salt, cardamom powder and dry yeast together. Add the sponge, egg and vanilla, and stir together to form a shaggy mixture. Add just enough water (1-2 tbsp) to bring the bits together into a firm and knobbly ball. Cover and leave for 10 to 15 minutes for the liquid to be absorbed.
Smear the softened butter on the dough and mix together it in until fully incorporated (squeeze with the whole hand and fold several times). 
Rub some water onto a work surface (marble is best). Place the dough on the surface and using wet hands, knead the dough until soft, smooth and elastic, wetting your hands occasionally. This will take 8-10 minutes. Form into a ball and leave on the work surface covered with the mixing bowl until tripled in size. In warm weather, this takes 4½ hours.
Deflate the dough, for into a ball again and place in a greased mixing bowl. Place the bowl in a large plastic bag or cover tightly with cling film and refrigerate overnight.
Divide the dough into 15 even pieces (30-35g each) and form each one into a tight ball. Place on a a parchment-lined baking sheet or into well-greased muffin or brownie moulds. Set aside for 10 minutes, then make a wide indentation in the centre and fill with desired filling.
Meanwhile, preheat the oven to 180°C. Bake the rolls, 20-25 minutes. The tops will be lightly golden.
Remove from oven and cool for five minutes.


The Daring Kitchen loses its co-founder

Saturday, November 16, 2013

I just read today the sad news that Lisa, co-founder of The Daring Kitchen, unexpectedly passed away. I only knew her through her posts and writing, but always enjoyed her humour, wit and the way she made us all get off our butts to join in the challenges. From the comments of the Daring Bakers in the group forum, some of whom knew Lisa well, she was an inspiring and kind person, who was always on hand to help anyone in need. I myself have learned so much from this amazing international and diverse group started by Lisa and Yvonne.

Rest in peace, Lisa.

Tamarind squid pasta

Friday, November 8, 2013

TAMARIND SQUID CAPELLINI 
This is a scheduled post.
I can't believe I have never posted on one of my favourite dishes, tamarind squid chilli pasta. I guess I think of it as everyday food, so it isn't so unusual that it needs to be featured. But I have posted on more mundane things before, and this really is a good, quick recipe, so why not.
If the dish looks a little yellow in the picture, that's because I had "preserved" the squid with turmeric powder. My friend Mumtaj told me about doing this when storing uncooked seafood. 
If there's time, I like to grill the tamarind-marinated squid until blackened and caramelised. That's even more delicious. But when I can't wait, it's a quick stir-fry.

Tamarind Squid Chilli Spaghetti
Serves 2

2 tbsp tamarind pulp or 1 tbsp tamarind paste
200g squid (3 medium), cut into 1.5cm rings (leave tentacles whole)
½-1 tsp sugar (preferably palm sugar)
A dash of white pepper
½-1 tbsp fish sauce
1 tbsp cooking oil
2 cloves garlic, sliced into thin chips
1-2 red bird's eye chillies, minced
1 stalk lemongrass (white part only), sliced thinly (optional)
2 servings of cooked spaghetti or other long pasta (reserve about ¼ cup of the cooking water)

Pour a little warm water on the tamarind pulp. Massage to loosen the seeds and pulp. Reserve the pulp but discard the seeds and tough fibres.
Combine the squid, tamarind pulp or paste, sugar, pepper and fish sauce in a bowl. Cover and set aside for 30-60 minutes.
Heat the oil and add the garlic chips. Fry until golden and crisp. Add the chillies and lemongrass and fry briefly, then add the marinated squid. Toss the squid around until cooked (the tentacles will curl). Add a little reserved pasta water to make it saucy (ahem!), then add the cooked spaghetti. Toss together and serve.

Coconut lime biscotti

Tuesday, November 5, 2013

COCONUT LIME BISCOTTI 
This is a scheduled post.
Biscotti, I think, is almost a dump-ingredients-together-haphazardly type of cookie.
I started off with the recipe for Lime Coconut Biscotti from Taste of Home, and went off it slightly to use what I had at hand.
I suppose having these tropical flavours, especially the lime, makes these biscotti more suitable for eating with a cup of tea. I don't drink tea, so it's coffee for me.

Coconut Lime Biscotti
Makes 2½ dozen. Adapted from Taste of Home.

½ cup sugar
¼ cup neutral-flavoured oil
2 medium eggs
¼ cup lime juice
1 tsp vanilla extract
¼ tsp coconut extract
2¼ cup all-purpose flour
1½ tsp baking powder
¼ tsp salt
1 heaped cup dessicated coconut
1 tsp lime peel zest

Preheat oven to 180°C.
Beat sugar and oil together, then add eggs, lime juice and extracts.
Combine flours, baking powder and salt, and stir together with the wet ingredients until just combined into a sticky dough. Stir in coconut and lime zest.
Divide dough into two portions and place them on a parchment-lined tray, shaping each one into a log. Bake for 20 minutes until set.
Cool slightly and then cut each log on the diagonal into 1.5-2cm slices. Place them cut side down on the baking tray and bake for 10 minutes, turning them over halfway through, until golden brown. remove from tray and cool. Store in an air-tight container.


Ayam Percik

Saturday, November 2, 2013

AYAM PERCIK 
This is a scheduled post.
I did a guest post for Jenni of The Gingered Whisk some time ago with a recipe for Ayam Percik, literally translated as spattered chicken. Mine isn't as "professional" looking as the ones you'd find at the pasar malam (night market), but for a home attempt, it turned out pretty good. Here's the recipe.
Ayam Percik
(Kelantan-style BBQ Chicken)
Serves 4

4 whole chicken legs (use skinless chicken if desired)
3cm fresh ginger, peeled and grated
2 tsp ground turmeric
¾ tsp salt

Marinade
6-8 dried chillies, soaked in hot water to soften
8 shallots, peeled
2 cloves garlic, peeled
¼ tsp belacan (dried shrimp paste)
250ml thick santan (coconut cream)
1 tbsp seedless tamarind paste
6 fenugreek seeds
¾ tsp salt
1 tsp palm sugar
1 tsp rice flour

Clean the chicken, pat dry and make a few slits in the thicker parts. Combine the ginger, turmeric and salt and rub over the chicken. Cover and set aside while you prepare the marinade.
For the marinade, grind/blend the chillies, shallots, garlic and shrimp paste with a little santan. Place this mixture in a pot large enough to hold the chicken together with the remaining coconut cream, tamarind paste, fenugreek seeds, salt, sugar and rice flour. Cook over medium heat, stirring frequently, until the marinade thickens and the oil separates from it (a layer of oil will appear on the surface; this is the coconut oil), about 15 minutes. Taste and adjust seasoning.
Add the chicken pieces to the pot and simmer uncovered, stirring frequently for 20 minutes. (The chicken should be about cooked by this time.)
Remove the chicken from the marinade and grill over hot charcoal or under the oven broiler for 8 to 10 minutes on each side until the chicken is browned, basting it several times with the marinade.
Simmer any remaining marinade over low heat in the pot until it thickens. Spoon it over the cooked chicken and set aside for 10 minutes to allow the chicken to cool. Serve with rice.

Black sesame and chocolate twist

Thursday, October 31, 2013

BLACK SESAME AND CHOCOLATE TWIST 
I noticed that the black sesame paste (from yesterday's post) that I had made months ago (it keeps well!) was still in the fridge, and I needed to use it up. After weeks of not having much time and only cooking daily meals, I have plunged elbow deep into dough with a vengeance this past week, and so decided to use the sesame paste as a filling for a loaf. 
Since I couldn't leave well enough alone, I added some black-and-white mini chocolate chips to the filling.
The next few posts will be scheduled as I may not be able to blog for some time. And this would be a good time to clean up my Draft folder in Blogger, so these posts will just have a short intro with a picture and recipe. I've had some drafts for over a year!

Black Sesame and Chocolate Twist
Makes 1 large loaf. Serves 10

½ batch basic sweet dough
¼ cup mini chocolate chips

Line base and sides of a large loaf tin with parchment paper.
Roll out the dough into a 20cm by 25cm rectangle. Spread with sesame spread and sprinkle the chocolate chips on top.
Beginning from one long end, roll up into a tight Swiss roll. Slice through the middle of the roll lengthwise into two. With the cut side up, twist them together into a rope. Place in the prepared tin, cover and leave to rise to the top of the tin.
Alternatively, shape it into a round like this Russian Rose Braid.
Meanwhile preheat the oven to 180°C. Bake the bread, 30-35 minutes.

Black sesame spread

Wednesday, October 30, 2013


BLACK SAND OR DELICIOUS BLACK SESAME SEED PASTE?
This post is a prelude to my post tomorrow, which is for a recipe using this black sesame seed spread. 

Black Sesame Spread

150g black sesame seeds, rinsed and well drained
100g sesame seeds, rinsed and well drained
50g toasted peanuts, skinned
3-4 tbsp soft brown sugar
1 tbsp milk powder
3 tbsp canola oil

Combine both types of sesame seeds in a clean wok. Fry without oil over low heat until fragrant. Dish out and leave to cool.
Place peanuts in a food processor. Blend until fine. Add all the sesame seeds. Continue to process until fine.
Add milk powder and soft brown sugar. Drizzle in oil. Continue to blend until smooth.
Remove and store in a sterilised clean jar. Can keep for several months in the fridge.

Halloween spider monkey bread bowl

Sunday, October 27, 2013

DISEMBOWELLED FRANKENSPIDER ~ IT'S CHEESY ALL RIGHT 
Most of the time, Halloween-themed food isn't scary – it's cute. And that's what my colleagues and I came up with for our newspaper's Halloween photo spread recently – although there was one that I think was a little gorier than others (look at the photos and you'll probably be able to tell. Hint: fingers and eyeballs).
What was disturbing was the fact that grown women had so much fun making the dishes!
I made cheesy monkey bread in the shape of a spider with leggy breadsticks and a built-in cavity for the dip. You can find spider bread bowl dips all over the Internet – I just made mine into bread that you could pull apart into individual cheese-coated pieces.  
Here are my own pictures of the dishes we made for the spread.
Halloween spread
For professionally taken pictures by The Star photographer Yap Chee Hong, go to the link above (the print version of the article was beautifully laid out). Chee Hong really took his time to get the best shot for each dish. The only downside is we had to wait ages before we could get at the food! My "spider gut" cheese dip had congealed by then, but it didn't matter one solid glob.
Spider-shaped Monkey Bread Bowl
Serves 12

1 quantity buttermilk bread dough
150g unsalted butter
1 cup finely grated Parmesan cheese
2-3 tbsp minced fresh parsley
2 tsp garlic powder
1 cup shredded cheese (eg. Mozzarella, Cheddar)

Additional stuff
Toothpicks
Marmite or other black ingredient for decoration
Chilli-cheese dip
Chilli or tomato sauce

Grease a large baking sheet and a medium oven-proof mixing bowl (or use a domed-shaped baking mould). Cover the outside of a small ramekin with foil and grease the foil.
Remove ⅓ of the dough and divide into eight equal portions. Roll each portion into 20cm lengths, tapering the ends if desired. These are the spider's legs.
Melt the butter in a small saucepan. Let it cool slightly (it should still be a little warm).
Combine the Parmesan cheese, parsley and garlic powder in a bowl.
Dip each leg into the melted butter and then coat in the Parmesan-parsley mixture. Lay the leg on the baking sheet in a curvy "V" shape. Repeat with the other legs. Cover the sheet with a clean tea towel.
Remove a small portion from the remaining dough and form into balls for the spider's head and bulging eyes. Dip the top of the head in the melted butter and sprinkle with Parmesan-parsley mixture. Place on the baking sheet with the legs.
In the meantime, preheat the oven to 190°C. Place the foil-covered ramekin upside-down in the middle of the prepared mixing bowl (or domed-shaped baking mould).
Press out the large portion of dough until about 1.5cm thick. Slice into 1.5cm squares. Dunk a few pieces into the melted butter, then coat with the Parmesan-parsley mixture. Put a layer of the dough into the bottom of the mixing bowl around the ramekin and sprinkle with a little shredded cheese. Continue layering the coated pieces of dough and cheese. The final layer should cover the upturned ramekin. Cover the bowl with a tea towel.
By this time, the legs and head will be ready for the oven. Bake until golden and crisp, 10-12 minutes. remove from the oven and cool on a wire rack.
Bake the spider's body until golden. Cool in bowl/mould for 10 minutes, then upturn onto a wire rack. Remove the ramekin. If the body is pale, return to the oven (without the bowl/mould) to brown.
Assembly
Place Spidey's body on a serving platter/board. With a paring knife, make eight slits in the form of a small "X" about 3cm from the top and equal distance apart around the body. Poke one end of the legs into the X's. One or both of the front legs can be in the air for a bit of drama.
Dot Marmite on the eyes for the irises and eyebrows. Carve out sharp teeth on the head and colour with chilli or tomato sauce. Attach head to the body with toothpicks.
Insert a ramekin or other small container into the cavity and fill with dip. Serve the spider.
Note: Next time, I'll try making this free-standing instead of moulding it in a bowl so that the individual dough pieces can puff up and the body of the spider will be knobby instead of smooth.

S-shaped filled loaf

Friday, October 25, 2013

S'WONDERFUL, S'MARVELLOUS, S'AWFUL NICE BREAD 
The Gershwin standard 'S Wonderful was playing in my head the whole time I was shaping this loaf (I love the Ella Fitzgerald version).
Filled and flavoured breads are nice to eat, but they're better – even if it's just psychological! – when they come in unusual shapes. It's like the song says, "S'what I like to see".
I started out having made a buttermilk and egg-enriched bread dough and was going to shape it into a loaf with a spiral of oven-dried cherry tomatoes and cubes of fried eggplant in the centre. It would be baked in a loaf tin. Then I looked around online and saw several loaves in an "S" shape, and the recipes all originated from King Arthur Flour's tomato, basil & garlic-filled pane bianco.
Well, that would be perfect for my loaf!
Fill, roll, shape, slice
Besides the tomatoes and eggplant in my filling, I roasted a whole head of garlic and store-bought salted fish pickle (acar) and both were mashed to smear on the dough.
The dough is rolled out into a rectangle and half of it is smeared with the salted fish, which is mashed into a paste –  I use it as a substitute for anchovy paste or tapenade. On top of that, I sprinkle the eggplant cubes (pic 1).
And then the uncovered half is folded over the filling. It is spread with the garlic paste and chopped oven-dried tomatoes are sprinkled on top (pic 2). Doing the double layer distributes the fillings more evenly, I think.
The rectangle is rolled up (pic 3) before being shaped into an "S". In the King Arthur instructions, the Swiss roll is sliced down the middle lengthwise before the shaping, but after reading the problem this blogger had and how she fixed it, I followed her cue and shaped the loaf (pic 4) before making the parting (pic 5).
I've used the same dough for another shaped bread. Tomorrow, my newspaper will run a photo spread on food as a run-up to Halloween, and a few of my colleagues and I came up with an item or two. A professional photographer took the pictures and the layout in print is really nice, so if you get the chance, do have a look at The Star.
S-shaped filled loaf
S-shaped Tomato and Eggplant Loaf
Makes 2 medium loaves

Buttermilk dough
350g flour
1¼-2 tsp active dried yeast (see note below)
2 tsp salt
1 tbsp sugar
1 tbsp oil
200g buttermilk
1 medium egg

Filling (quantities at one's own discretion)
Fried eggplant cubes
Oven-dried cherry tomatoes
Roasted garlic, mashed into a paste
Salted fish pickle, mashed into a paste

Combine the flour, yeast, salt and sugar in a mixing bowl.
Combine the oil, buttermilk and egg in a jug. Add to the dry ingredients and mix into a dough. Add more water or flour as needed to form a soft dough. Knead with your desired technique to develop the gluten. Set aside to rise.
Divide the dough into two equal portions. Roll out one portion into a rectangle and layer the fillings as desired. Roll up into a Swiss roll and shape into an "S". Slice through the centre of the shape halfway down so the top opens out and the layers can be seen.
Do the same with the other portion of dough, or use it for another kind of bread.
Preheat the oven to 190°C. Bake the bread for 30-35 minutes until nicely golden on top and cooked through.
Note: I use the lesser amount of yeast as the dough is proofed in the fridge overnight. If making the loaf on the same day, you could use up to 2 tsp of yeast.

Frankenflowers: Cinnamon chrysanthemums

Saturday, October 12, 2013

CINNAMON CHRYSANTHEMUMS 
I have been away from this space for a while now. Have had to concentrate on work. Not that I hadn't before; there have just been changes – as many newspaper companies all over the world have been going through lately – and things have been more hectic than usual. Plus my Internet connection at home was down for more than a week because I didn't have time to even call up my provider to see to the problem.
Anyway, I have returned to my wayward oven with a bread roll that I have been meaning to try out for some time. They're made with a sweet dough which I based on a recipe by Peter Reinhart but with changes such as using condensed and evaporated milks – only because I had some sitting in the fridge and couldn't think of what to use them for. The flowers are shaped from 5cm-wide strips of dough. These are dipped into melted butter and cinnamon sugar, and then a deep fringe is cut along the length of the strip before they are rolled up. The "petals" are then splayed out, and left to rise before baking. I saw the instructions here.
I think my chrysanthemums look a little mutated – a Franken version of the flowers. Maybe I should make them for Halloween and call them centispiders or spiderpedes or something else as spooky. Perhaps put in some beady eyes and fangs...

Daring Bakers: Pastel de Tres Leches

Friday, September 27, 2013

THREE MILK CAKE WITH COCONUT 
I have wondered what a tres leches cake would taste like ~ actually it was more the texture that I was worried about. Would it be soggy? Would it be too sweet with all that condensed milk in it? So although I was curious, I never really wanted to find out and perhaps waste a cake. Until this Daring Baker's challenge.
Inma of la GalletIKA was our September 2013 Daring Bakers’ hostess and wow, did she bring us something decadent and delicious! Pastel de Tres Leches or Three Milk Cake: creamy yet airy, super moist but not soggy ... just plain delish!
According to Inma, her recipe was slightly adapted from the one given by one of Mexico's best pastry chefs, Paulina Abascal, to the magazine Revista Secretos de la Pastelería Caserais.
Being the coconut fiend that I am, of course I made the coconut tres leches cake variation that Inma provided. I changed the recipe slightly, scaling it down by about half (using three medium eggs instead of five large ones), including some rice flour in the mix and adding coconut extract for flavour. This was certainly a light, airy sponge.
The cake was baked in a log shape in what is called a "half roll bake pan". I saw it one day and bought it thinking I would use it all the time, but haven't. It does make a nice looking cake with the fluted top, which also makes dividing the cake very easy. However, after spreading the topping on, that was all lost. (A week later, I made the cake again, this time in a rectangle baking tin.)
Looking at Inma's recipe, I thought there was just too much leche, so I used just a quarter of what was called for in her original recipe. Maybe the larger amount was necessary, but I really didn't want to end up with too much extra milk. Having said that though, the mixture was absolutely delicious! I bet it would make superb ice cream. (And I used the leftover as a topping for butterscotch banana sourdough pancakes.) 
A cake filled with three kinds of milk, and decorated with pastry cream and coloured dessicated coconut
Coconut Pastel de Tres Leche
Three-milk cake with a touch of chocolate. Serves 10-12

3 medium eggs, separated, at room temperature
Pinch of salt
60g caster sugar
½ tsp each vanilla extract and coconut extract
65g all-purpose flour
1 tbsp rice flour
1½ tbsp cocoa powder mixed into a paste with 2 tbsp water

Filling
100ml condensed milk (or condensed filled milk)
90ml fresh coconut milk (or a good quality canned or boxed one)
60ml evaporated milk (or evaporated filled milk)

Topping
Whipped cream or pastry cream
Toasted shredded or dessicated coconut

Preheat oven to 180°C. Grease a half roll bake pan (or similar sized pan) well.
Beat the egg whites with the pinch of salt until they form soft peaks, about 2 minutes. Gradually add the sugar and beat on medium high speed until they form stiff peaks, 3-5 minutes.
Beat the egg yolks until they are pale and thickened, and leave ribbons when the whisk is lifted, 3-5 minutes. Quickly beat in the extracts.
Add the beaten yolks to the whites and fold together with a large rubber spatula. They do not have to be completely blended at this time.
Stir the flours together and sift over the eggs. Fold in quickly but gently to keep the mixture from deflating. Fold in the cocoa paste (it's okay of it's streaky).
Transfer to the prepared tin, level the top and bake until risen and and springy, and a toothpick inserted in the centre comes out clean, 20-25 minutes.
Cool in the pan, then invert onto a wire rack. Place rack over a large baking pan. With a skewer or fork, poke holes all over the cake right down to the bottom.
For the filling, heat the three milks together with a pinch of salt until the mixture comes to a boil. Lower the heat and simmer for a further 3 minutes. Take off the heat and leave for 5 minutes.
Spoon a third of the warm milk over the cake and leave for 10 minutes. Repeat this two more times. (As the milk sits, it will thicken, so after the third application, it will leave a sticky topping on the cake.) Don't forget to spoon the milk that drips down into the baking tray below the wire rack back onto the cake.
Refrigerate the cake overnight for the milk to soak in thoroughly.
Spread whipped cream or pastry cream over the cake, and decorate with toasted coconut.

Everything-but-the-kitchen-sink flapjacks

Monday, September 23, 2013

EVERYTHING-BUT-THE-KITCHEN-SINK FLAPJACKS 
Why aren't rolled oats sold in smaller packets, say, 250g? I mean, how much oats can one person eat? I'm not a horse.
All right, I know I'm complaining about nothing really. Although I sometimes do have a problem using up half a kilo of rolled oats. Especially since I tend to forget it's there.
Today, I took the day off work since I worked last weekend. I woke up really hungry and since I didn't have anywhere to go  I love staying at home and don't leave it unless I absolutely have to!  I looked through the food store and fridge for something to eat and found a number of things.
On their own, each one was not breakfast material. But put those bits of nuts, chocolate, dried fruit and rolled oats together, and here was something I could pour milk on and eat like muesli. But even better, muesli bars or flapjacks! Something I could keep for those mornings when I am in no mood to butter my toast.
Pureéd dates are the glue that holds these bars together and rolled oats form the bulk. There are no eggs or flour, so the mixture can be eaten raw. I put in whatever I thought would taste good in the mix, hence the everything-but-the-kitchen-sink reference. I didn't add any kind of sweetener since the dried fruit were sweet enough for me. These bars are chewy and crunchy too from the nuts and seeds.
Still have about two cups of rolled oats to use up though. Any ideas?
Chewy and crunchy breakfast bars
Everything-but-the-kitchen-sink Flapjacks
Makes 20 (roughly 3cm by 6cm) bars

1 cup pitted dates
1 cup rolled oats, toasted
1 cup dessicated coconut, toasted
½ cup mashed banana
½-⅔ cup miscellaneous ingredients (a combination of seeds, chopped nuts, chocolate, dried fruit)*
½ tsp ground spice*
Liquid sweetener to taste (honey, agave nectar, jam etc), if required

Preheat oven to 180°C. Line base and sides of a 21cm square pan (or equivalent size) with greaseproof paper.
Pureé the dates with a tablespoon of warm water. Transfer to a mixing bowl and add oats, coconut, banana, miscellaneous ingredients and ground spice. Stir together until the mixture clumps together. Taste; add sweetener, if required. If mixture is crumbly, add a little more pureéd dates, sweetener, or a neutral-flavoured oil (or coconut oil).
The mixture should clump together. Press firmly into a tin before baking. 
Tip into the prepared pan and press down firmly with your palm or the back of a spoon to level the surface and compact the mixture. Bake for 25-30 minutes until golden. Leave in the tin to cool slightly, then score into bars. Cool completely before storing in an air-tight container.
* My miscellaneous ingredients were: walnuts, white chocolate, crystallised ginger, candied winter melon, toasted white sesame seeds, flax seeds and black sesame seeds. I used allspice in the mix, and sprinkled some cinnamon on top before baking the flapjacks.

Sourdough Surprise: Butterscotch plantain pancakes

Friday, September 20, 2013

BUTTERSCOTCH PLANTAIN SOURDOUGH PANCAKES 
I am not kidding when I say the plantain was as long as my arm – there it is in the picture below. It's called pisang tanduk or horn banana in Malay for good reason.
I wanted to make a curry or plaintain chips and you need still green bananas for that, which this one isn't. So I ended up making fritters.
My mother got the banana at the farmer's market. The thing is,I didn't just have one banana, not even two. My mother got three and each one weighed about 400g! Needless to say, I had to find a few more uses for the giant bananas beyond fritters.
So pancakes it was since Sourdough Surprises suggested pancakes and waffles with unusual flavours for this month. (I wish I had a waffle maker because I would have liked to try the plantain in waffles instead.) To give it a boost, I was inspired by Dan Lepard's recipe for a butterscotch banana cake in his book, Short and Sweet, and cooked the banana in a sugar syrup before adding to the pancake batter. I used condensed milk instead.
What a stack! Pour on tres leches and dig in. 
I'm happy with how these pancakes turned out. I ate them with a three-milk mixture (tres leches; from an upcoming recipe) of condensed, evaporated and coconut milks.
After seeing what the Sourdough Surprises group came up with, I really need to get a waffle maker!


Pan-fried steamed buns

Tuesday, September 17, 2013

PAN-FRIED STEAMED PAU 
The chilli sauce in the picture looks like a Chinese character, doesn't it? I just hope I haven't scribbled (more like dribbled) a bad word!
And the chopsticks? They're obviously a prop since I can't pick up anything as big as the steamed buns with chopsticks. 
I am no expert maker of pau or steamed buns, but if I'm feeding myself, these are good enough. I like these two-in-one pan-fried and steamed buns – they are placed in a little oil to brown the bottom and then water is poured into the pan so the pau are steamed until done.
Filling ingredients for pan-fried steamed pau
I use a mushroom filling with lots of different vegetables thrown into the mix for taste and texture.
What's important is the type of flour that is used. Water Lily or Hong Kong flour is a fine, low-protein flour which makes the pau fluffy. It's also bleached, however. With buns that are only steamed, apparently if you put a few drops of white vinegar in the steaming water, it keeps the buns white.
After the bottom is fried, water is added to the pan to steam the buns
Pan-fried Steamed Buns
Makes 6 medium buns

Filling
1 tbsp sunflower oil
1 tsp sesame oil
2 cloves garlic, minced
4-5 shiitake mushrooms, thinly sliced
¼ cup julienned carrot
½ cup shredded cabbage
¼ cup thinly sliced snow peas
1 spring onion, white part, chopped
2 tbsp oyster sauce

Buns
150g pau flour (Water Lily or Hong Kong flour; low-protein flour)
1 tsp baking powder
½ tsp instant yeast
1 tbsp sugar
½ tbsp oil
A drop of alkaline water (air abu), optional
70ml water, approximate
Neutral-flavoured oil (like corn or vegetable), for brushing

Assembly and cooking
1½ tbsp hoisin sauce
1 tbsp sunflower oil
1 tsp sesame oil
1 tbsp sesame seeds, optional
1 tbsp all-purpose flour mixed with 1 cup water
1 spring onion, green part, chopped
Chilli sauce, to serve

To make the filling, heat oil and sesame oil in a frying pan. Sauté the garlic briefly and then add the other ingredients. Toss briefly and then remove to a plate to cool.
To make the buns, sift flour and baking powder into a mixing bowl. Stir in instant yeast, sugar, oil and alkaline water. Gradually add water and continue mixing to form a firm ball.
Transfer dough to a work surface and knead until smooth and elastic, five to eight minutes. Cover dough with a damp tea towel and allow to rise until twice its size.
Scale dough into six equal pieces and form into balls. Cover with a damp tea towel and set aside for five minutes.
To assemble, roll out each ball into a circle about 8cm wide. Brush the centre of the circle with a little hoisin sauce and place a mound of filling on it. Gather up the edges and pleat neatly (or just press together and twist!). Press the bottoms of the buns in the sesame seeds, if using.
To cook, heat the oil and sesame oil in a large lidded pan. Place the buns in the pan and cook until the bottoms are crisp and a deep brown. Pour in the flour solution and cover the pan to steam the buns. Leave until puffed up and water has evaporated, six to eight minutes. Sprinkle with chopped spring onion and serve immediately with chilli sauce.