The Oven has baked its last loaf. This blog is no longer being updated.

My cooking videos appear at youtube.com/janeragavan

I write on food at star2.com

Showing posts with label dessert. Show all posts

Ginger: naked, cordial, and in a cookie

Sunday, June 1, 2014

Continuing my use of Australian-made ginger products, I've made madeleines. They have three types of ginger in them ~ crystallised, powdered and cordial ~ as well as almond meal. The recipe is the result of blending a number of different ones to come up with something that works for me and with the ingredients I wanted to include in this cookie. I've used a silicone mould ~ each of the nine scallops in it is 7cm long and 4cm at its widest.


Three-times-the-Ginger Almond Madeleines
Makes 17

Prep: Mince 75g crystallised ginger. Melt 75g butter and cool.
1. Stir together 50g all-purpose flour, 50g almond meal, 1 tsp ground ginger and the minced ginger until well combined.
2. Beat 2 medium eggs and a pinch of salt until foamy. Add 75g caster sugar, and whisk until the ribbon stage, 12-15 minutes. Whisk in 1 tbsp ginger cordial.
3. Fold in the flour mixture quickly but gently, and then the melted butter. Cover the bowl with cling film and refrigerate overnight.
4. Preheat the oven to 190 degrees Celsius. Grease a silicone madeleine mould well (I used coconut oil). Fill the moulds three-quarters full of batter (place mounds in the centre of each mould; they will spread out naturally) and bake until madeleines are springy and brown, about 12 minutes. Remove from the mould and cool. Best eaten the same day.
Note: If using only one mould, allow to cool slightly and grease it again before filling. Refrigerate the batter while one batch is baking.

Upside-down cake in a ring

Thursday, April 17, 2014

Is it right to mess with a classic? Should the traditional look of a pineapple upside-down cake be altered? Well, I think if I can get more pineapple in every bite, then it's forgiveable. Normally, the cake has full rings on it, but an American chef ~ darn it, I cannot remember who it was other than that it was a lady ~ gave this suggestion of using pineapple ring halves so that the whole surface of the cake would be covered in the fruit. About using a ring pan instead of a round or square one, well, I had to for practical purposes: the middle of my cakes sometimes don't cook because of my wonky oven. One final change to the classic recipe: it's not a sponge cake; it's made with a sour cream pound cake batter. A little heavier, but it still managed to absorb all the lovely brown sugar syrup.

Daring Bakers: Beautiful breads

Sunday, March 2, 2014

A LOVE FOR BREAD ART 
Beauty surrounded the Daring Bakers this month as our host, Sawsan, of chef in disguise, challenged us to make beautiful, filled breads. Who knew breads could look as great as they taste?
This was the brief for the February challenge and it was a challenge I really enjoyed. I still like the whole breadmaking process even after making breads for so long, but I have wanted to it to be a little "different" and bread art is the perfect way to liven it up a bit.
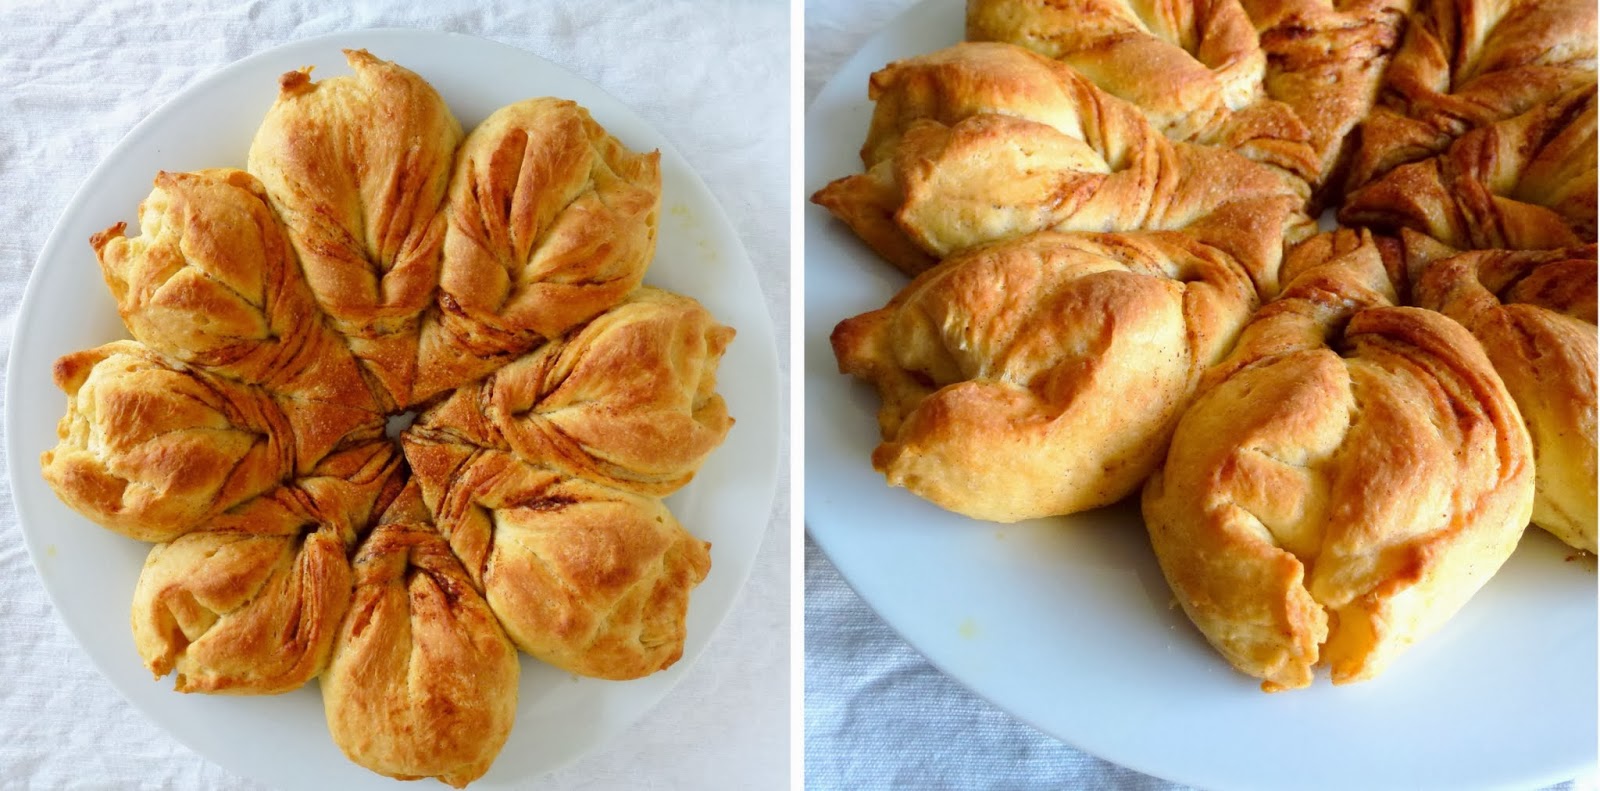
Cinnamon sweet bread
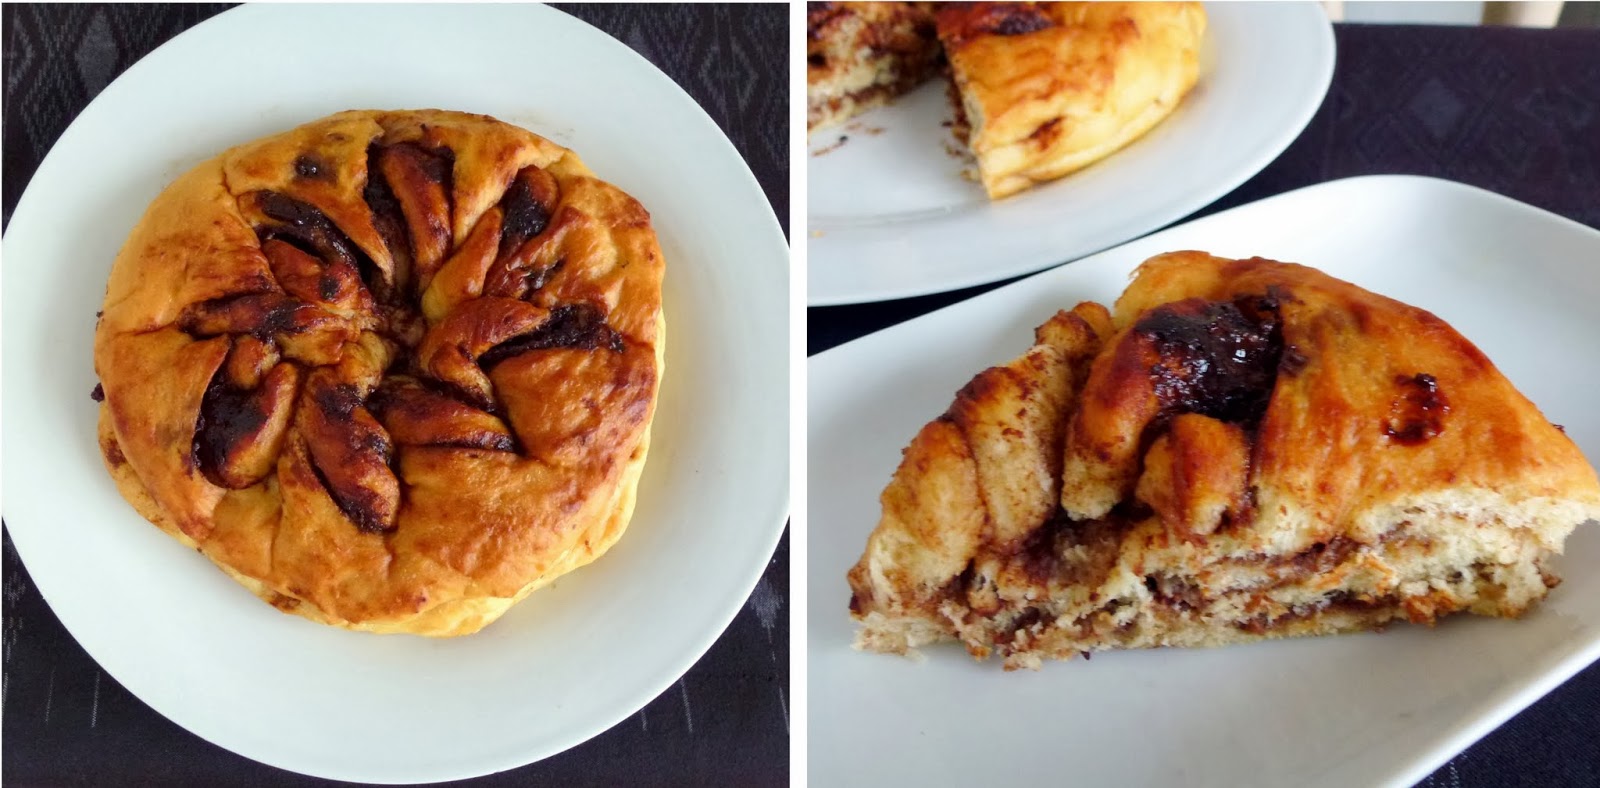
Sawsan gave recipes and showed us how to shape two breads: one is a cinnamon sweet bread and the other a Nutella twist. I used my own recipe for the dough but filled and shaped them as suggested. Because my loaves were smaller, I couldn't make enough slits in my Nutella bread (pictured below) to get properly shaped twists. But even with a less elaborate pattern, I still liked how the bread turned out.
Nutella twist
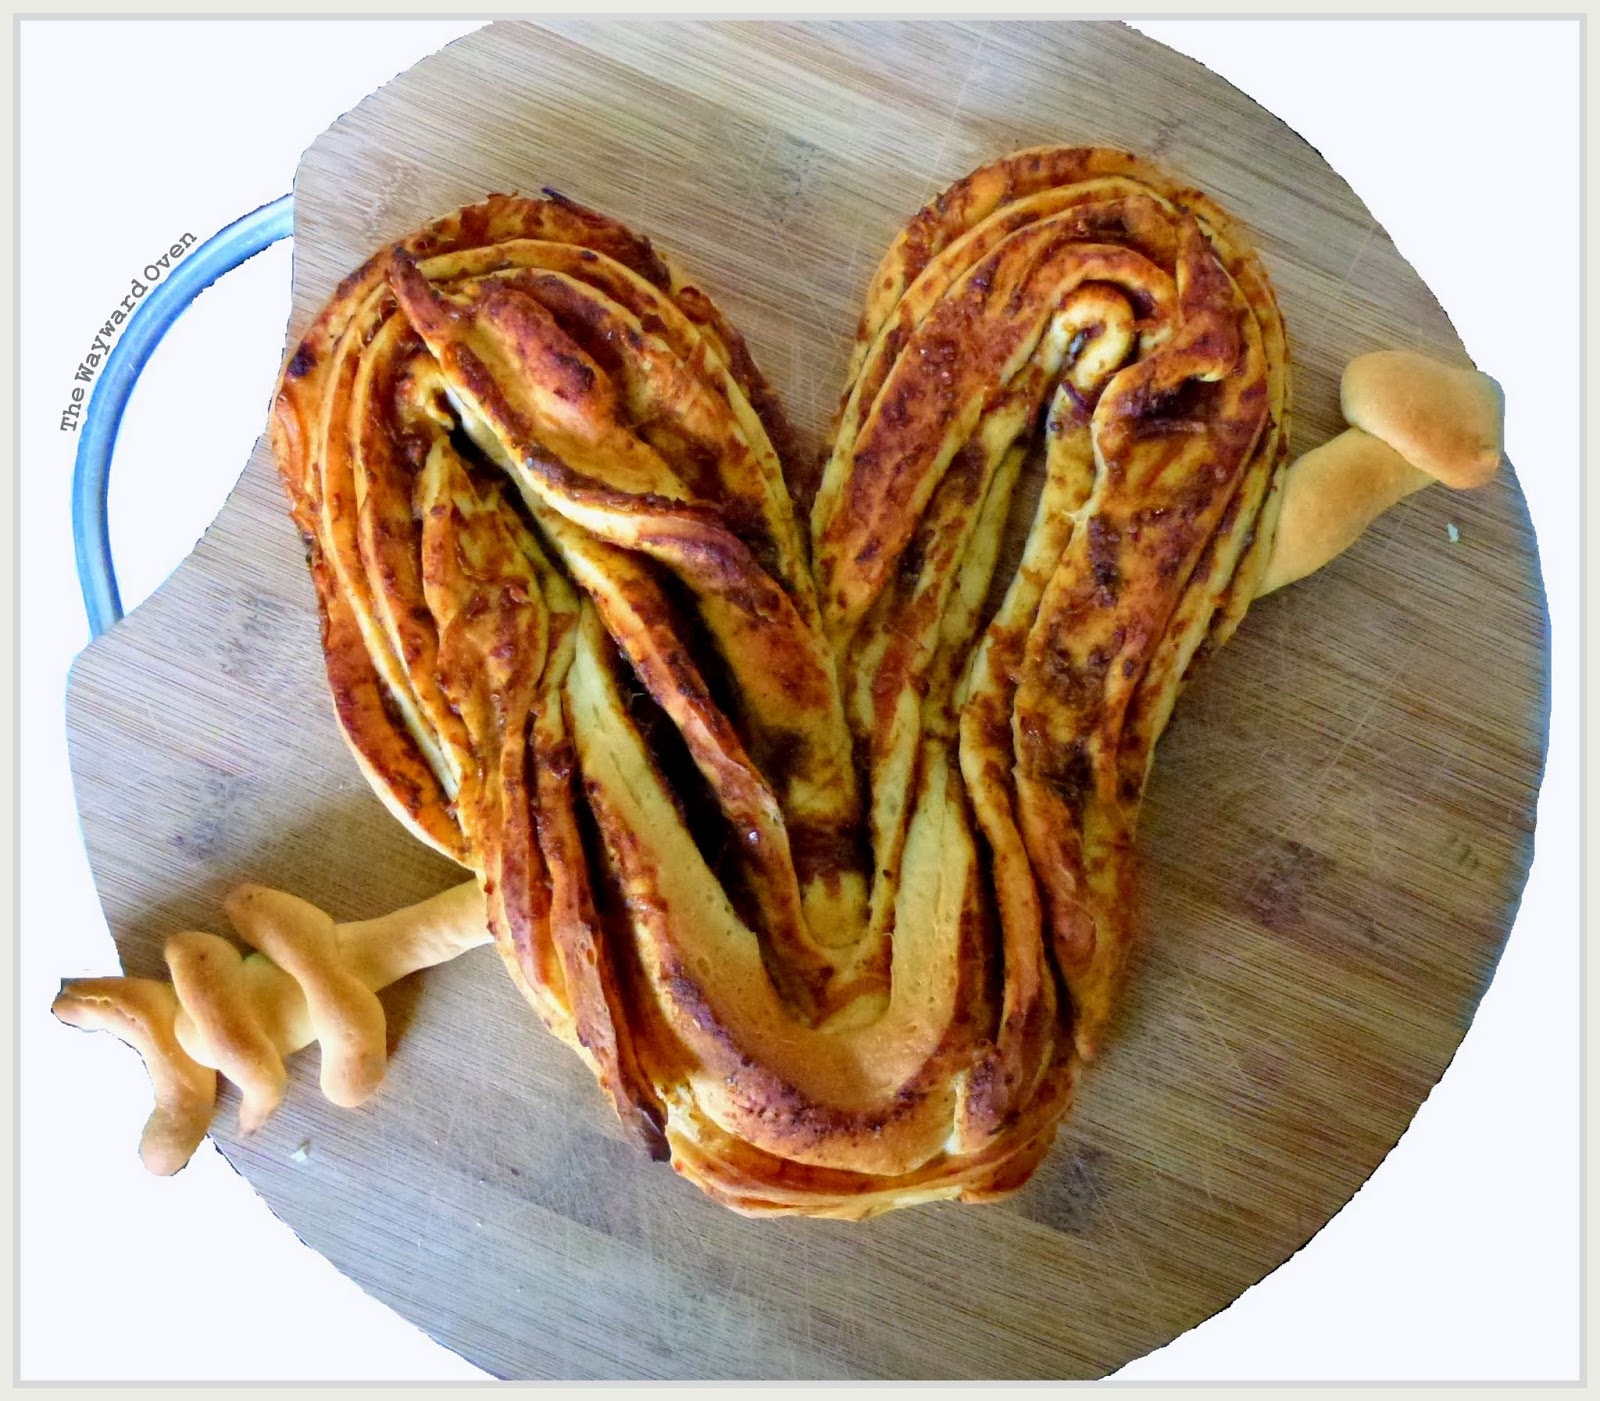
This year, Valentine's Day coincided with Chap Goh Meh (lovers' day in Chinese custom) and my section head decided we would have an office party to celebrate it. With the love theme, how could I not come up with a heart-shaped item?
Of course, it had to be bread. It's filled with a savoury chilli-date paste and shaped using instructions from this site. I added Cupid's arrow, although it is a little misshapen!
I will definitely be trying out more bread art from now on.

Year-end baking disasters

Sunday, December 29, 2013

PEPPERMINT MERINGUE MICE ~ THE ONES THAT SURVIVED 
Unless my oven goes completely kaput, I see my baking in the last few days of 2013 to be mishap-free – although for my own self, I foresee hands and arms with inevitable burns due to my inherent ability to get into accidents.
My last few baked dishes, however, have been quite terrible. The peppermint meringue mice in the picture above received some compliments, but these were the ones that survived the journey from my home to the office where we were having a Christmas pot luck. Most had cracked or lost their ears and tails. But that probably saved everyone from eating them because they were so tooth-achingly sweet!
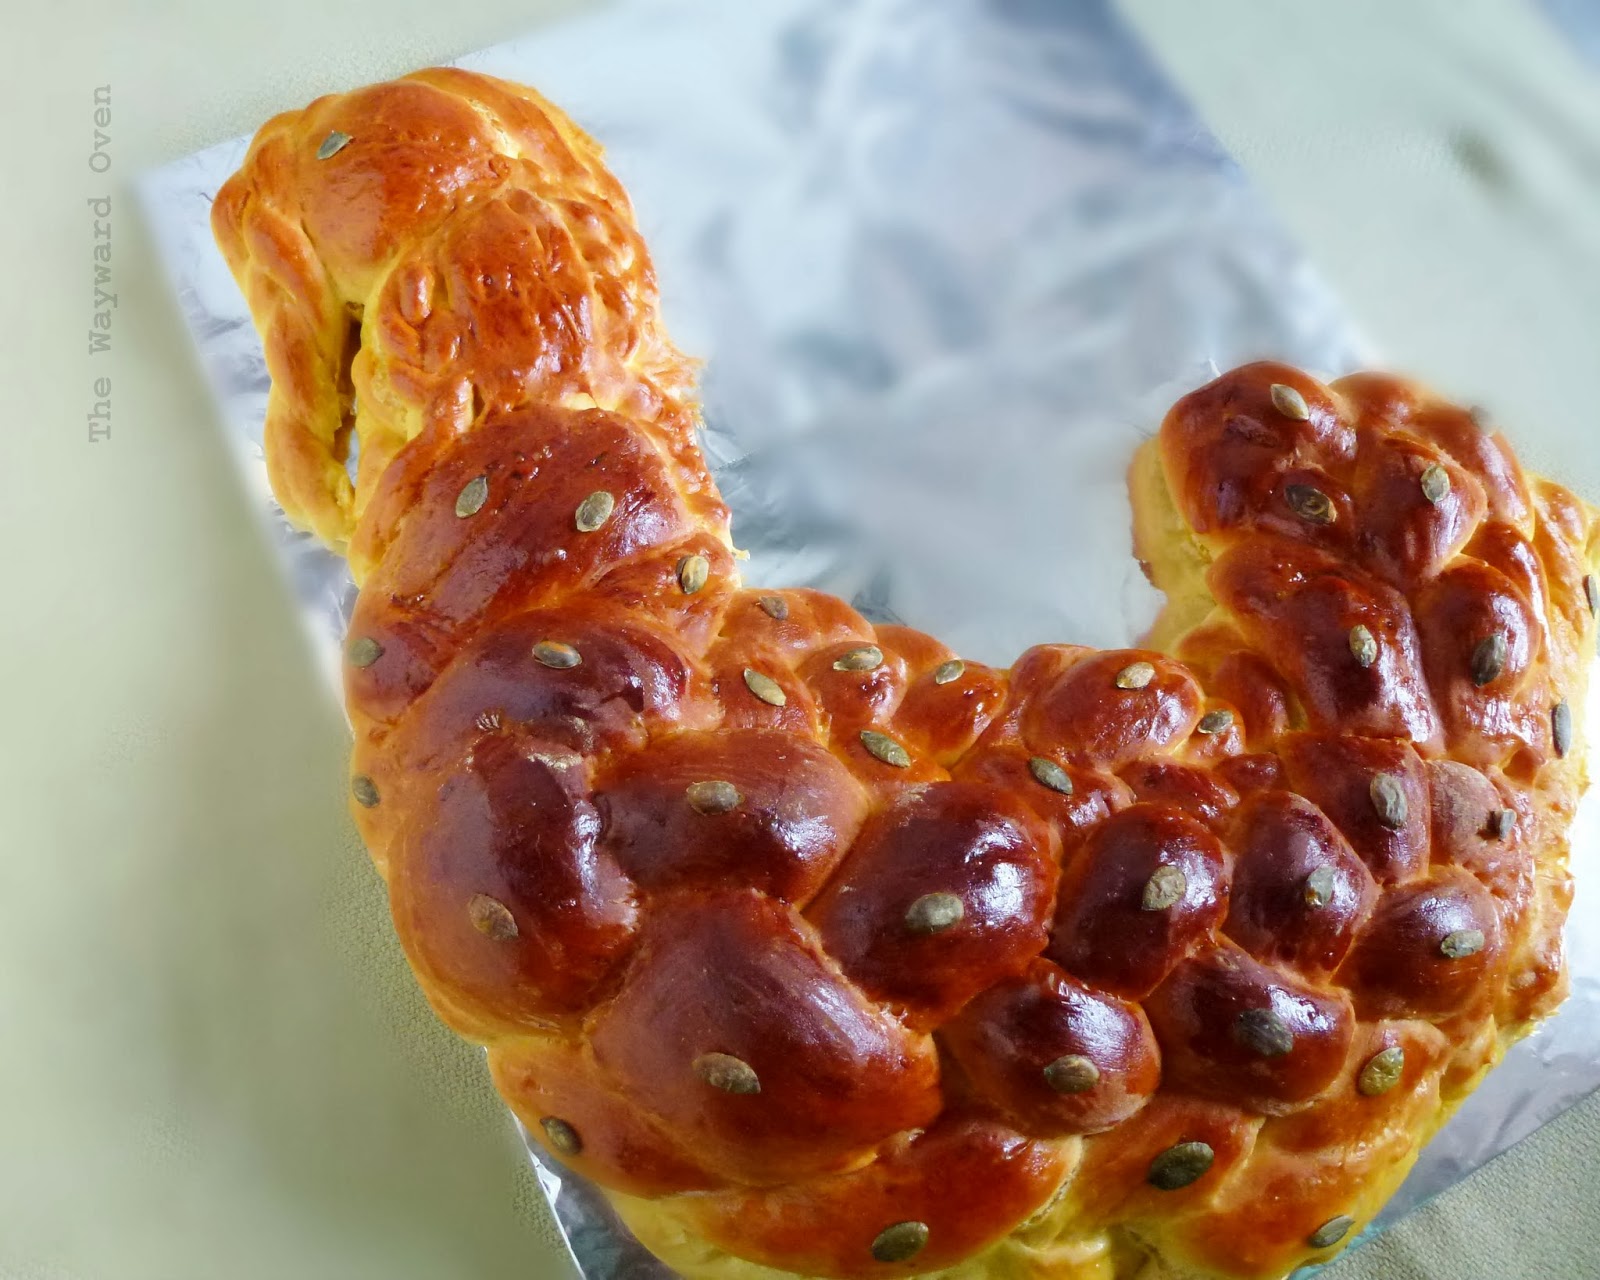
I only made them to use up the leftover egg whites after using the yolks for a turkey-shaped challah I was determined to make.
Shaping the turkey-shaped challah
The loaf started out fine. I followed the instructions for what this site called the "Turkallah" although I changed a little of the head and neck. 
The problem started when the loaf was ready for the oven. I normally bake free-standing loaves directly on a heavy upturned baking tray that I place in the oven when I am preheating it. This is how I was going to bake the turkey loaf as well. 
But then, I clumsily slid the loaf into the oven and part of it hit the side and was distorted. I tried my best to reshape it on the hot baking tray, but unfortunately, the turkey lost its beak.
The turkey loses its beak.
I took the loaf to the office pot luck and no one could figure out what it was. One colleague said it looked like a dragon and another thought it was a Christmas stocking. Thank goodness, it was cooked well and tasted good.
But the worst was yet to come.
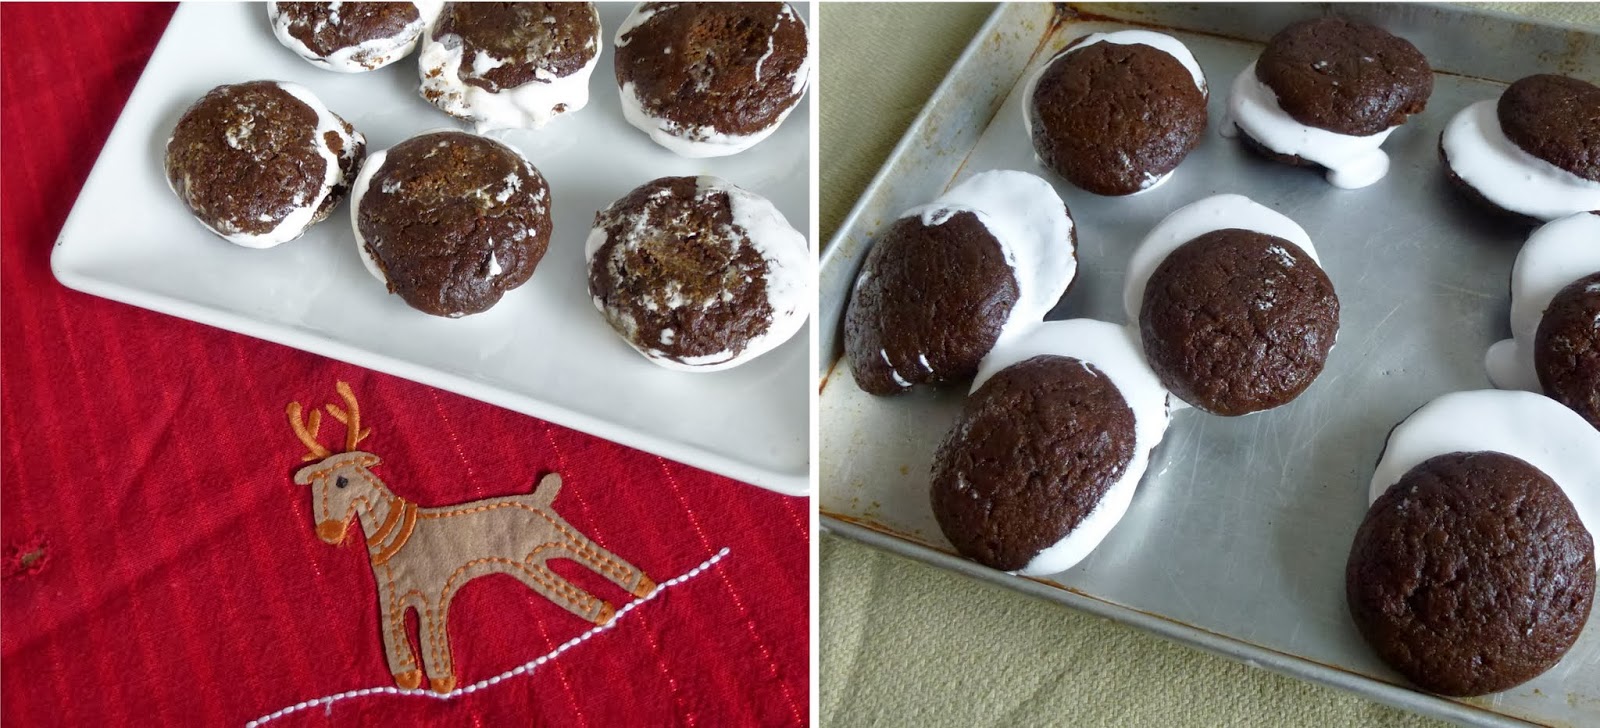
The whoopie pies disassembled themselves after sitting for a while (right).
The gingerbread whoopie pies with marshmallow fluff filling I made for the Daring Bakers challenge were a disaster. The marshmallow fluff was stiff enough after I had made it, but it turned liquid a few minutes after the cookies were sandwiched together. Refrigeration didn't help. So just for the picture, I squeezed them into shape. Shortly after the picture was taken, they slid apart again.
Here's wishing everyone a Happy New Year, and may all your baking be excellent!

Daring Bakers: Pastel de Tres Leches

Friday, September 27, 2013

THREE MILK CAKE WITH COCONUT 
I have wondered what a tres leches cake would taste like ~ actually it was more the texture that I was worried about. Would it be soggy? Would it be too sweet with all that condensed milk in it? So although I was curious, I never really wanted to find out and perhaps waste a cake. Until this Daring Baker's challenge.
Inma of la GalletIKA was our September 2013 Daring Bakers’ hostess and wow, did she bring us something decadent and delicious! Pastel de Tres Leches or Three Milk Cake: creamy yet airy, super moist but not soggy ... just plain delish!
According to Inma, her recipe was slightly adapted from the one given by one of Mexico's best pastry chefs, Paulina Abascal, to the magazine Revista Secretos de la PastelerĂ­a Caserais.
Being the coconut fiend that I am, of course I made the coconut tres leches cake variation that Inma provided. I changed the recipe slightly, scaling it down by about half (using three medium eggs instead of five large ones), including some rice flour in the mix and adding coconut extract for flavour. This was certainly a light, airy sponge.
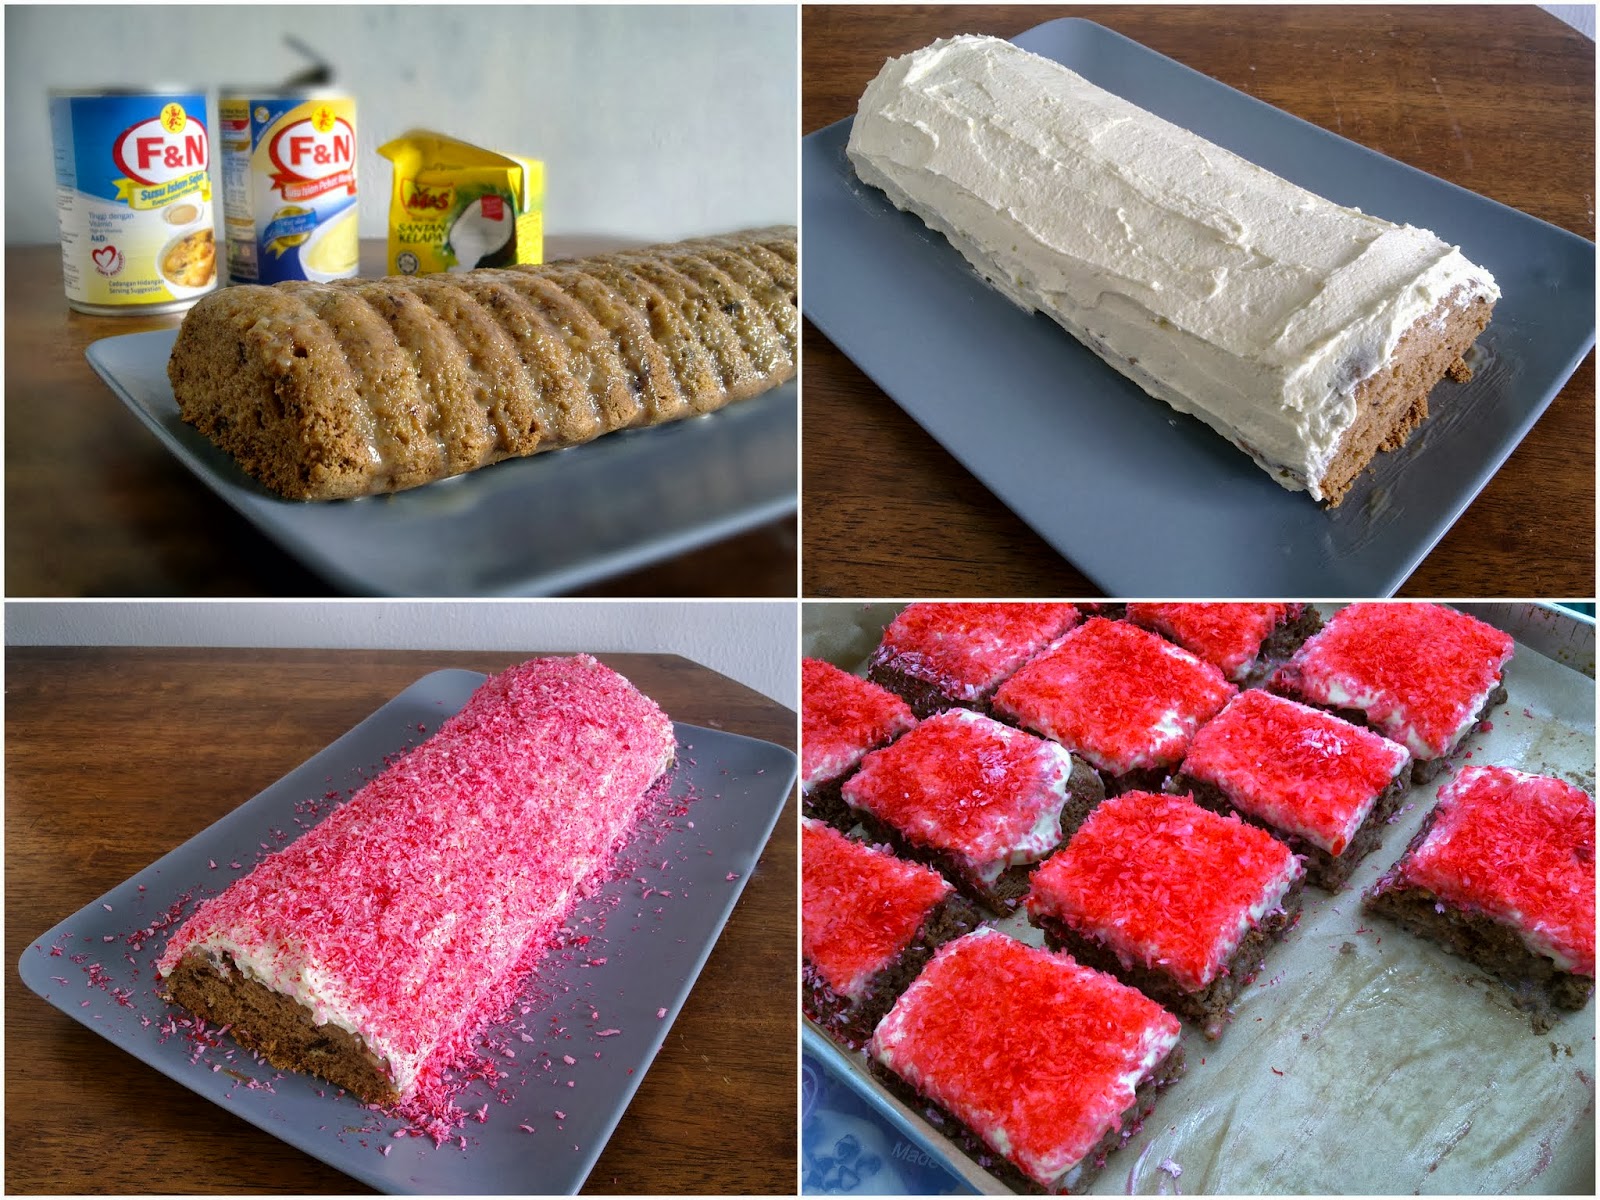
The cake was baked in a log shape in what is called a "half roll bake pan". I saw it one day and bought it thinking I would use it all the time, but haven't. It does make a nice looking cake with the fluted top, which also makes dividing the cake very easy. However, after spreading the topping on, that was all lost. (A week later, I made the cake again, this time in a rectangle baking tin.)
Looking at Inma's recipe, I thought there was just too much leche, so I used just a quarter of what was called for in her original recipe. Maybe the larger amount was necessary, but I really didn't want to end up with too much extra milk. Having said that though, the mixture was absolutely delicious! I bet it would make superb ice cream. (And I used the leftover as a topping for butterscotch banana sourdough pancakes.) 
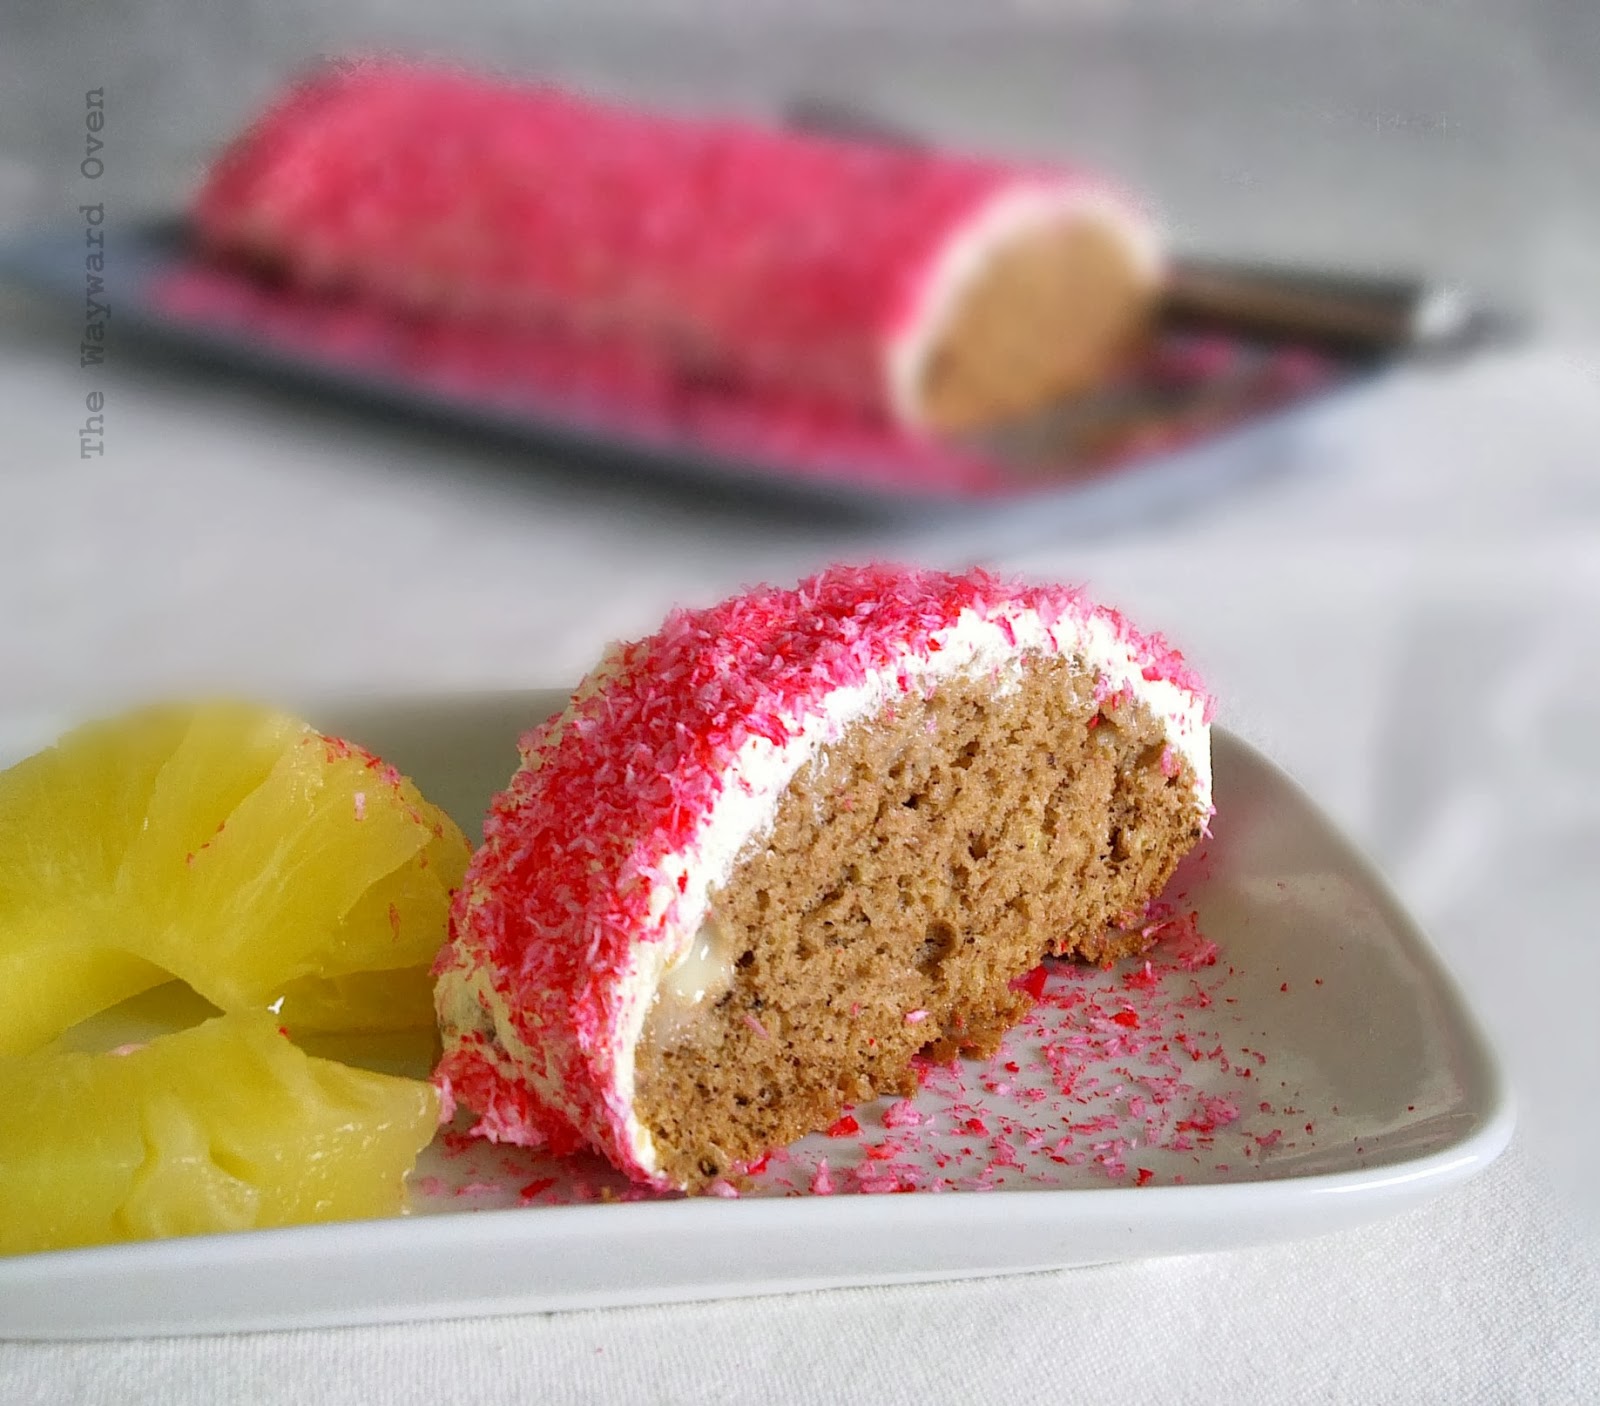
A cake filled with three kinds of milk, and decorated with pastry cream and coloured dessicated coconut
Coconut Pastel de Tres Leche
Three-milk cake with a touch of chocolate. Serves 10-12

3 medium eggs, separated, at room temperature
Pinch of salt
60g caster sugar
½ tsp each vanilla extract and coconut extract
65g all-purpose flour
1 tbsp rice flour
1½ tbsp cocoa powder mixed into a paste with 2 tbsp water

Filling
100ml condensed milk (or condensed filled milk)
90ml fresh coconut milk (or a good quality canned or boxed one)
60ml evaporated milk (or evaporated filled milk)

Topping
Whipped cream or pastry cream
Toasted shredded or dessicated coconut

Preheat oven to 180°C. Grease a half roll bake pan (or similar sized pan) well.
Beat the egg whites with the pinch of salt until they form soft peaks, about 2 minutes. Gradually add the sugar and beat on medium high speed until they form stiff peaks, 3-5 minutes.
Beat the egg yolks until they are pale and thickened, and leave ribbons when the whisk is lifted, 3-5 minutes. Quickly beat in the extracts.
Add the beaten yolks to the whites and fold together with a large rubber spatula. They do not have to be completely blended at this time.
Stir the flours together and sift over the eggs. Fold in quickly but gently to keep the mixture from deflating. Fold in the cocoa paste (it's okay of it's streaky).
Transfer to the prepared tin, level the top and bake until risen and and springy, and a toothpick inserted in the centre comes out clean, 20-25 minutes.
Cool in the pan, then invert onto a wire rack. Place rack over a large baking pan. With a skewer or fork, poke holes all over the cake right down to the bottom.
For the filling, heat the three milks together with a pinch of salt until the mixture comes to a boil. Lower the heat and simmer for a further 3 minutes. Take off the heat and leave for 5 minutes.
Spoon a third of the warm milk over the cake and leave for 10 minutes. Repeat this two more times. (As the milk sits, it will thicken, so after the third application, it will leave a sticky topping on the cake.) Don't forget to spoon the milk that drips down into the baking tray below the wire rack back onto the cake.
Refrigerate the cake overnight for the milk to soak in thoroughly.
Spread whipped cream or pastry cream over the cake, and decorate with toasted coconut.

Merdeka Day cake

Saturday, August 31, 2013

MALAYSIA FLAG CAKE FOR NATIONAL DAY, AUG 31 
HAPPY MERDEKA DAY! 
To all Malaysians, here's wishing you a Happy National Day! And to those of you who are 56 today, Happy Birthday!
As an extension to my last post on ulam and kerabu, which I wrote as a run-up to today's cooking column in the newspaper (this is where to get all the links to the Don't Call Me Chef stories and the other Merdeka-themed stories in the lifestyle section of the newspaper), I wanted to make a cake using typically Malaysian ingredients. And what better ingredient than coconut (any excuse to include one of my favourite flavours into every dish!).
So I started out with a basic yellow cake recipe (a simple 1-2-3-4 recipe), and was going to use coconut extract for the flavouring, but of course being as prone to mishaps as I am, I reached for the lemon extract instead and ended up with a lemon-flavoured sponge!
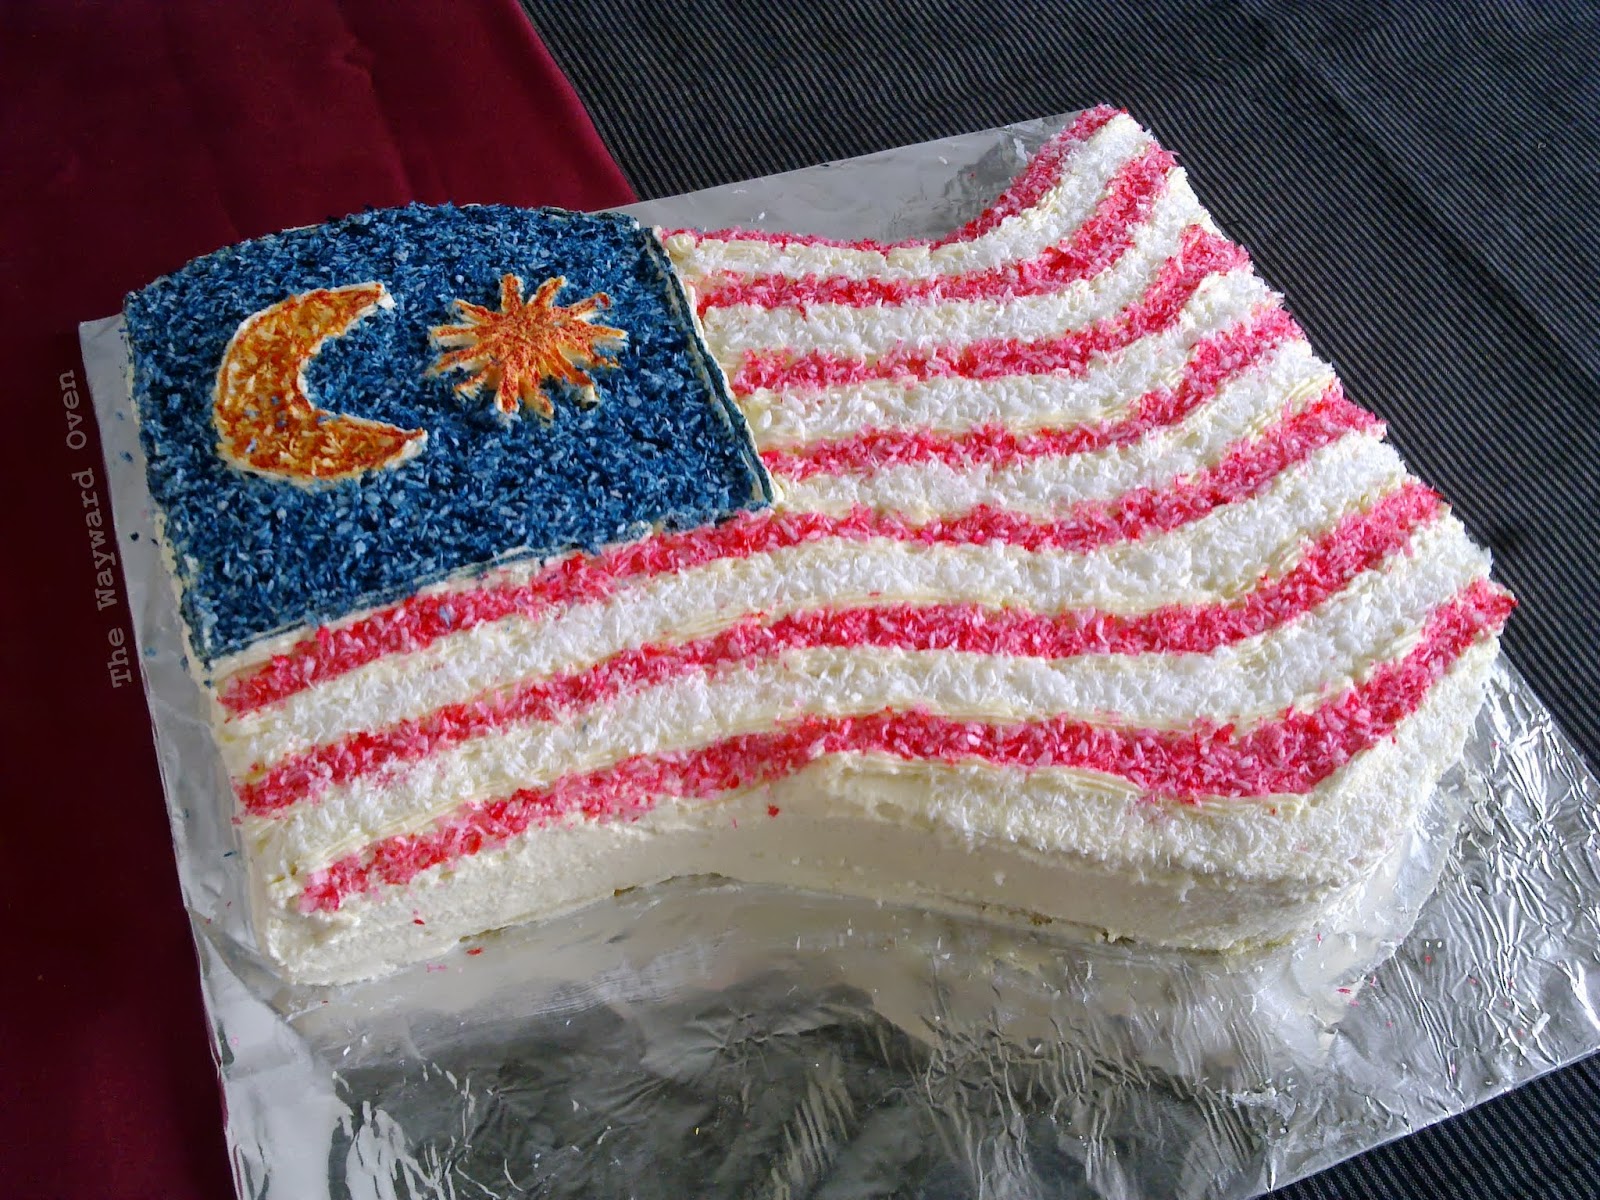
Oh, well. I baked the cake in a rectangular tin and then cut out a triangle at the top and "pasted" it to the bottom using buttercream to make a wavy flag shape. 
Next was my attempt at cake decoration. I am hopeless at fancy swirls or sugar decorations, so I used an easier way. I iced the cake, piped out the outline of the national flag design and filled it in with dessicated coconut (have to include that somehow!) coloured with food dye. 
All the elements are accurate except for one thing: I just could not get 14 points on the star! It's two points short since it was too small to fit them all in. 

Centrepiece cakes: Dacquoise

Thursday, August 8, 2013

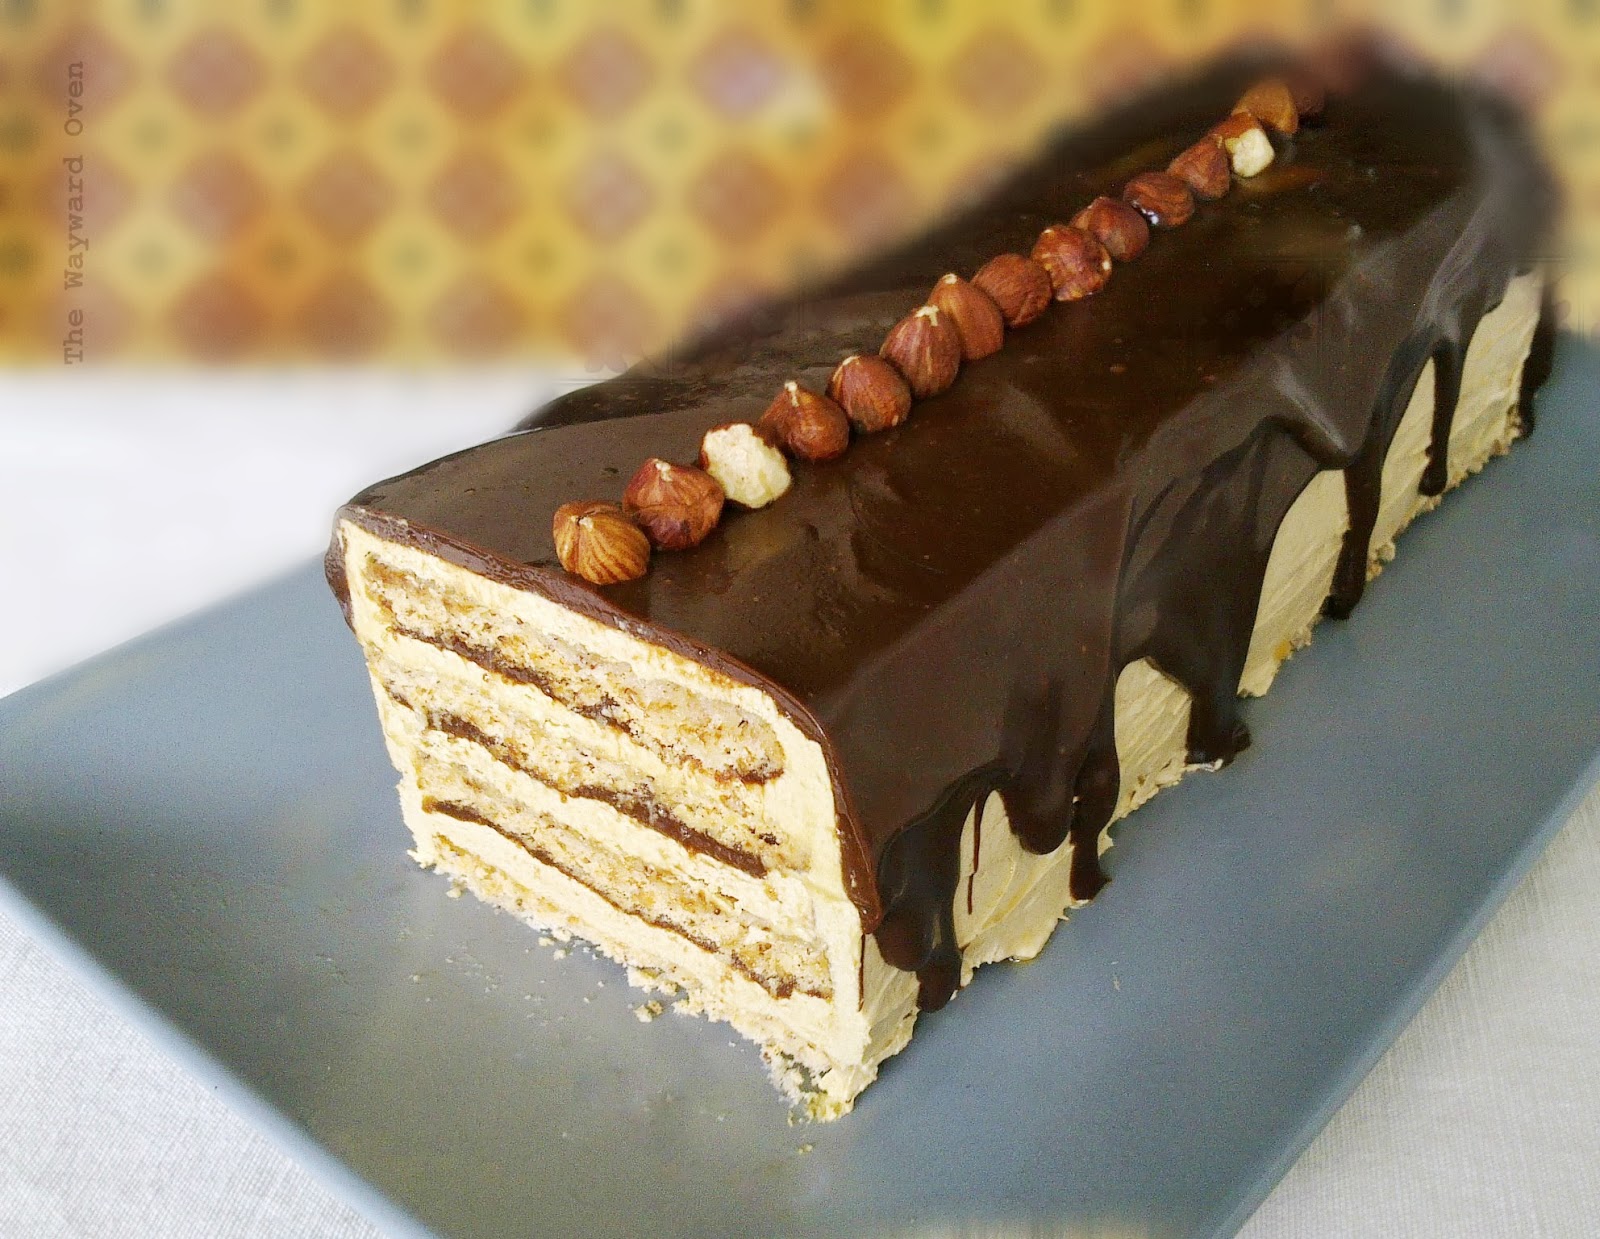
CHOCOLATE COFFEE DACQUOISE RAISES THE BAR 
I have no talent for cake decorating or even make successful cakes 100% of the time, but the dacquoise – this I can do.
It's made of meringue layers (which start off as a large cookie!), buttercream and chocolate ganache. Separately, each component is not difficult to do though together, they do take a little time. But to get something that looks pretty impressive without a whole lot of effort – now, that's the kind of cake I like.
It certainly doesn't take a professional pastry chef to make this cake. Which is why it was appropriately featured in the newspaper's Don't Call Me Chef cooking column which I write with Indra and Ivy. This month's theme was all about chocolate desserts and was just in time for the Hari Raya or Eid celebration.
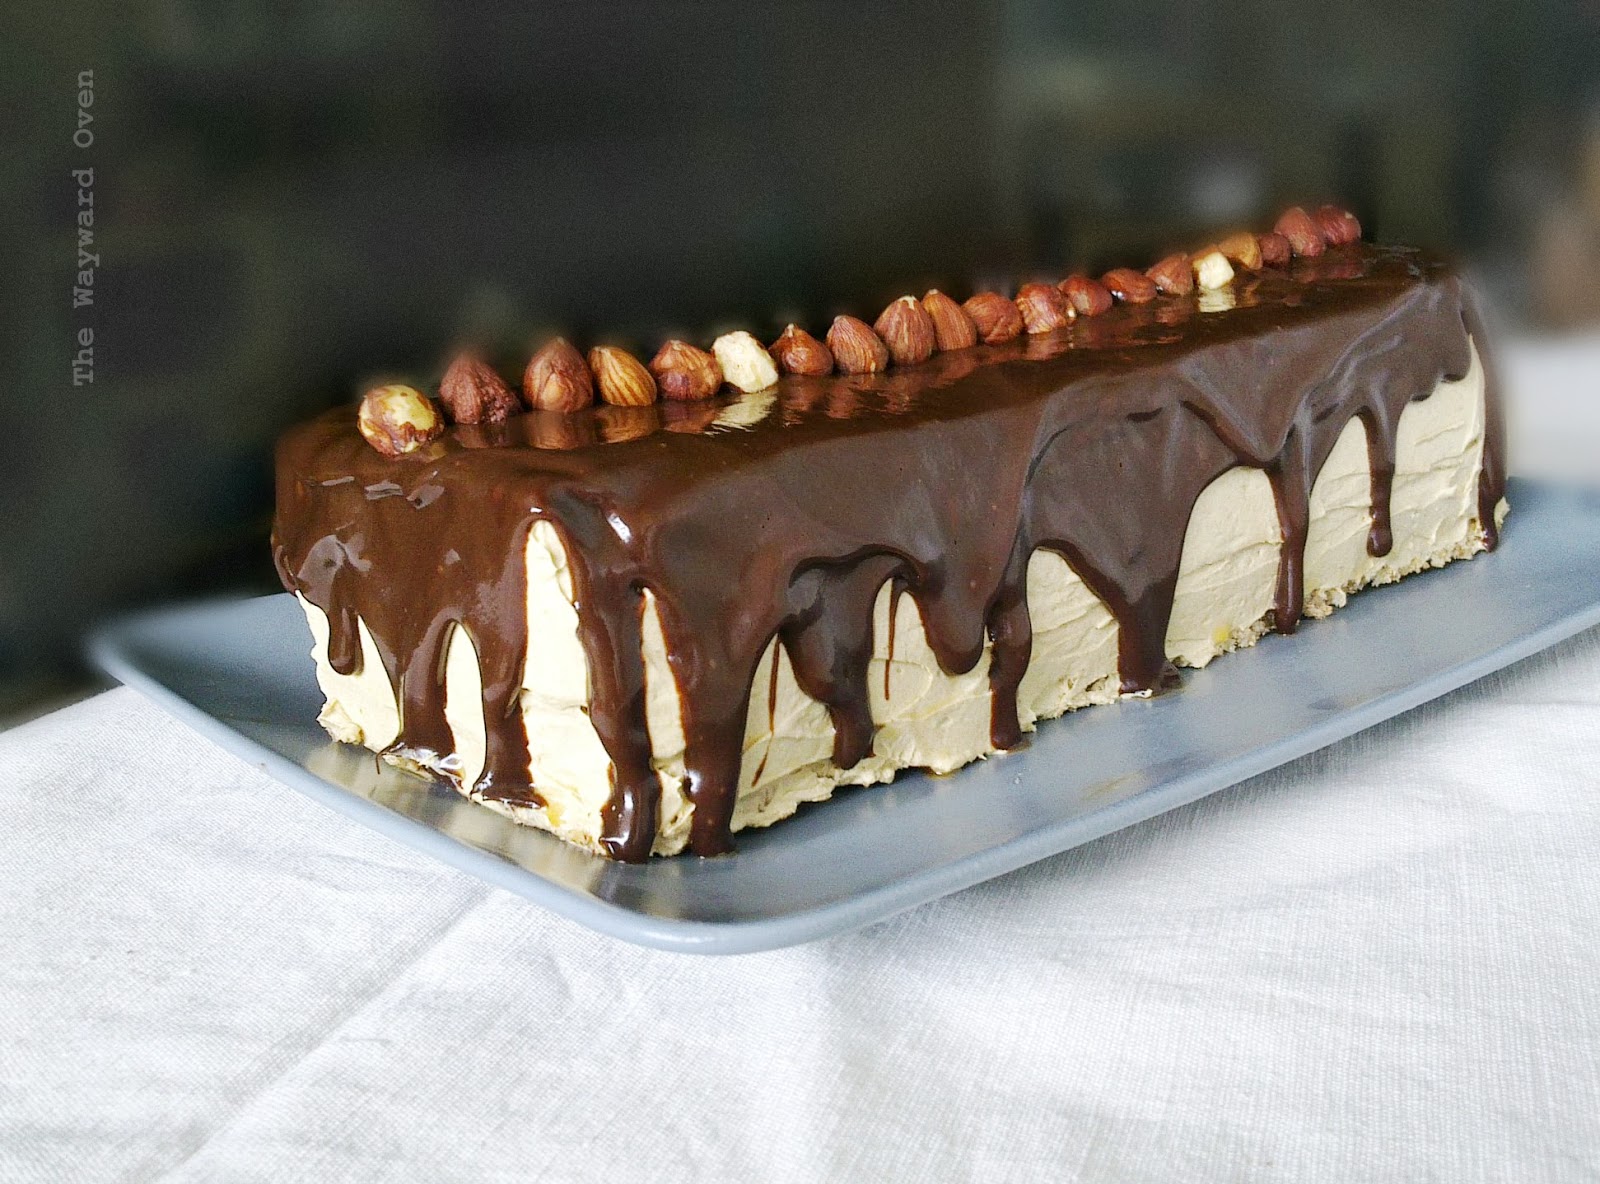
The dacquoise is made of sterner fluff
Very often, meringue-type confections use the egg white in the cake or cookie and the yolks are either discarded or used for an unrelated dish. For this cake, the yolks are used in the buttercream, which is custard-based. This is one of my favourite ways to make buttercream frosting. I think it is smoother and more stable than whipping just butter and icing sugar together and it's not uncooked like a Swiss meringue frosting.
I think this cake is best cut and served straight from the fridge. In a less casual situation, I'd probably set out saucers and forks, but in fact, slices of chilled dacquoise can be picked it up with the hand to eat as the layers holds together well.
A cake to celebrate with
Chocolate-Coffee Dacquoise
Serves 12. Adapted from a recipe at cooksillustrated.com (requires subscription)

Meringue
80g ground almonds
50g ground hazelnuts
180g caster sugar, divided
1 tbsp cornstarch
¼ tsp salt
4 large egg whites (about 120g), room temperature
Large pinch of cream of tartar

Coffee Buttercream
4 large egg yolks
60g sugar
1 tbsp cornstarch
¼ tsp salt
175ml full-cream milk
1½ tbsp instant coffee
2 tbsp hot water
225g unsalted butter, softened

Chocolate Ganache
170g chocolate (60% cocoa), finely chopped
170ml whipping cream
2 tsp corn syrup
20 whole hazelnuts, to decorate

Mark out a 32cm by 25cm rectangle on baking paper; place it on an upturned baking tray. Preheat oven to 120°C.
Meringue: Combine the nuts, half the sugar (90g), cornstarch and salt in a bowl.
Place the egg whites and cream of tartar in a large metal or glass mixing bowl (the bowl should be very clean). Using electric beaters, whip the eggs until foamy, 30 seconds, then slowly add the remaining 90g of sugar until glossy, stiff peaks form. With a rubber spatula, fold in the nut-sugar mixture in two batches.
Spread the meringue evenly onto the paper and mist the surface with water. Bake for 90 minutes, then turn off the oven and leave the meringue inside for another 90 minutes. Do not open the oven doors at this time. Remove from the oven and cool the meringue on the paper on a wire rack.
Buttercream: Whisk egg yolks, sugar, cornstarch and salt in a bowl. Place milk in a small pot and heat until simmering. Pour half the hot milk into the yolk mixture while whisking until smooth, then add this to the milk in the pot and return to medium heat. Continue whisking until it thickens. Transfer custard to a bowl, cover and refrigerate until set, two hours. Before using, bring to room temperature.
Dissolve instant coffee in water. Whip the butter until light. Beat in the custard in three batches until just combined. Add coffee mixture and continue to beat until light and fluffy, five minutes.
Ganache: Place chocolate in heatproof bowl. Heat up cream and corn syrup until simmering and pour over the chocolate to soften; stir until smooth. Cool for five minutes.
Assembly: Make sure there is room in the fridge to chill the cake in stages.
Peel off paper from meringue and place on a cutting board. Using a serrated knife, trim edges and cut into four equal rectangles, about 25cm by 8cm.
Spread three rectangles each with ¼ cup ganache. Refrigerate until firm, 15 minutes.
Spread remaining rectangle with ½ cup buttercream; place on a wire rack. Place one ganache-coated meringue, chocolate side down, on top of the buttercream and press gently. Repeat this process with all the meringue layers. Finally, frost the top and sides of the cake with the remaining buttercream. Refrigerate until firm, two hours.
Warm remaining ganache in a heatproof bowl set over simmering water until it is runny but not hot. Pour ganache over top of cake and spread with a spatula, letting excess flow down sides.
Garnish top of cake with hazelnuts. Chill, uncovered, then transfer cake to a platter. To serve, cut each slice with a sharp knife dipped in hot water and wiped dry.
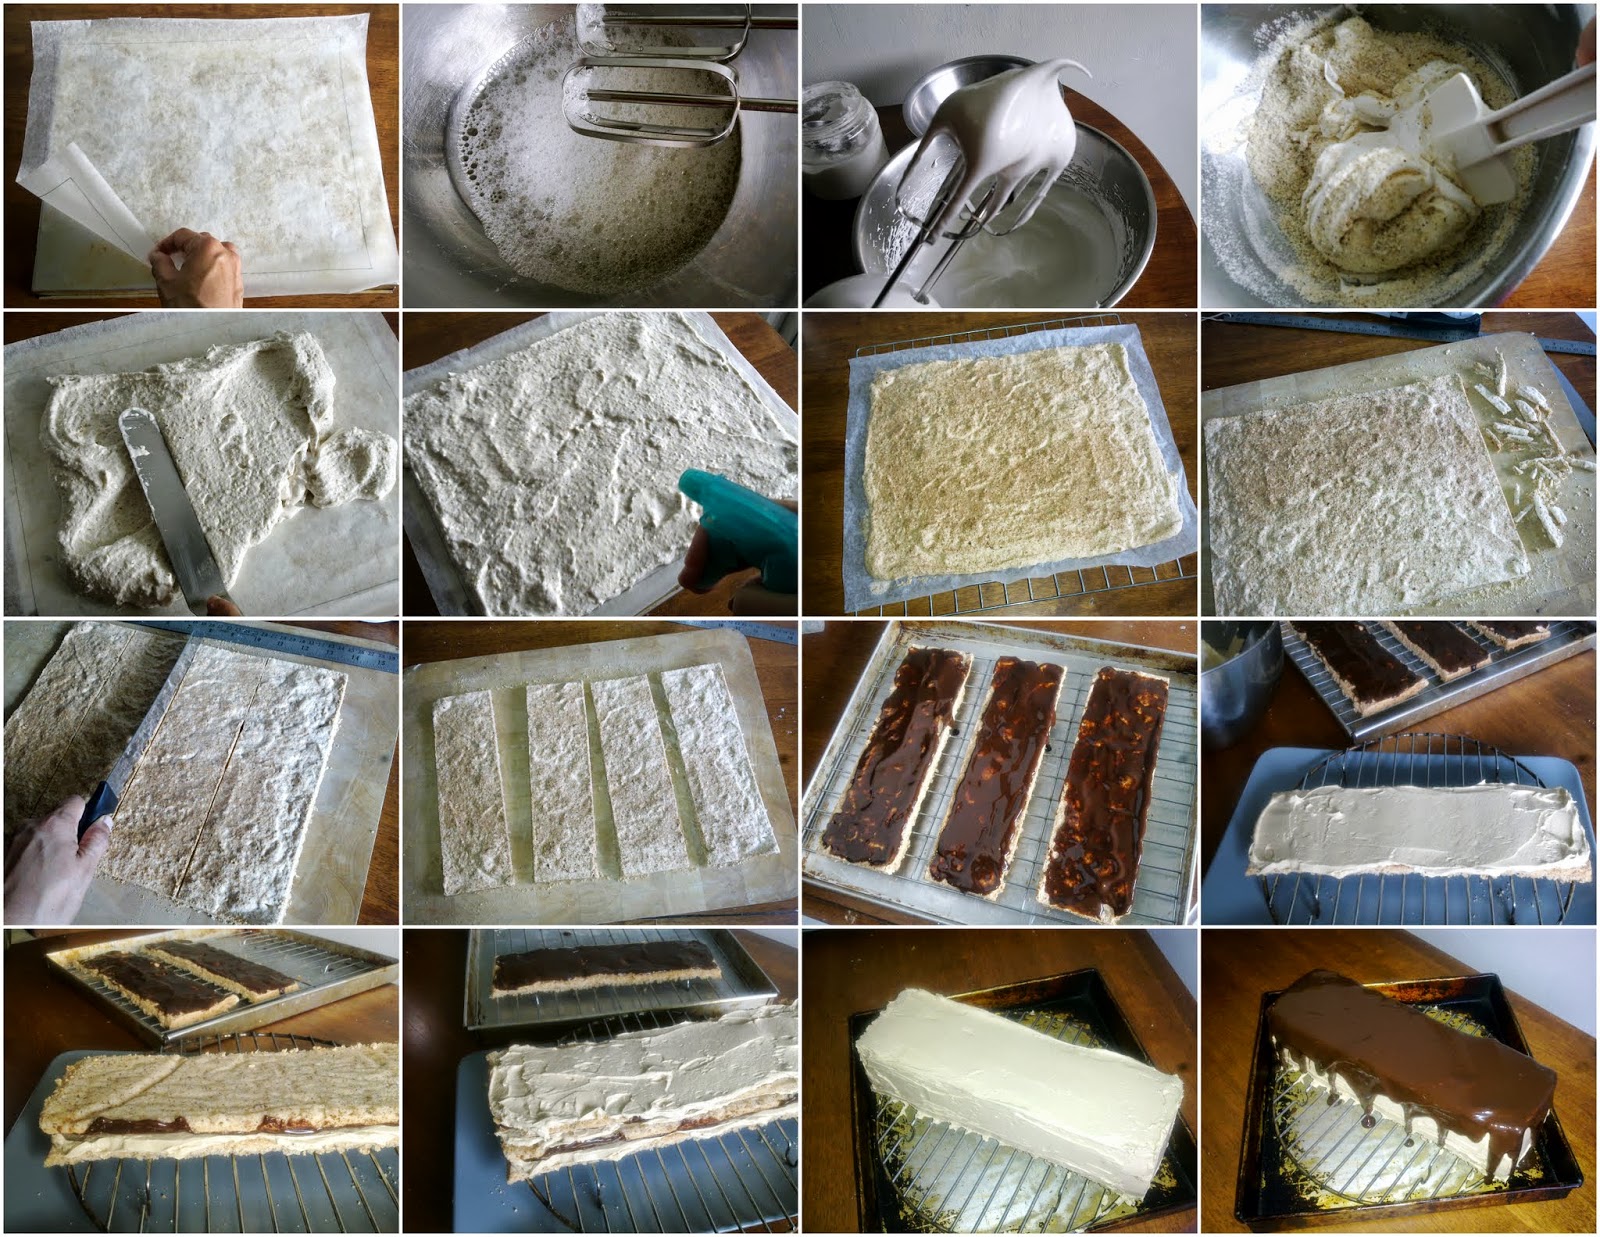
The dacquoise-making process
Pictorial guide
Top tier: Lay down baking paper on an upturned baking tray. Beat the egg whites with sugar until they form stiff peaks and then fold in the nut mixture.
Second tier: Spread out the meringue and spritz the top with water to prevent burning. Bake until brown and cooked, and trim off the uneven ends.
Third tier: Mark the meringue cookie and cut into four even strips. Spread chocolate ganache on three strips, and buttercream on the final strip.
Final tier: Layer the strips, spreading buttercream in between. Finally, spread buttercream on the outside of the stack and pour ganache over the top.


Hot under the cola

Sunday, July 7, 2013

FROSTED CHOCOLATE COLA CAKE WITH MARSHMALLOWS 
There was this British monthly cooking magazine, aptly and simply called Cookbook, which I used to buy. It was only about 70-pages long, but every page was filled with recipes that I found easy to do since I wasn't much of a cook then. The first magazine I got was the November 1999 issue, and for the next year and a bit, I waited to get it every month. It cost £1.50 which doesn't seem a lot, but the Husband and I were living on his scholarship money (and a small sum of my savings) in London at the time and it was the only thing I spent our little money on after we took care of the rent and basic necessities.
Cookbook came in handy when I did a small three-day catering job for a friend of ours who was making a student film, and my whole menu came from the magazines. I didn't get paid for my time or labour but it was a good experience and I am credited as the caterer on the film!
Publication of the magazine stopped many years ago. I can't even find anything about it online now.
The recipe in Cookbook magazine, with my scribbles in red
I brought all the magazines back to Malaysia and they are now bound into two hefty volumes. I still look through them occasionally for ideas and recipes and have used an egg-free chocolate cake recipe from it (a reader's contribution) countless times. I have even adapted it – using orange juice instead of milk, ground ginger instead of  cocoa, omitting the cocoa powder altogether for a vanilla cake, and I have even made it into a Poppy Seed Crazy Cake.
For yet another adaptation, I wanted to use the recipe for a cola cake. The original recipe contains golden syrup, which I would substitute with a cola reduction. So I boiled down a tin of cola but it didn't turn syrupy enough, so I tried it again but this time added sugar to it before reducing it. It worked – it looked like treacle and the cola flavour was really strong. (Was that ginger I detected in the secret formula? I won't mention the brand but it's probably the most well-known one in the world!)
Unfortunately, the flavour wasn't distinctive in the cake. I'm still recording the recipe here because it makes a cake with a good taste and texture. It was a little sticky from the marshmallows but was chewy  as well though I haven't figured out why. It went down well with the family so I consider it a success, cola-less notwithstanding.
The pointy frosting 'decorations' on the plate were a happy accident*
Frosted Egg-free Chocolate (Cola) Cake
Makes an 18cm sandwich cake

Cola syrup

1 (325ml) can cola
3 tbsp firmly packed brown sugar

Sponge
275g all-purpose flour
1½ tsp baking powder
½ tsp salt
3 tbsp quality cocoa powder
175g caster sugar
60g egg-free mini marshmallows
1 tsp bicarbonate of soda (baking soda)
175ml buttermilk
150ml vegetable oil
3 tbsp cola syrup (or use golden syrup)
Frosting
Chocolate ganache, pourable

To make the cola syrup, place cola and brown sugar in a small saucepan. Bring to a gentle simmer over medium heat. Leave to bubble but swirl the pan around occasionally until mixture reduces to about 5 tbsp (about 100ml). Pour into a small container to cool. It will still be runny but will thicken a bit more upon standing.
Preheat oven to 180°C. Grease and base line two 18cm sandwich tins.
Sift the all-purpose flour, baking powder, salt and cocoa powder together in a mixing bowl. Stir in the sugar and marshmallows, if using.
Dissolve bicarbonate of soda in 1 tbsp of buttermilk. Add the remaining buttermilk, oil and cola syrup to the dry ingredients and stir until smooth. Stir in the buttermilk-soda mixture. The batter will have a soft dropping consistency.
Divide the batter evenly between the tins and level the tops. Bake for 25-30 minutes until the centre is springy to the touch and the cakes are cooked. Cool in tins on a wire rack for 5 minutes (the cakes will shrink slightly), then turn out to cool completely. Remove the lining paper, wrap the two cakes in cling film and chill overnight. The flavour seems to develop after overnight storage.
Place one sponge on a serving plate. Put strips of greaseproof paper under the cake along the sides to catch the drips. Spread with some of the frosting. Place the other cake on top and spread with more frosting; chill to set. Pour on the ganache, allowing it to drip down the sides. Leave to set, then pull out the greaseproof paper strips. *The ganache drips may accidentally leave pretty streaks on the plate.

Wave the flag for Italian cookies

Sunday, June 30, 2013

7(-MINUS-1)-LAYER ALMOND COOKIES 
There's a delightful looking biscuit called Italian rainbow cookies, which are often made at Christmas. They have almond paste or ground almonds in them and are in the colours of the Italian flag.
The red, green and white layers are made separately and sandwiched together with apricot jam. Finally, the top and bottom are coated in chocolate. That makes seven layers (3 dough + 2 jam + 2 chocolate), and that's why they are also known as seven-layer cookies.
Well, I decided to forgo the bottom chocolate layer and so there are only six layers to my cookie. Hence, 7-minus-1-layer cookies. And that's why the Roman numeral in the picture at the top is a six.
The recipe for these chewy biscuits can be found all over the Internet. Those recipes use one large sheet pan (33x22cm/13x9") for baking, and because of this, the three layers of biscuit dough have to be baked separately – the pan is lined with baking paper, one layer is baked, removed, and the same pan is lined with paper again, the second layer is baked, and then on to the final layer.
That's too much work for me and raised too many potential problems, especially with a wayward oven that overheats and can cause uneven baking. So I cut down the amount and since I have three shallow 18cm (7") square pans, I baked all three biscuit layers at the same time. 
So why didn't I give the biscuit another layer of chocolate? I really don't know...
Six layers are just as good as seven
Layered Almond Cookies
Makes about 2½ dozen. Based on the Italian seven-layer cookie.

2 eggs, separated
160g sugar, divided
140g butter, softened
½ tsp vanilla extract
65g almond meal (ground almonds)
140g all-purpose flour
¼ tsp salt
Red and green food dye (liquid or gel)
5-6 tbsp apricot jam
50g chocolate
½ tsp corn syrup

Line 3 shallow 18cm square baking pan with baking paper, with two opposite sides overhanging. Preheat the oven to 180°C.
With electric beaters, whip egg whites until they form soft peaks. Continue beating and add 2 tbsp of sugar slowly. Whisk until the meringue is glossy and forms stiff peaks.
Place butter in another mixing bowl. Using the same egg beaters, whip butter and remaining sugar until pale and fluffy, about 5 minutes.
Beat in yolks and vanilla until combined, 1 minute.
Combine almond meal, flour and salt, and fold into butter mixture.
Stir a third of the egg whites into the butter mixture to loosen, then fold in the rest of the whites.
Divide batter into three equal parts, about 200g each. Colour one portion red and another green (about ½ tsp liquid or ¼ tsp gel) and leave the third portion natural.
Place the batters into the three prepared pans and bake for 8-10 minutes until cooked but still soft as they will firm up while cooling. Remove from oven and from the pans, and cool on a wire rack (leave the baking paper on).
Warm the apricot jam to loosen it.
Line a tray with greaseproof paper or a silicon mat and upturn the green layer onto it. Peel off the baking paper. Spread with a thin layer of jam and upturn the white layer on top; peel off the baking paper. Spread with jam and upturn the red layer on top; peel off the baking paper.
Cover with cling film and place a tray or baking pan on top of the cling film and weight it down with something heavy to press the layers together. Refrigerate for 8 hours.
Melt the chocolate with the corn syrup in a heatproof bowl over barely simmering water. Remove cling film and spread chocolate on top of the red layer. Chill until chocolate is set. (If making a seven-layer cookie, invert the cookie onto another tray and spread the green layer with chocolate. Chill until set. The chocolate and corn syrup need to be doubled.)
Trim the edges and cut into fingers, about 4cm by 2cm.

Love and hate bring out the passion for muffins

Saturday, June 22, 2013

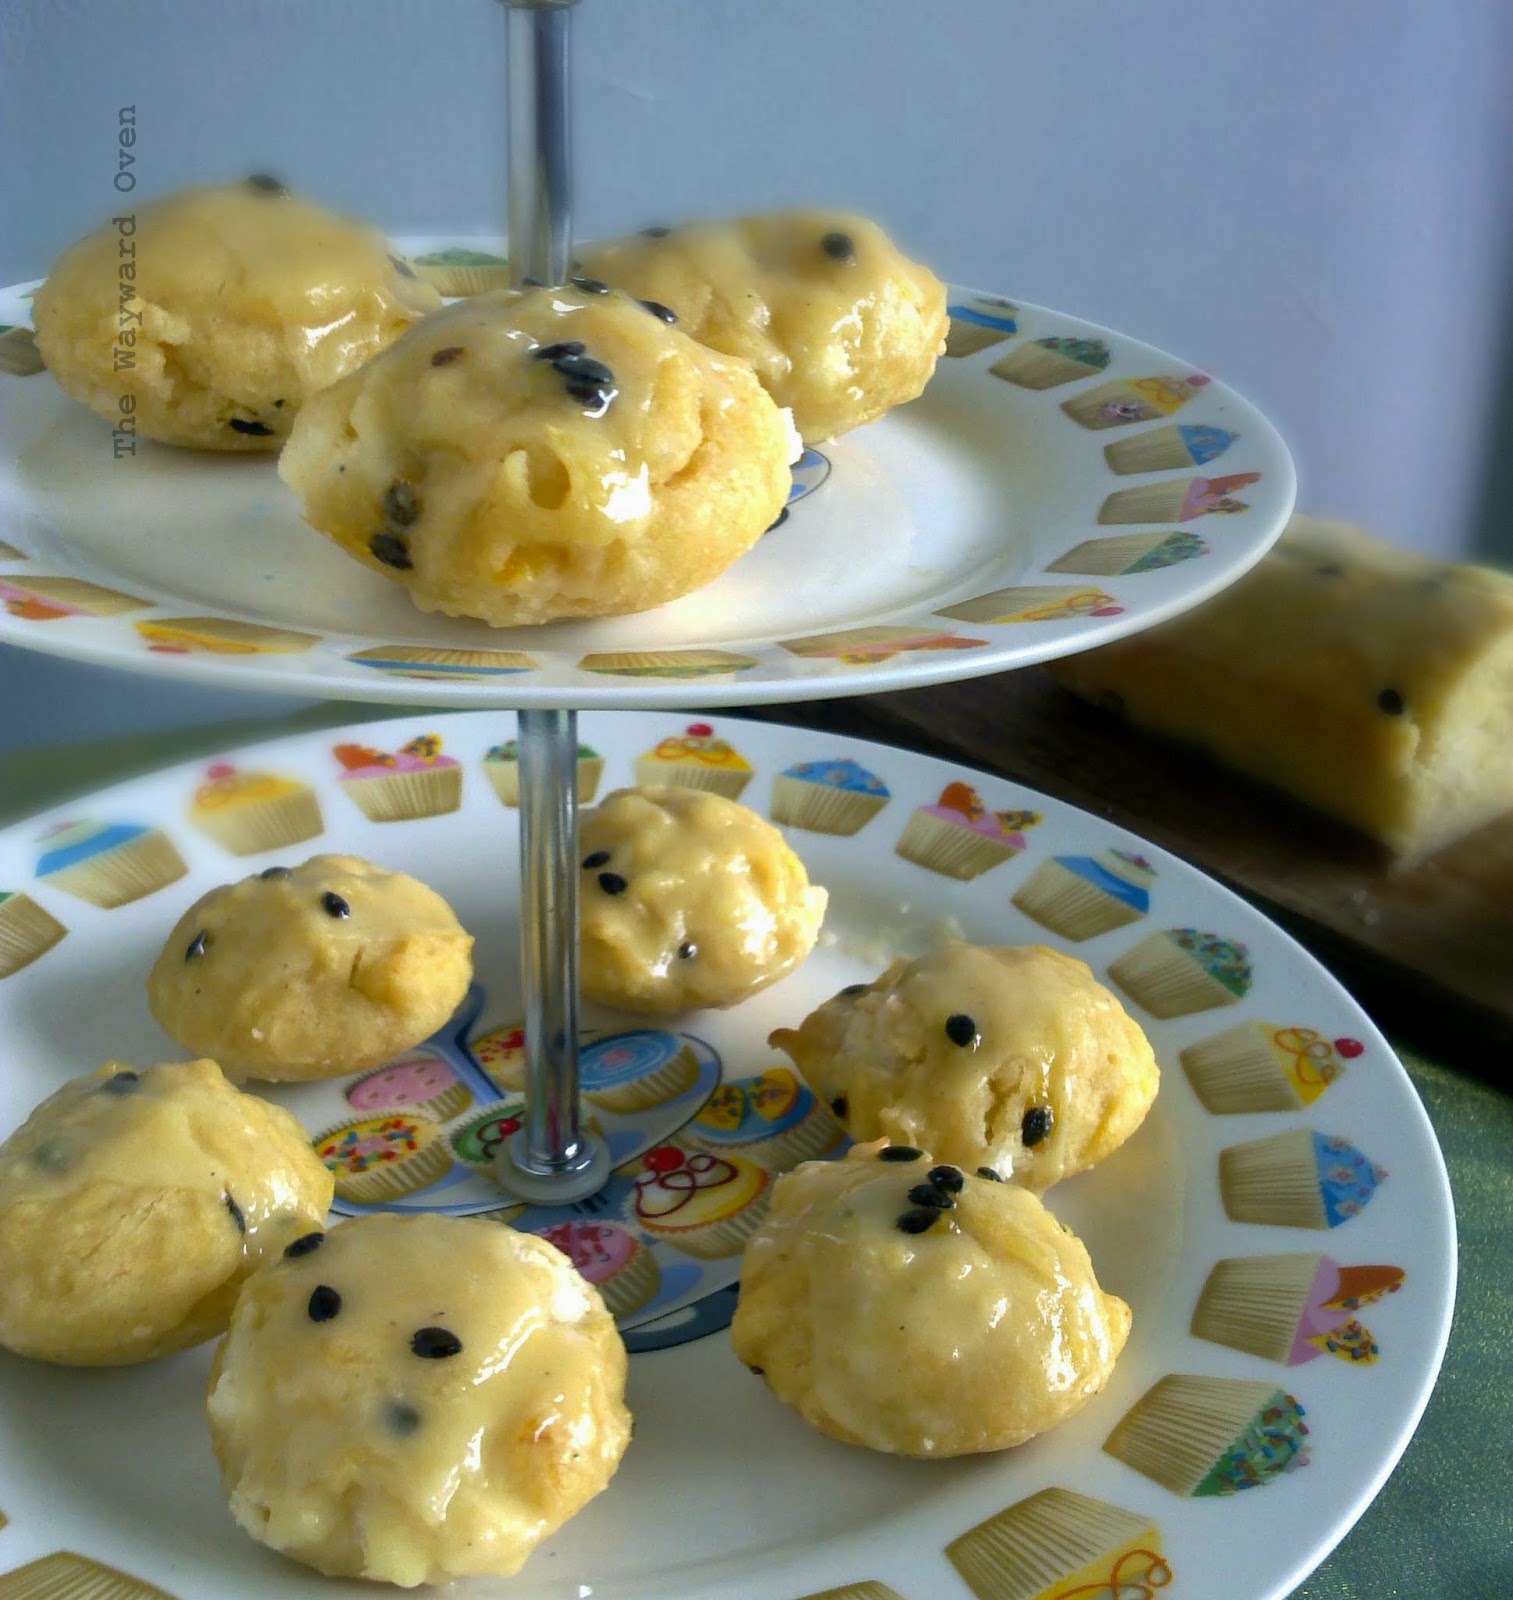
PASSIONFRUIT & WHITE CHOCOLATE MUFFIN TOPS  
I'm not a fan of muffins. They seem to be confused about who they are: Are we cake? Are we bread? Scones perhaps? 
I'm not sold on white chocolate either. After all, anything that calls itself something that it isn't is just masquerading.
Despite using the word in the post title, I don't "hate" muffins or white chocolate. They're just not the first things I think of when I want to make or eat something.
But I love passionfruit. Sour and sweet all at the same time.
And when I put what I love with something that I'm not crazy about, the love seems to get spread around and the result is quite appealing. 
The muffin mix can also be made into a loaf cake
I followed this recipe for passionfruit and white chocolate muffins, and the only change I made to the batter was to swap half the melted butter for sunflower oil.
And then I used a jelly cake pan as a mould for a slightly different shape (I guess any little thing helps to take my mind off the fact that these are muffins!). The leftover batter was baked in a mini loaf pan.
I think my icing was a little runny, so it isn't pretty. Other than that though, I liked how this turned out.
* * *
This post has been a long time coming. I have been out of blogging action for a while because I have been so busy with work and too tired to do much of anything else. It's hard to get back into the swing of things when you've been out for a while, and this is one of those times.
Also, I think I have been consuming too much sugar in the form of cakes and sweet snacks and this has some bearing on my current lack of energy. Because I've had little time to prepare my own meals, I have just been grabbing a quick bite of unwholesome – though tasty – food when I can, which, again, isn't beneficial for my well-being.
Having said that though, I don't expect to stop posting on the sweet stuff!

More (and moreish) sourdough brownies

Saturday, June 1, 2013

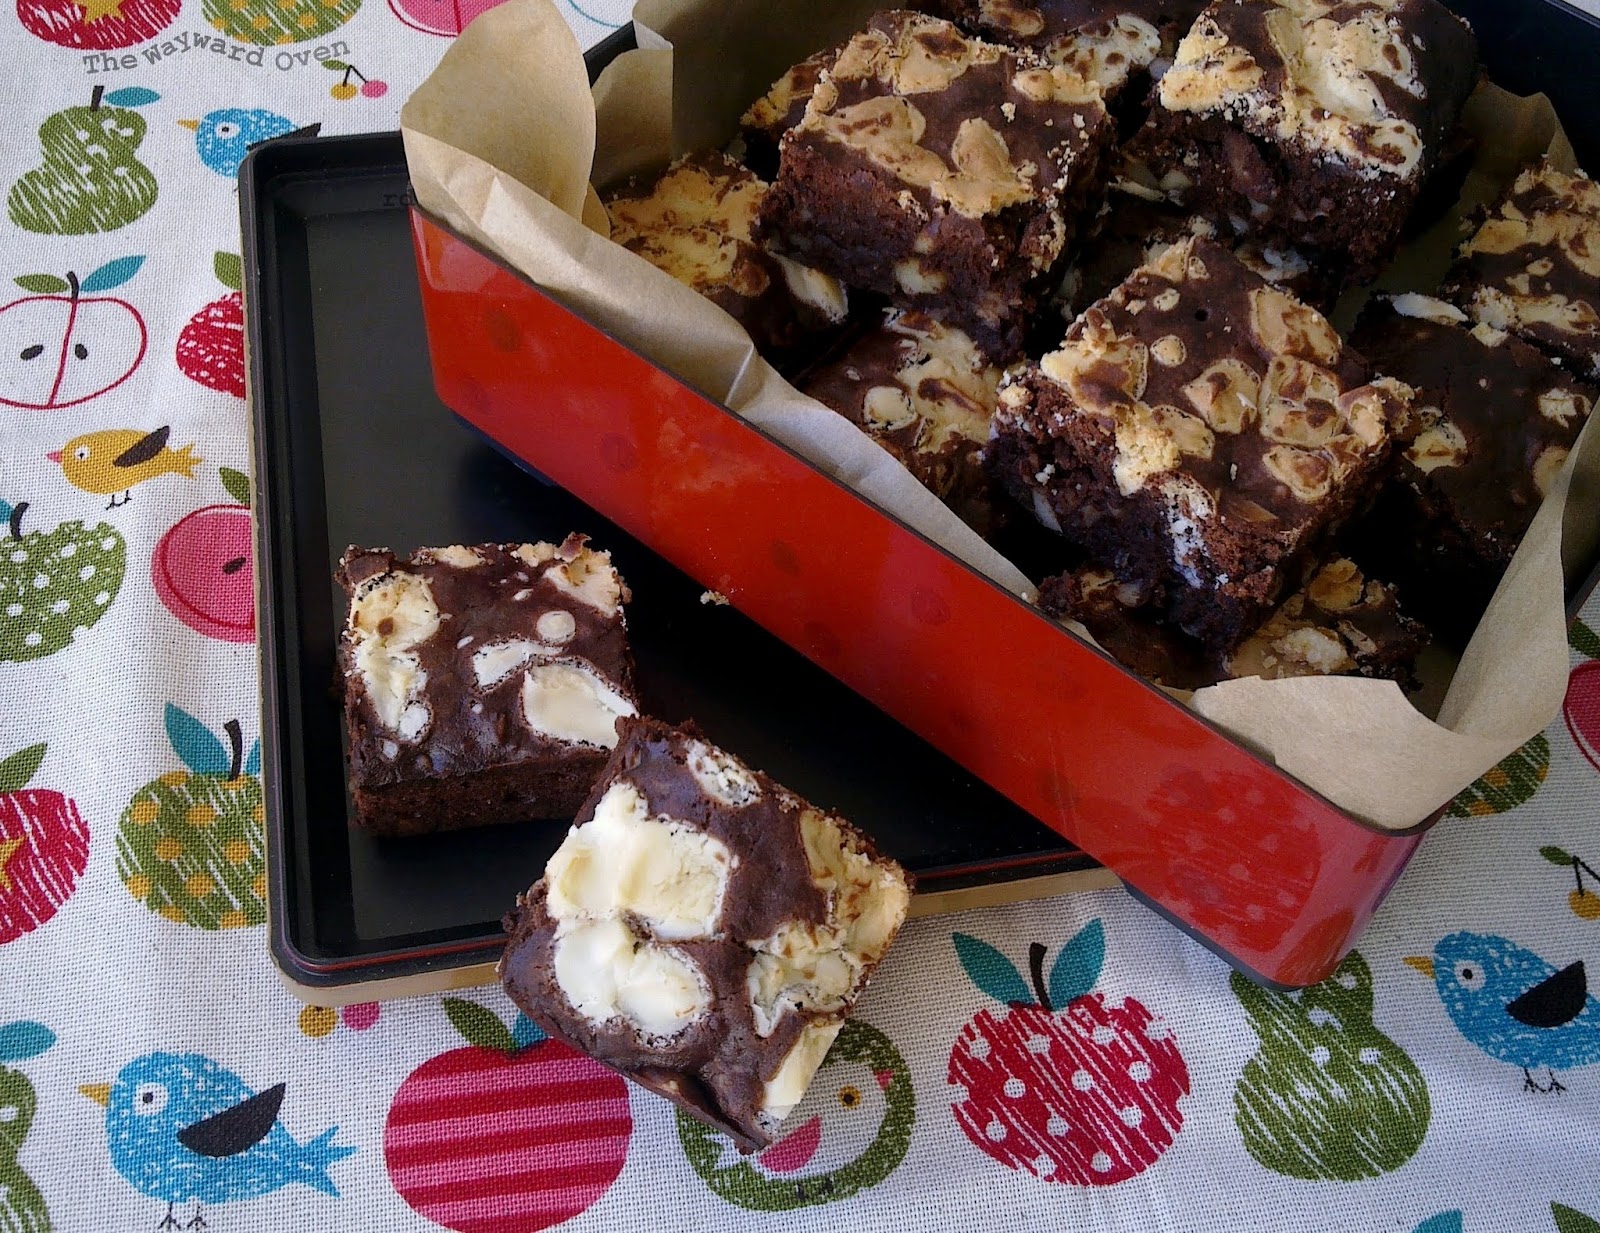
ALMOND SOURDOUGH BROWNIES CAPPED WITH WHITE CHOCOLATE 
Everyone has their own favourite brownie recipe, the one some people call "the best brownie recipe ever" or "the ultimate brownie".
I don't doubt that a brownie can be the best ever or the ultimate one. But it is all a matter of taste. Personally, I'm not so keen on really squidgy or pudding-like brownies or the ones with an additional gooey layer slathered on top. If I have to eat it with a fork or keep wiping away the creamy topping or chocolate smears from around my mouth and on my fingers, then I consider that not quite ideal.
I prefer my brownies crisp and crackled on top, and chewy and tender in the middle. Brownies are often referred to as a cross between cake and cookie and that's how I like it. If there's a topping, it should be baked on. I'd like to be able to pick up a brownie with one hand and not have it crumble as I eat it.
These brownies came about because I wasn't satisfied with the Coconut Nut Sourdough Brownies that I made for the Sourdough Surprises baking group challenge. That recipe was adapted from a sourdough-less but very reliable cocoa brownie recipe from Mad About Brownies by Barbara Albright and Leslie Weiner. Well, I did say in that post that I would be tweaking the recipe. 
So I played around with my basic sourdough recipe, and thought about reducing some ingredients and adding others – and changing how they are added – and this is what I came up with.
I think – in fact, I know since I have done it many times before – that it's easy to make ordinary brownies. But it's easy to make extraordinary ones too. 
These cocoa sourdough brownies may not be everyone's idea of the best ever or ultimate brownie, but to my taste, they are.
Crisp top, firm nutty centre
White Chocolate & Almond Sourdough Brownies
Makes 16

Sponge
25g unfed leaven
55g all-purpose flour
45g tepid water

Mix all the ingredients together, cover and set aside until slightly bubbly, 2-3 hours.

Final batter
25g all-purpose flour
¼ tsp baking powder
¼ tsp table salt
150g caster sugar
75g butter, softened
1 egg yolk
2 egg whites
All the sponge (about 110g)
1 tsp vanilla extract
50g unsweetened cocoa powder, sifted
90g almond nibs
50g white chocolate, roughly chopped

Preheat oven to 180°C. Grease a 20cm square baking tin and line the base and sides with parchment paper.
Sift the flour, baking powder and salt together. Set aside.
In a mixing bowl, beat together the sugar and butter until light and fluffy. Beat in the egg yolk until just combined.
Beat in the sponge and vanilla extract.
Fold in the cocoa powder, followed by the flour mixture and almond nibs.
Whisk the egg whites in a clean bowl until the soft peak stage. Stir a third of the egg whites into the cocoa mixture to loosen it. Fold in the rest of the egg whites.
Spoon the batter into the prepared tin and sprinkle with the chopped white chocolate. Press down lightly and bake for 35-40 minutes until a toothpick inserted in the centre comes out with just a few crumbs sticking to it.
Cool in the tin on a wire rack until warm, the remove from the tin. Best cut and served after storing overnight in an air-tight container at room temperature.

Want to go blondie?

Saturday, May 11, 2013

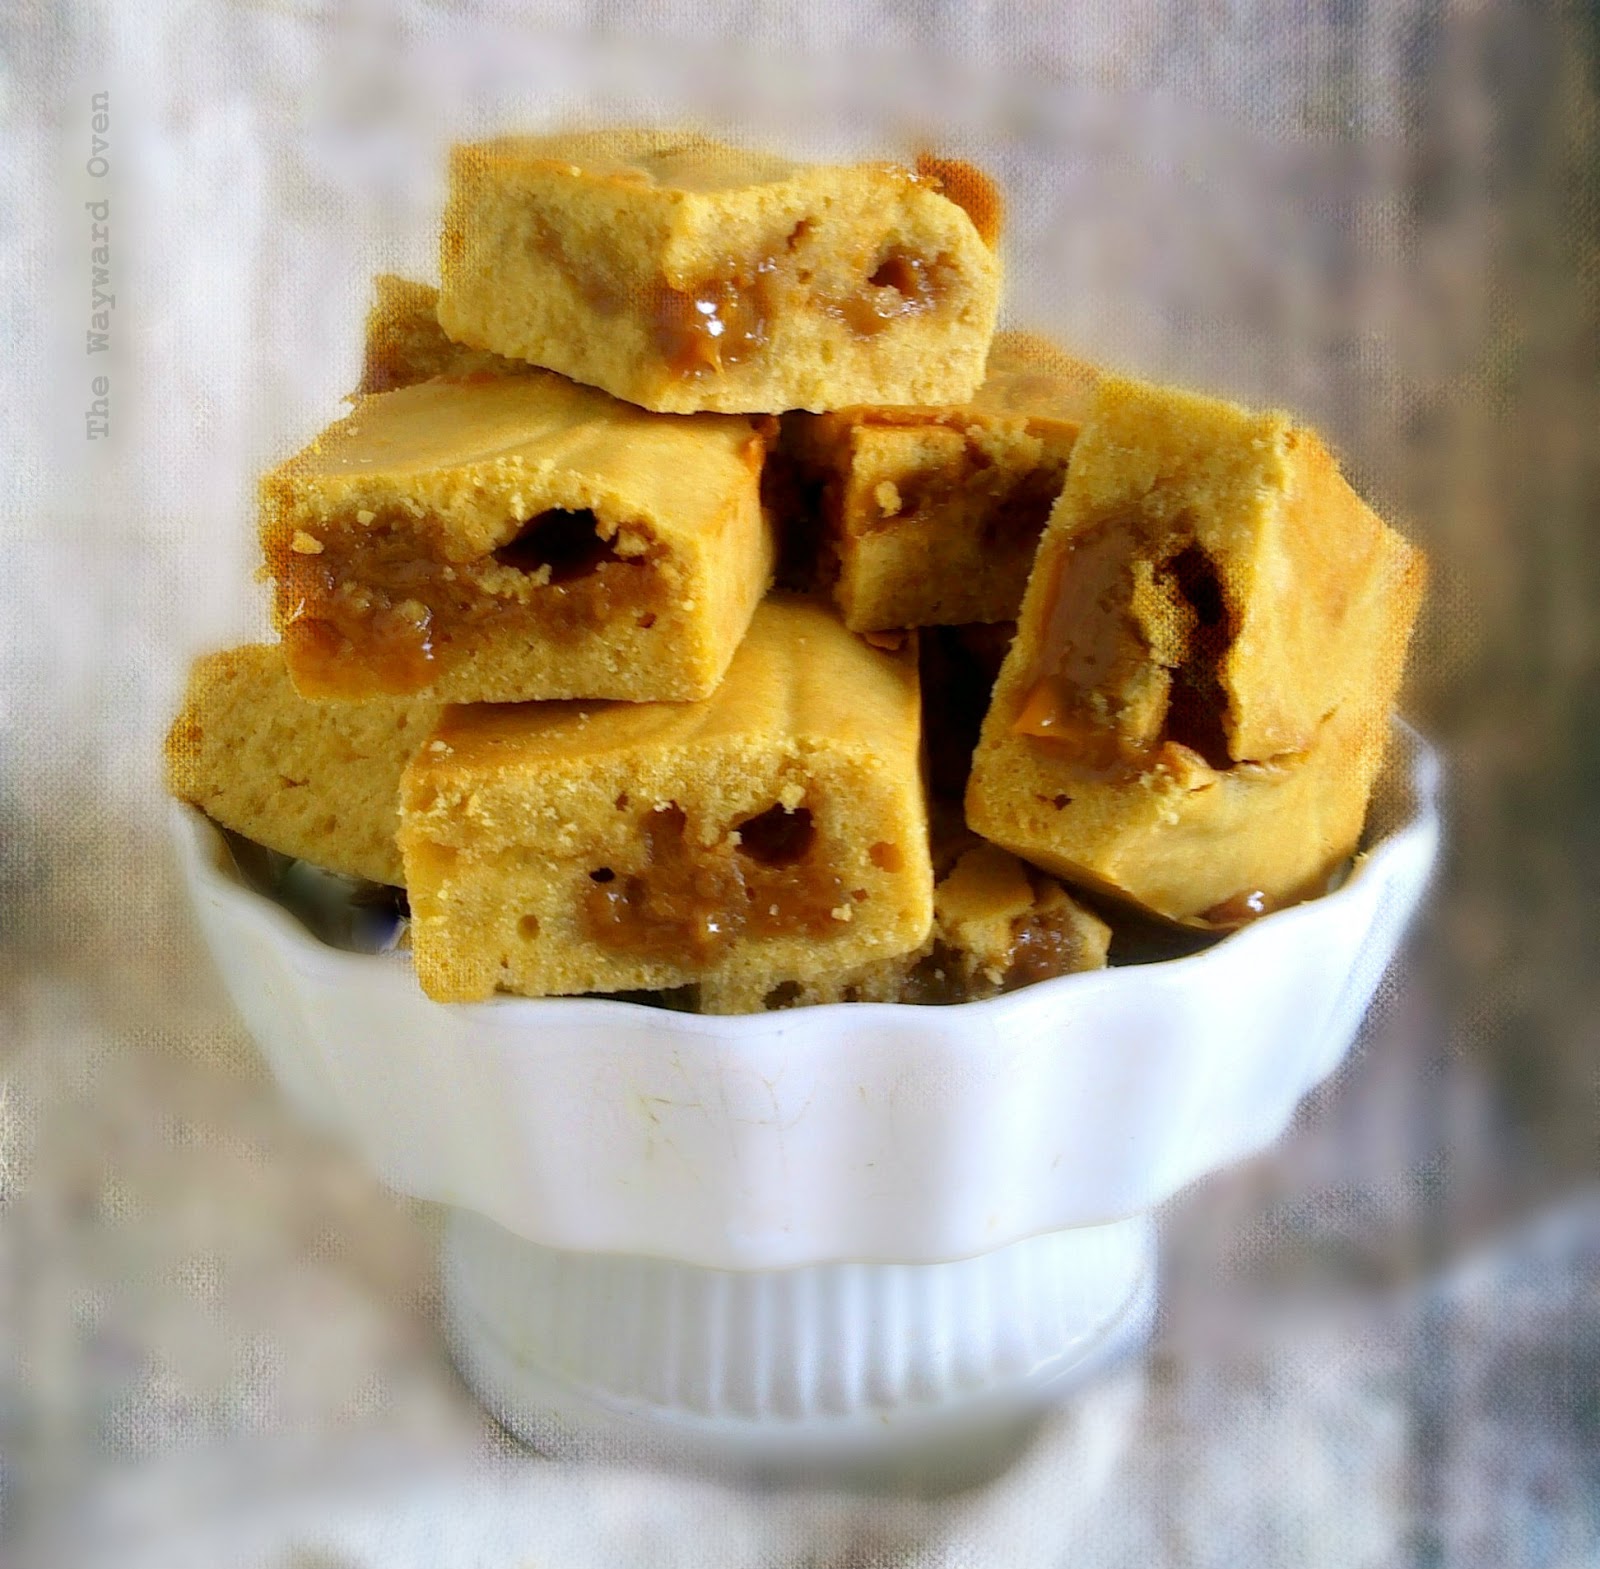
BROWN BUTTER DULCE DE LECHE BLONDIES 
I'm a little mad about brownies at the moment. I made some coconut ones last week and nutty chocolate ones yesterday (recipes to be posted at another time). I will be feeding the nut ones to the family when we meet tomorrow for Mother's Day.
Because I had some leftover condensed milk, I thought I would turn that into dulce de leche and then use it in another sweet. But chocolate brownies again? No, with the dulce de leche, I decided to go with blondies.
I've made coconut dulce de leche before in a microwave oven, which really cuts down on the time. But since I don't have a microwave anymore, I used the stovetop method this time, which took me 35 minutes. Just pour the condensed milk into a saucepan and simmer it over medium-low heat, stirring constantly, until the milk is reduced and thick. However, there is a fine line between oozy dulce de leche and hard toffee so it is important not to let the milk thicken more than it should. This site, which instructs on various methods, provides some guidance.
To all mothers, 
HAPPY MOTHER'S DAY!
Brown Butter Dulce de Leche Blondies
Makes 16
Dulce de leche

150g flour
1 tsp baking powder
110g butter (if using salted butter, omit salt below)
75-90g brown sugar
Large pinch of salt
2 medium eggs
1 tsp vanilla extract
140-150g dulce de leche

Line the base and sides of a 20cm square tin with parchment paper. Preheat the oven to 180°C.
Sift flour and baking powder together. Set aside.
Melt butter in a saucepan over low heat. Simmer the butter until it turns a golden brown, about 10 minutes.
Whisk the sugar and salt into the brown butter. Set aside to cool until just warm, five to 10 minutes.
Whisk in the eggs, one at a time, and the vanilla extract.
Stir in the flour mixture until incorporated.
Spoon two-thirds of the blondie batter into the prepared tin and smooth the top. Scoop little dollops of dulce de leche all over the batter. Scrape the remaining batter on top and smooth it out (no need to be precise).
Run a butter knife through all the layers in swirls (just six or seven swirls will do so that there will still be pockets of the dulce de leche).
Bake until the top is light brown and a toothpick inserted in the centre comes out without any wet crumbs sticking to it, 20 to 25 minutes. Leave in the tin until just warm, then use the paper to remove the slab from the tin. Cut into 16 pieces.

Daring Bakers: Savarin

Saturday, April 27, 2013

LIME SAVARIN WITH COCONUT CUSTARD AND GRILLED PINEAPPLE
Every step of the process of making savarin is rather enjoyable! The dough is very sticky, and developing the gluten by hand takes a while, but I really liked it. And when the outcome is as delicious as it was, well, all that effort was worth it.
Natalia of Gatti Fili e Farina challenged us to make a traditional Savarin, complete with soaking syrup and cream filling! We were to follow the Savarin recipe but were allowed to be creative with the soaking syrup and filling, allowing us to come up with some very delicious cakes!
I made mini savarins with half the recipe provided by Natalia. Almost all the liquid in the dough comes from the eggs which I thought was unusual since water is usually one of the components of bread. I didn't follow the instructions as given though and made the dough with much fewer steps.
I mixed and kneading the dough completely by hand, so I know this can be done without a machine.
Here's a video of how I kneaded the sticky dough (or view it on YouTube). This was after about 25 minutes, and the dough was already getting stronger. It was my first attempt at filming anything with my phone camera (the DSLR is being serviced) and I was holding it in my left hand so the video is a little shaky.

My kitchen is not the brightest spot in the flat so I had to take the mixing bowl to a table by the door to the balcony, and there are sounds of cars passing by outside. In between, when the dough plops against the bowl, there's a squelching sound of air bubbles popping. Also, the dough starts coming away from the sides of the bowl and takes scraps sticking there along with it. Another eight minutes of this and the dough had become nice and elastic, and was ready for the proofing stage.
Pipe savarin dough into mini bundt moulds
To get the dough into the mini bundt moulds, I used a piping bag, pressing out three blobs to fill the holes, then cutting the dough with oiled scissors. With a wet finger, I smoothed out the surface. Unfortunately, the pattern doesn't really show up on the mini savarins (the grooves are too shallow). And I probably could have got one or two extra savarins if I hadn't overfilled some of the moulds.
Mini savarin with lime syrup, coconut custard and grilled pineapple
Mini Lime Savarin
Makes 10-12. Find the original recipe here.

175g bread flour, divided
2 tsp sugar
¾ tsp instant yeast
1 tbsp water
3 medium eggs, separated
½ tsp table salt
40g butter, softened
Lime syrup (recipe follows)

To serve
Coconut custard pudding
Grilled pineapple rings
Toasted dessicated coconut

Place 2 tbsp flour, sugar, yeast and water in a small bowl. Blend into a paste and set aside for 10 minutes.
Put the remaining flour in a large mixing bowl with the egg whites. Stir together to form a batter. Set aside for 10 minutes.
Add yeast mixture to the egg white mixture along with the egg yolks and salt. Mix to blend.
Add butter in three batches and stir well to blend well after each addition.
Knead the dough until elastic (see video above). Place dough in a lightly oiled bowl and cover with cling film. Set aside until tripled in size.
Lightly oil a 10-hole mini bundt pan and scoop savarin dough into a piping bag. Pipe dough into the moulds (or use two teaspoons), cutting the portions with oiled kitchen scissors. Smooth out the surface with a wet finger. Cover the pan and set aside until dough reaches near the top of the moulds.
Meanwhile, preheat oven to 180°C. Bake mini savarin until golden and cooked, 18 to 20 minutes. Cool in tin, 10 minutes, then completely on a wire rack. Dunk into warm syrup. Pipe coconut custard into the centre of the ring, sprinkle with toasted coconut and serve with grilled pineapple rings.

Lime Syrup
½ cup caster sugar
100ml water
Large pinch of salt
2 tbsp lime juice
½ tbsp rose water

Put sugar, water and salt into a saucepan and bring to the boil, stirring constantly until sugar dissolves. Lower heat and simmer syrup for 10 minutes until slightly reduced and thickened. Take off the heat and stir in lime juice and rose water. Use while still warm.
* * *
Traditional savarin ring
Earlier, 
I used the recipe from this video to make a savarin in my new 24cm classic savarin mould.
It rose very high and emerged from the tin looking like an inner tube!
Not your traditional savarin
I diverted from tradition by slicing the savarin in half  and brushing on an orange-pomegranate syrup. There were pockets of dry crumb though, because they didn't get enough syrup.
The savarin was filled with pastry cream, then the topped was glazed with salted brown sugar toffee.
Pastry cream-filled savarin with salty toffee glaze 
This savarin was all right but I definitely prefer the mini ones since they're much easier to eat.
Check out other savarins in the slideshow on The Daring Kitchen.

Easter-slash-birthday cake

Sunday, March 31, 2013

MINT-CHOCOLATE MARBLE SOURDOUGH CAKE 
HAPPY EASTER!

10.30am: The troops are gathering. And by "troops", I mean my large family – who are far from doing anything together with military precision!
Today, we're also having an early celebration of my nephew/godson's birthday which is on April 3. My mother asked him what cake he wanted, he told her he'd like a mint-flavoured cake, she asked me if I had a recipe for said cake... and in my family, "Do you have the X recipe?" is code for "Can you make the X?"
I'm not complaining. I was going to make a crepe cake with a caramelised banana filling (I have a ton of frozen bananas), but that will just have to do for another day. This cake would have required more effort than a mint-flavoured cake anyway – all that standing over the stove and cooking 25 or more crepes.
After successfully adapting the King Arthur Flour chocolate sourdough cake recipe for a two-toned matcha sourdough cake, I decided to make the mint cake the same way, this time marbling two colours as well as two flavours.
The un-iced cake
And so I made a plain white sourdough cake batter and divided it. I flavoured one portion with peppermint and coloured it a soft green with food gel, and added cocoa powder to the other portion. The batters were then layered in a baba pan and swirled by cutting through them with a butter knife as the pan is rotated once. Just eight knife cuts are sufficent. The sourdough batters are thicker and stickier than normal cake batter, so there might be a tendency to swirl more than normal.
I tasted some crumbs when the cake was done, and there was a nice combination of mint and chocolate – which would be more pronounced once I added the two icings. But I couldn't tell what the inside would look like until my nephew cut it at his party.  
To be continued after the cutting of the cake...

The swirls in the crumb; (inset) embarrassing the just-turned-teenager with little-girl candles
5.52pm: The swirls on the inside of the cake didn't come out as evenly as I had hoped but they were all right. My nephew was very pleased with the minty taste, and that is all that matters to me.