The Oven has baked its last loaf. This blog is no longer being updated.

My cooking videos appear at youtube.com/janeragavan

I write on food at star2.com

Showing posts with label pastry. Show all posts

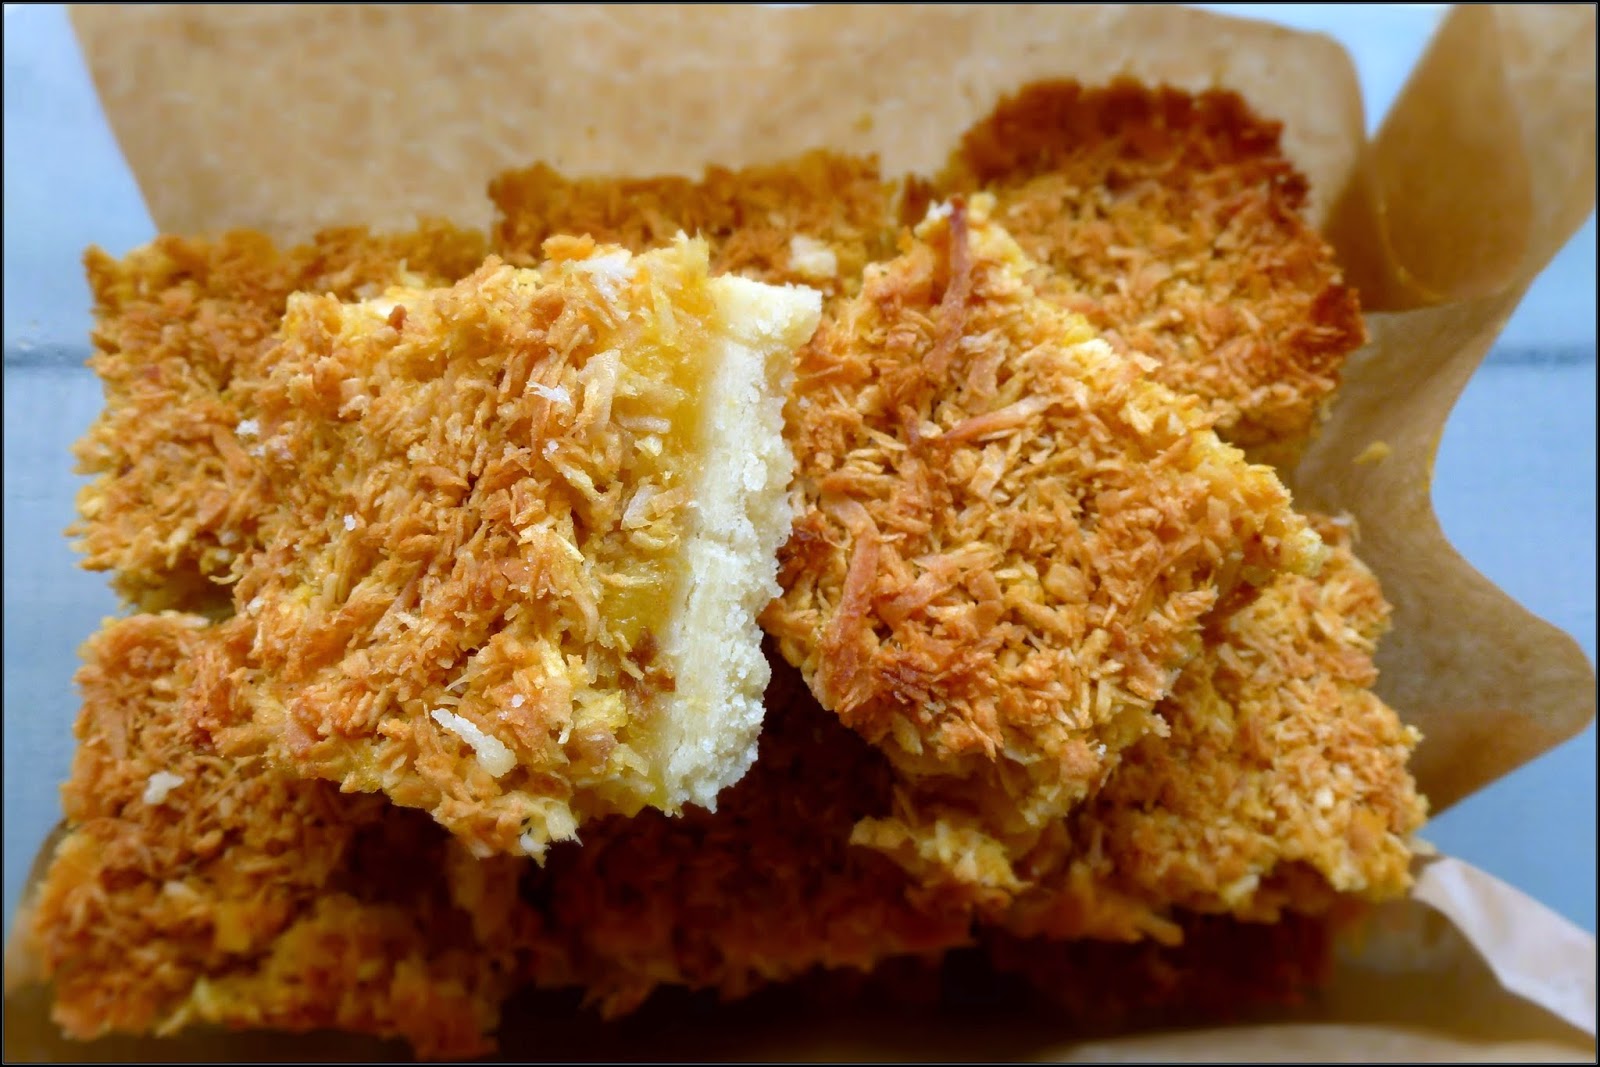
Coconut and lemon curd bars

Sunday, August 3, 2014

I made the lemon curd used in these bars with this foolproof method. The only tweak I made to the recipe was to add a tablespoon of corn starch to the mix after the eggs are beaten in. It's advice I took from a cooking show many years ago, and it works ~ the corn starch prevents the eggs from curdling as well as thickens the custard.

Coconut and Lemon Curd Bars
Makes sixteen 4.5cm square bars

Grease an 18cm square tin. Line the base with paper that extends over two opposite sides. Preheat the oven to 180 degrees Celsius.

Place 75g cold butter, 3/4 cup all-purpose flour and 1/4 cup icing sugar in a bowl. Blend with a pastry cutter. Tip into the prepared tin and press to compact. Refrigerate for 15 minutes, then bake the pastry until light brown, 8-10 minutes. Cool.

In a bowl, beat 1 egg and 2-1/2 tablespoons caster sugar together. Add 1 cup lightly toasted dessicated or shredded coconut (or a mix of both).

Spread 3-4 tablespoons lemon curd on the cooled pastry base. Tip the coconut mixture on top and press lightly to even out. Bake until golden, 10-12 minutes. Cool and cut into bars (they're easier to slice after being refrigerated for about 30 minutes).

Four-times-the-coconut doughnut

Thursday, July 17, 2014

Having consumed all manner of the edible parts of a coconut probably since I was a baby, coconut surely flows through my veins. So when I saw the picture for Top Pot Triple Coconut Donuts at Saveur, I had to make it. But an addict never has enough coconut, so mine has four types. Instead of the melted butter of the original recipe, I used coconut oil. It's also used to shape the doughnuts before frying. I didn't use the oil for deep frying though. That would have been over the top even for me.

Sigara böreği: Turkish cigar-shaped snacks

Wednesday, December 18, 2013

SIGARA BÖREĞI OR CIGARETTE BÖREK 
I didn't get the chance to try cigarette börek or sigara böreği in Istanbul. This pastry, shaped like a Turkish cigar, is made with a phyllo-like flaky dough called yufka and filled with ingredients like feta, parsley and sometimes potato or meat.
I saw other kinds of börek though – made in the larger pie-like shape and snail shell, but not the cigars.
Yufka pastry apparently comes in various thicknesses. The thicker ones are eaten like flatbread and used for wrapping meats and to scoop up dips (like the one in the picture below). The thinner ones are used for pastries like the börek. A lot of recipes say to use phyllo pastry if yufka is not available. Phyllo is thinner though, so about three leaves need to be layered together.
A thicker version of yufka is the flatbread seen in the background. Chicken doner with rice and (inset) pickled chillies. 
I decided to make my own pastry, based on the type you might use for a strudel. The dough is elastic so it can be stretched until quite thin. I've used this recipe for a strudel before, but this time, I left out the egg yolk.
The filling is a mixture of mashed potato, shredded cheddar, a Turkish hard cheese and snipped spring onions (green onions). I don't know what the Turkish cheese is called; it has the crumbly texture of parmigiano-reggiano and tastes like a sharp blue cheese – very sharp, in fact, which I only realised after the börek were cooked. 
I bought the cheese at a grocery shop in the northwest quarter of Istanbul where hardly any English is spoken, but it's where the locals shop. One of the delightful shopkeepers saw me looking at this variety and cut off a piece for me to taste. I liked it and chose a chunk that was already portioned. He weighed it and it cost 11 Turkish lira (about RM17.50), which is a really good price for organic, unprocessed cheese.
Turkish spice mix
The filling is seasoned with a spice mix that I got in Kadıköy, a town on the Asian side of Istanbul. This is one of the residential areas of the city but again, not much English is spoken. There are some shops catering to tourists but the prices are not inflated because it's also where the locals shop. 
According to the tube, the mix has eight type of spices. The names are all in Turkish, though, so I had to do some Googling to find out the English names. Except for one spice (poy), I found out (if I've correctly identified them) that the others are mint (nane), fenugreek (çemek), white pepper (toz biber), Greek oregano or wild thyme (kekik), sumak (no English name), coriander (kişniş) and red pepper flakes (pul biber). 
Make the sigara böreği in advance and store in the fridge or freezer.  
My börek are fried, but they can also be baked. I'm hopeless at frying but since I made only six this time, this was quicker and I got to eat them sooner!

Cigarette Börek (Sigara Böreği)
Makes 6

95g bread flour
Pinch of salt
50ml water, plus extra if needed
1 tbsp vegetable oil, plus extra for brushing and frying
½ tsp apple cider vinegar
Filling*, about 1¼ cups

Combine flour and salt in a bowl. Combine the liquids and add to the bowl. Bring everything together to form a soft dough, adding more water if necessary. Set aside for 30 minutes.
Divide dough into six equal balls. Roll out the dough into an elongated oval until very thin. Then, using the back of your fists, slowly stretch out the oval into a rough triangle until you can see through it (a few small holes are okay).
Brush the surface with oil. Place a row of filling at the wider end, fold in the lower points of the triangle and roll up towards the upper point. Make the rest of the börek.
At this stage, the börek can be stored in the fridge or freezer.
Heat up a large frying pan and add about 2 tbsp of oil. Fry the börek until brown on all sides. Serve with a dip.
* The filling is a mixture of mashed potato, shredded cheddar, a Turkish hard cheese and snipped spring onions (green onions), and seasoned with a Turkish spice mix. 

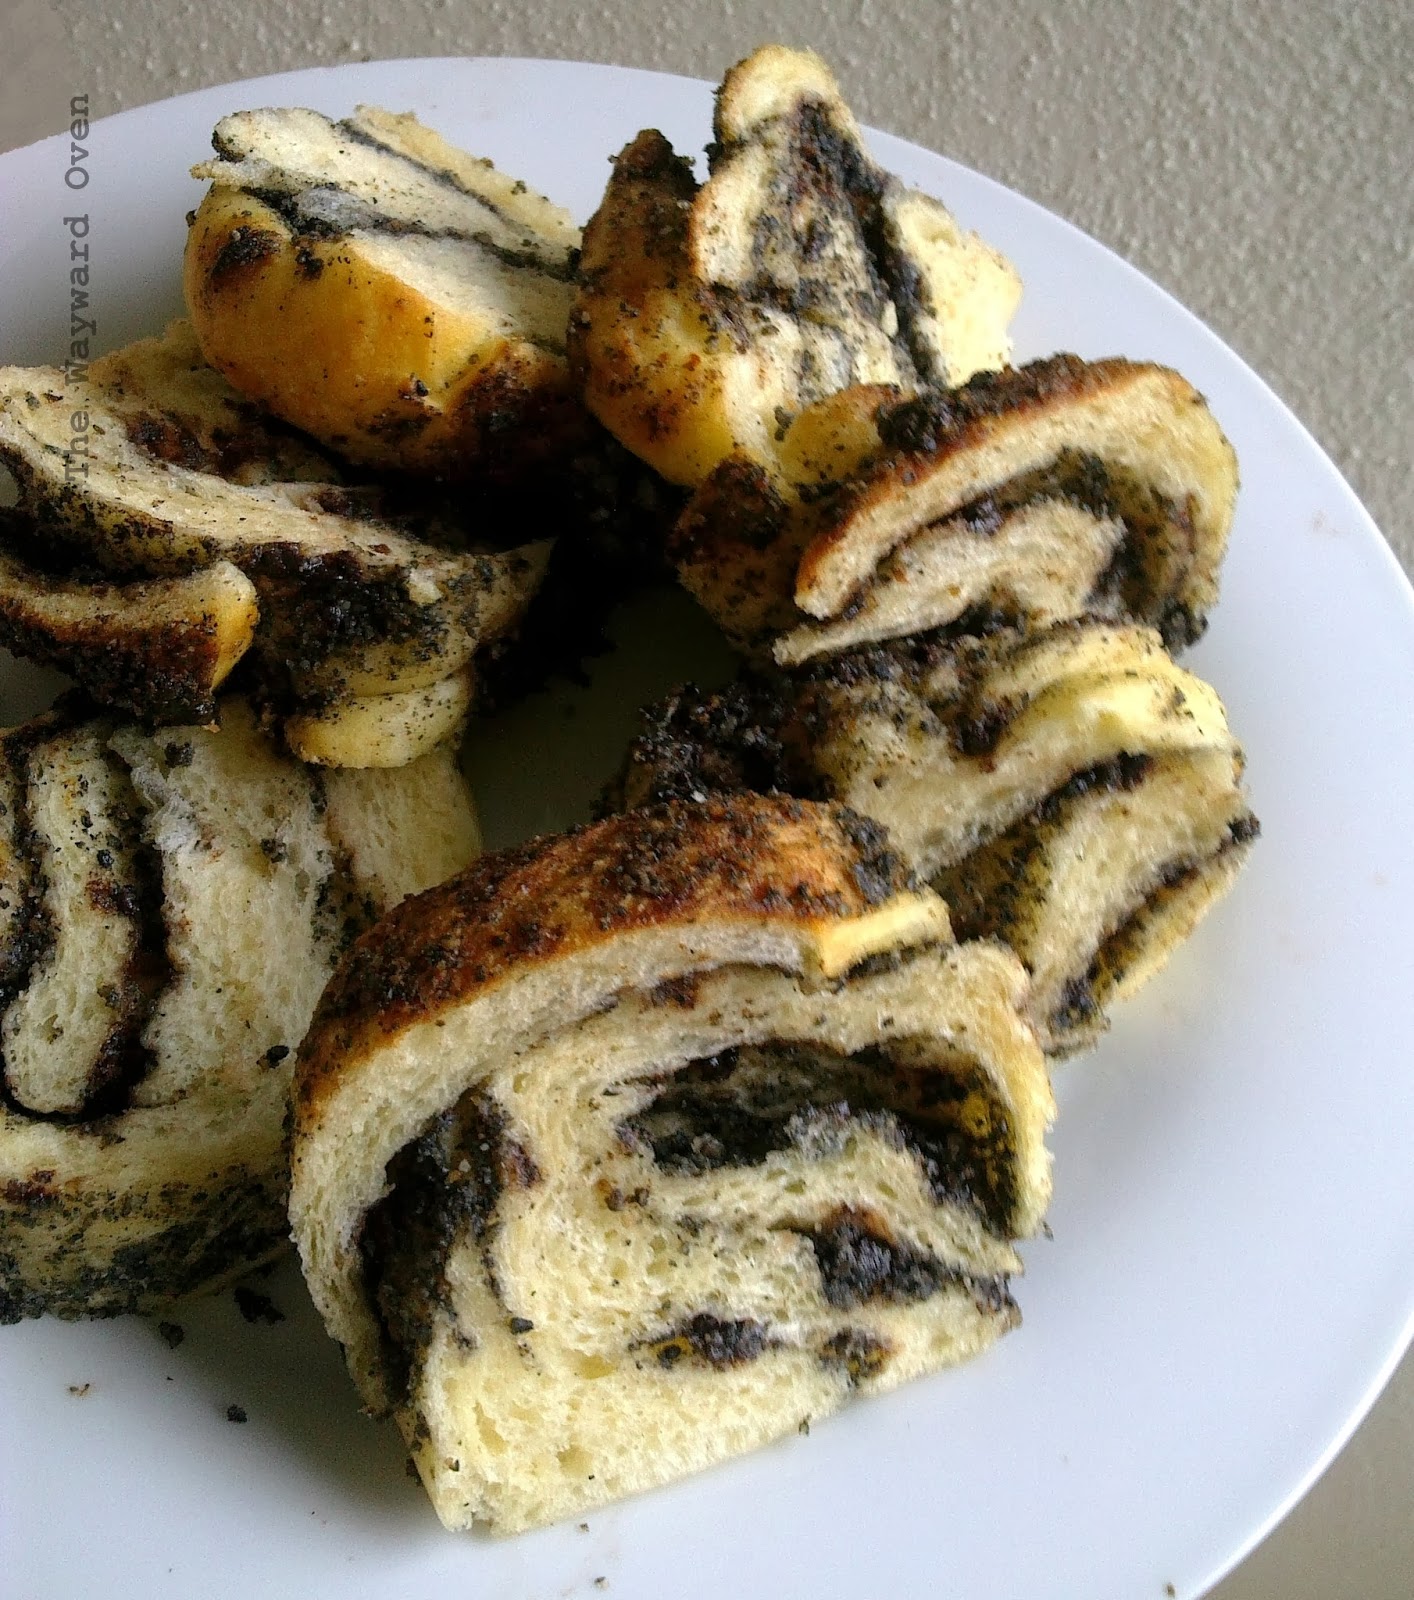
Black sesame and chocolate twist

Thursday, October 31, 2013

BLACK SESAME AND CHOCOLATE TWIST 
I noticed that the black sesame paste (from yesterday's post) that I had made months ago (it keeps well!) was still in the fridge, and I needed to use it up. After weeks of not having much time and only cooking daily meals, I have plunged elbow deep into dough with a vengeance this past week, and so decided to use the sesame paste as a filling for a loaf. 
Since I couldn't leave well enough alone, I added some black-and-white mini chocolate chips to the filling.
The next few posts will be scheduled as I may not be able to blog for some time. And this would be a good time to clean up my Draft folder in Blogger, so these posts will just have a short intro with a picture and recipe. I've had some drafts for over a year!

Black Sesame and Chocolate Twist
Makes 1 large loaf. Serves 10

½ batch basic sweet dough
¼ cup mini chocolate chips

Line base and sides of a large loaf tin with parchment paper.
Roll out the dough into a 20cm by 25cm rectangle. Spread with sesame spread and sprinkle the chocolate chips on top.
Beginning from one long end, roll up into a tight Swiss roll. Slice through the middle of the roll lengthwise into two. With the cut side up, twist them together into a rope. Place in the prepared tin, cover and leave to rise to the top of the tin.
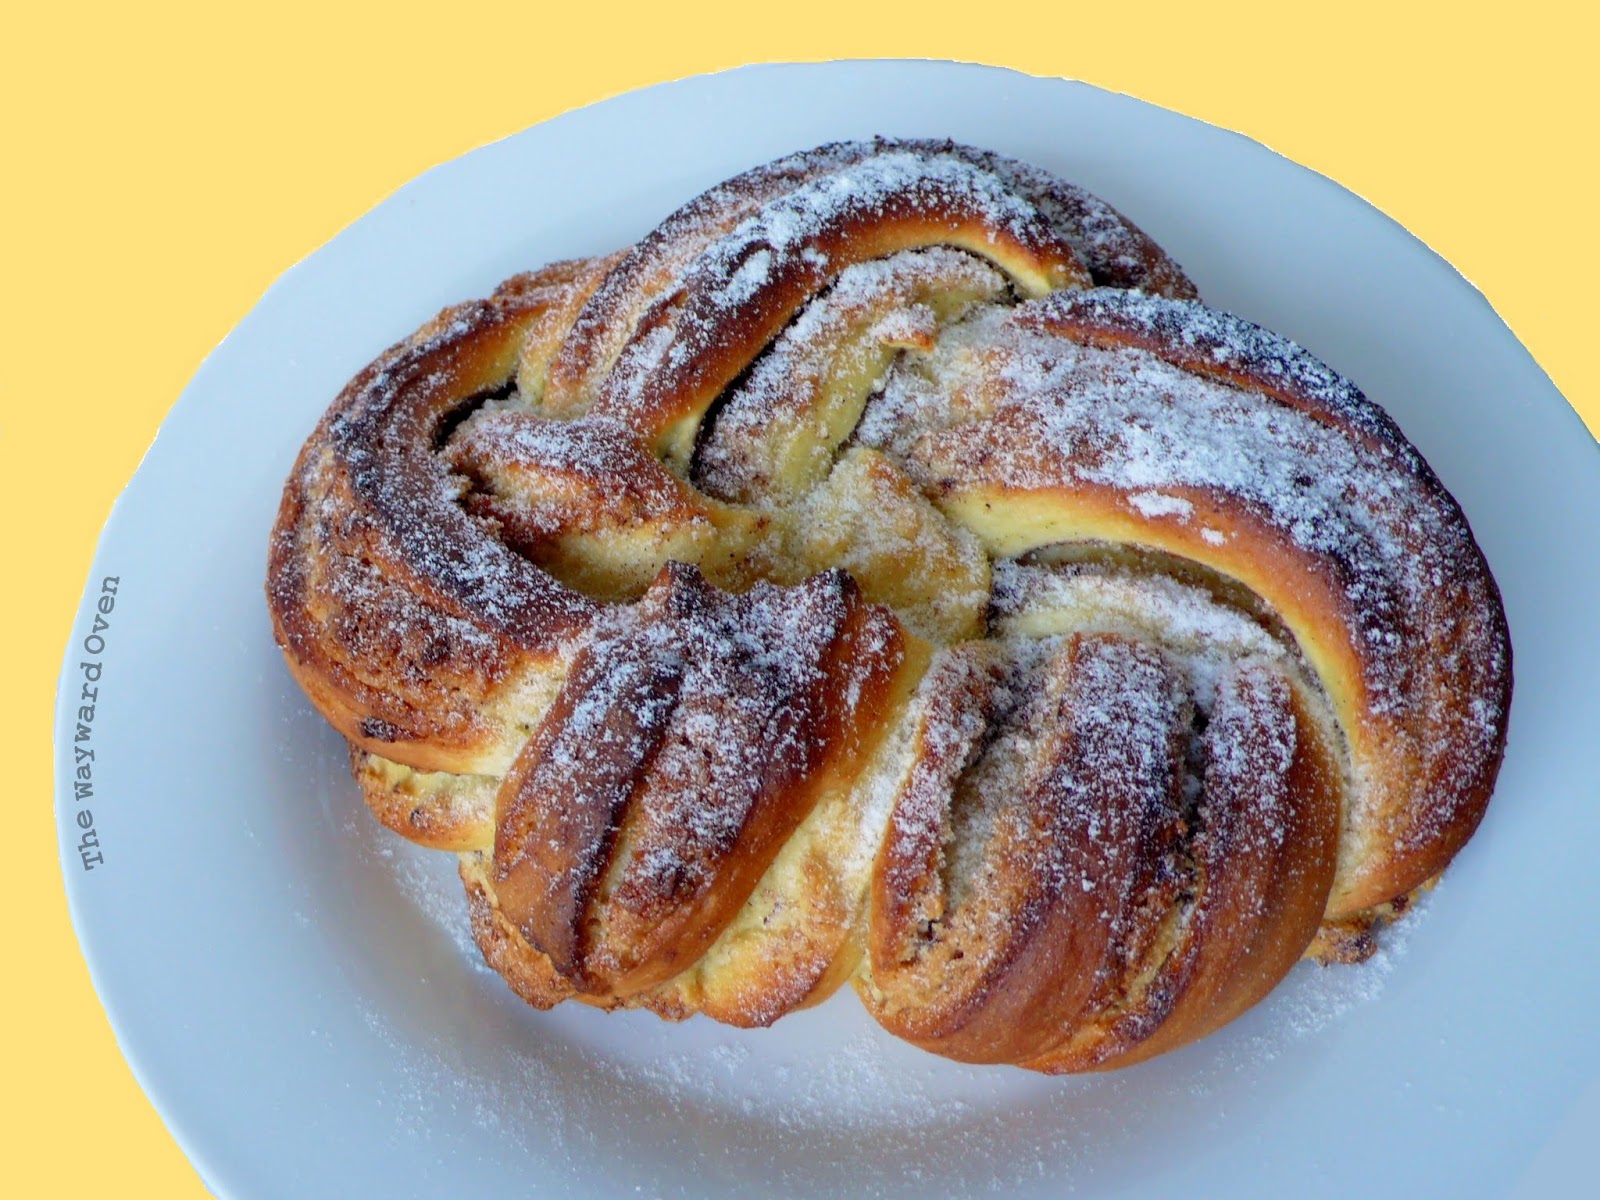
Alternatively, shape it into a round like this Russian Rose Braid.
Meanwhile preheat the oven to 180°C. Bake the bread, 30-35 minutes.

Daring Bakers (from the archives): August 2010 ~ Pierogies

Saturday, July 27, 2013

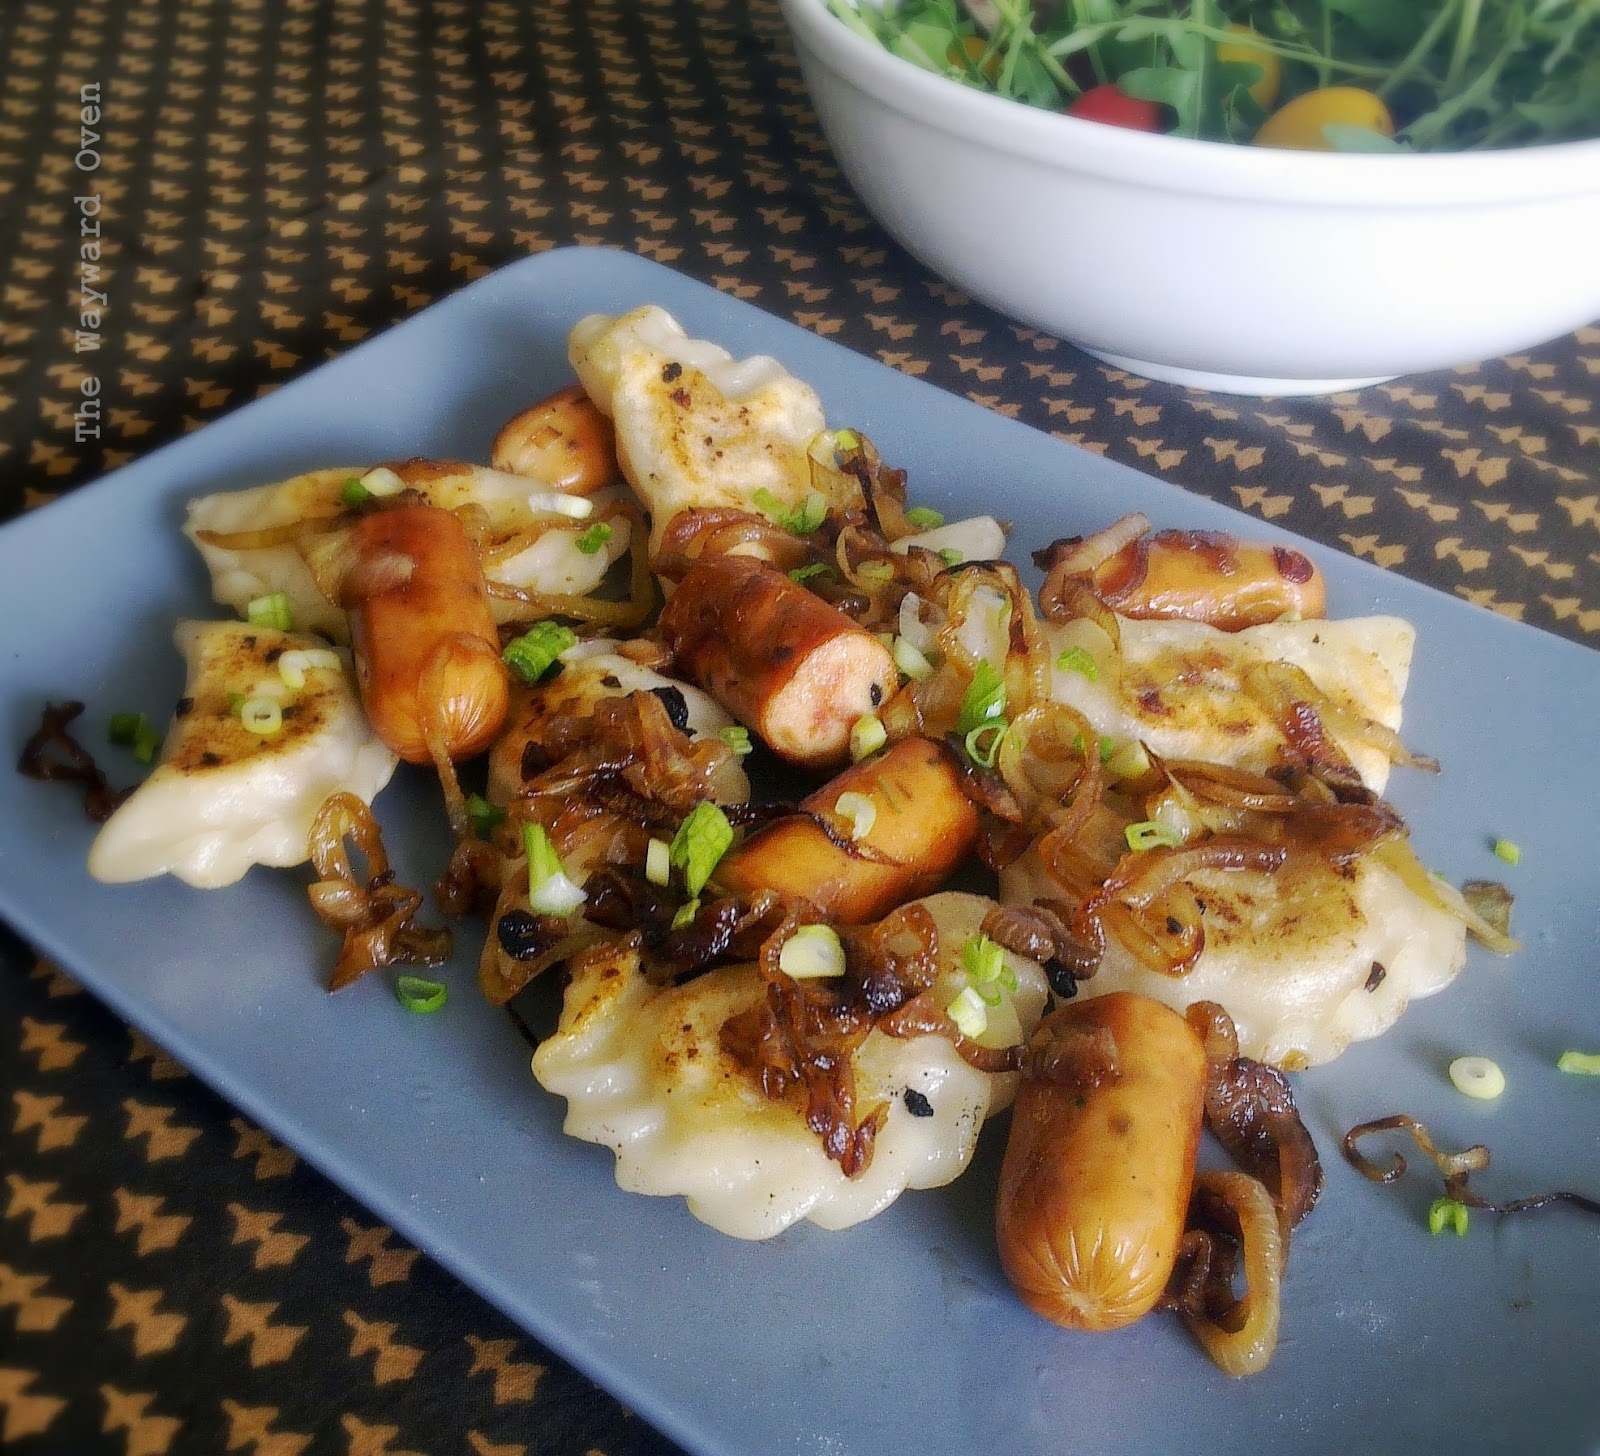
POTATO-CHEESE PIEROGIES WITH SAUSAGES AND FRIED ONIONS 
In a "celebration" of past Daring Baker and Daring Cook challenges, Lisa challenged all of us to search through the Daring Kitchen archives and pick any one we'd like! The REAL challenge was picking which delicious recipe(s) to try! 
Now, I have been a Daring Baker for a few years now and the reason I chose to be a baker and not a cook was because I could not resist making all those sweet baked goods. I have participated almost every month since I started – some dishes have come out well, others were excellent, and there were a few miserable failures as well. But I've learned many new things.
So for the challenge, I could have tried out a bake I had never done before, or gone back to one that had failed. But I decided to put aside the sweets this time and try out a Daring Cooks challenge. 
So I am making pierogies (August 2010 challenge hosted by LizG of Bits n' Bites and Anula of Anula's Kitchen) for the first time and after the whole process, which has several steps, I ask myself, "Why?" Why is this the first time I am making pierogies?! They're wonderful!
 Use the water after boiling the potatoes for the filling to make the dough
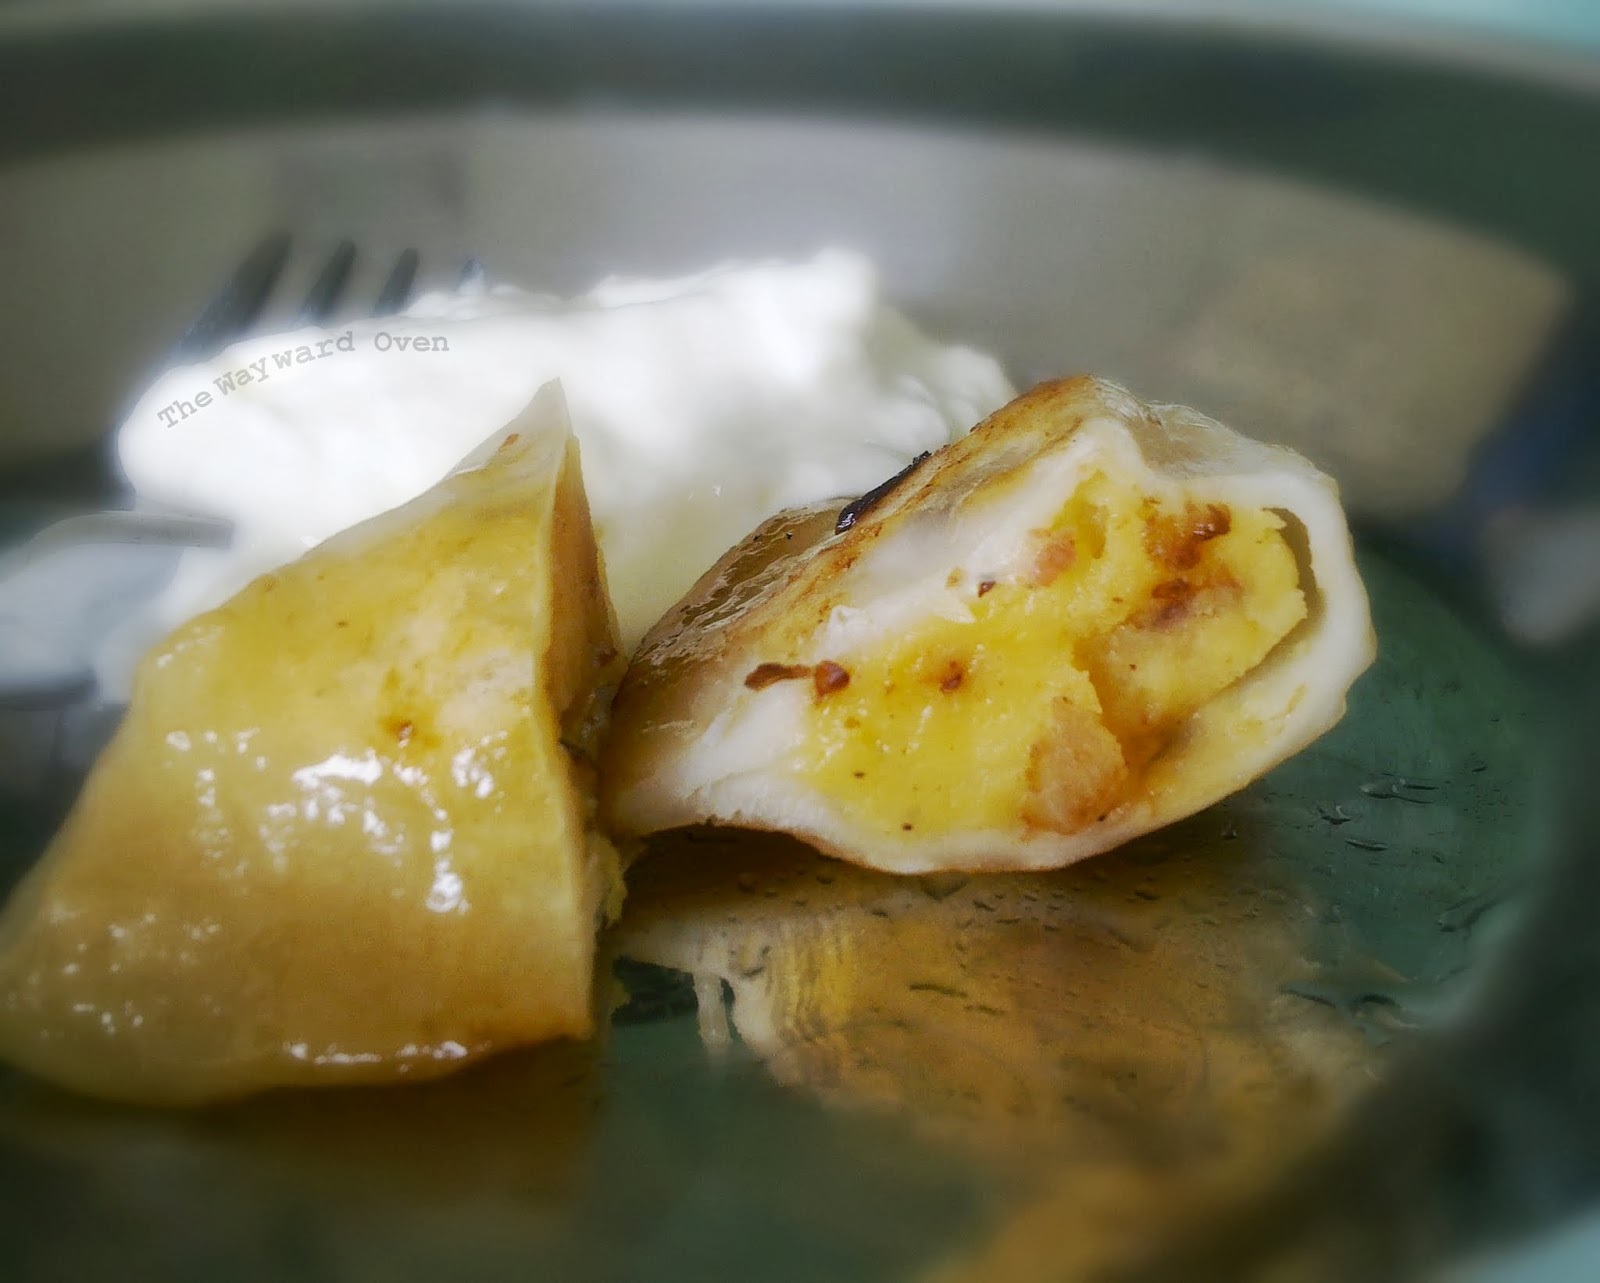
For the filling, I went with a traditional Polish/Russian one of potato and cheese. With the dough, I'd read that the water used to boil the potatoes is a good binder instead of eggs, and I also used sour cream. Apparently, low-protein flour makes a softer dough, so I used Chinese pau/bao flour. I like the texture of the dough, and it is easy to work with.
No doubt about it, pierogies are stodgy, so don't eat too many of these before doing something that requires moving about a lot. I had seven in one go – couldn't resist! – and had to have a lie-down after that.
Fry the onions, then brown the boiled pierogies in the same pan
Potato-Cheese Pierogies
Makes 30 pieces

Filling
300g potatoes, (about 4 medium) peeled and halved
4 rashers streaky bacon (optional)
1 medium (about 70g) white onion, finely chopped
1 clove garlic, minced
50g (about ½ cup) shredded sharp cheddar (or other cheese)
Salt and pepper, to taste

Dough
300g (about 2 cups) pau/bao flour (low-protein flour; or use all-purpose)
2 tbsp sour cream
175ml (about ¾ cup) warm potato water, plus extra

To make the filling, heat a pan and fry the bacon without any oil. Once the bacon is crisp and the oil is rendered, remove the bacon and crumble or chop. Sauté the onions in the bacon grease and cook until golden. Add the garlic and fry briefly. Set aside.
Boil the potatoes in plenty of lightly salted water until tender. Drain, retaining about 1 cup of the water.
Return the cooked potatoes to the pot over low heat to dry out slightly, 1 minute. Take pot off the heat and add the crumbled bacon, onion mixture and shredded cheese. Mash the potatoes, then let the mixture cool.
To make the dough, place the flour in a bowl. Stir in the sour cream. Make a well in the centre and add almost all the potato water. Bring the mixture together, adding more water a tablespoon at a time if necessary, until a soft dough forms. It should not be sticky. Cover and rest for 15 minutes.
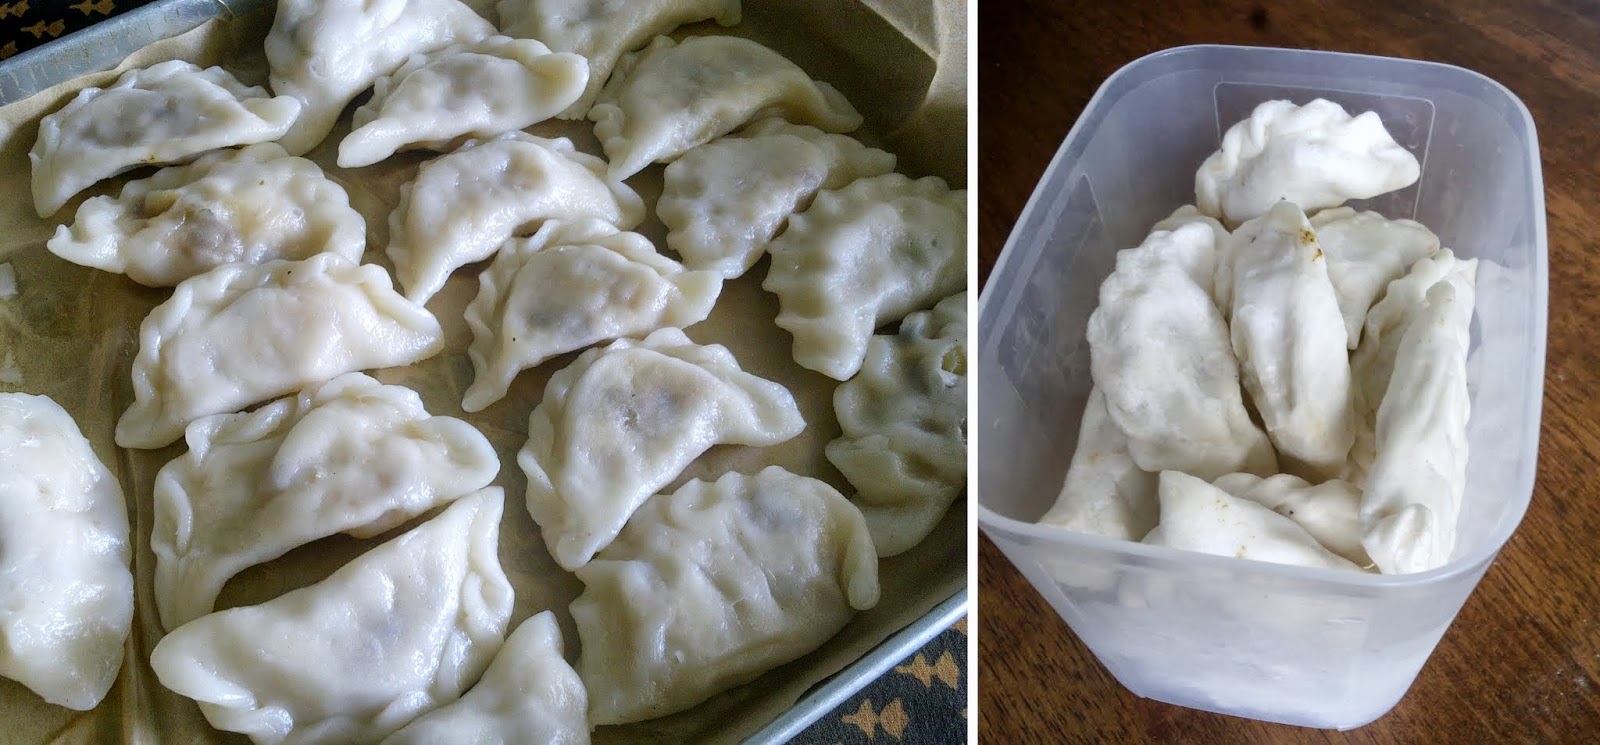
Pierogies: boiled and frozen. They may look bland, but these little half-moons pack flavour - and comfort.
To assemble, roll out the dough to about 2mm and stamp out 7cm circles with a plain cookie cutter or drinking glass. Turn a dough circle over so the moister side will now be on top, and place a teaspoon of filling in the centre; press the opposite edges together firmly to form a semi-circle. The edges do not need to be crimped as they stick together well but for a bit of decoration, crimp away! Place the half-moons on a lightly floured plate.
Bring a large pot of water to the boil; salt lightly. Boil the pierogies in batches. When they float, leave them in for 1-2 minutes longer, then transfer to a tray lined with greaseproof paper. If desired, the pierogies may be frozen after they cool. Freeze them in one layer, then transfer to a freezer-proof plastic bag. 
Serve them with sour cream, or lightly fry them on each side and serve with fried onions and good-quality sausages.
* * *
And on the Bakers' side...
The August 2010 Daring Bakers challenge was pound cake. I chose to use it in a Baked Alaska.

Daring Bakers: Gevulde Speculaas

Sunday, January 27, 2013

SPICY DUTCH PASTRY: GEVULDE SPECULAAS 
Francijn of Koken in de Brouwerij was our January 2013 Daring Bakers’ Hostess and she challenged us to make the traditional Dutch pastry, Gevulde Speculaas from scratch! That includes making our own spice mix, almond paste and dough! Delicious!
Francijn was right – the Gevulde Speculaas was indeed delicious, and fun to put together too. At first, it was daunting to see the number of different spices used in the mix – nine in all! – but when combined, every one of them was essential: cinnamon, cloves, mace, ginger, white pepper, cardamom, coriander, (star) anise, and nutmeg.
I had all the spices in my pantry as many of them are used in curries. While I am not a big fan of cloves, I did not omit them from the mix. After tasting the pastry, I was glad I didn't.
Most of the spices I stock are whole – the only ground ones I have are cinnamon, ginger, white pepper and nutmeg in ground form. I chose to use the whole ones and proceeded to toast them separately, then pound (with a mortar and pestle) each one into a powder, and finally to sift them! That was the most elaborate part of the challenge for me, but I was getting pure spices and didn't mind the extra work.
Here's the recipe in PDF. In it, Francijn writes about the history of Dutch spice trading and the background on this lovely pastry. Malaysia, or Malaya at the time, was of course part of the spice route, and there is a history of the Dutch in this country too. 
Gevulde Speculaas is two layers of dough with another layer of homemade almond paste (pictured right) sandwiched between them. I used ready ground almonds which I get from the baking supply shop over here. The paste also consists of sugar, and lemon zest and the binding agent is an egg. I had read that flax seed paste can be used as a substitute for egg so I toasted and ground flax seeds and mixed the powder with water. After sitting for a while, the mixture has a gel-like consistency. In place of one egg, use 1 tablespoon of whole flax seeds, grind them and then mix with 3 tablespoons of water. The flax seeds give the almond paste a light brown hue, which is perhaps why the middle layer is not so distinct in the pastry.
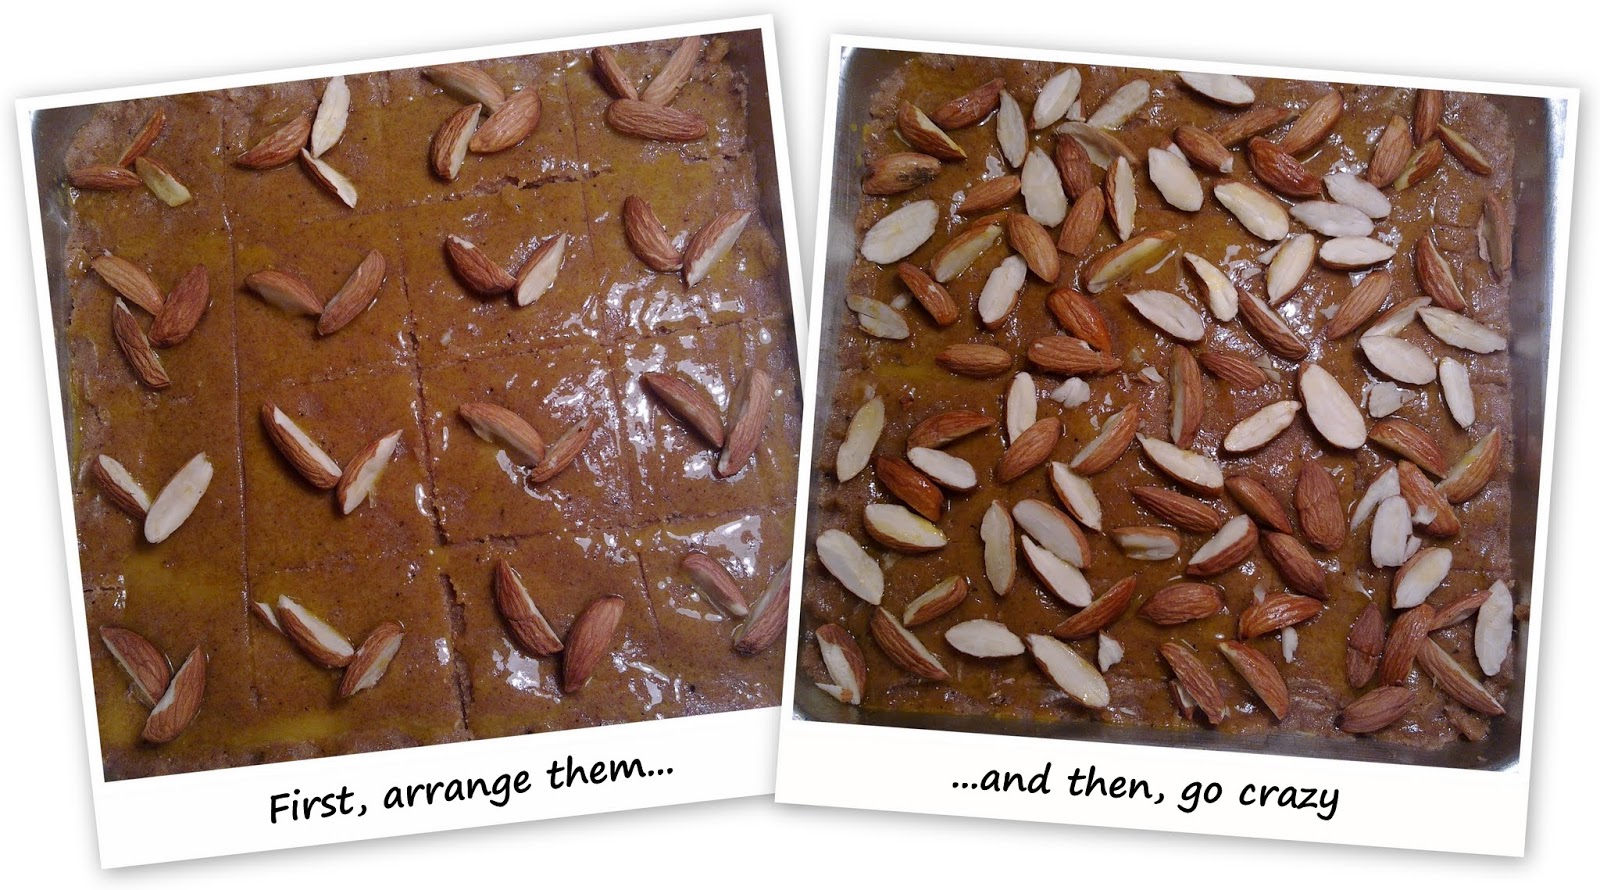
I only strayed from Francijn's recipe in one respect, and that was to use almonds with their skin on for the decoration on top. I think they taste better after they get toasted in the oven. They are halved to offer some contrast in colour.
After seeing the finished pastry from some of the Daring Bakers on the DB forum (see the pictures in a slideshow at the site), I was keen to try the beautiful patterns made with slivers of almonds, but I knew it would be too much to handle since I only made the gevulde speculaas last night. I started out with a simple arrangement, and then decided to just sprinkle on a whole lot of the halves. More crunch to enjoy!

Sourdough Surprises: From brioche to babka

Sunday, January 20, 2013

MOCHA-CINNAMON SOURDOUGH BABKA
Who would have thought that you could have too much chocolate. Being generous was certainly detrimental this time.
Sourdough Surprises had a double challenge this month: use our starters to make sourdough brioche, and then use the brioche dough to make babka. I kept to the traditional flavours of chocolate (grated) and cinnamon for the filling.
The dough I made was a little too wet and so I added a lot more flour to firm it up. I took about a third of it and made panettone, and the rest, I filled, rolled and formed into a babka. The loaf was quite heavy and didn't look like it would rise much, so I placed it in a small cardboard loaf case (great for gift loaves). In the oven, however, the loaf expanded and the box looked like it might burst its seams! (The panettone turned out well because they were baked in cupcake-size boxes.)
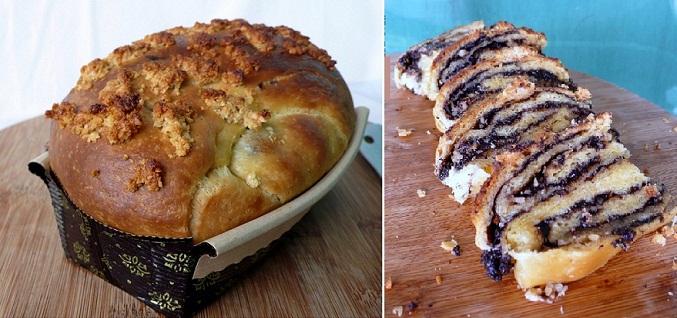
Babka 1: Bursting out of the cardboard loaf case; and too much chocolate
This was like trying to encase my wobbly bits in Spanx, only I used a pair that were a tad small so that the lower part was compressed and the upper part was pushed upward and outward like a muffin top. Add to that too much filling and the result was a very close crumb and oozing chocolate. The loaf was still a little undercooked, I felt, even though I had baked it for longer.
Okay, first time, not good, so I tried again. This time I didn't add extra flour (but with a tiny bit of instant yeast just for insurance) and instead of kneading the "usual" way, I used a kind of slapping and folding technique shown by Richard Bertinet in this video (I did it in a less professional manner, of course). I kneading directly in the large ceramic mixing bowl and with just one hand. 
It was amazing how that sticky slack dough was transformed and though it took me about 20 minutes, it did lose its stickiness.
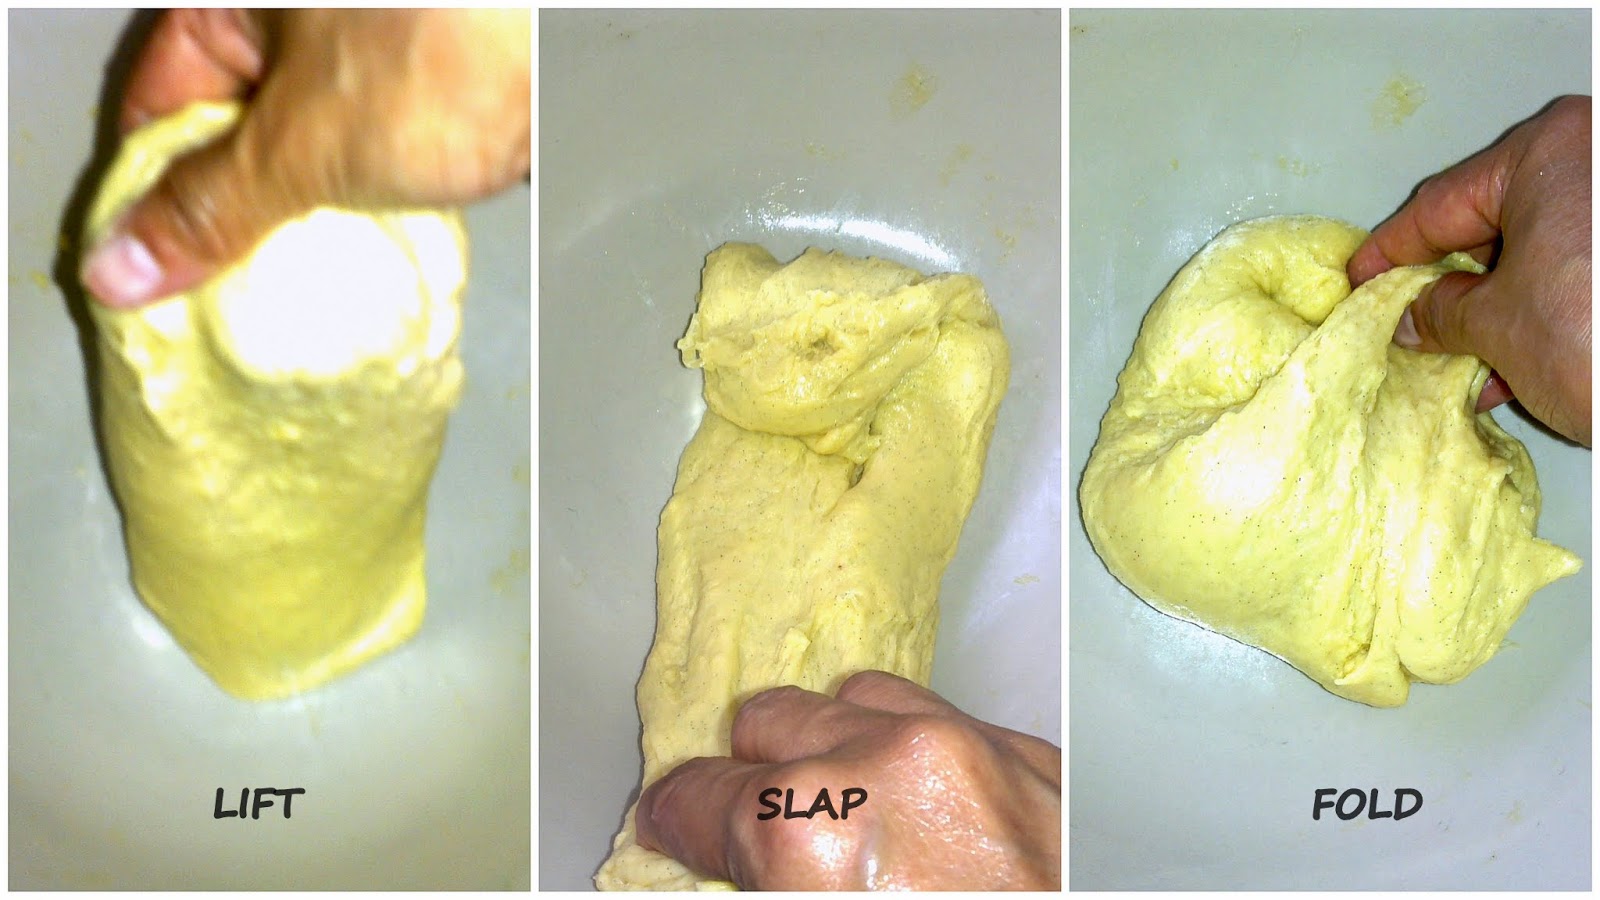
The slap-and-fold method of kneading dough in a bowl
When you first start to knead, there is a dull thud as the heavy dough hits the bottom or side of the bowl. As it gets more elastic, the sound transforms from a plop to a thwack and finally a slap. You can feel the texture changing as well. It's all very exciting!
The pictures are a little lemony-green because I was doing the kneading at night when the light wasn't good. When the dough was slapped against the bowl, it sometimes caused the bowl, heavy though it was, to clatter against the counter-top. If any of my neighbours could hear all the noises, they must have wondered what the heck was going on in Apartment 12!
For the second loaf, I looked up some Jewish babka recipes. This one has an interesting filling of  instant coffee, cocoa powder and cinnamon, and I mixed up the filling to my own taste. There's only a little coffee but it boosts the flavour of the chocolate.
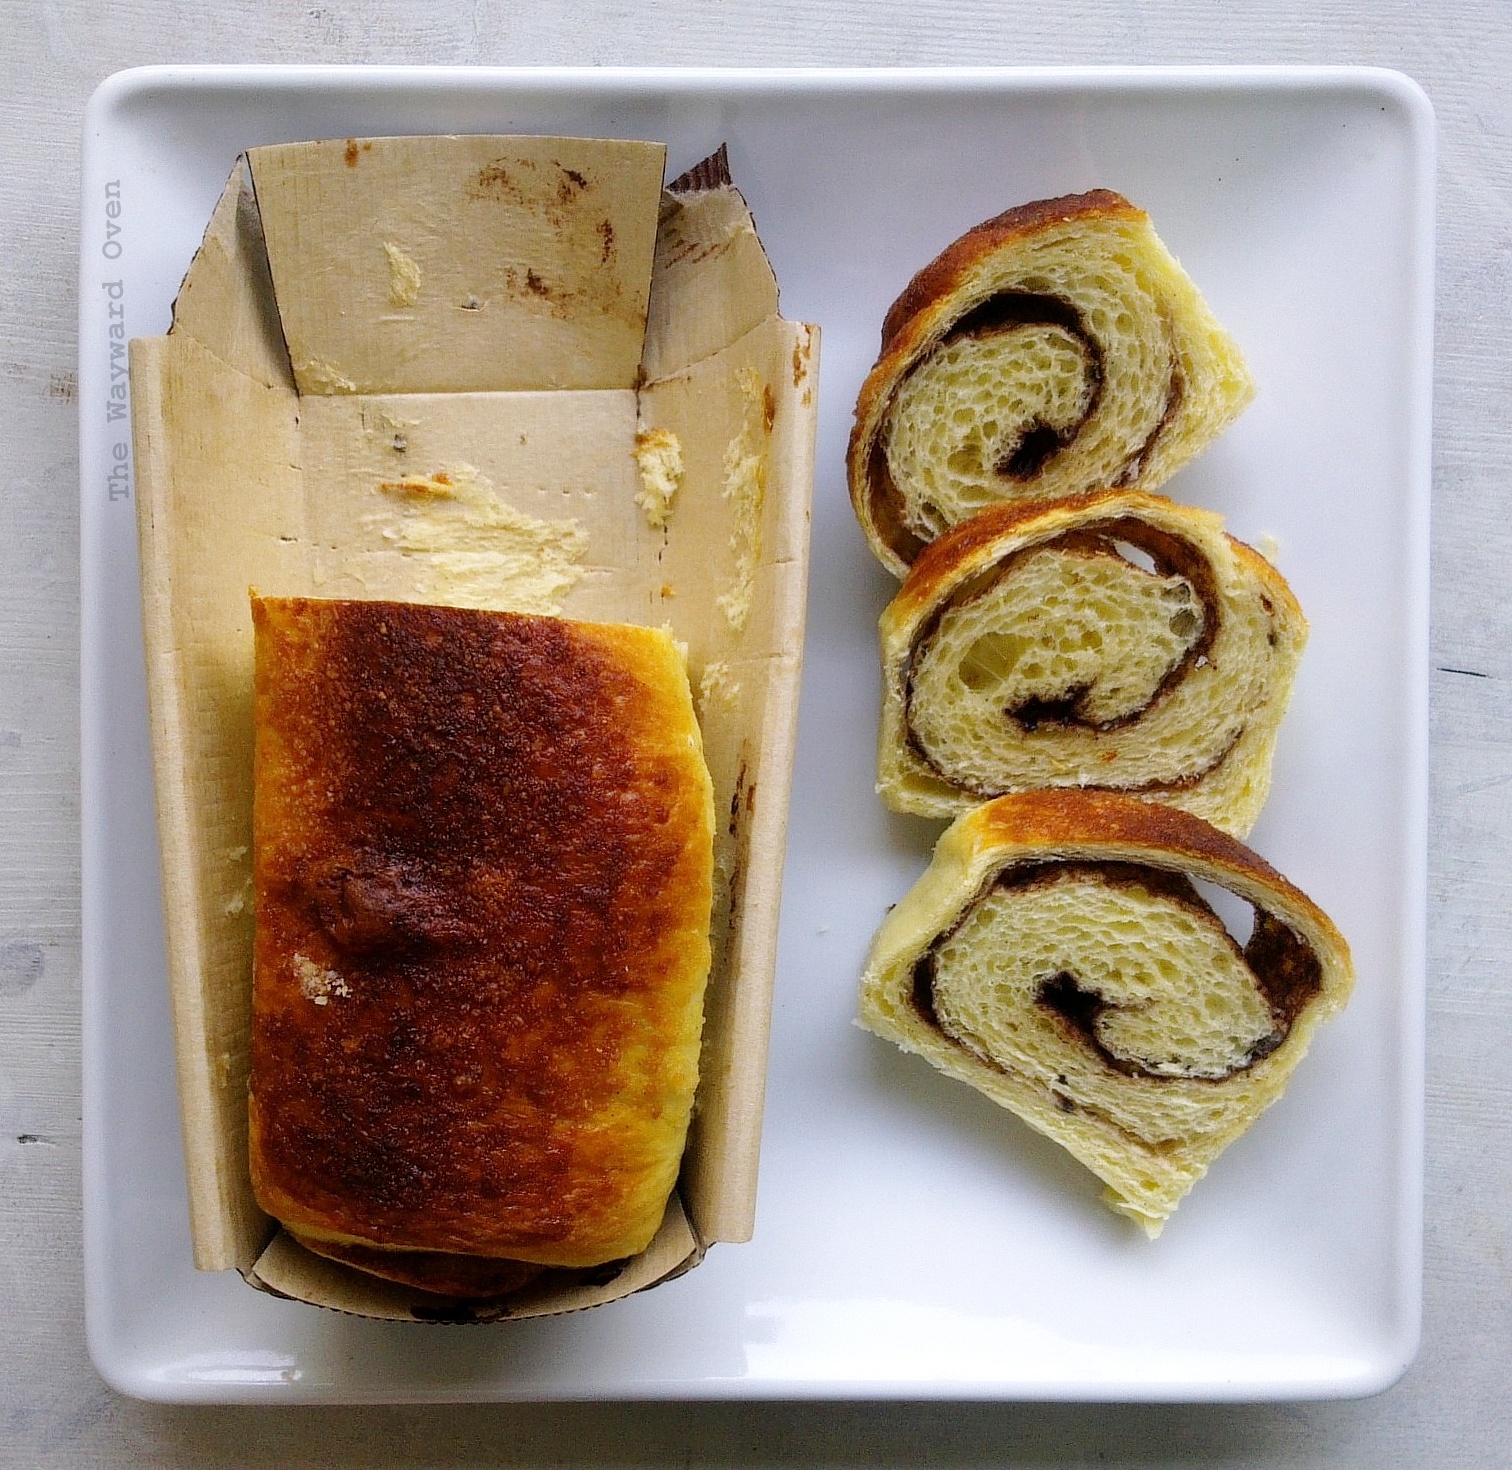
This time the loaf rose during proofing (and I didn't overfill the cardboard box!) and it had a nice open crumb. Peter Reinhart's advice is to use a toothpick to poke a few holes into the loaf to burst the air bubbles before baking, but I forgot and that's why there is a separation between the filling and the dough (see opening picture, top). Anyway, it proves how light this babka is so I am not  complaining.
See what the Sourdough Surprises baking group came up with:

Babka 2: This time it fits the cardboard box perfectly
Mocha-Cinnamon Sourdough Babka
Makes 2 medium loaves + a few buns
Without the filling, the dough can be baked as brioche.

Levain
50g mother starter (at 80% hydration)
65g water
100g flour

Dough
All the levain (about 217g; it is quite stiff)
56g water
21g honey
⅛ tsp instant yeast (optional)
1 whole medium egg
2 egg yolks
Seeds from 2 vanilla pods or 1 tsp pure vanilla extract
315g bread flour
4g salt
49g caster sugar
150g butter, at room temperature

Filling and topping
20g soft brown sugar
5g icing sugar
5g cocoa powder, sifted
1g instant coffee granules
¼ tsp ground cinnamon
1 egg white
2 tbsp caster sugar
1-1½ tbsp almond meal (ground almonds)

Make the levain: Combine all the ingredients, cover and set aside for 12 hours. If it is not bubbly at this time, remove half and feed it again. Leave for another eight to 12 hours.
Make the dough: Place the levain in a large mixing bowl. Combine the water, honey and yeast (if using); stir into the levain. Leave for five minutes.
Combine whole egg, yolks and vanilla seeds. Stir into levain mixture.
Combine flour and salt and stir into levain mixture. Stir in sugar.
Add butter in three batches, stirring together well each time to incorporate completely. The dough will be slack.
Knead the dough using whatever method you are comfortable with until the dough holds together well. It will be elastic and leave the side of the bowl.
Line a baking tray with parchment, with two sides overhanging. Spread dough onto tray, place tray inside a food-grade plastic bag and proof overnight in the refrigerator. The tray "shapes" the dough into a rectangle and makes it easier to roll out when ready to fill.
The next day...
Lightly grease two loaf pans.
Make the filling: Combine brown sugar, icing sugar, cocoa powder, coffee granules and cinnamon in a small bowl. Set aside.
In a medium bowl, mix egg white with 1 tsp water.
Assembly
Transfer cold dough rectangle to a lightly floured surface. Roll out to a 5cm-thick rectangle. Brush egg white over the dough, then sprinkle the cocoa-coffee mixture on top. Reserve the remaining egg white. Roll up jelly roll style. Cut dough to a length that will fit the loaf pans, and twist each half three times. Place in the loaf pans. Slice any remaining dough for cinnamon rolls. Cover with cling film and leave to rise.
Preheat oven to 180ºC.
Make the topping: To the remaining egg white, add sugar and almond meal. Brush the mixture over the top of the loaves. Using a toothpick, poke a few holes into the loaves to burst the air bubbles. Place loaves in the oven. If the tops brown too quickly, cover with foil. Bake until a toothpick inserted in the centre comes out clean, 40-50 minutes.

Everything's coming up roses!

Friday, December 28, 2012

RUSSIAN ROSE BRAID 
It's so nice being on leave. I have almost three weeks off from work and it coincides with the time my sister Joyce and her family are visiting from the US.
Last week, the day after they arrived, the whole family met at one of my brothers' homes for breakfast. My mother had ordered an array of local breakfast dishes like nasi lemak (coconut rice with sambal) and fried noodles as well as Indian specialities like tosai (rice and lentil pancakes), roti canai (flatbreads) and idli (steamed rice cakes) along with the accompanying chutneys and curries. I had a feeling these spice-rich and chilli-laden foods would not agree with my American brother-in-law, so I made a sweet breakfast bread for him.
A couple of days earlier, I had prepared some basic sweet yeasted dough from a recipe in Ciril Hitz book, Baking Artisan Pastries & Breads (Quarry Books) and used it for the bread. This video shows Ciril Hitz making his Russian braids in loaf pans. I made my bread according to his recipe except it's coiled to look somewhat like a rose.
The quantity of dough was sufficient for two loaves. I made the first one with about two-thirds of the dough and let it rise in a 22cm springform tin so it has a more defined shape (pictured above). This one I took to the office for a Christmas party.
Fill and roll, slice, braid, coil
The second loaf, which I made for Keith, was freestanding (pictured below). The crust was a deeper brown on the sides and the shape was a little less rose and a bit more knot, I think.
I'm sure any sweet yeast dough would be suitable for this braid. What I think is special is the Nut Filling that Ciril Hitz uses. It's also one of his basic recipes and he uses it for other confections in his book. The recipe is reproduced here with permission from the book publisher. I used almond meal and after spreading the paste on the rolled-out dough, I sprinkled on some ground cinnamon.
This braid was baked without a mould.
Both times I made the braid, I forgot to take a photo after the loaf was sliced, so there is no picture of the crumb. But it's not difficult to imagine the intertwined layers of dough and filling.
I also forgot to taste the bread both times. For the office party, I just dropped it off since I was already on leave, and at the family breakfast, after stuffing myself with a packet of nasi lemak and an idli, I didn't have room for anything else. But I have a feeling it wasn't bad since Keith kept eating it. (Or maybe he was just hungry!)

Freckled beauties

Sunday, December 2, 2012

PÃO DE QUEIJO ~ SUPERSTAR BRAZILIAN BREAD 
When I was a child, I was a fan of Brazilian football – like many, I adored the superstars like Pele, Socrates and Zico. But I tell you if I had then tasted the Brazilian bread called pão de queijo, I don't know if those football greats would have even registered with me!
I first learnt about these buns from Renata over at Testado, Provado & Aprovado. Her blog is in Portuguese but put it through Google Translate and you'll read about what she considers "an eternal pleasure". Now that I've made the buns, I know exactly what she means.
The hole-y crumb
After reading up on the buns, I became aware of how popular they are and that everyone who has eaten them raves about how good they are. I won't disagree.
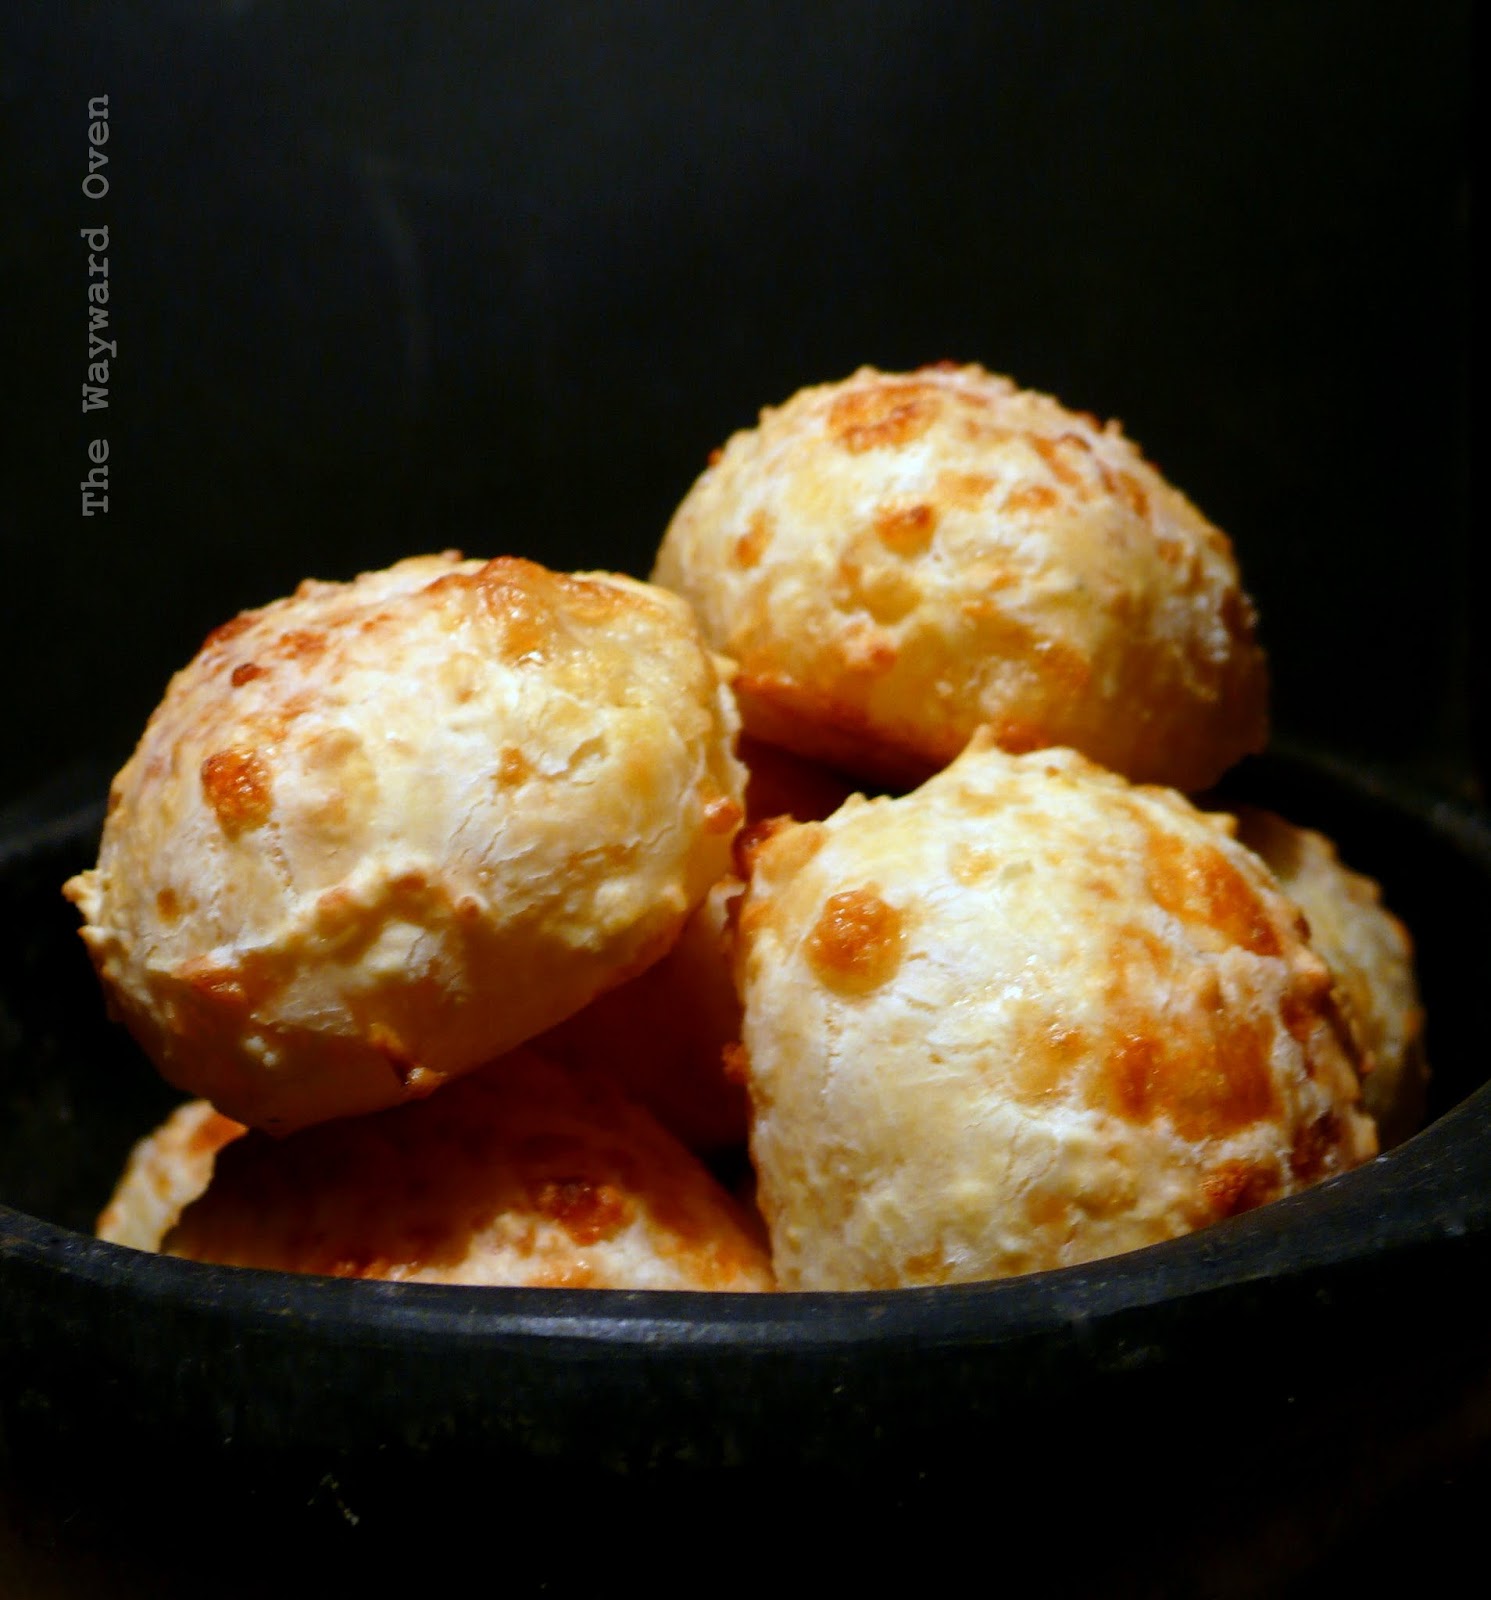
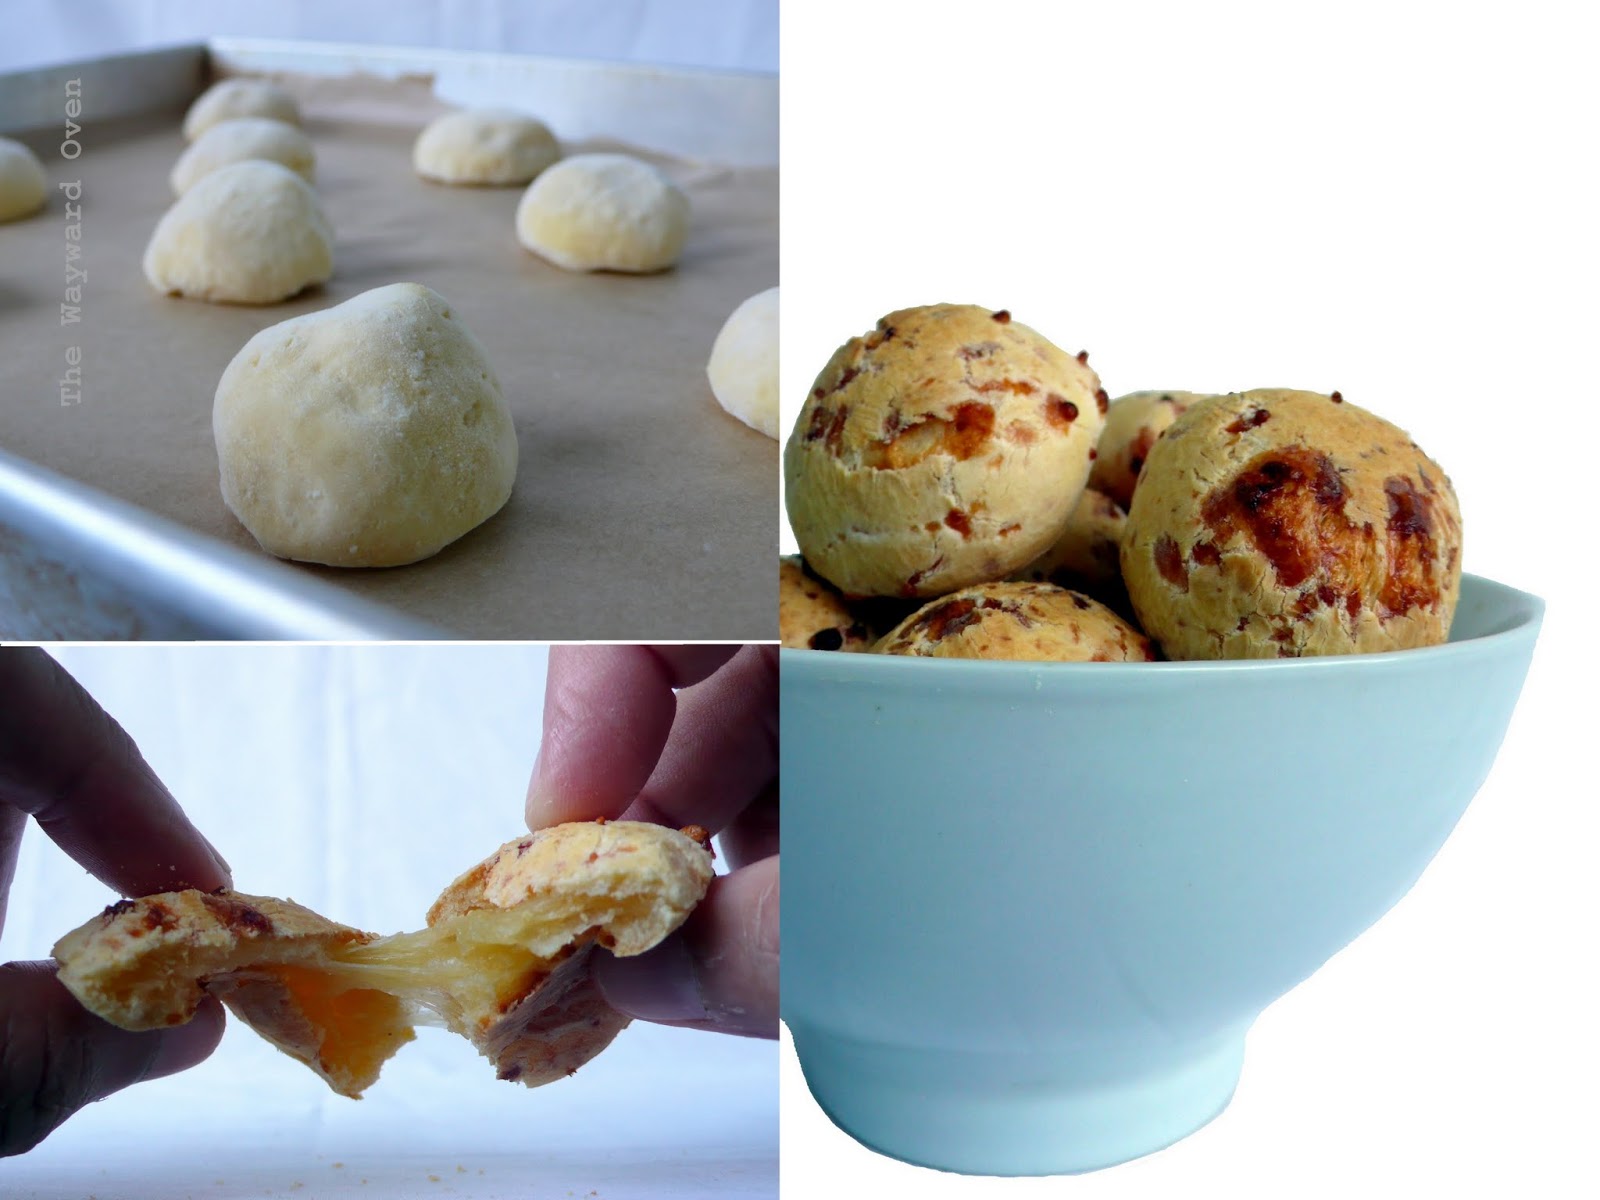
Pão de queijo is made with tapioca flour, which makes it gluten-free. The crust is crisp, and the crumb is... well, if you don't expect it, it can be a surprise. I actually thought the buns might be uncooked when they first came out of the oven and I broke one open to see what the inside was like: it was gummy and elastic. But after the buns cool slightly, the texture firms up although they remain springy, with a web of air pockets on the inside.
For the first batch (pictured at the top of the post), I made the buns exactly as in Renata's recipe, only I halved it. The ingredients were tapioca flour, milk, butter, salt, Monterey Jack cheese and eggs. I wasn't sure what the batter should look like –  mine was sticky and I used an ice cream scoop to shape the buns. When I left a comment for Renata at her blog, she emailed me and told me that the texture can be sticky (and is sometimes piped) or firm (and can be rolled with the hands). I got 17 buns out of the batch... and I finished all of them myself!
Clockwise from top left: Frozen unbaked buns; the second batch of buns; 'gummy' texture on the inside
When I made the buns again (pictured above), I used coconut oil instead of butter and included some grated Parmigiano Reggiano together with the other cheese. I didn't add as much egg and the dough was firmer – I could roll out balls with my hands. I made them smaller this time and got 35. I baked just four and froze the rest after shaping. This batch was a little crisper on the outside, perhaps due to the firmer dough. 
Today, I baked a few of the frozen buns to take with me to a meeting with some of my family. Like me, they couldn't quite decide what to make of the texture when they first bit into the pão. The rubber-like crumb was not what they had expected. But after they got over that little surprise, they really enjoyed the buns and loved the chewiness. My sister asked me to include more cheese and my mother dipped it into some curry and found it to be very tasty!
Since I have made it twice and can compare, I think I prefer the dough a little sticky. The buns seem to puff up a little more in the oven, but it's entirely up to individual tastes. I haven't recorded the process of making the buns in photos, so please visit Renata's blog for how the dough should look at each step.
Made after getting Renata's advice
Postscript, Dec 3, 2012: After this post was published, Renata left a comment (see below) and I realised that I had probably baked the buns for too long. They are supposed to be quite pale and should be taken out of the oven as soon as they start to brown. I have amended the recipe.

Pão de Queijo (Brazilian Cheese Bread)
Makes 17 medium-small buns (four three-bite size). Can be easily scaled up.
125ml milk
1 tbsp coconut oil or 20g butter
½ tsp salt
250g tapioca flour (tepung ubi kayu)
125g cheese (eg. Monterey Jack, Parmesan, Cheddar), coarsely grated
1-2 medium eggs, beaten

Preheat the oven to 200°C.
In a small saucepan, heat the milk, coconut oil and salt until small bubbles start to appear around the edge of the milk (if using butter, it should have melted). Do not allow it to come to a full boil.
Sift the flour into a large bowl and pour in the hot milk. The flour will immediately take on a gelatinous texture. Mix with a fork until the mixture is combined. There may be a few clumps, but at the next step it will be fixed.
When the mixture is cool enough to handle, rub it with your fingertips until it becomes crumbly. Stir in the cheese.
Mix in 1 egg. Stir with the fork until the mixture is hydrated and starts coming together. Add more egg until the mixture comes together into a sticky dough. You may not need to use all the egg.
Drop small spoonfuls (or use a small ice cream scoop) of the dough on a parchment-lined baking tray about 3cm apart.*
Bake the buns for about 25 minutes, or until puffed and freckled with golden brown spots just starting to brown with a few freckles. They may flatten slightly at first, but will puff up towards the end of baking time.
Remove from oven and cool slightly before serving serve them immediately.
* The unbaked buns can also be frozen. Place the balls on a tray lined with cling film or food-grade plastic and place in the freezer until hardened. Remove the balls from pan and place in a plastic bag, seal and store in the freezer. Bake them from frozen for about 5 minutes longer.
I have also baked five buns at a time in a toaster oven on HIGH – the setting just under TOAST – and they take 21 minutes from frozen to cook.

Whey hey! A pastry that pops

Friday, November 23, 2012

TOASTER TARTS MADE WITH WHEY PASTRY 
The few plants on my balcony get fed some good stuff every time I make yoghurt. After straining the curd to get thick Greek-style yoghurt (or yoghurt cheese as it is also called), I pour the whey onto the plants since I've read that the protein in it is good for them.
And then I read about using the whey as a substitute for the liquid in baking. How long has this been going on? Why have I not informed myself on this sooner?
Sorry, plants. It's plain water from the tap for you fellows from now on.
Well, I started experimenting by using whey instead of water in a straightforward bread recipe. The texture was the same but there was a slight tang to the taste, as if I had added a sourdough leaven. It was quite pleasant.
But what I was really pleased about – and I know I did not imagine this – was that after manually kneading the dough, my hands felt softer. So that's another good reason to use whey. And to knead dough by hand.
Right, while I was quite confident that whey would not adversely affect a bread dough, I didn't know what to expect with pie pastry since it's a bit more temperamental. I chose to make toaster pastries, based on that famous brand, Pop-Tarts®, a snack which I have never eaten before but which I like the look of. They're flat, filled with nice things and easy to carry about – what's not to like?
I am pleased to say that the pastry with the whey turned out well.
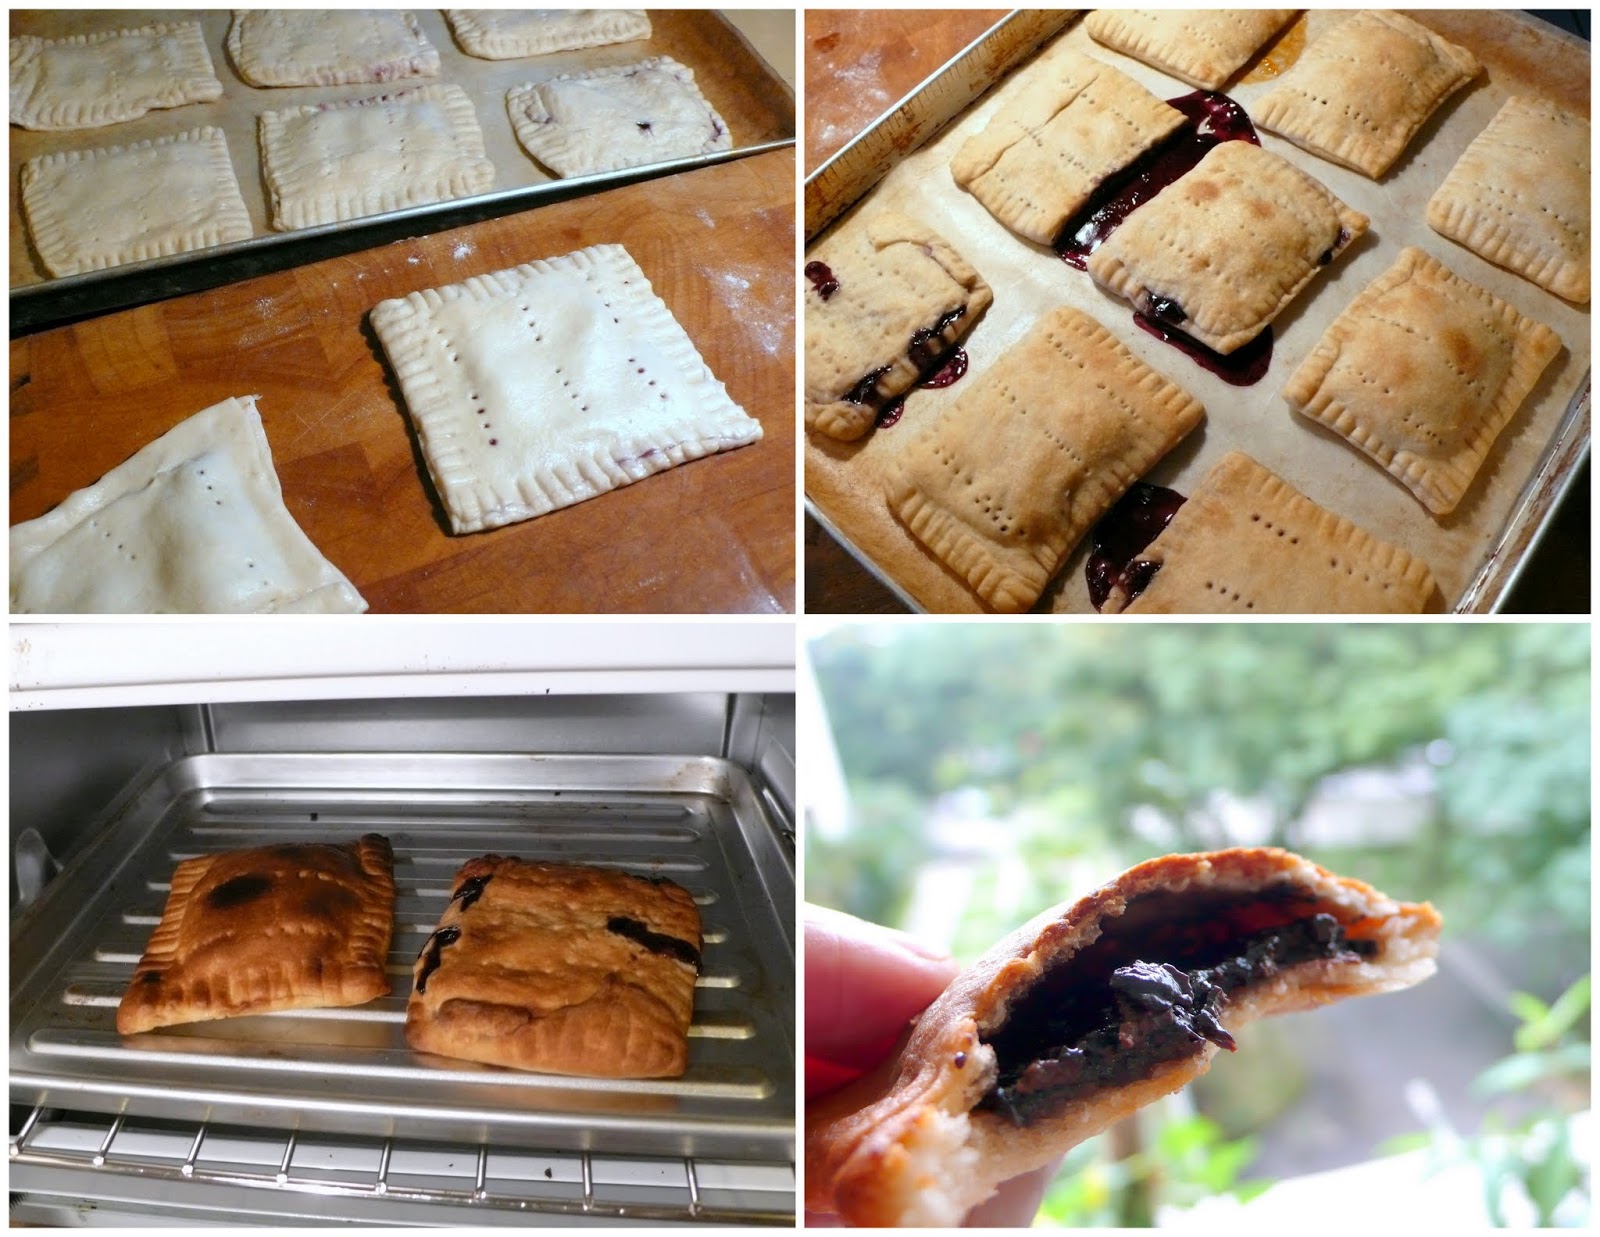
Bake until partly cooked, freeze and then cook in the toaster oven until fully cooked

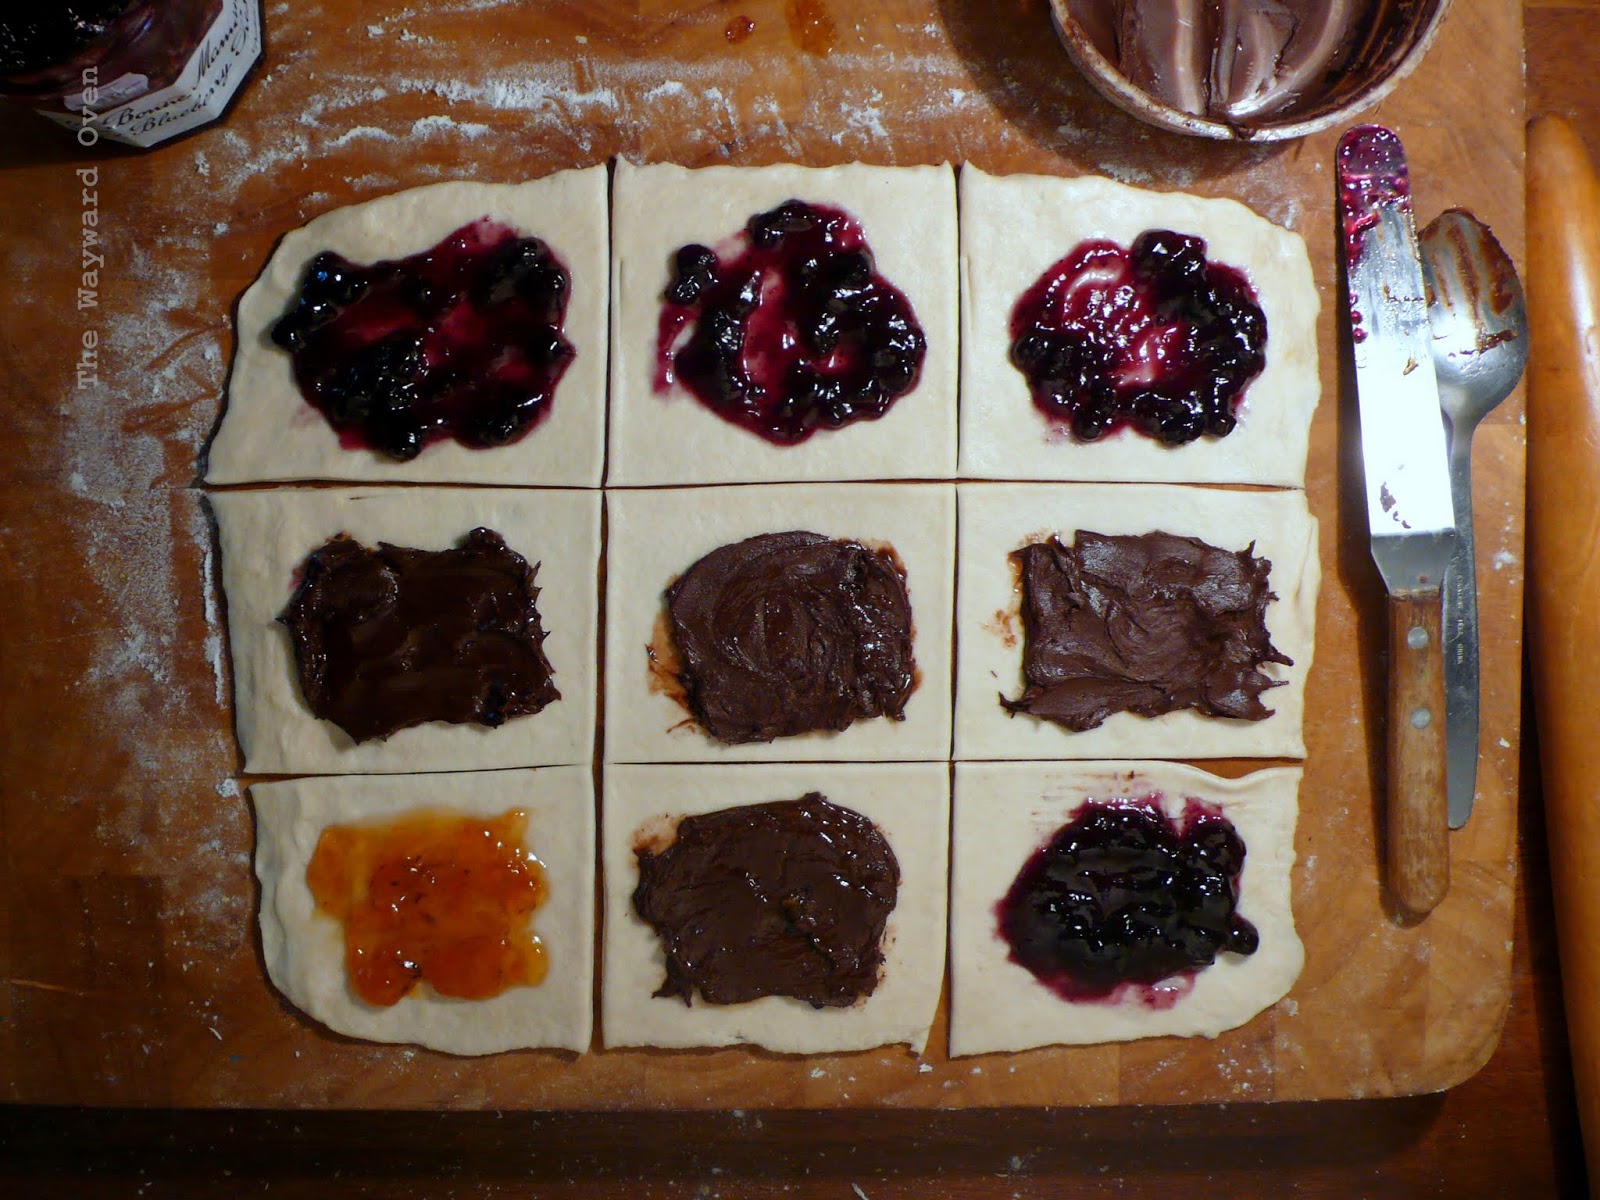
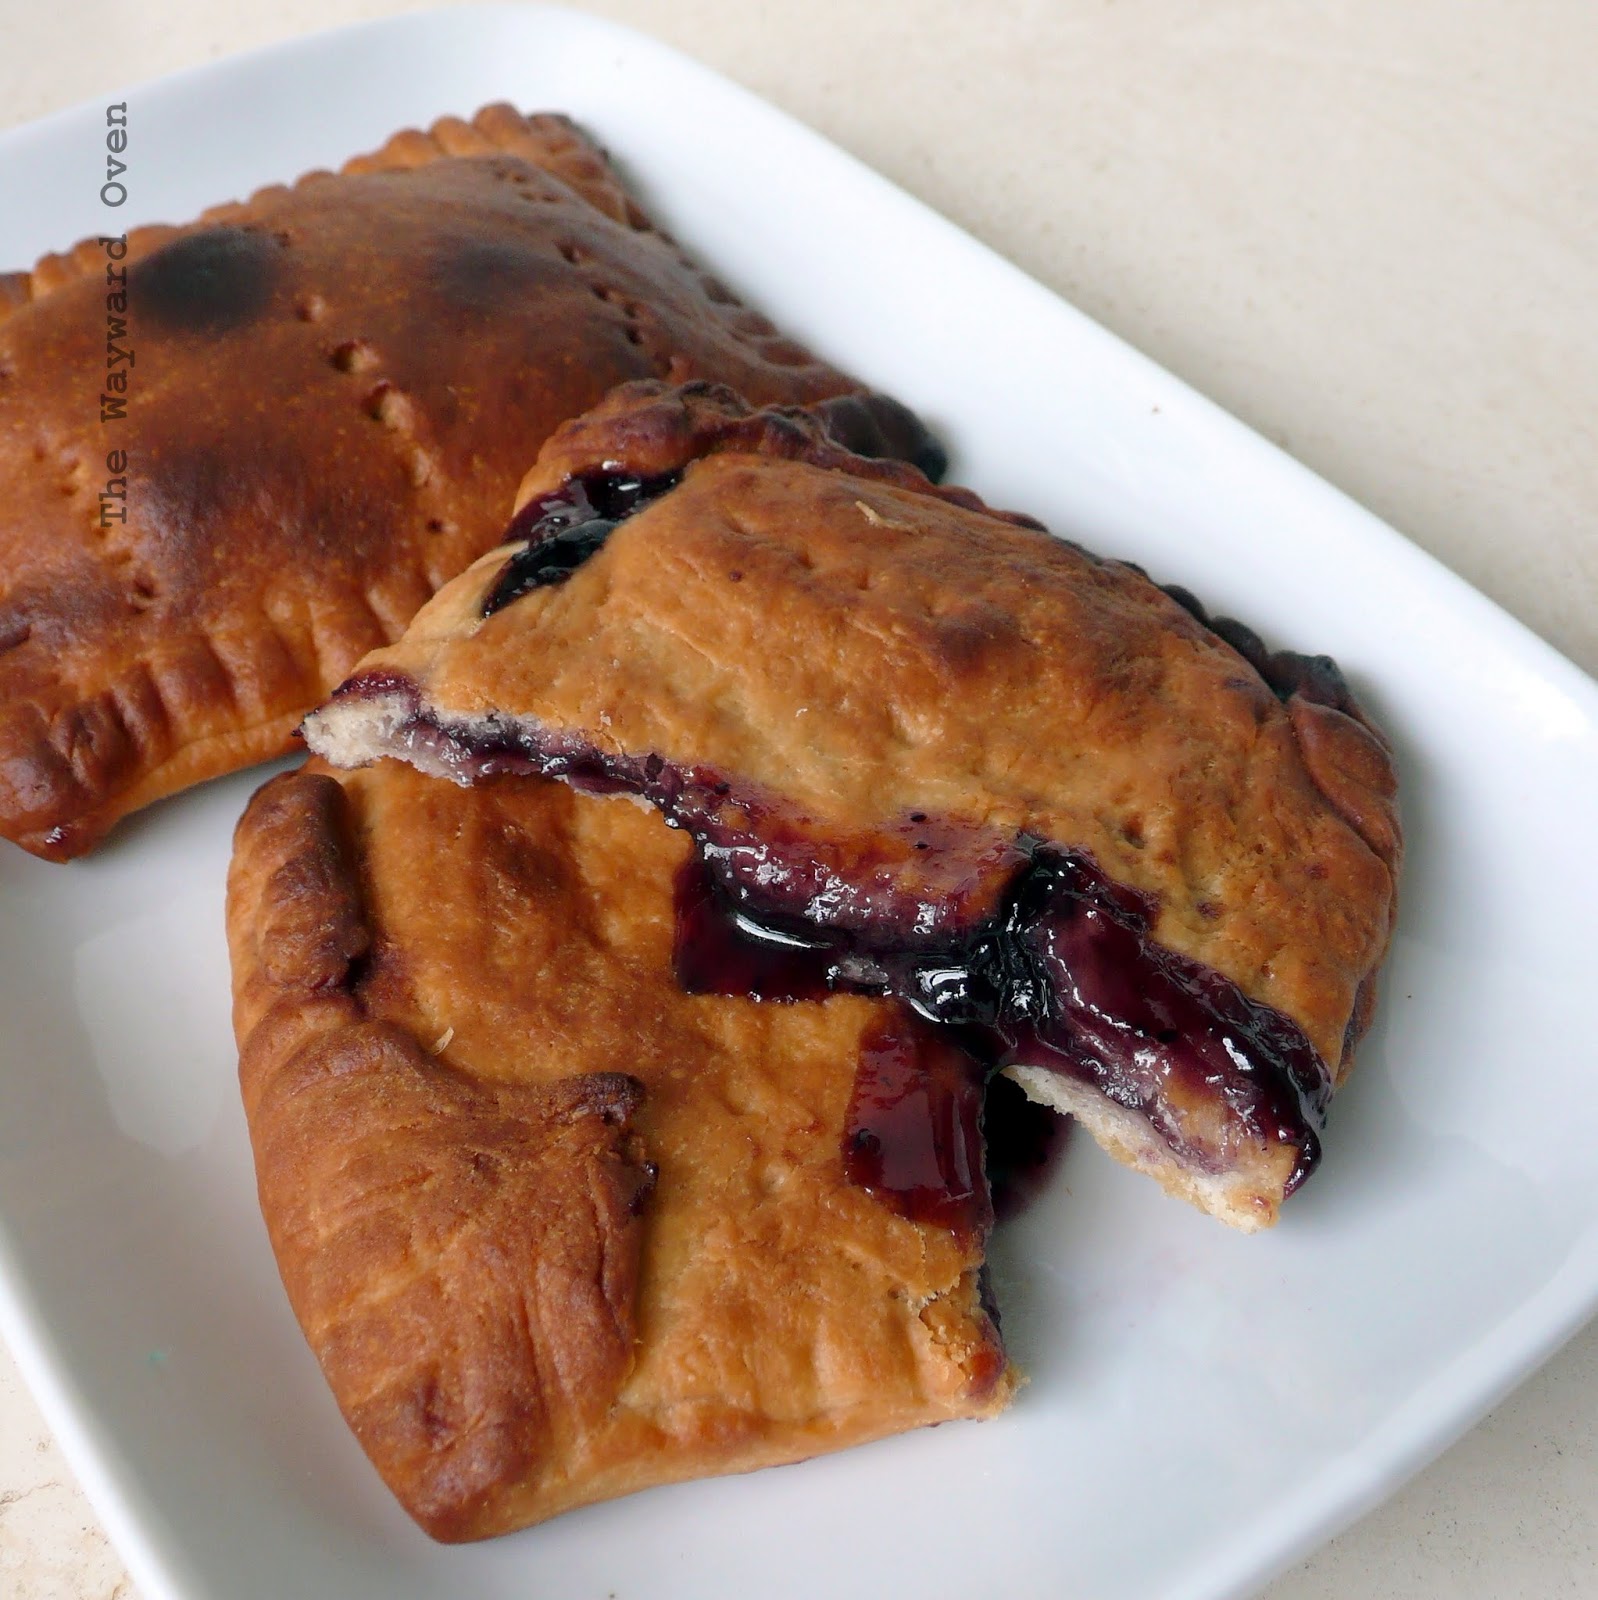
The tarts were filled with raspberry and apricot jams and a chocolate spread. Now, as the montage above (top, right) shows, some of the tarts leaked jam. I love the Bonne Maman brand, but the raspberry jam was just too runny to stay put inside the pastry shell. The apricot, from another brand, was more set, and the chocolate spread, of course, hardly moved at all.
These tarts are meant to be toasted in a toaster oven as the pastry is not sturdy enough for a pop-up toaster like commercial Pop-Tarts. But that's a good thing. The pastry is soft – and stays that way when chilled – yet it is easy to work with. And it is tender after baking, although keep an eye on the tarts when they're in the toaster oven or they may end up burnt like the first two I toasted here.
Keep an eye on the tarts when toasting, and mind the hot filling when biting in

Toaster Tarts
Makes 9  palm-sized tarts

1 quantity whey pie dough
Fillings, about a tablespoon for each tart (eg. jam, chocolate spread, fruit slices, cream cheese)
1 egg, beaten

Whey Pie Dough
270g all-purpose flour
½ tsp table salt
2 tsp baking powder
1 tsp caster sugar
70g white shortening (eg. Crisco)
180ml yoghurt whey (top up with water or milk if there isn't enough whey)

Sift the flour, salt and baking powder together. Stir in the sugar. Rub the shortening into the flour mixture. Make a well in the centre and pour in almost all the whey. Bring the ingredients together into a ball, adding more whey if the mixture is too dry. Knead the dough for 10 seconds, then form into a disc and wrap in cling film. Chill for 30 minutes.
Preheat the oven to 180°C. Lightly grease a large baking sheet or line with non-stick paper.
Divide the dough into two. Roll each portion out into a 30cm by 24cm rectangle, and cut each one into 9 smaller rectangles, roughly 10cm by 8cm (life is too short to be absolutely precise with this; don't worry, it'll all work out in the end). Brush half of the pieces with beaten egg and place a heaped tablespoon of filling in the centre. Spread the filling to 1.5cm from the edge. Lay the other 9 pieces of pastry on top of the filling. Press the edges of the pastry together and crimp with the fork. Prick the tops several times with a fork.
Place tarts on the baking sheet and bake until the tops turn light brown, 10-12 minutes. This will only cook them partly. Remove to a wire rack to cool completely. Place them on a tray and freeze them, about 30 minutes. Store in freezer bags.
To eat, pop a tart into a medium hot toaster oven (200°C) for 5-7 minutes and cook until golden brown. Take care when biting into the tart as the filling will be hot.

Raising pies by hand

Tuesday, November 6, 2012

WHO WANTS PIE, RAISE YOUR HAND

Hand-raised pies have been on my to-do list for a while. These are pies that are shaped by hand and not in a tin. Because they're unsupported when they bake, the sides drop slightly and expand outwards like a pot belly. Think Melton Mowbray pies.
Now, there are people out there who call their pies "hand-raised" even though they are baked in a tin (often a deep muffin pan). I don't think that's completely accurate, although it does makes the process simpler. But where's the fun in that?
Because hand-raised pies bake without anything to hold them up, they need a strong shell and that's where hot water crust pastry comes in. This is another item that I've intended to try for some time. I haven't put it off because it is difficult – it's not – but the pastry has lard in it and that's not an ingredient I use in my baking.
So I did some reading and looked up several recipes, and found that vegetable shortening or suet is also used. In terms of flavour, neither ingredient can compete with lard, but I don't think it makes much difference in the texture so that's a trade-off I'm willing to make. I have used all shortening, all shredded suet (Atora brand) and a combination of both, with good results for all alternatives.
So that's the gravity-defying pastry sorted out.
Traditional hand-raised pies are often made with a wooden pie dolly, which I don't have. Later, I found out a jam jar or drinking glass can be easily employed as a substitute.
And then I saw a video where the pie maker didn't use any sort of utensil to help shape the pie. He did it all by hand. I tried it and love it!
Hand-raising a pie
The filling for hand-raised pies is very often made with uncooked pork meat. This means the filling can be pressed together in a tight ball which doesn't come apart. That makes it easier to mould the hot water pastry around it.
I have used a cooked filling of cubed chicken, chestnuts, mushrooms, potato and frozen peas (in hindsight, I should have left out the peas) which is slightly looser in texture, and it is a bit fiddly to put together but not impossible. I feel like I'm playing with modelling clay! Sculptors will probably know the feeling.
The sides of my pies didn't brown thanks to my wayward oven (the name of this blog wasn't chosen on a whim), but they were cooked properly and didn't have the dreaded soggy bottoms. One of these stout little pot-bellied pies makes the perfect portable lunch.
Eat hot or cold
Hand-Raised Pies
Makes 2 pies (about 7cm wide by 5cm high). Pastry based on Paul Hollywood's recipe.

100g plain flour
20g strong flour
25g butter
65ml boiling water
½ tsp salt
30g vegetable shortening or shredded suet, or a combination of both
1½ cups of cooked filling
1 egg, beaten, for egg wash

In a large mixing bowl, combine the flours then rub the butter in with your fingertips.
Mix together the boiling water, salt and shortening in a small saucepan. Heat and stir together until the shortening melts. Pour on top of the flour mixture, stirring with a spoon until everything comes together.
Tip the dough onto a work surface and knead briefly; bring together into a ball. It will be lumpy. Use the pastry while still warm.
Divide the pastry into two equal portions. From each half, remove a quarter of the pastry for the lids. Press out the lids into 6cm rounds and poke a small hole in the centre with a chopstick. 
On a lightly floured surface, press out the remaining three-quarters of the pastry into two 13cm rounds. Place a mound of filling (about ¾ cups) in the centre of each round and press together to keep it together as much as possible (a stickier filling will stay together better).
Sculpt the pastry around the filling, trying as much as possible to make sure it is the same thickness all around and on the base. This is a bit fiddly, but can be done with some patience. Cup both hands under the edge of the pastry round and press it up tightly against the filling, building the sides straight up until the top of the filling. Don't worry if it isn't very neat at first. Rotate the pie on the floured surface with your palms to even out the sides and to make sure the filling is packed in, ensuring there are no holes in the pastry.
Brush a little water inside the rim of the pastry. Place the lid on top of the filling and press the edges of the pastry together to seal, with the rim slightly rising above the lid. Rotate the pie on the floured surface while pressing the sides gently – this will help tidy up its appearance and build up the height. Crimp around the top. If the hole has closed, use the chopstick to open it up again. Place pies on a lightly greased baking tray and refrigerate for about 20 minutes.
Meanwhile, preheat the oven to 200°C.
Brush the lids of the pies (not the crimp) with egg wash. Cook for 25-30 minutes, or until the pastry is nice and crisp all the way around.

Daring Bakers: Mille Feuille/Napoleon

Saturday, October 27, 2012

NO NEED TO SPELL IT OUT: MAGNIFICENT MILLE FEUILLE 
Our October 2012 Daring Bakers’ challenge was hosted by Suz of Serenely Full. Suz challenged us to not only tackle buttery and flaky puff pastry, but then take it a step further and create a sinfully delicious Mille Feuille dessert with it!
(I have to say I didn't feel any guilt creating – or eating – this dessert!)
Suz provided an excellent recipe and step-by-step instructions for the mille feuille, from the pastry to the filling and assembly. I followed the recipe for the puff pastry exactly and didn't have any problems.
To make a small mille feuille, I only needed half of the pastry and used the other half for some old-school cream horns which took me back to my childhood.
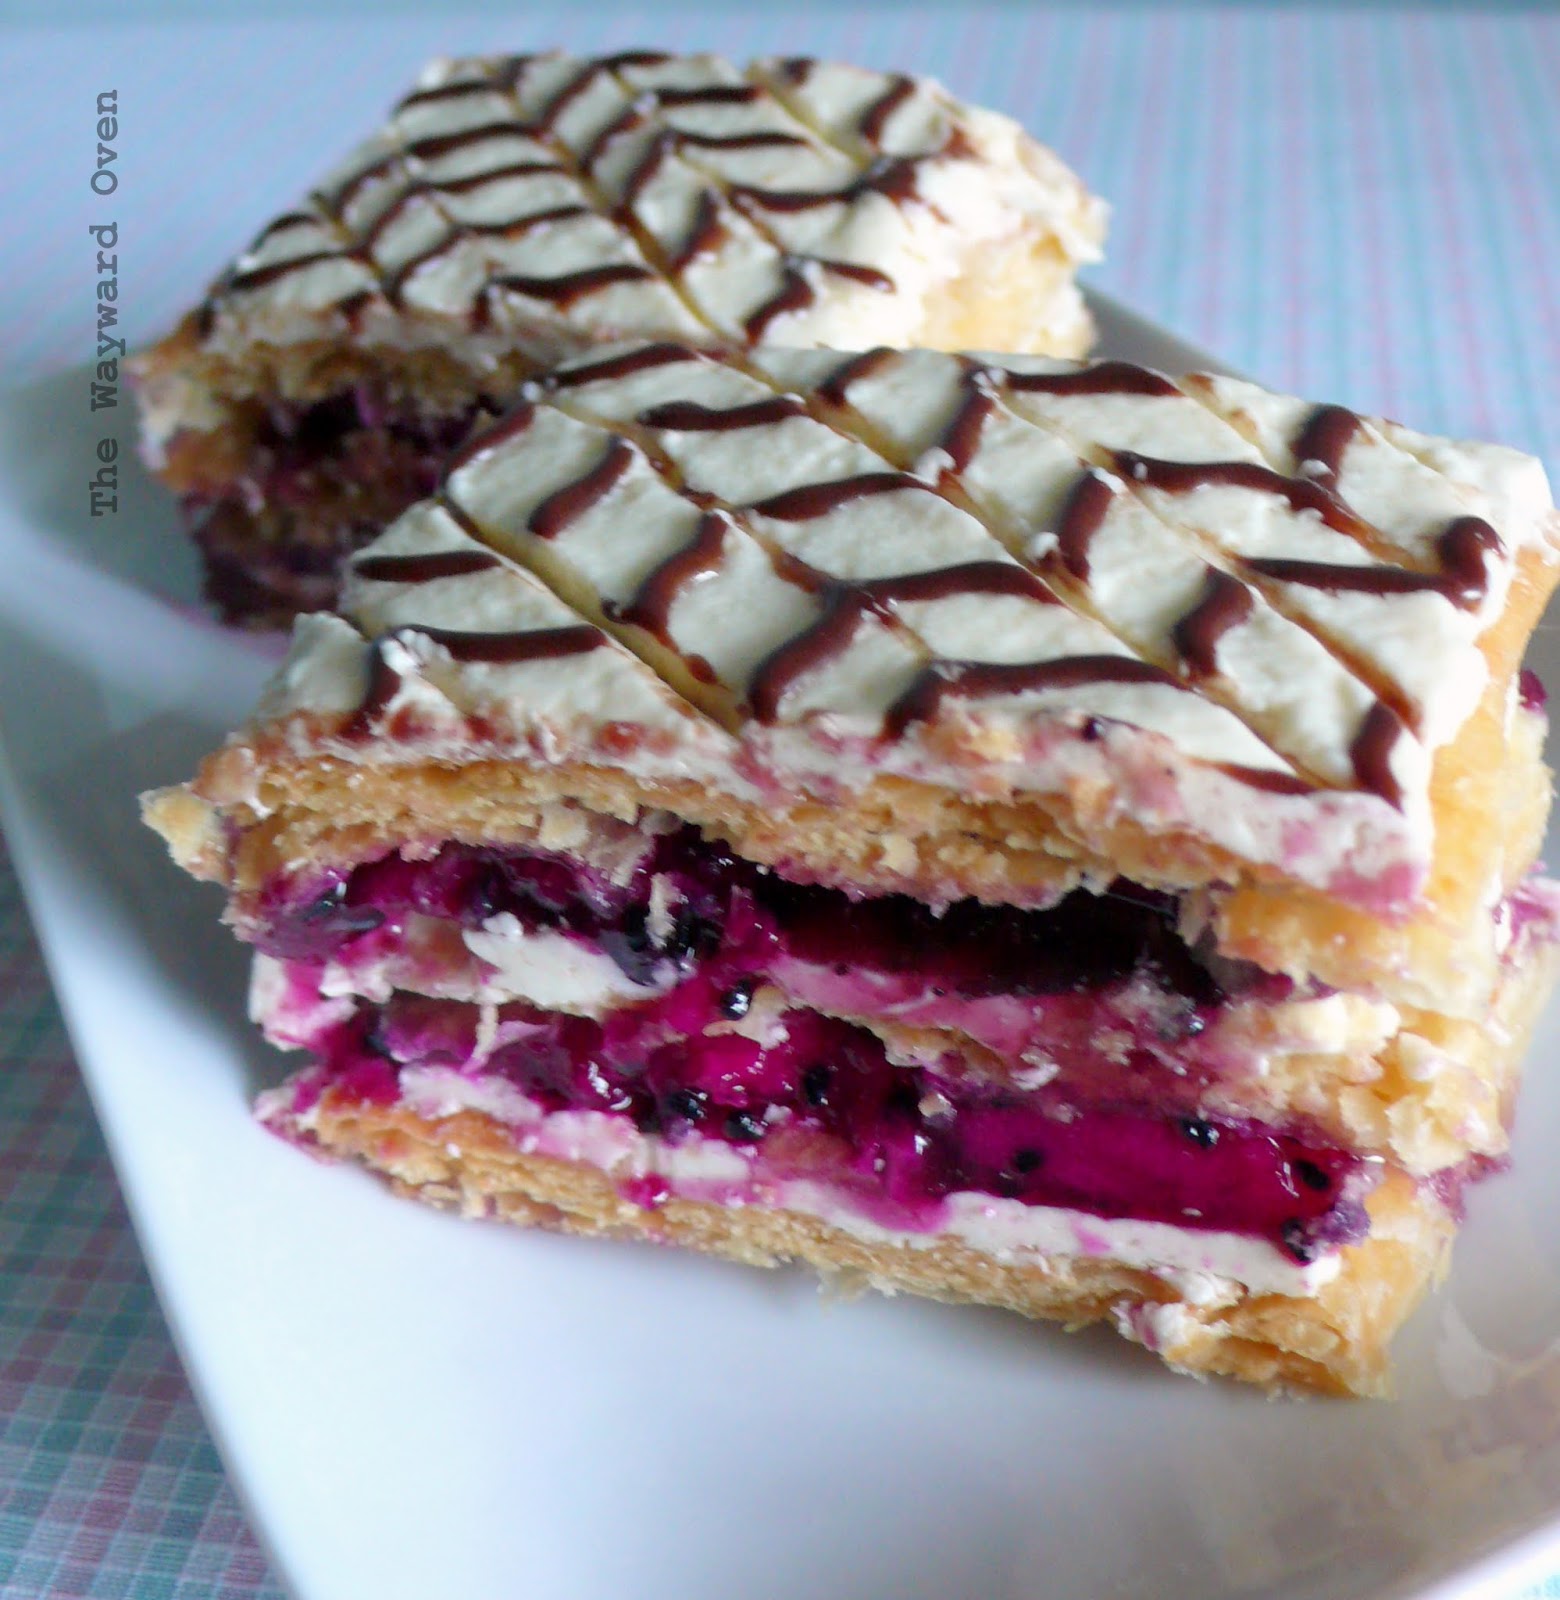
Suz wrote that the traditional mille feuille is filled with a vanilla pastry cream (crème pâtissière). It is also known as a Napoleon (thought to refer to Naples in Italy rather than the diminutive French emperor), a custard slice or a vanilla slice. It’s often topped with royal icing and distinctive chocolate squiggles.
Succulent and sweet red dragon fruit
Well, my strips of pastry were a little burnt and so I thought I would draw attention away from that by building the layers up with slices of fruit. I've read that strawberries are commonly used, but I stayed local and used red dragon fruit. Instead of a custard-based pastry cream, my mille feuille has a filling of whipped cream and jam – it takes less work but is no less delicious, I think. The vanilla icing for the top is also much easier to make and doesn't contain raw egg whites as in a royal icing. The chocolate icing for the feathered effect is a paste of cocoa powder, powdered sugar and water.
French for "thousand sheets", the mille feuille gets its name from the multi-layered puff pastry which expands when cooked. However, the pastry layers of the mille feuille are actually pressed down while baking to prevent this from happening and I've always wondered why. None of my reference books nor online searches has an explanation. I posed this question on the Daring Bakers forum and Heather, Renata and Suz had thought about it too. Renata and Suz suggest it might be for texture since puffed up, "bumpy" pastry isn't very neat or flat. That's certainly plausible.
A thousand visible sheets or not, no one can say this dish wouldn't be the high point of any high tea.
The slicing could be a little less messy :-p
Mille Feuille with Dragon Fruit
Serves 6

325g puff pastry, preferably homemade (here are the recipe and instructions)

Vanilla Icing
125g (1 cup) icing sugar, sifted
¼ tsp vanilla extract

Chocolate Icing
30g (¼ cup) icing sugar, sifted
½ tbsp cocoa powder

Filling
110g raspberry jam
160ml cream, whipped
½ large red dragon fruit

On a lightly floured surface, roll the pastry out to about 30cm x 24cm. Cut the rectangle into three equal pieces (10cm x 24cm).
Place the pastry on a large baking sheet lined with grease-proof paper. Prick the pastry strips all over with a fork. Place another sheet of grease-proof paper over the top and then a heavy baking tray.
Preheat the oven to 200°C. Bake the pastry for about 25 minutes, removing the top layer of grease-proof paper and tray 10 minutes before the end for the tops to brown. Keep an eye on them and lower the temperature if they are browning too much. Cool on a wire rack.
To make Chocolate Icing: Mix the icing sugar and cocoa with ½ tbsp hot water to get a smooth paste like melted chocolate, adding more water if necessary. Spoon into a paper icing bag.
To make Vanilla Icing: In a heatproof bowl, mix the icing sugar and vanilla with 1-1½ tsp hot water. Stand the bowl over a pan of simmering water, stirring until the icing is smooth and glossy. Spread icing on one of the cooled pastry strips. Pipe diagonal lines with Chocolate Icing. Drag a skewer along the icing at intervals in alternate directions to give a feathered effect. Leave to set on a wire rack.
To make the filling: Peel the dragon fruit and cut the half into four wedges. Cut each wedge into thin slices. Spread jam over the two un-iced pastry strips and top with slices of dragon fruit, overlapping them slightly. Cover the fruit with whipped cream. Finally, sandwich the three layers together with the iced strip on top.
Cut into six slices with a serrated knife and serve.

Herbed cheese rolls

Tuesday, September 18, 2012

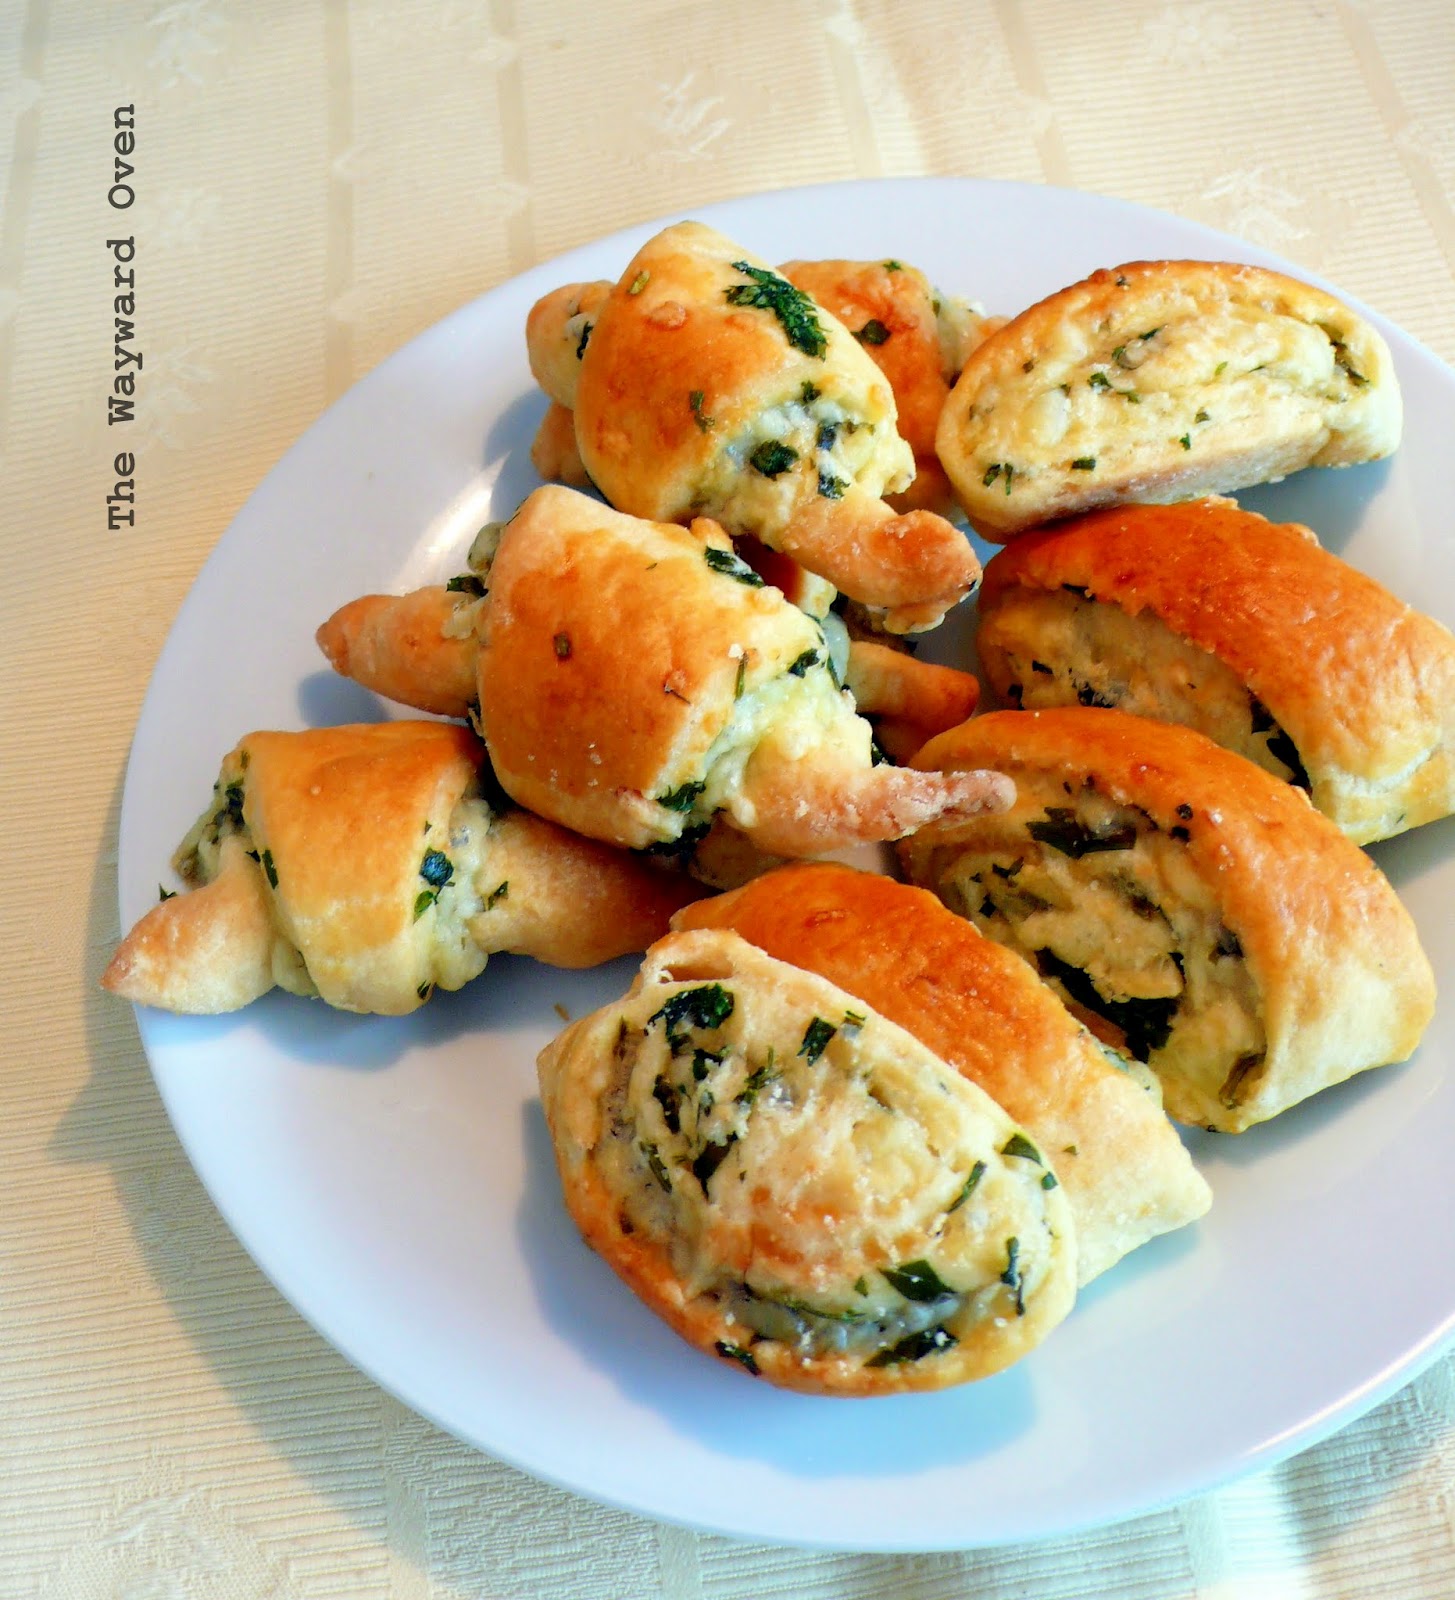
HERBED CHEESE PASTRIES IN CRESCENTS AND SCROLLS 
I have been elbow-deep in bread dough for the past two weeks. I am taking part in a food fair at the end of the month, and am providing 300 mini buns for the event. And so I have been making, baking and freezing buns as I go along 
Now, the thing is, when I excitedly signed up to do this, I did not imagine what 300 mini buns look like. When the picture (a really big one!) finally came to my mind, I realised the enormity of the task for a home baker and a domestic oven, and so I have been making a few batches a week and freezing the buns. (And begging relatives to lend me space in their freezers!) So far, I've made 184 buns. Another seven batches to go. More on this in upcoming posts.
You would think that being immersed in bread dough for the past two weeks, I would stay away from it for my own personal consumption. But when I thought of making some cheese and herb pastries recently, I decided to go with a yeasted dough which was inspired by the Nazook from the April 2012 Daring Baker's challenge.
The original dough is made with sour cream and has a sweet filling, but for this pastry, I went with strained yoghurt and a savoury filling.

Herbed Cheese Pastries
Makes 12-16 pieces

Yoghurt Dough
200g all-purpose flour, sifted
4g active dry yeast
110g strained or Greek yoghurt
110g softened butter, at room temperature

Filling (combined)
125g grated cheddar
3-4 tbsp medium-fine chopped fresh herbs (parsley, coriander, daun saderi [celery leaves])

Wash
1 egg yolk 

Mix the sifted flour and yeast in a large bowl. Add the yoghurt and mix to form a rough dough. Set aside for 10 minutes for the flour to absorb the liquid. Spread the softened butter on the dough and knead in until well incorporated. Continue to knead for about 10 minutes, or until the dough is no longer sticky. Place the dough back in the bowl, cover and refrigerate overnight.
Preheat the oven to 175°C. Divide the dough into two equal portions. Place one portion on a lightly floured work surface. If making crescents, roll or pat the dough out thinly into a 22cm circle; if making scrolls, form into a rectangle. 
For crescents, spread ½ the cheese-herb filling on the circle. Cut the circle into 8 wedges and roll up from the wide end to the point. Brush with egg wash. Repeat with the other piece of dough.
For the scrolls, spread ½ the filling over the rectangle. Roll up like a Swiss roll from one of the long sides. Pat down the roll gently to flatten slightly. Cut into short logs, 4-5cm long, on a slant. Use a crinkle cutter, if desired. Brush with egg wash. Repeat with the other piece of dough.
Place pastries on a baking sheet lined with baking parchment. Bake for about 30 minutes, until the tops are a rich, golden brown. Cool on a wire rack.