The Oven has baked its last loaf. This blog is no longer being updated.

My cooking videos appear at youtube.com/janeragavan

I write on food at star2.com

Showing posts with label sides. Show all posts

Sourdough Surprises: Rolls (Garlic Knots)

Thursday, November 20, 2014

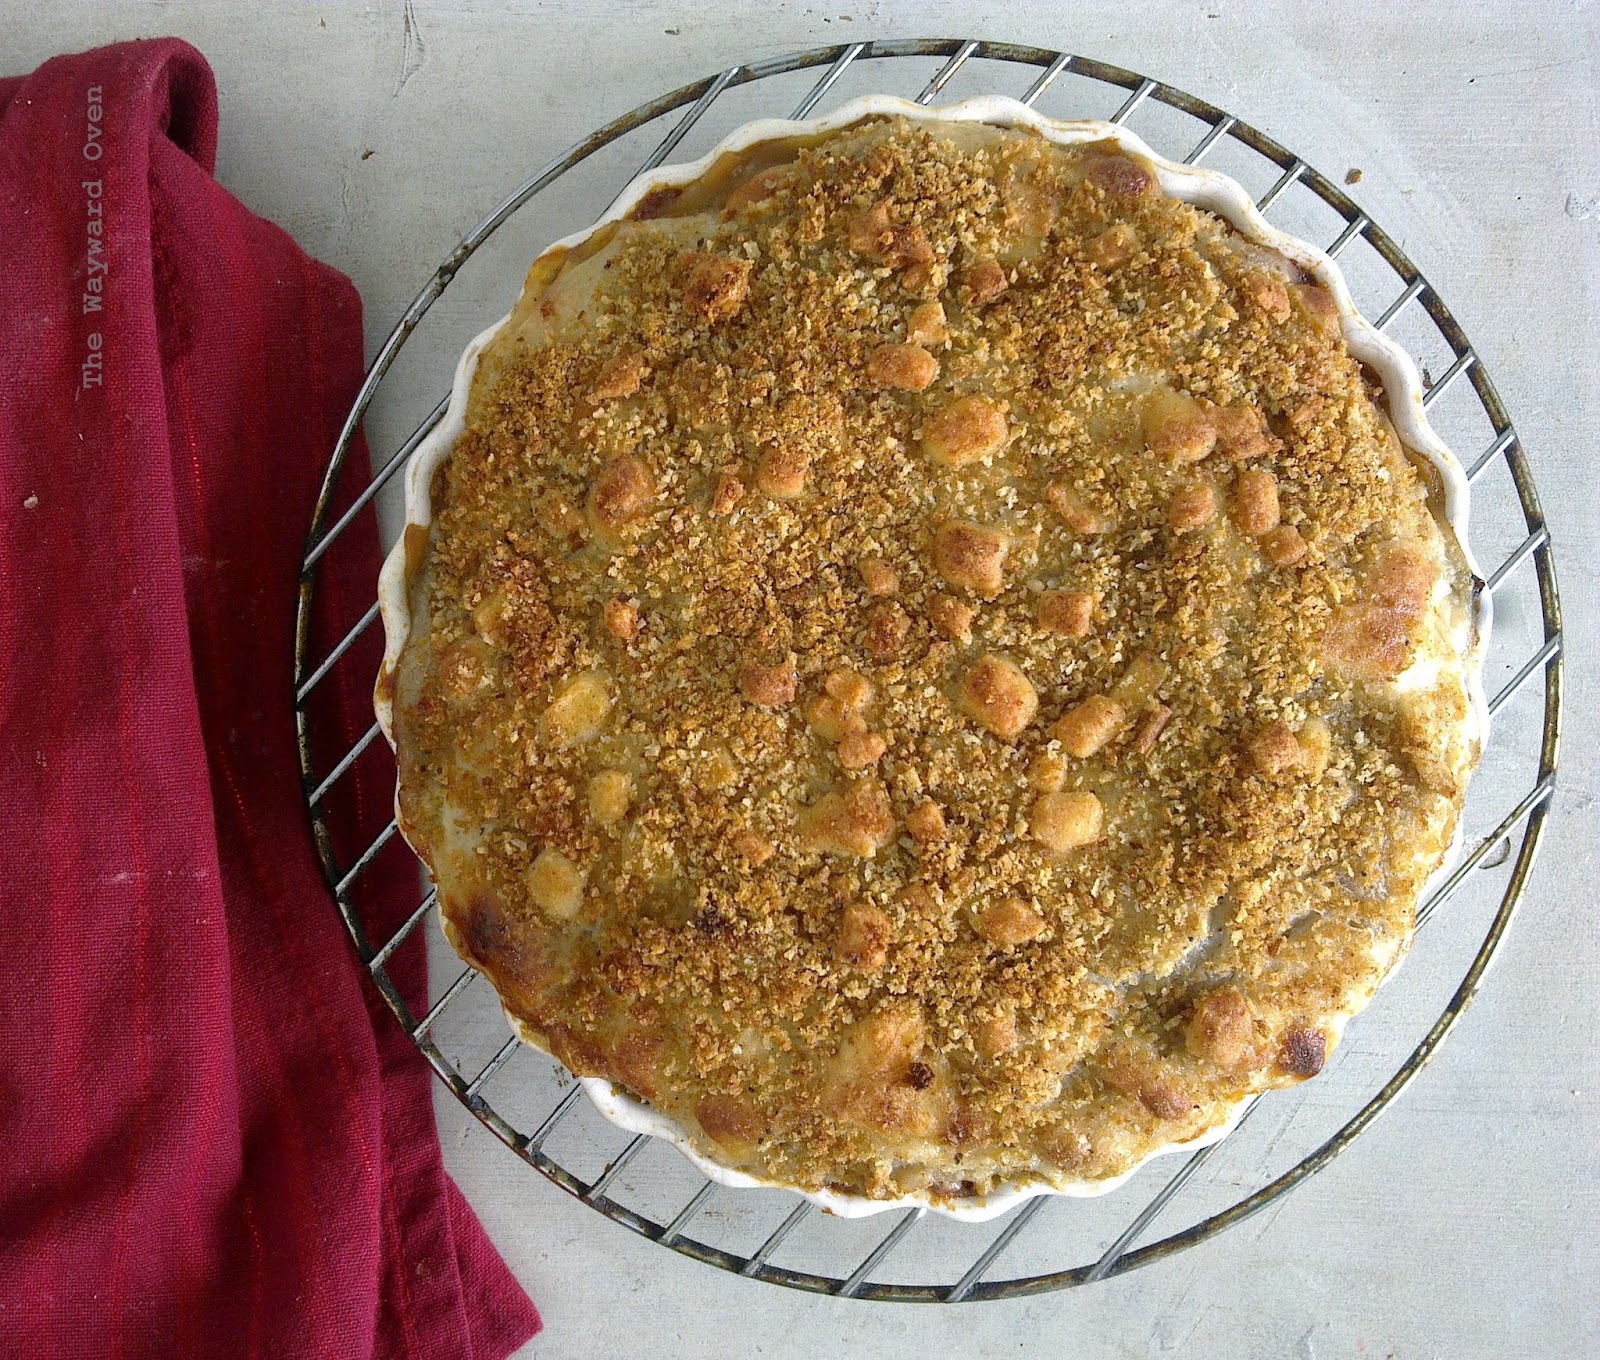
Does this look like fried chicken to you? I took this to the office for a colleague's farewell tea and more than one person said they thought it was fried chicken. Huh?

They're garlic knots. I admit they're a lit-t-tle big for a snack but they make good-sized rolls for dinner. They're for this month's Sourdough Surprises.

Anyway, they're made with the 1:2:3 sourdough formula ~ one part leaven to two parts water to three parts flour by weight. It's easy to remember and always produces a good loaf. For these knots, the amounts were: 92g refreshed and very active leaven (at 80% hydration), 184g water, 276g all-purpose flour and a teaspoon of salt (which should be weighed so that it is around 4%, but I winged it this time).

Lately, I've been making cooking videos for work and made this one which I can probably use when I write about bread in the future ~ although before I put it up on YouTube, I will have to edit in new bread knots that don't look like fried chicken!


The dough is bulked proofed in a square container so that when it is transferred to the work surface, I don't have to fiddle around with the shape too much (I learnt this from Paul Hollywood's recipe for ciabatta and watching the latest series/season of The Great British Bakeoff). Using a pizza cutter, I divide the dough into 11 strips (the last one was runty!), tie them in knots and bake them for around 25 minutes. I didn't let them get crusty or too brown on top or they wouldn't soak up the garlic-parsley dressing.


Ginger: fresh, naked, candied, and in cake

Friday, May 30, 2014

I am finally getting around to cooking with ingredients I got from Australia's Sunshine Coast where I was on assignment a couple of weeks ago. The day after I got home from the trip, it was straight back to work (which included working on the weekend), and so I have had to wait for my days off to get back into the kitchen.

I got some fresh ginger and naked ginger, among other things, from The Ginger Factory. Naked ginger is candied ginger coated with a very fine sugar. It is delicious eaten straight from the packet but I will be putting it into a confection I am planning to make.
The fresh ginger was young and tender. The guide at The Ginger Factory explained that this is the best type to make candy with. It still has a lot of zing though. I made a jam with it ~ although it's more like a relish, as can be seen in the picture right at the top of the post. It was 168g after peeling and I simply used 75% of that weight to measure out the sugar and water (126g each) for a simple syrup. The three ingredients, plus a pinch of salt ~ always! ~ were simmered for about 35 minutes until thick and jammy. I can imagine how good this would be stirred into ice cream or a bowl of muesli, but I have other plans for it...

The Shift and a Lao brinjal dip

Friday, April 4, 2014

It's not working. I just can't seem to put in the time that I used to into this blog. So, things need to change. The purpose of this space needs to change. As with life, less clutter. Fewer words. Lists and instructions only when necessary. I want to remember what I baked on my day off, what I thought of cooking with those tomatoes I bought yesterday, how I felt when I ate what I cooked today. Recipes... they're just a guide ~ even for bread. I'll follow rules elsewhere, not in my kitchen. And so I kick off today with jeow mak keau, a Lao roasted brinjal dip. Roast brinjal, garlic, chilli till soft; pound everything together. Good with glutinous rice. Good tossed through long pasta. Good start to a much-needed change.

Black sesame spread

Wednesday, October 30, 2013


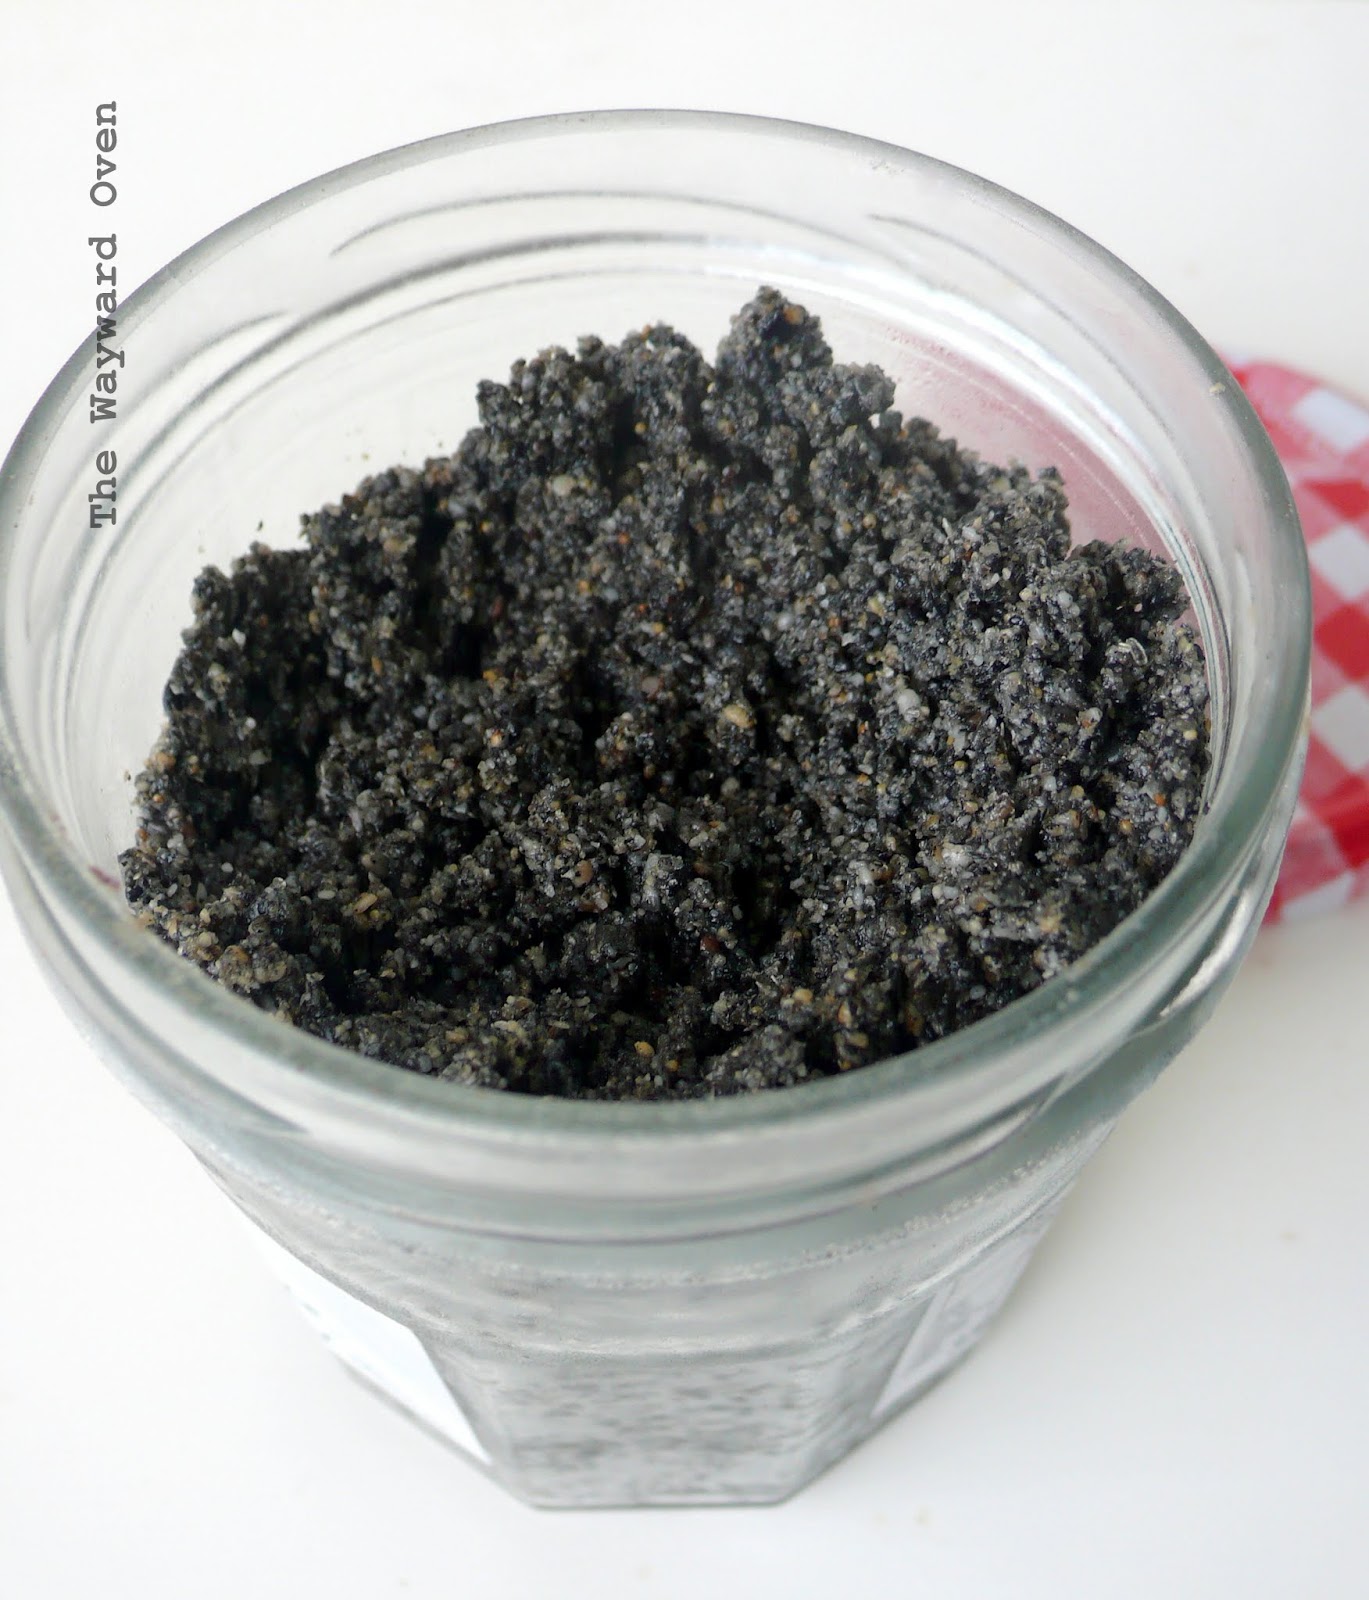
BLACK SAND OR DELICIOUS BLACK SESAME SEED PASTE?
This post is a prelude to my post tomorrow, which is for a recipe using this black sesame seed spread. 

Black Sesame Spread

150g black sesame seeds, rinsed and well drained
100g sesame seeds, rinsed and well drained
50g toasted peanuts, skinned
3-4 tbsp soft brown sugar
1 tbsp milk powder
3 tbsp canola oil

Combine both types of sesame seeds in a clean wok. Fry without oil over low heat until fragrant. Dish out and leave to cool.
Place peanuts in a food processor. Blend until fine. Add all the sesame seeds. Continue to process until fine.
Add milk powder and soft brown sugar. Drizzle in oil. Continue to blend until smooth.
Remove and store in a sterilised clean jar. Can keep for several months in the fridge.

Ulam redux

Thursday, August 29, 2013

FERN-TASTIC ULAM INGREDIENTS 
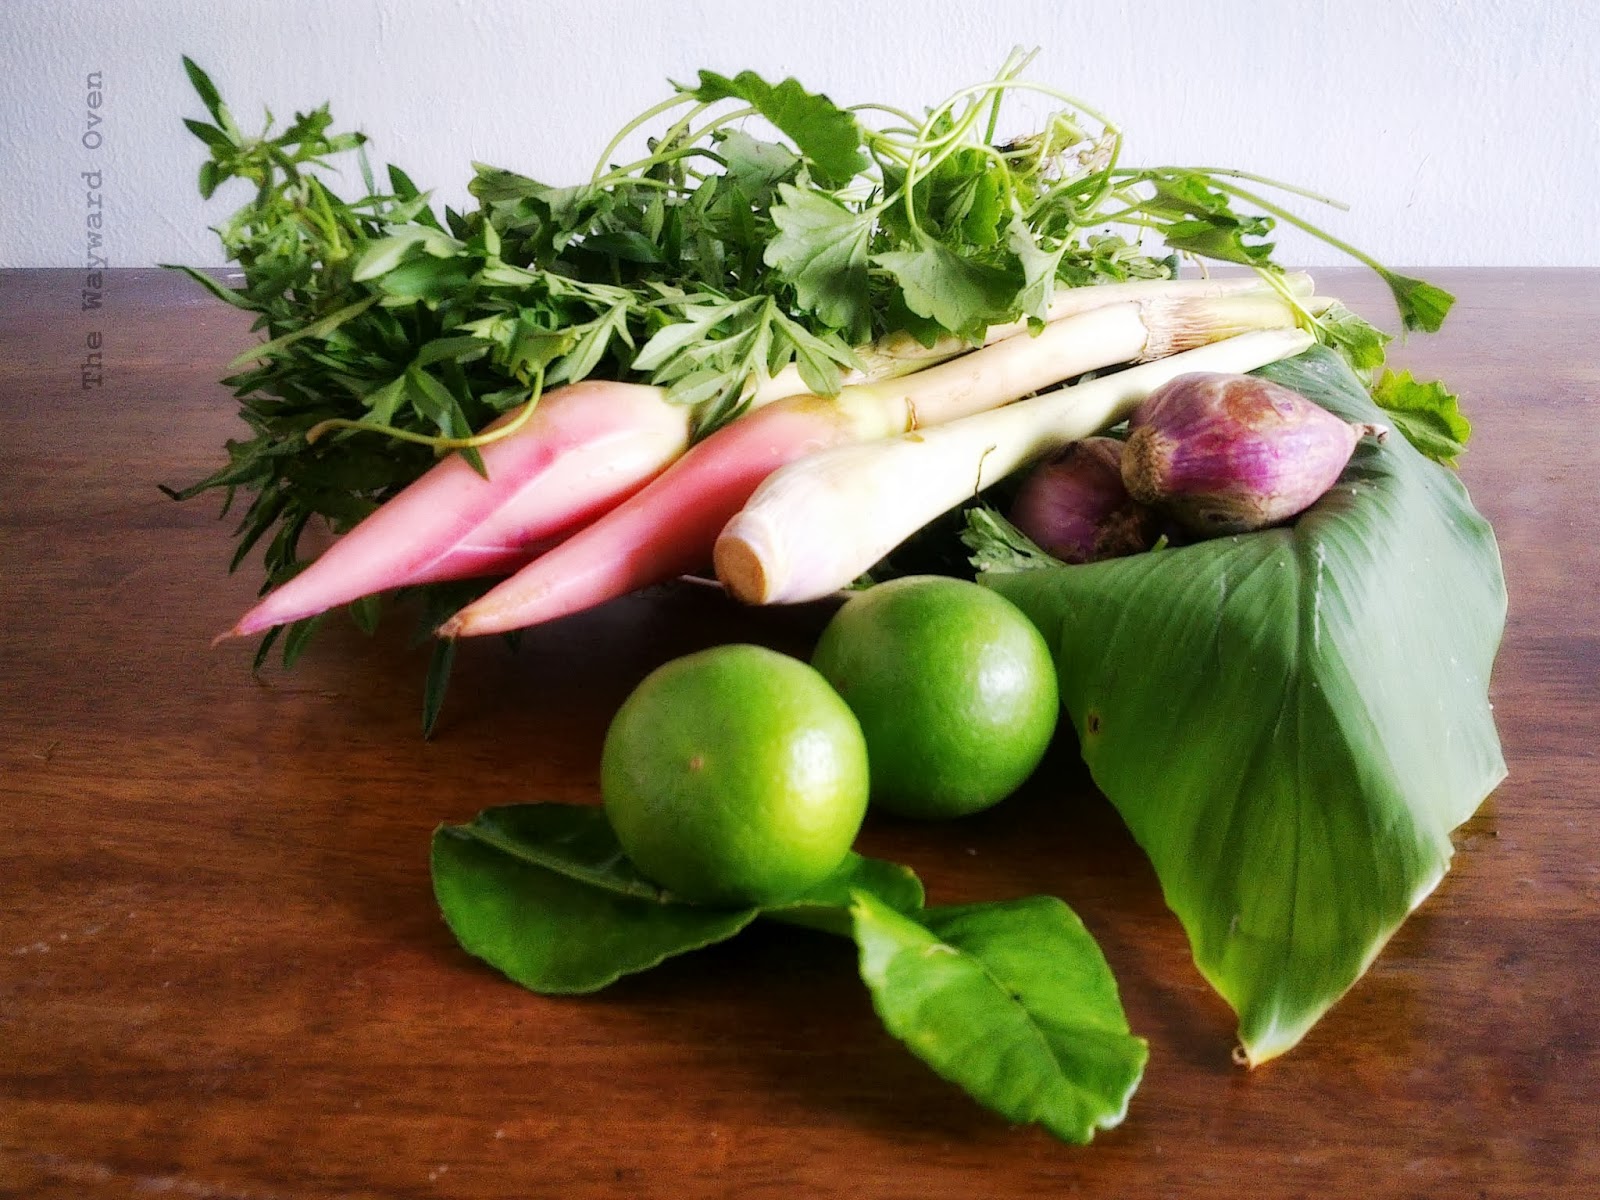
I posted on kerabu (Asian salads) and nasi ulam (herbed rice) separately some time ago. For our National Day on Aug 31, Ivy, Indra and I are writing on the theme "Malaysia on a plate" for our Don't Call Me Chef cookery column in the newspaper. For me, the dish that screams Malaysia is nasi ulam, a mix of rice, fried fish, salted fish and prawns, toasted coconut and a whole bunch of herbs, shoots and leaves such as lemongrass, torch ginger, kaffir lime leaves, and various jungle plants.
For the column, I provided a recipe for Nasi Ulam Utara (Northern-style herbed rice; pictured below, top left) so as a prelude, I thought I would reproduce the recipes for the three types of kerabu that I wrote on before. These Malaysian salad dishes are prepared with similar ingredients to those found in a nasi ulam.
Clockwise from top left: Nasi Ulam Utara, served with sambal belacan; kerabu kacang botol; green papaya salad; and kerabu pucuk paku
All recipes serve 4.

Kerabu Kacang Botol (Four-angled Bean Salad)

200g four-angled beans
2 shallots, thinly sliced
2 bird's eye chillies, finely diced
1 tbsp dried prawns, washed and pounded
2 tbsp grated coconut, toasted
2 tbsp lime juice
1-2 tbsp palm sugar
Salt to taste

Pick off the ends of the four-angled beans. Blanch in boiling salted water, about 30 seconds, then run under cold water to stop the cooking process. Cut on the diagonal into 2cm-wide pieces. Toss with the sliced shallots and chillies; set aside.
Combine the remaining ingredients and dress the vegetables.

Green Papaya Kerabu
This salad is loosely based on the Thai som tam.

1 small green papaya (about 400g), peeled, cut into half and seeds removed
1 cup long beans, cut into 3cm lengths
1 tbsp palm sugar
Juice of 2-3 limes, or to taste
2-3 tbsp fish sauce
6-8 bird's eye chillies, thinly sliced on an angle
1 tbsp dried prawns, washed and pounded
6-8 cherry tomatoes, halved and seeds removed
2-3 tbsp chopped toasted peanuts

Grate papaya coarsely and into long strips.
To make the dressing, dissolve palm sugar in the lime juice. Add the fish sauce.
In a mortar and pestle, bruise the long beans. Add the chillies, dried prawns and some of the dressing. Toss well and add the papaya. Bruise the papaya so that it is mixed with the dressing. Add more dressing as needed.
Add the tomatoes and bruise them lightly, blending them with the rest of the ingredients. Serve sprinkled with chopped peanuts.

Kerabu Pucuk Paku (Fiddlehead Fern Salad)

300g pucuk paku (fern shoots)
50g fresh prawns, shelled and deveined
2 tbsp ready-made kerisik
2-3 tbsp coconut milk
2 large red chillies, pounded
2 tbsp lime juice
2-3 tsp palm sugar
Salt to taste
3 tbsp toasted peanuts, coarsely pounded

Pick off the tendrils and tender part of the stalks from the pucuk paku. Cut into 6cm pieces. If the ferns are a little tough, blanch in boiling salted water, about 30 seconds, then run under cold water to stop them cooking further.
Blanch the prawns until pink but still firm. Combine with the ferns.
Combine the rest of the ingredients and toss with the greens.

Avoca-dough is naan the better

Friday, August 23, 2013

STUFFED NAAN AND AVOCA-DOUGH NAAN 
I couldn't pass up the hunk of gouda selling at a discount. With cheese being so expensive over here, it's a good idea to snap up the deals any chance you get. Even if the cheese is about to expire. I just get my fill of it and then ration myself until the next good deal comes along.
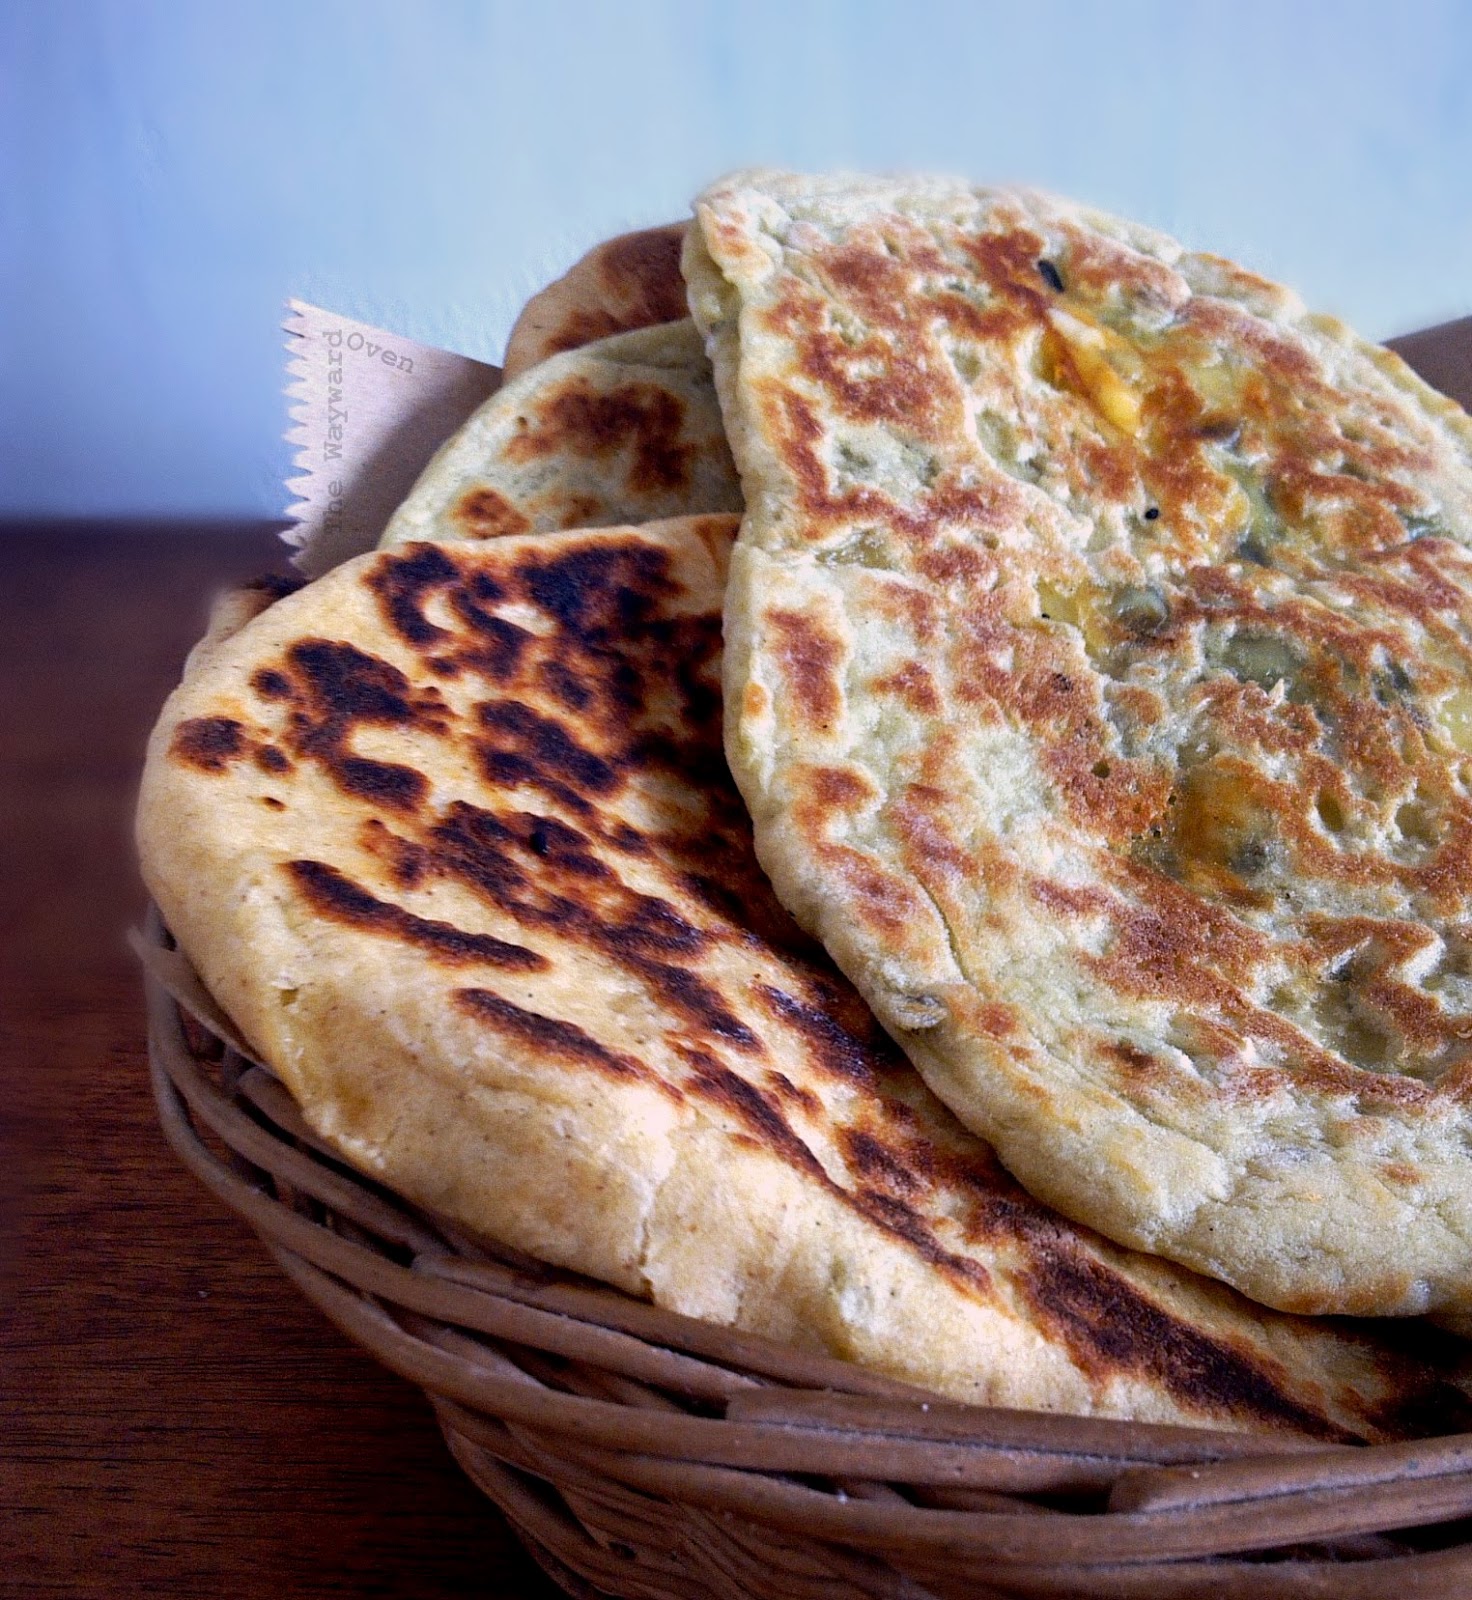
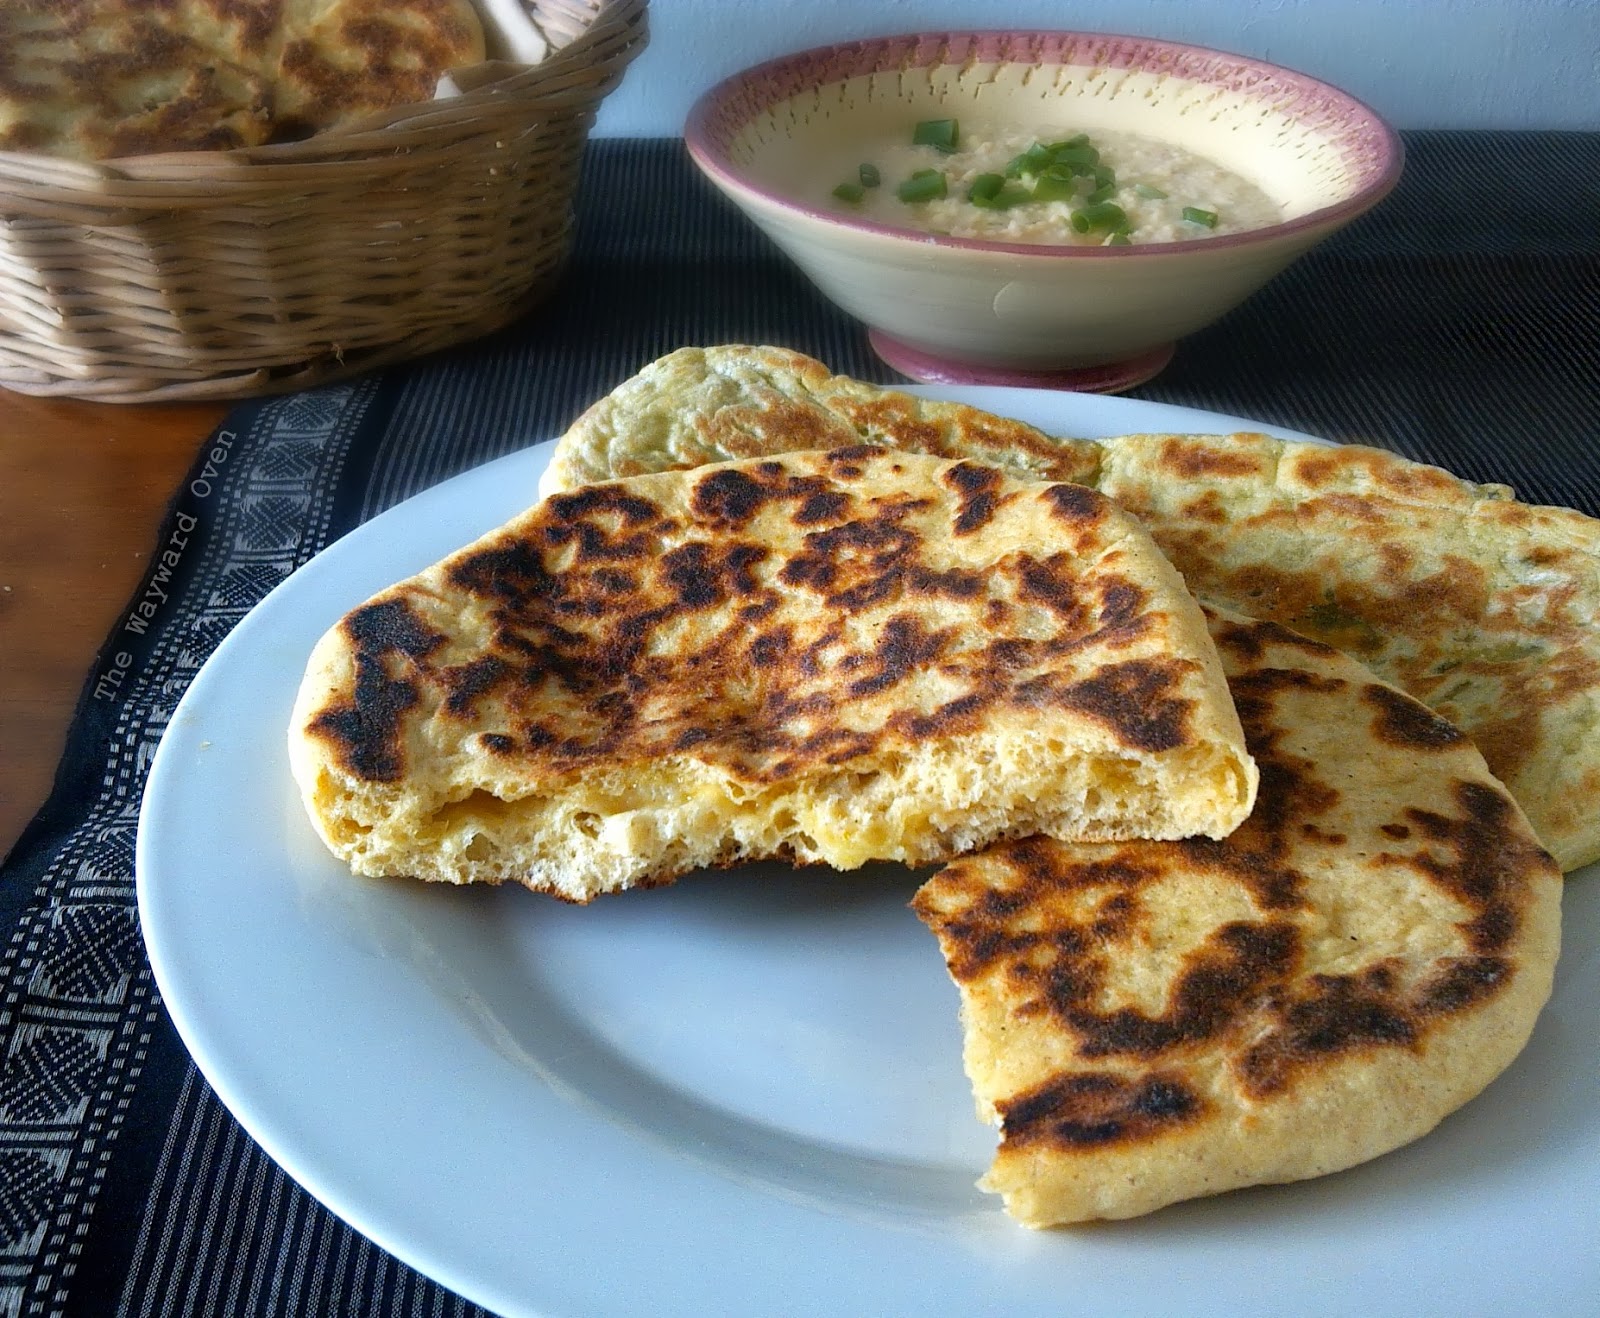
So it goes without saying that I've been making a lot of things with cheese. One of them is cheese-stuffed naan, which I cook on the stove top. Once cooked, the naan can be stored in the fridge or freezer, so the expiry date on the cheese is no longer an issue. I don't know if that's how it really works but if I tell myself that, then it true for me, hehe.
Stuffed naan made from plain dough
Naan dough typically contains yoghurt and sometimes egg as well, which help produce a soft and flavourful dough. I have both in mine.
And then I came across Vegan Richa's avocado naan. Not a naan stuffed with avocado, but a naan dough made with avocado mash. The avocado is the substitute for the yoghurt and egg. It's the fat from the fruit that you're after and not the flavour, because you can't really tell that there's avocado in the dough. And I found that the naan doesn't puff up as much as the ones with egg and yoghurt. But the avocado does give the dough a delightful natural pale green tinge.
As the blog name suggests, it's about vegan cooking. But while the recipe certainly gave me the inspiration, my dough is non-vegan. I always have dairy milk at home, so that's what I use.
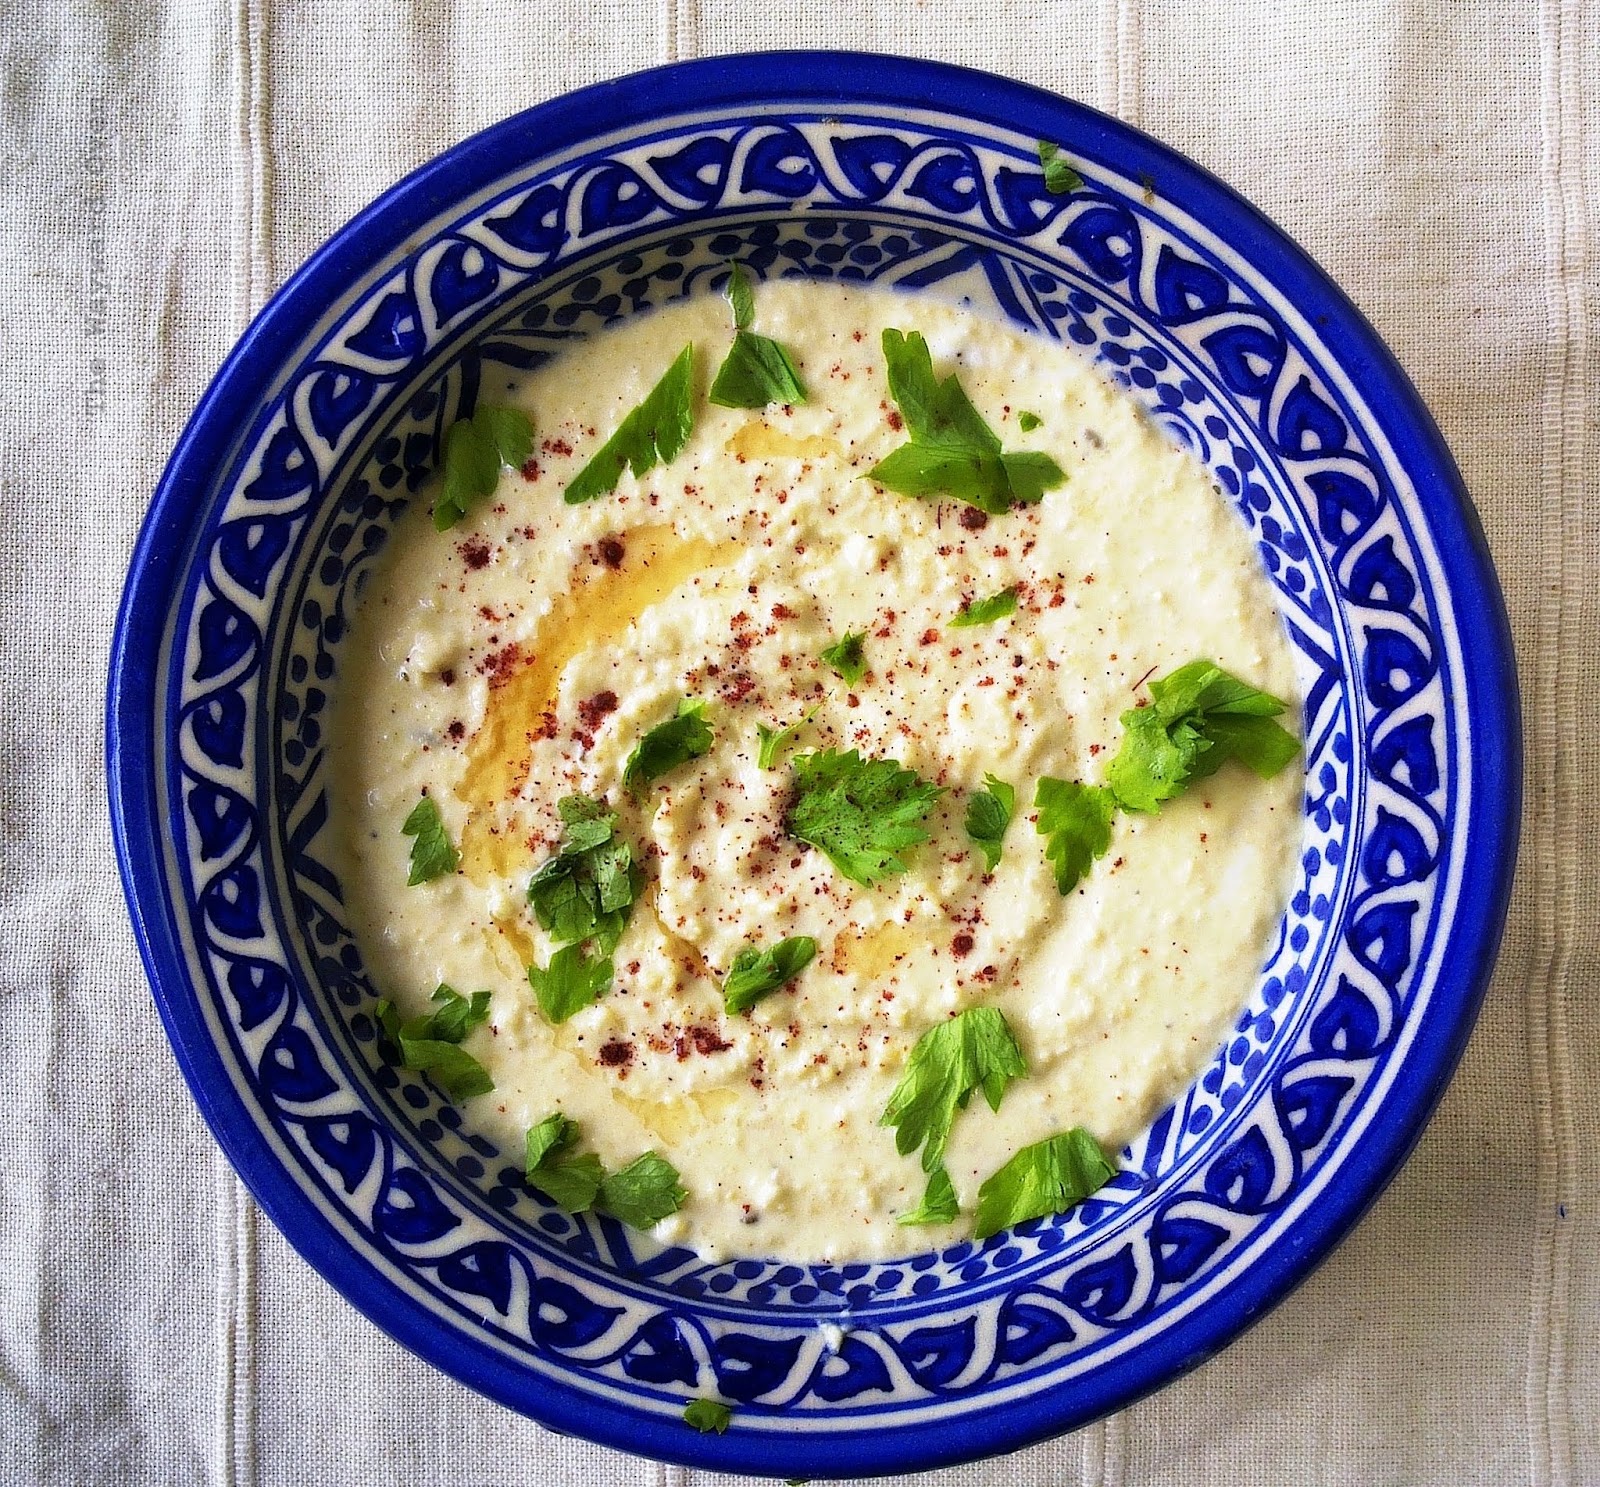
Chickpea-yoghurt dip
I had the naan with a chickpea-yoghurt dip one day. Whizz up some cooked/tinned chickpeas, a clove or two of garlic, a pinch of cumin seeds and some Greek yoghurt. Drizzle in some olive oil while the motor is running until the mixture is smooth. Season with salt and pepper and top with argan oil (or olive), chopped herbs and sumac before serving.
Stove-top cheese-stuffed naan cooked in a griddle pan
Stove-top Stuffed Naan
Makes 3. Variation for avocado naan dough in bold in recipe instructions.
225g (about 1¾ cups) bread flour (or substitute some white flour with 
½ tsp table salt
½ tsp instant yeast
60ml (about ¼ cup) milk
1 egg
2 tbsp natural yoghurt*
1 tbsp sunflower oil (or other neutral-flavoured oil)
Stuffing (examples: roasted eggplant purée; chopped cheese and fresh herbs; date-tamarind chutney)

Combine flour, salt and yeast in a large mixing bowl.
In a measuring jug, combine milk, egg, yoghurt and oil; stir well to blend.
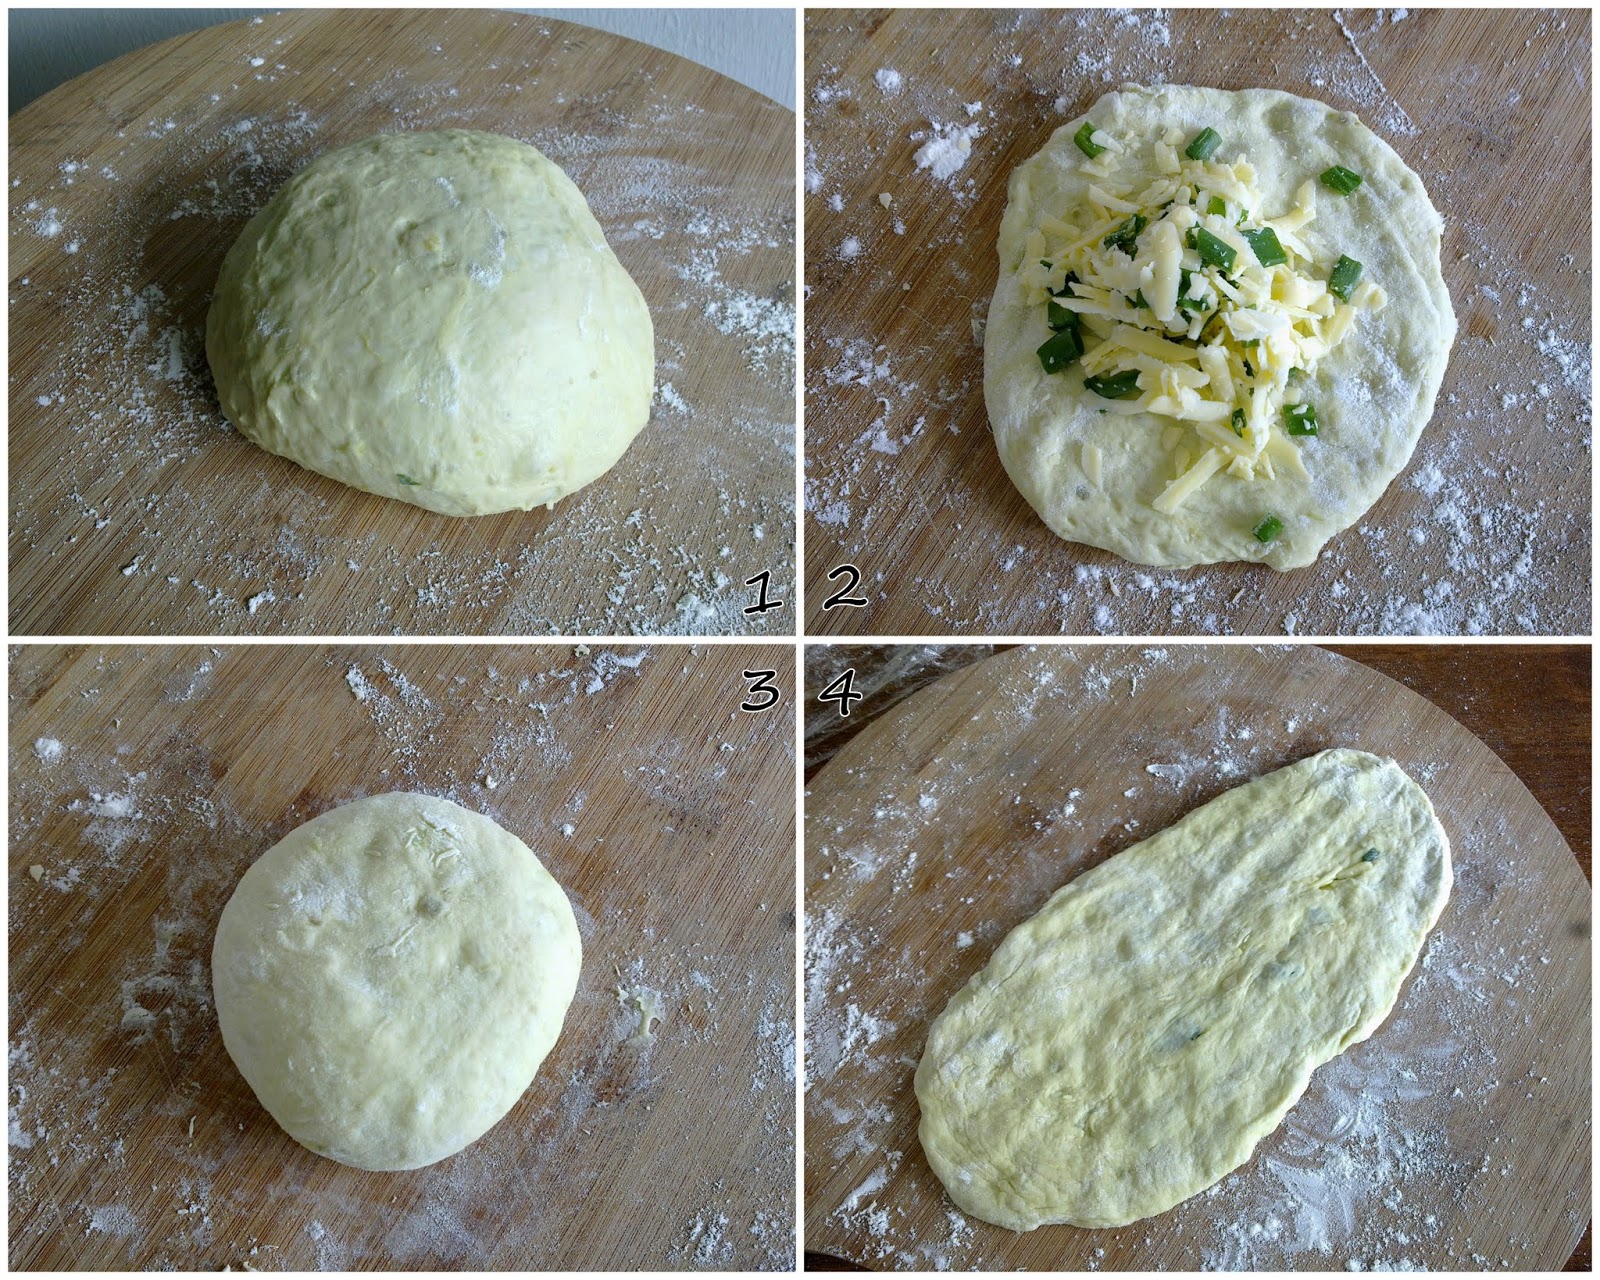
Add wet ingredients to dry ingredients and mix to a soft dough. Knead until smooth and form into a ball. Cover the bowl and set aside for dough to rise, one to two hours.
* For an avocado naan dough, omit the egg and yoghurt, and use the mashed flesh of one medium avocado. The milk can be substituted with a non-dairy milk, if desired.
Divide dough into three, form into balls and set aside, covered, to rest for 5 minutes.
The avoca-dough has a pale green tinge
On a lightly floured surface, press each ball out into a circle, with the edges thinner than the middle. Place a generous amount of filling into the centre of each circle and bring the edges up to enclose the filling, pressing the edges together to seal. Press down lightly to form a disk and set aside, covered, to rest for 10 minutes.
Press and stretch out the disks into elongated ovals or teardrop shapes.
Heat up a large non-stick frying pan or griddle.*
Place one naan at a time into the pan and cook over medium heat until the bottom is brown and it puffs up. Flip and brown the other side. Transfer to a plate and keep under a clean towel as you cook the other naans.
* Instead of cooking on the stove, naan can also be baked in the oven. Place a heavy baking tray on the middle rack of the oven and preheat oven to 225°C. Transfer naan onto the hot tray and baked until they are darkened, blistered and puffed, about five minutes. There is no need to flip the naan.

Sourdough Surprises: Papadum crackers

Tuesday, August 20, 2013

SOURDOUGH PAPADUM CRACKERS
This month's Sourdough Surprises challenge was to make crackers. I like crackers but I do have a problem with them – I tend to eat too many! They're really hard to resist, savoury ones especially, but even the plain type is moreish. It must have something to do with reliving our childhood – or further back, our baby years, when we were given rusks to chew on while we were teething. 
Well, I'm no psychologist so I shall get back to what we came here for: crackers. I decided to try making sourdough papadum.
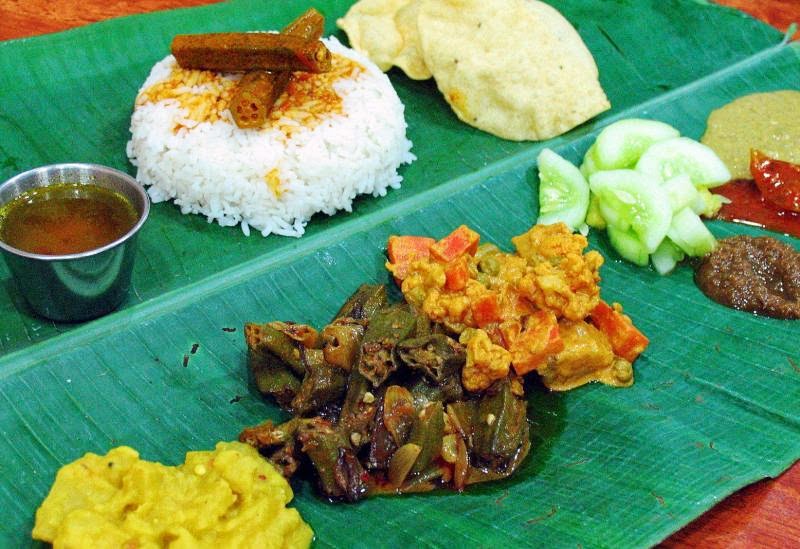
Banana leaf rice lunch served in South Indian restaurants in Malaysia. Papadum is at top right.
Although papadums are eaten as a snack or used to scoop up dip, they're typically an accompaniment to a South Indian banana leaf lunch – rice is placed in the centre of a large piece of banana leaf and the meat, fish and vegetable dishes are placed around it with the curry poured over the rice. The food is usually eaten with the right hand although some people use a spoon and fork. The discs of papadum are crushed by hand and mixed in with the rice.
Papadum is made from a variety of flours. The dough is rolled out thinly into discs and dried out under the sun. I think all the papadum we find in Malaysia is imported from India; I doubt if anyone actually makes their own as it's so easily available.
I've seen dried papadum being cooked directly on a flame and parts of it will char, but when cooking a large batch, as in a restaurant, they are simply fried. The puff up immediately and are drained quickly, then stored in large air-tight containers.
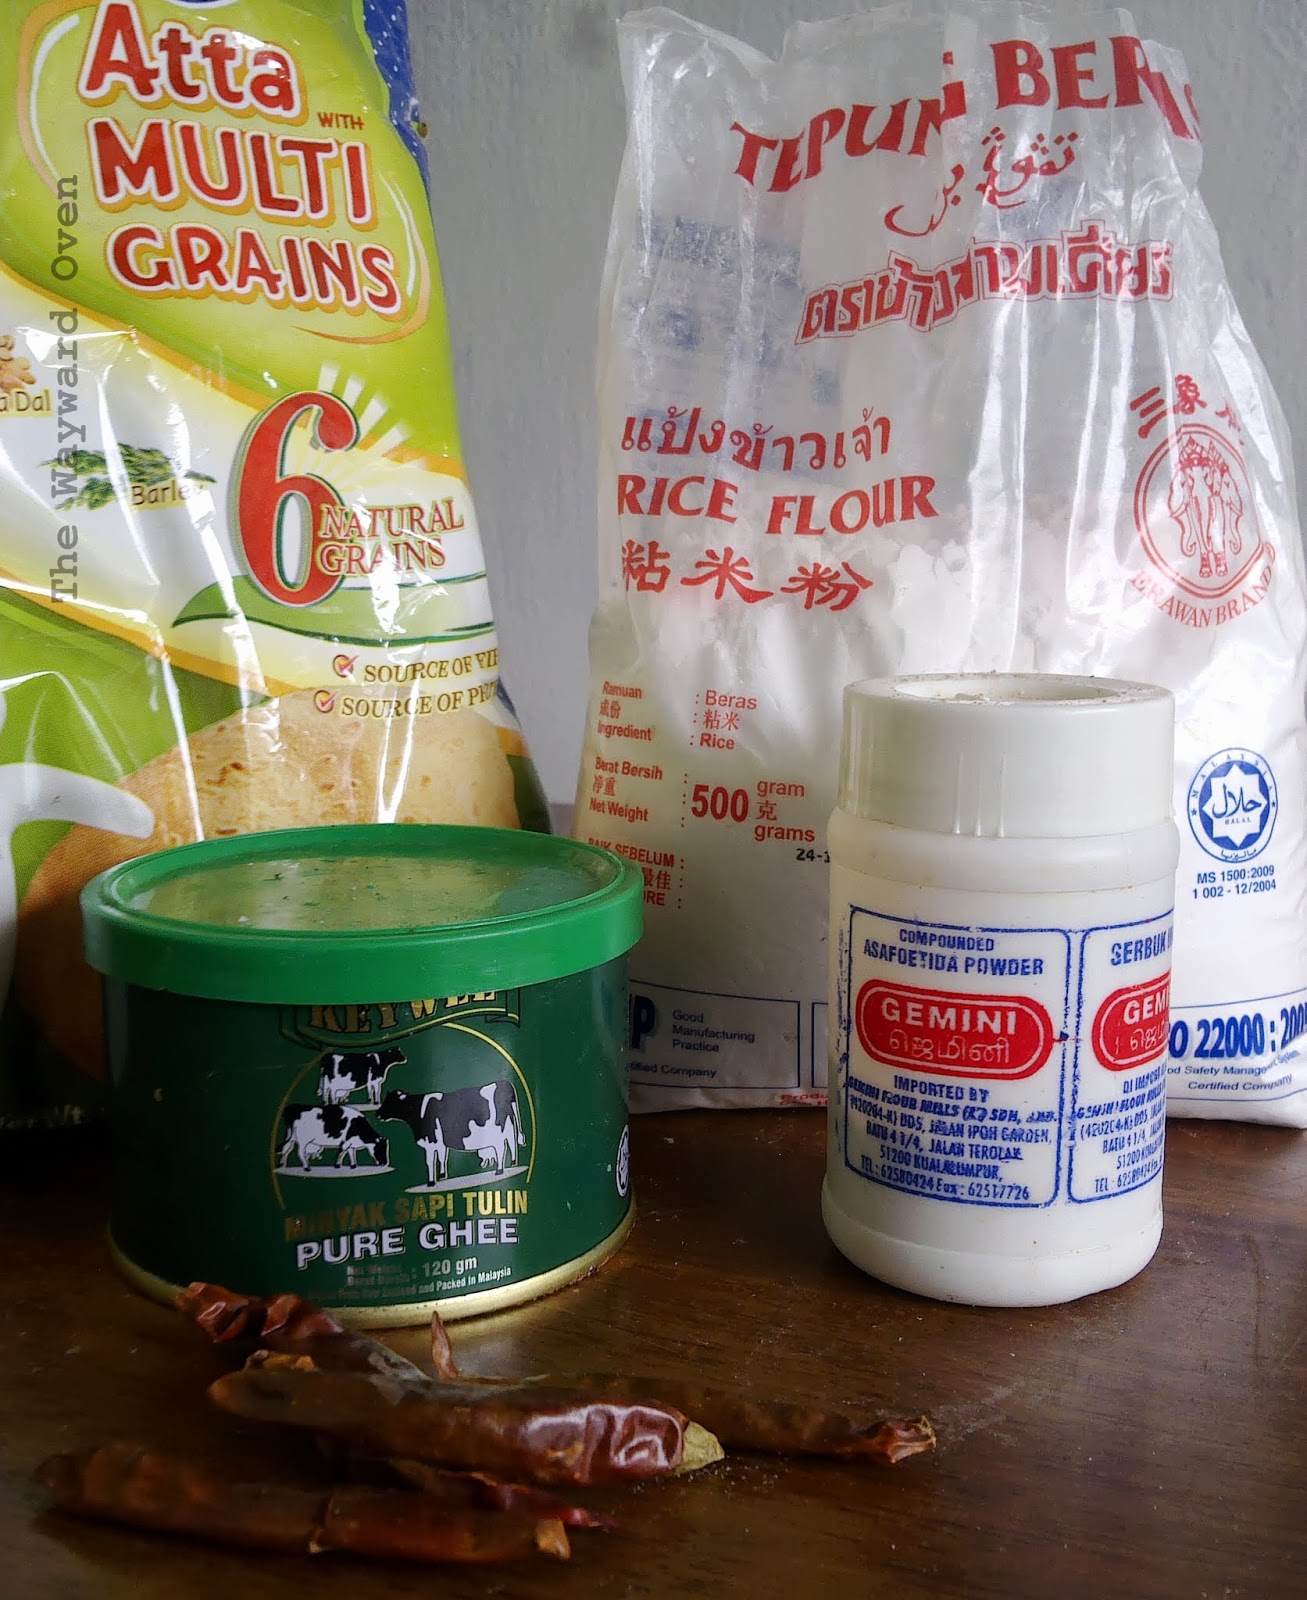
Sourdough papadum ingredients
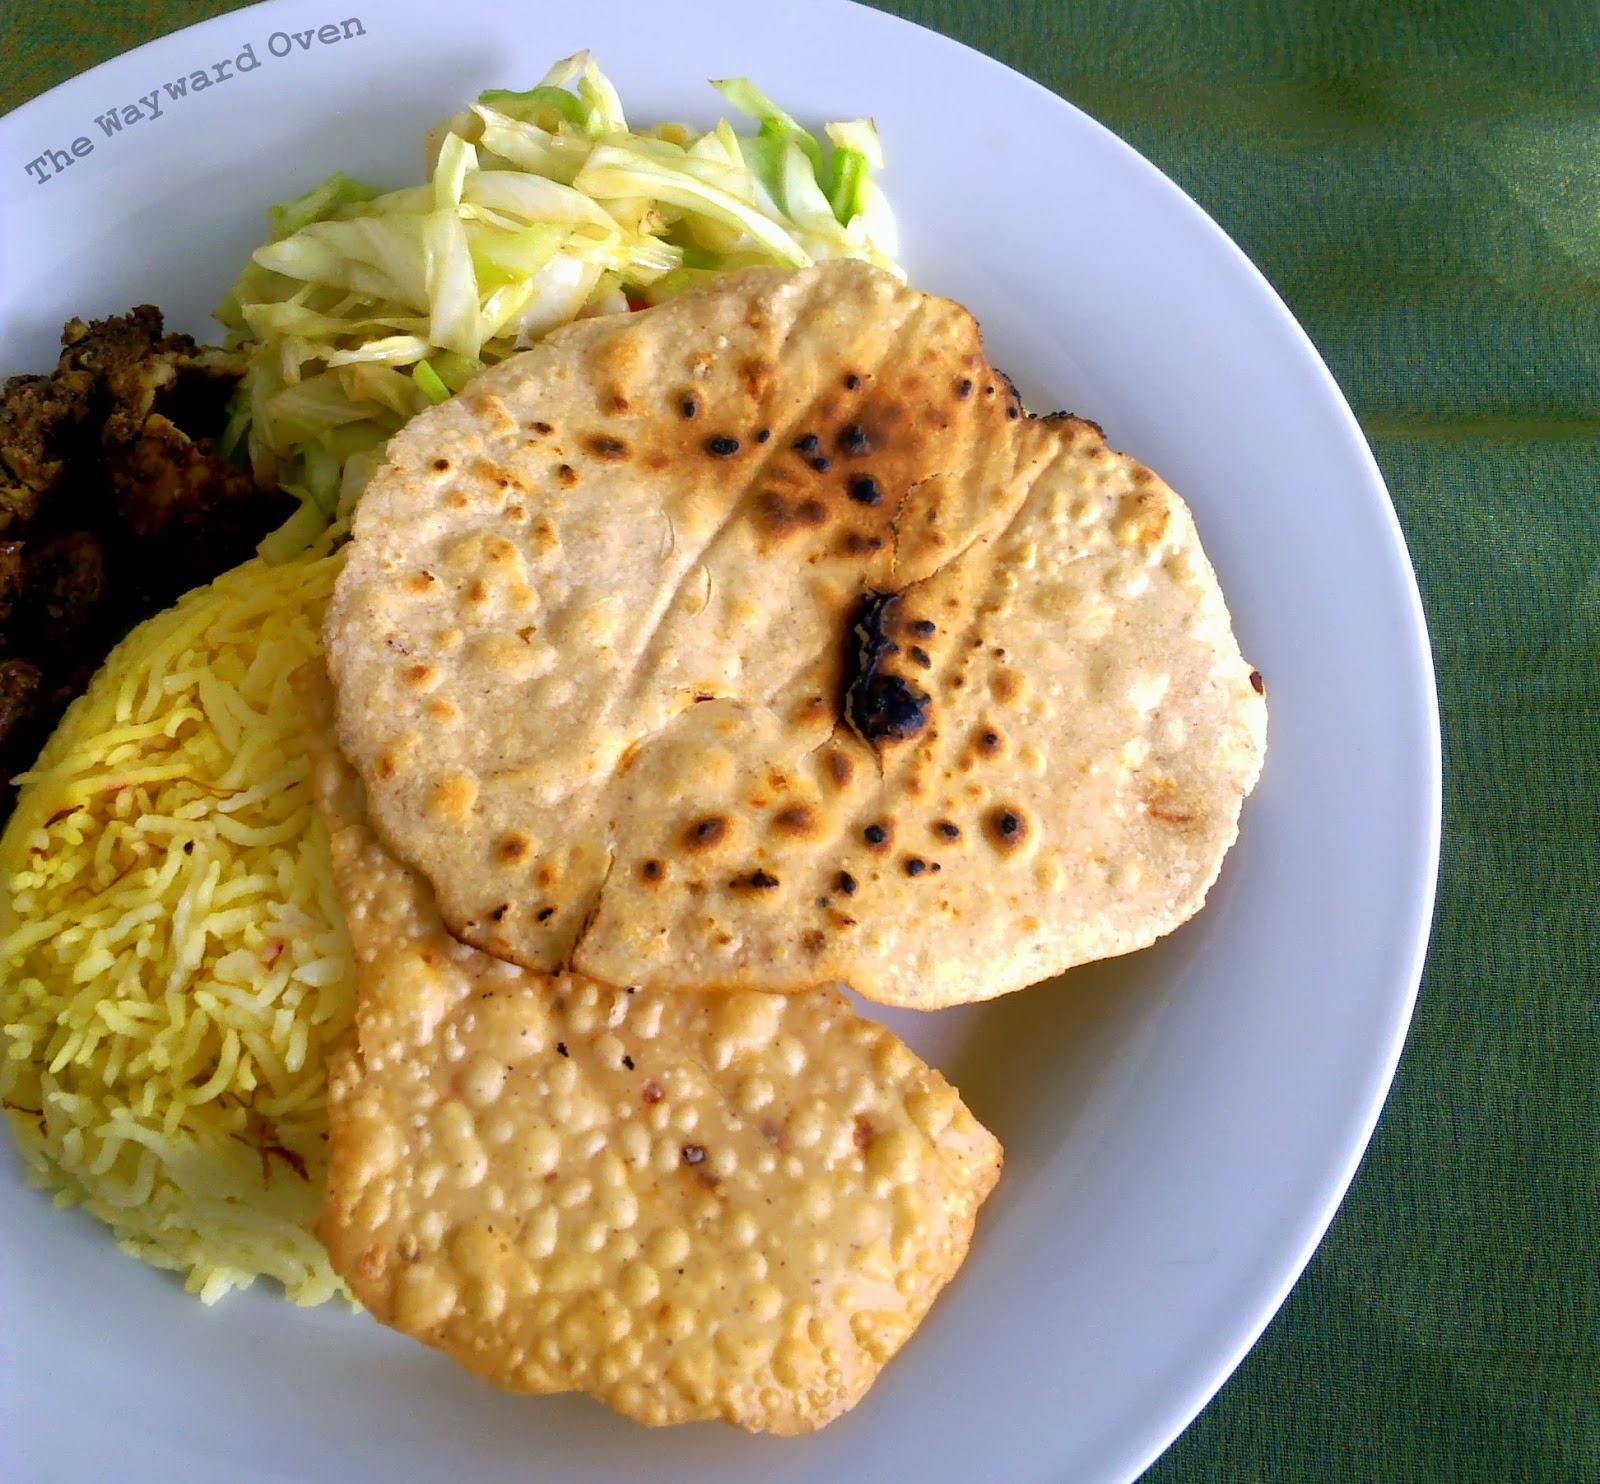
Besides the sourdough starter, my papadum contains multi-grain and rice flours, ghee, asafoetida powder and dried chillies flakes. I divided the dough into small rounds, then rolled them out into thin discs (about 10cm wide) on greaseproof paper. I didn't put them out in the open air but simply dried them out in a low oven, then cooked some of the papadum directly on a flame and shallow fried the others. The fried ones came out with little blisters all over the surface.
My recipe is sketchy because I didn't really measure anything but just went with the feel of the dough. Roughly, there's three-quarters of a cup of sourdough starter, a quarter cup of rice flour, two tablespoons of ghee, then enough multi-grain flour to mix into a firm dough. After that salt, asafoetida powder and chilli flakes to taste. I left the dough overnight and then carried on with the rolling and drying.


A bit of culinary Kerala

Tuesday, June 25, 2013

A LITTLE TASTE OF KERALA 
At the time of writing, I should have been packed and ready to fly to Chennai in India, and then on to Thiruvananthapuram (Trivandrum) in the southern state of Kerala for a short holiday.
Unfortunately, the trip has had to be postponed.
The Husband and I had planned to watch some Kathakali performances, eat Keralan food, visit interested sites, perhaps take a boat in the backwaters, gorge on Keralan seafood, explore markets, browse through bookshops, stuff myself... um, ourselves with Keralan food, and more.
I was disappointed... for a second, because I always remember my late father saying that "everything happens for the best". I've always believed in that and things usually work out. My father's parents were originally from Kerala and came to then British Malaya to work in the rubber estates, so perhaps they're telling me, in spirit, that it's not the right time to visit their homeland. *wink*
It would have been good to get out of Malaysia at this time, though. We are experiencing the worst haze (smog) I can remember. I don't think it has ever been this bad. I look out the glass doors of my flat and just beyond my balcony, I can see the haze pollutants just hanging in the air. Outdoors, it's hard to breathe and my eyes hurt. There's an eerie glow all around, which I would describe as pretty if it wasn't hazardous (in some places, it's at dangerous levels).
Well, if you have to stay in, cooking is always a good way to pass some time. And since I had been looking forward to Keralan food in Kerala but not getting to eat it there, I thought I should make a few dishes at home.
Aviyal
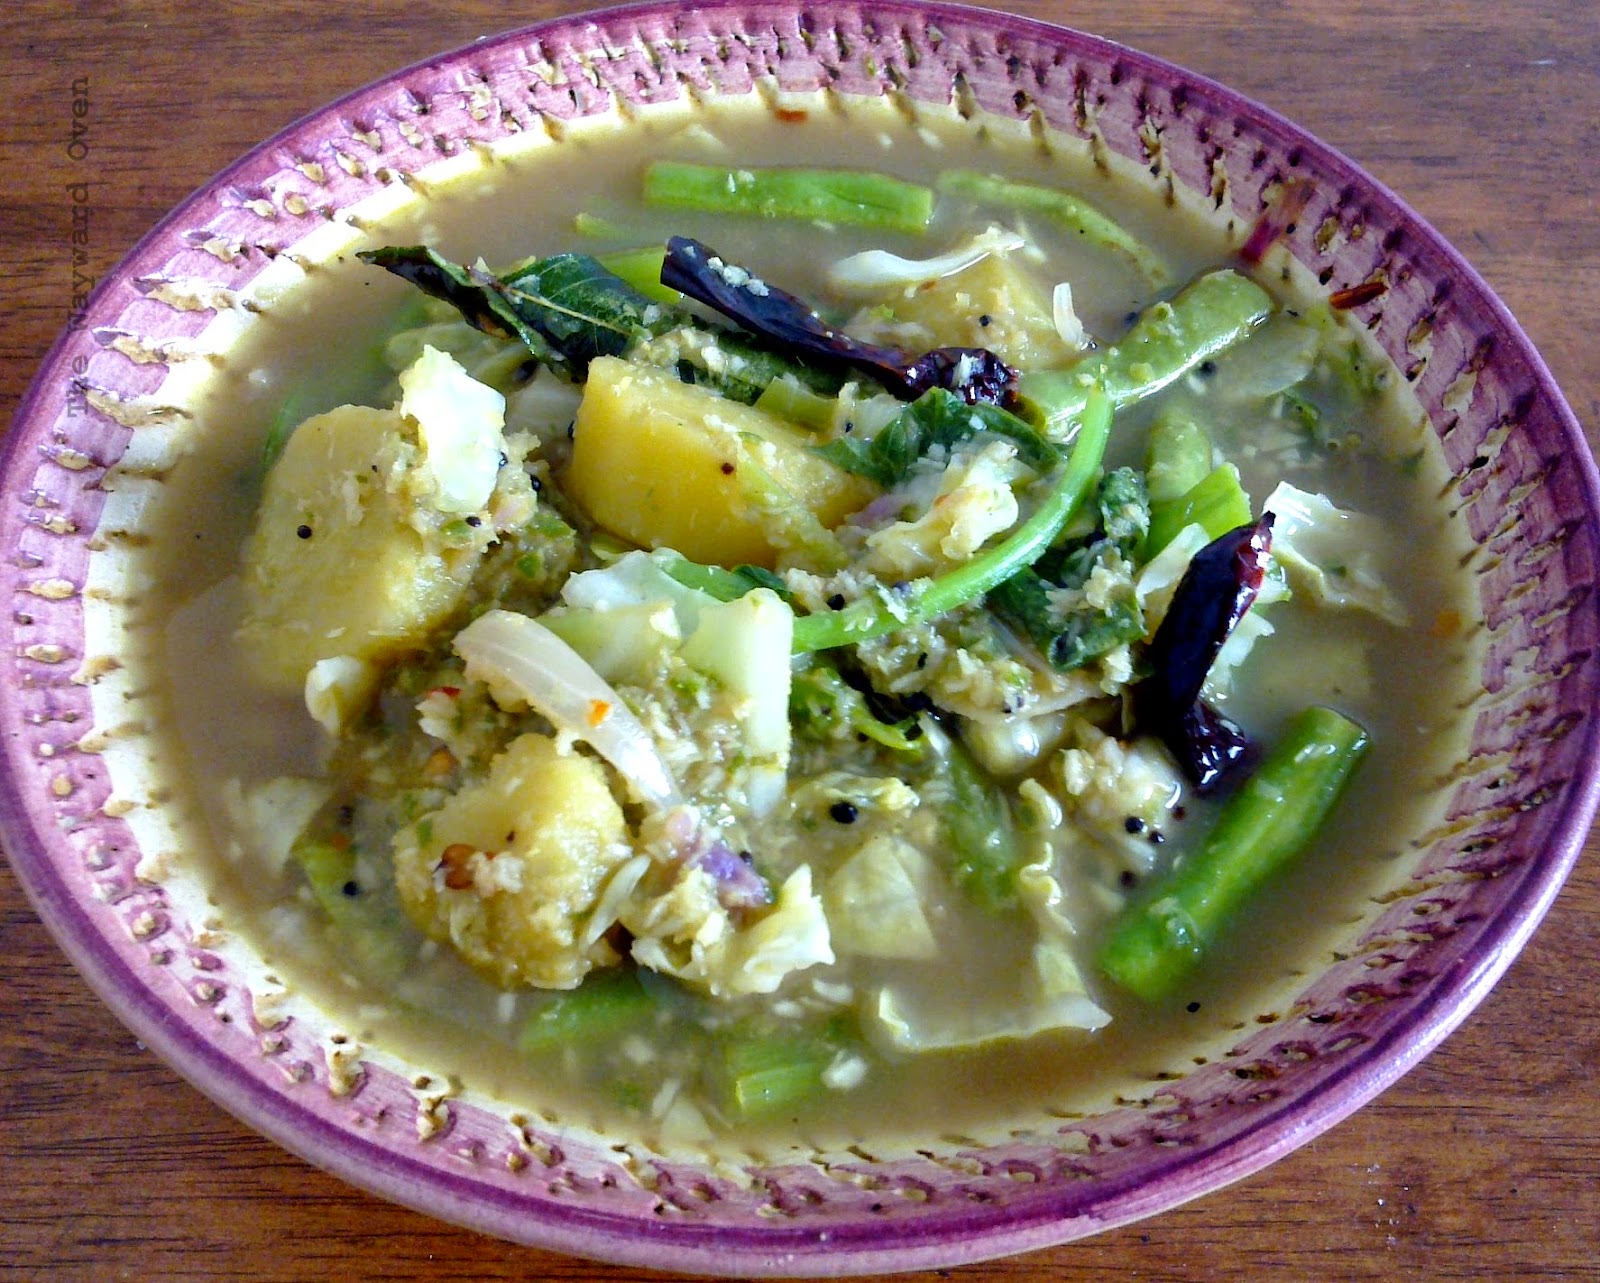
Coconut and green chillies are used a lot in Keralan cooking. A dish that contains both of these ingredients is aviyal, a mixed vegetable curry cooked with a fresh coconut-green chilli spice paste. Root and hardy vegetables like potatoes, plantain, carrots, long beans and drumstick pods are often included. I didn't have any of those so I used French beans, sweet potatoes, cabbage and after I turned off the heat, I added spinach so that it just wilted in the hot curry. I think I added too much water though, so the aviyal is not thick enough. And it should be yellow, which means I didn't add enough turmeric powder.
Fried fish with crisp onions
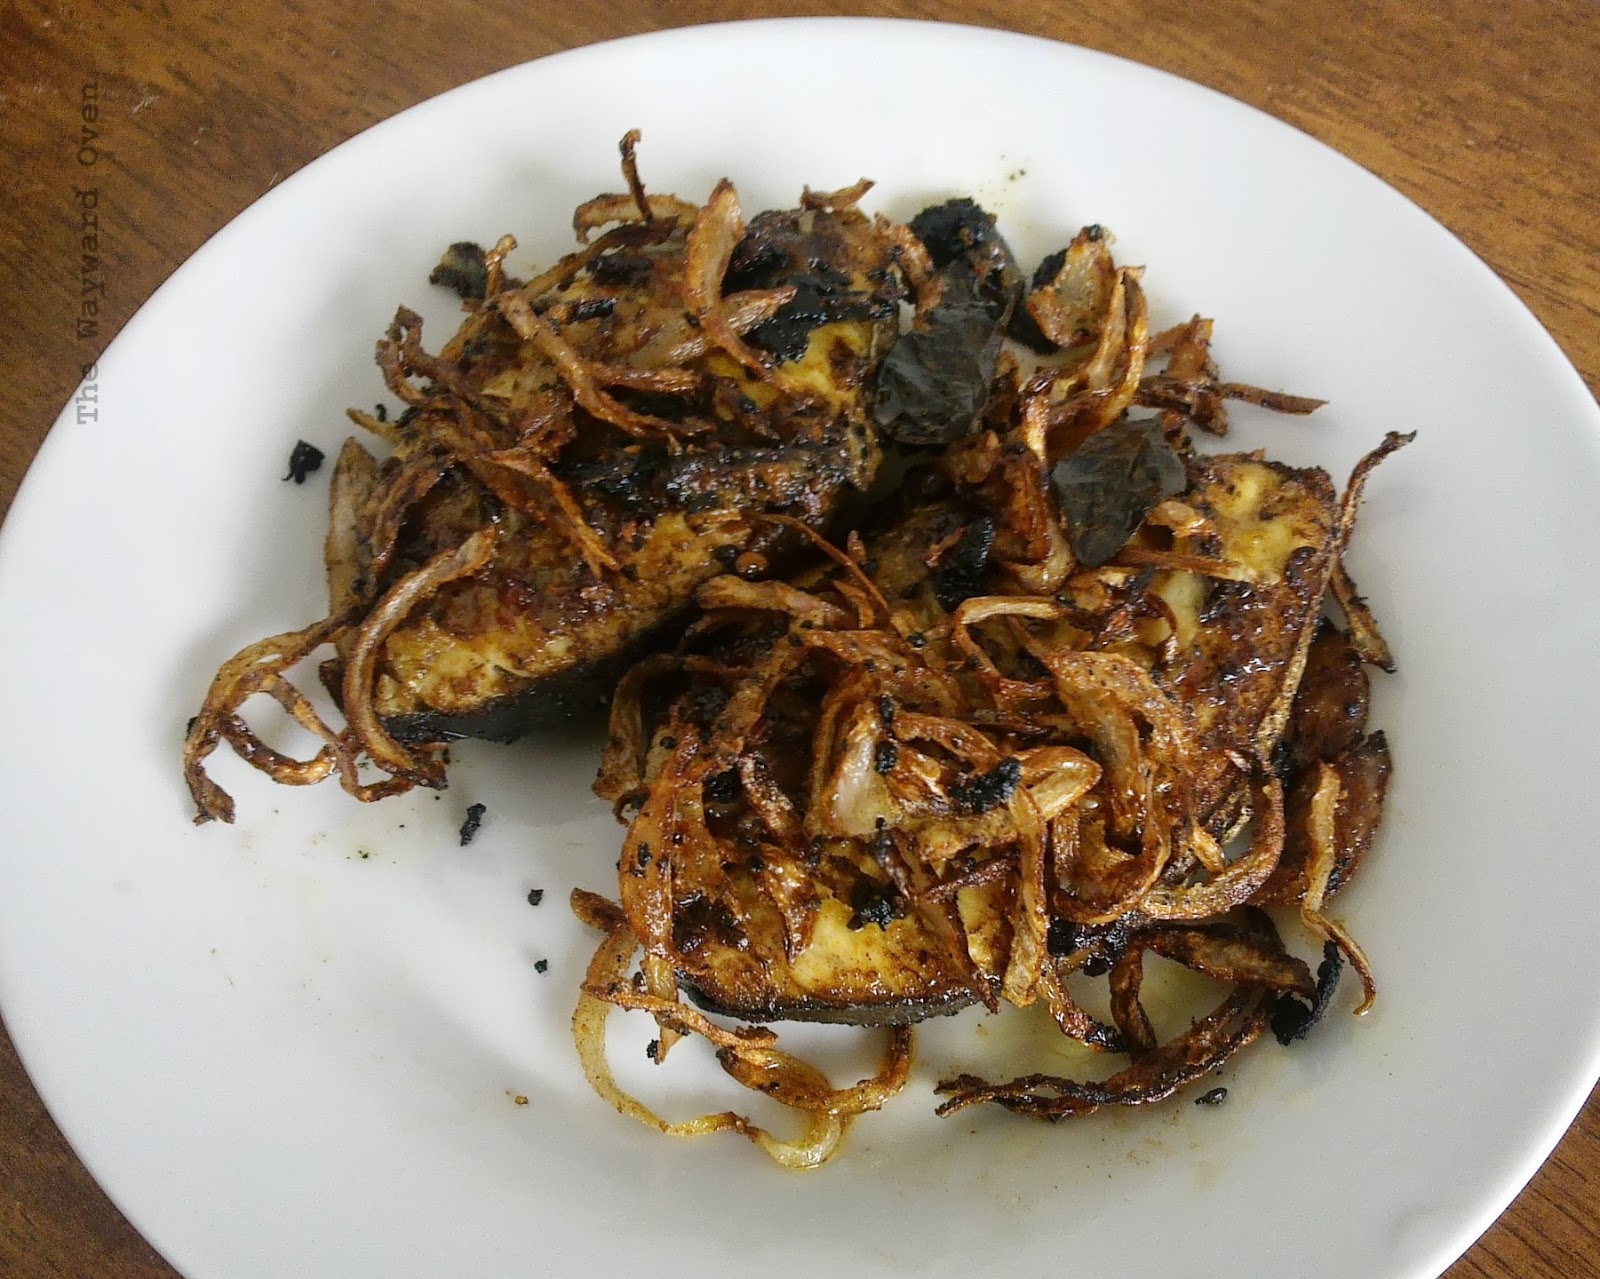
Kerala is also famous for its seafood dishes. Since there was already the aviyal, which has gravy to mix into rice, I just fried a couple slices of tenggiri fish that had been simply dredged in curry powder, turmeric and salt, and then garnished it with fried crisp onions and curry leaves.
Rasam
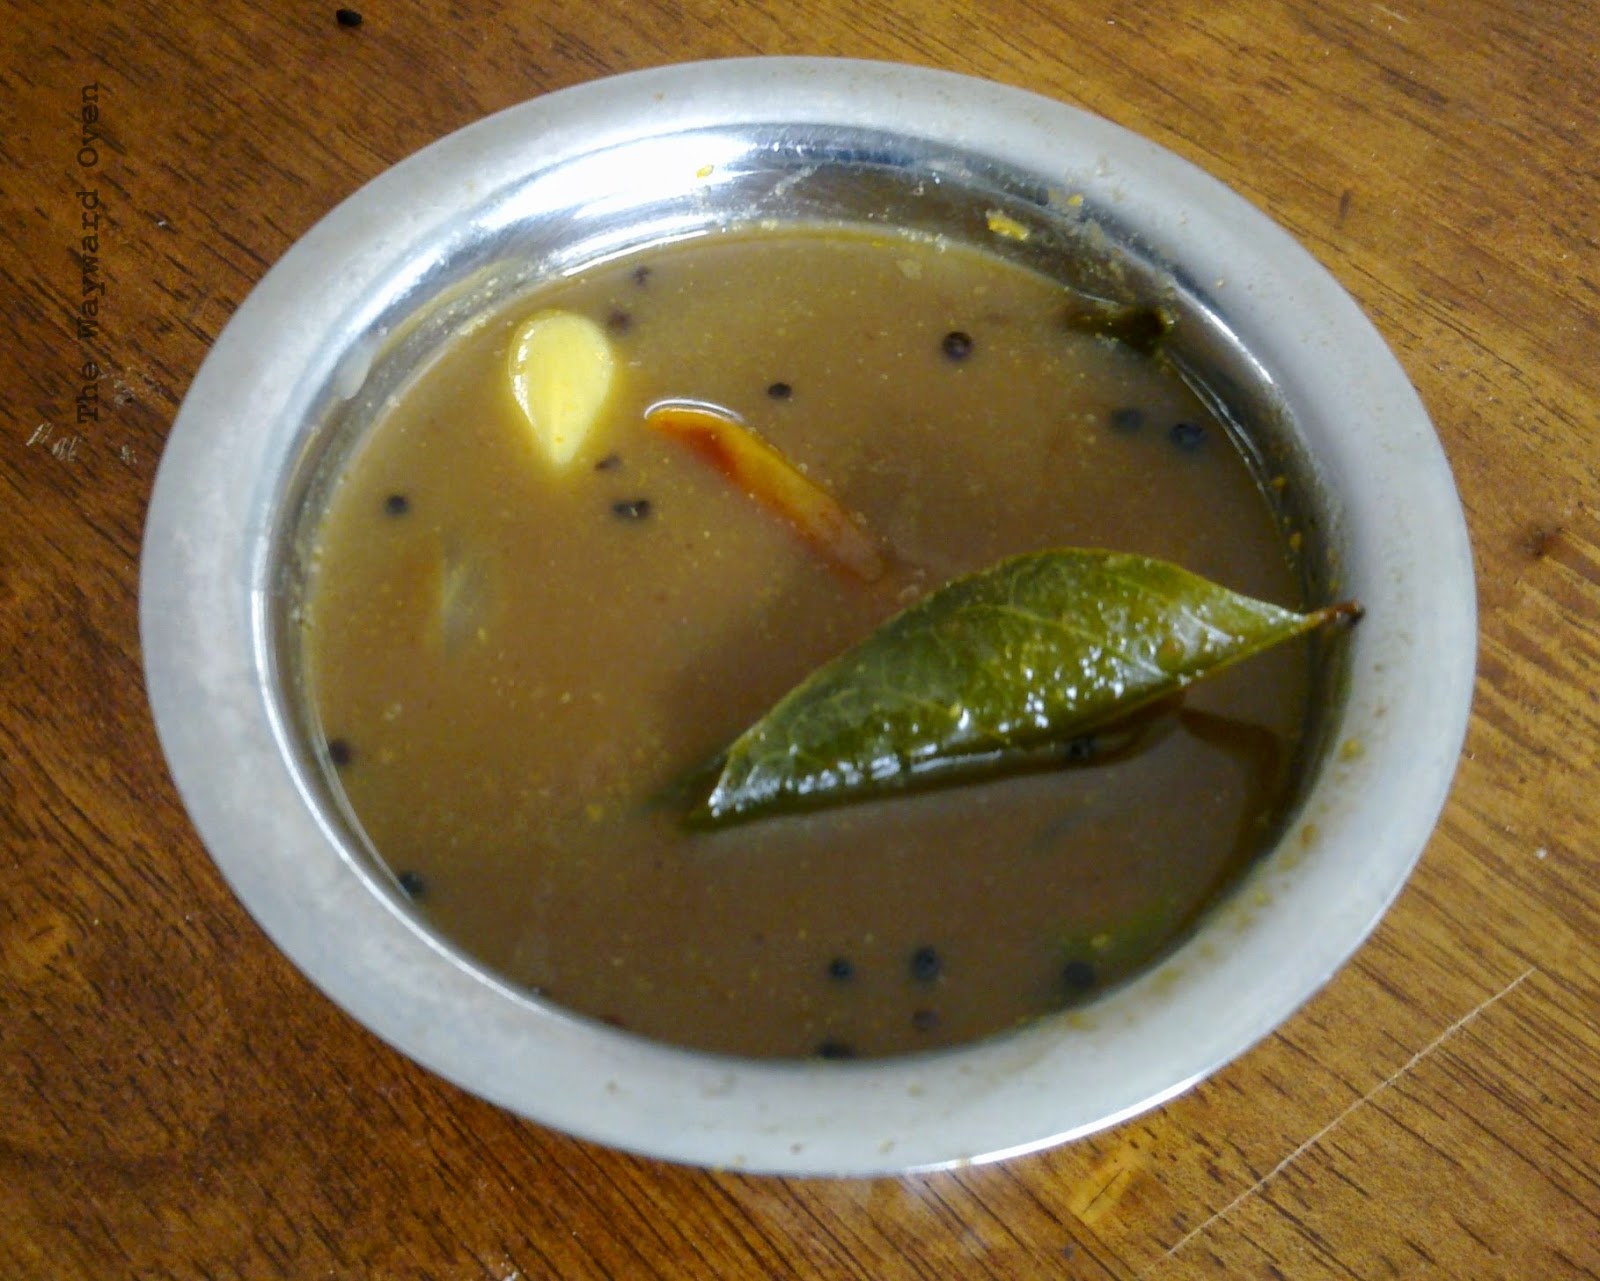
For me, no curry meal can be complete without rasam – a tamarind-based soup. I like my rasam sour because that's what I grew up with, while the Husband prefers rasam that is not so sour. I add hot water to it to thin it down.
Rasam is kind of a tonic, so I always make extra and drink it like a beverage. Taken on its own, I water it down slightly because without the rice, my version can be too sour even for me.
It was a good meal. It wasn't Kerala, but at least I ate well.

Fasta sourdough pasta

Friday, May 17, 2013

VEGETABLE AND PASTA STRATA WITH SOURDOUGH PASTA 
When Sourdough Surprises chose to make sourdough pasta for April, I was excited. I have a hand-crank pasta machine that rolls (and kneads) the dough and cuts the noodles, and I try to use it as often as I can, but to be honest, the machine only makes an appearance three or four times a year. A shame really, because although I like dried pasta and use it all the time, pasta made from scratch is a notch above.
I actually made three flavours of dough and used them for various pasta dishes, but the posting date of April 20 came and went without a word from me. I'll get to the reason in a minute.
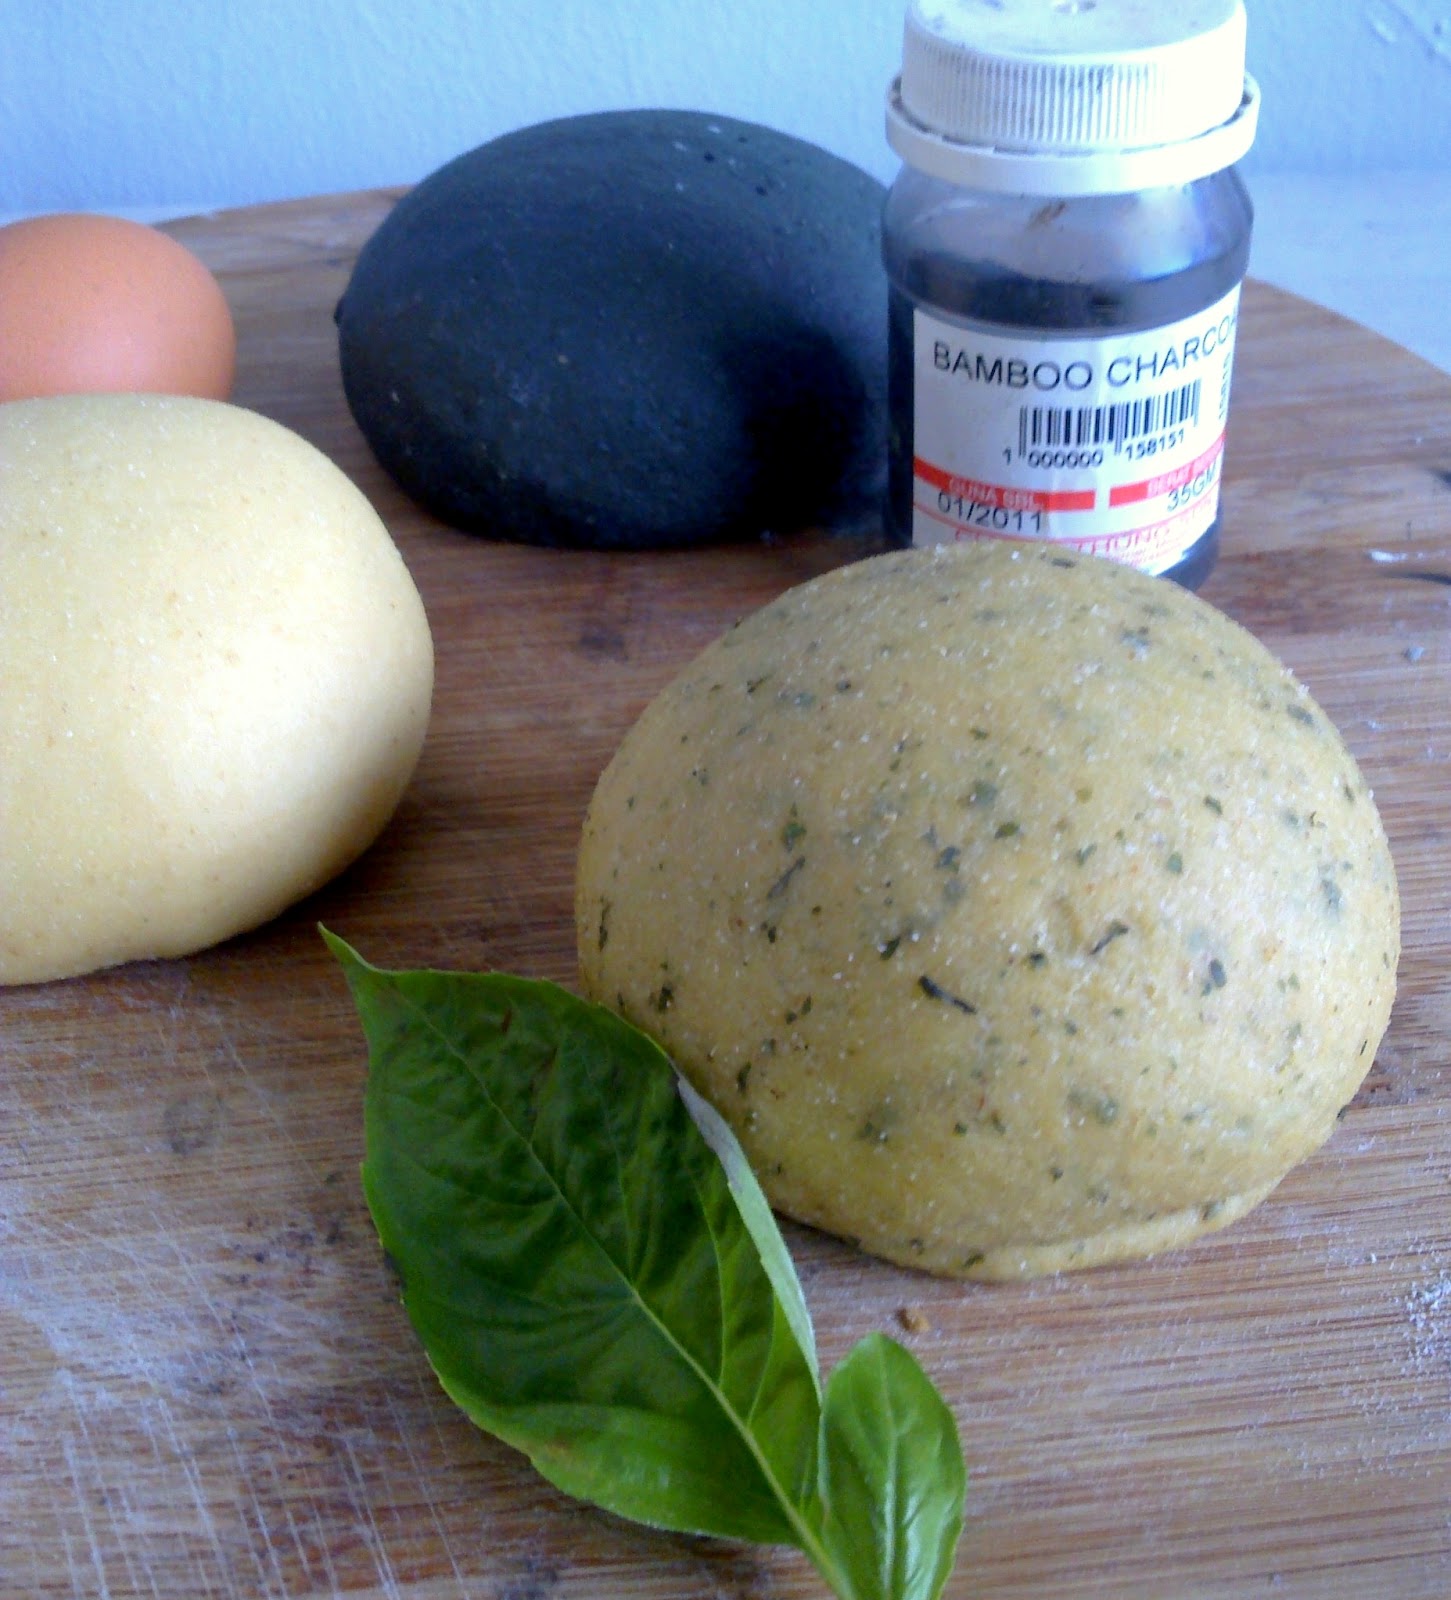
I had made two of the sourdough pasta doughs with semolina (durum) flour and egg – one of plain, the other flecked with Thai basil. The third one, I thought I would like to try making my version of soba noodles and combined all-purpose and buckwheat flours with the addition of bamboo charcoal powder (no egg this time).
Three flavours of sourdough pasta dough
The egg doughs came together well, but not the black buckwheat noodles, possible because of the lack of eggs. The noodles broke up into little bits (they looked like orzo) almost as soon as they hit the boiling water.
However, I realised something when I tasted all three noodles: they were extremely sour! Which meant there was a problem with my sourdough starter.
I'm sure some people like that level of sourness, and in fact, it isn't extreme in a loaf of bread, but for the pasta dough that I made, it was almost like biting into a lemon.
Anyway, the reason I didn't post on April 20 was because I was really busy and didn't have time to write up a post (we had our country's General Election on May 5 and there was a lot of activity before and after the date). But that gave me time to come up with a better tasting sourdough pasta. 
I discarded over half the starter I have tended to for over two years, and fed the remainder every day for a few days. Maybe I'm just imagining it, but the bread dough I made recently appeared stronger and was more flavourful. I've also made sourdough cakes with the "new" starter, and the chocolate ones have been very good.
So then, on to the sourdough revamp. I mixed the dough by hand, like I've illustrated here. For my vegetable strata (pan-fried courgette, eggplant and mushrooms, mustard cheese sauce and tomato sauce), I made just a plain egg (sour)dough, again with semolina, and the flavour of the pasta was at just the right level of sourness for me. I'll add flavourings next time.
Cubed gouda cheese and breadcrumbs for the topping
Fresh Egg Sourdough Pasta (Dough)
Makes about 240g

120g (about ¾ cup) semolina durum
Large pinch of salt
70g (a bit more than ¼ cup) unfed starter
1 medium egg

Flavourings (and colours)*
2-3 tsp tomato paste (red)
1 tbsp finely chopped basil (speckled)
1½ tbsp puree of cooked spinach (green)
A pinch of saffron threads mixed with 1 tbsp warm water (bright yellow)

Place the semolina on a work surface. Sprinkle the salt on top and stir together with your fingers. Bring the semolina together into a mound, then make a hole in the centre. Place the starter and egg* into the hole and then gradually stir in the semolina with your fingers or a fork. Incorporate the mixture until no dry bits remain. 
Knead the mixture; it will be crumbly at first but the semolina will soon absorb the liquids and the mixture will come together into a smooth ball. Leave in the work surface and cover with a clean tea towel. Set aside for 1 hour before rolling out and cutting into shapes by hand or a pasta machine.
* If including flavourings, add with the liquids.

Plum chutney is a good sidekick

Monday, May 6, 2013

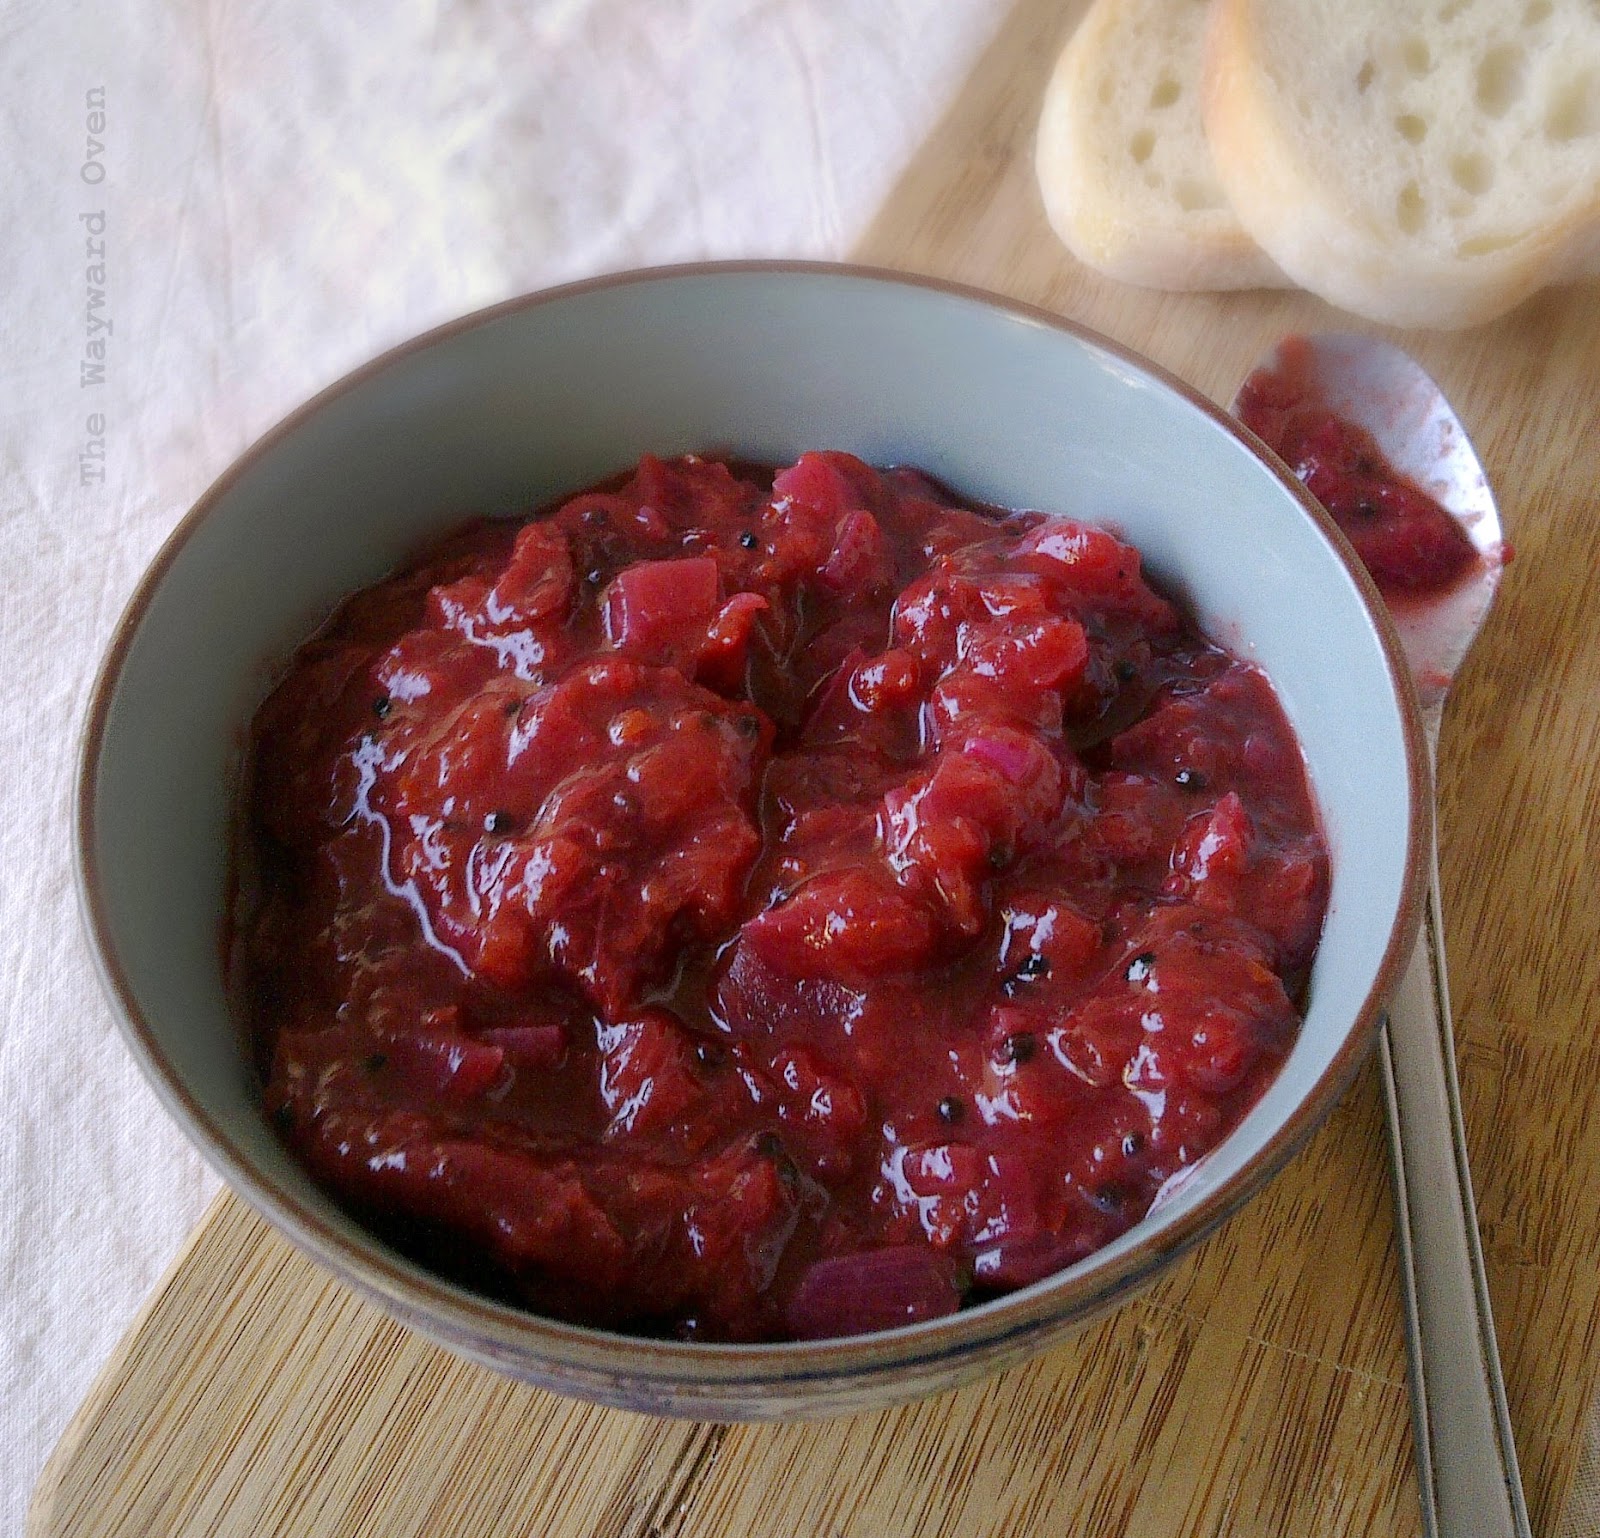
HOT SPICED PLUM CHUTNEY 
Chutney, relish, pickle, achar... whatever you call it, a preserved condiment is a good partner to have when it comes to eating.
Of course, not all preserves are made alike.  Some are sweet, others are hot, and some are sweet and hot. There are also sour preserves and salty ones too.
I keep quite a few varieties on hand. Some can be kept in the store cupboard, others have to be refrigerated. I've recently been enjoying some kumquat pickles my mother made and salted fish achar from a home-based business, both of which I've been having with my rice and curry dishes.
But chutneys, relishes, pickles and achar don't always have to play sidekick: How about a tamarind and date chutney baked into a cake or a sour masala jam of chillies, pineapple and cucumber which can hold its own against meats? And a good mango achar takes centre stage in a grilled cheese and chutney sandwich or sabich, an eggplant sandwich with hard-boiled eggs.
Recently, I got a bag of purple plums and ate most of it fresh. But I got down to the last three and thought I would turn them into a hot and sweet spiced chutney. After pitting the plums, they weighed close to 250g, which made hardly enough chutney to fill a Chinese soup bowl. But I tend to forget what I have in the fridge so if I have too much, it might just go to waste if I didn't finish it. Anyway, the chutney doesn't take long to make (though it needs to sit at least a day before eating), so I can always make more.
I don't have a precise recipe for this plum chutney. The ingredients are all to taste, but here's a rough guide.

Hot Spiced Plum Chutney
Makes ¾ cup

250g purple plums (about 3 medium)
½ tbsp neutral-flavoured oil
1 tsp black mustard seeds
1 small red onion, diced
2 tbsp sambal oelek (red chilli paste)
100ml (scant ½ cup) white vinegar (white wine or rice)
1½ tbsp brown sugar
Water
1 tsp cayenne pepper
¼ tsp each ground cinnamon, ground allspice and asafoetida
Salt to taste

Pit the plums and chop them up into medium-sized chunks.
Heat the oil in a saucepan and toss in the mustard seeds. Stir them around until they start to pop.
Add diced onion and sauté till translucent.
Add sambal oelek (chilli paste) and sauté briefly. Add brown vinegar, sugar and 2 tablespoons of water. Bring to the boil, then add the chopped plums. Simmer, uncovered, over medium-low heat until fruit is soft. Use a potato masher or the back of a wooden spoon to break up some of the fruit. Stir occasionally until the mixture has thickened. Add more water if it looks dry.  
Stir in the cayenne pepper and spices. Add salt to taste. Simmer a while longer. Spoon into clean air-tight bottles and store in the refrigerator. Best left a day before consuming.

'Varai' good!

Sunday, April 7, 2013

SRI LANKAN PRAWN VARAI 
I got this recipe from Mr S. Siluvairasu, the proprietor of the Yarl Beach Inn in Jaffna, Sri Lanka, when I stayed there in August 2003. I haven't cooked it much, which is a shame since it isn't difficult to do at all and is really delicious.
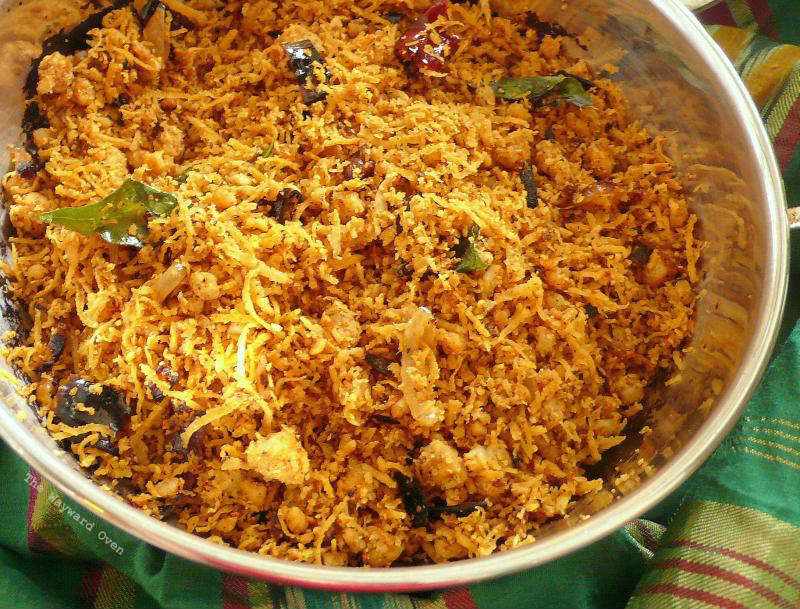
Actually what Mr Silu cooked when I was there (on a press assignment) was shark varai  (pronounced vah-ray) – flaked shark meat cooked with grated coconut and spices. Prawns are an alternative, and the dish can be eaten with rice, thosai or stringhoppers.
One of Mr Silu's other specialities that I enjoyed was baked crabs, also a well-known dish in Jaffna and another recipe that he gave me. That one takes a bit more preparation but it's also a really wonderful dish.

Mr Silu’s Prawn Varai

500g prawns, shelled and cleaned
150g grated coconut
2 tsp chilli powder
Pinch of turmeric powder
¼ tsp black pepper
½ tsp cumin powder
Salt to taste
3 shallots, sliced
3 dried chillies, soaked and cut into 1cm lengths
Leaves from 1 sprig of curry leaves
2 tbsp cooking oil

Steam the prawns until tender. Cool and chop finely (do not mince; you want little chunks).
Mix prawns with grated coconut, chilli powder, turmeric powder, black pepper, cumin powder and salt. Set aside.
Heat oil in a wok and fry the sliced shallots, dried chillies and curry leaves over medium heat until shallots are golden.
Add prawn mixture and fry, stirring constantly, until dry and coconut turns lightly golden. Adjust seasoning if necessary.

From figs to persimmons

Saturday, March 16, 2013

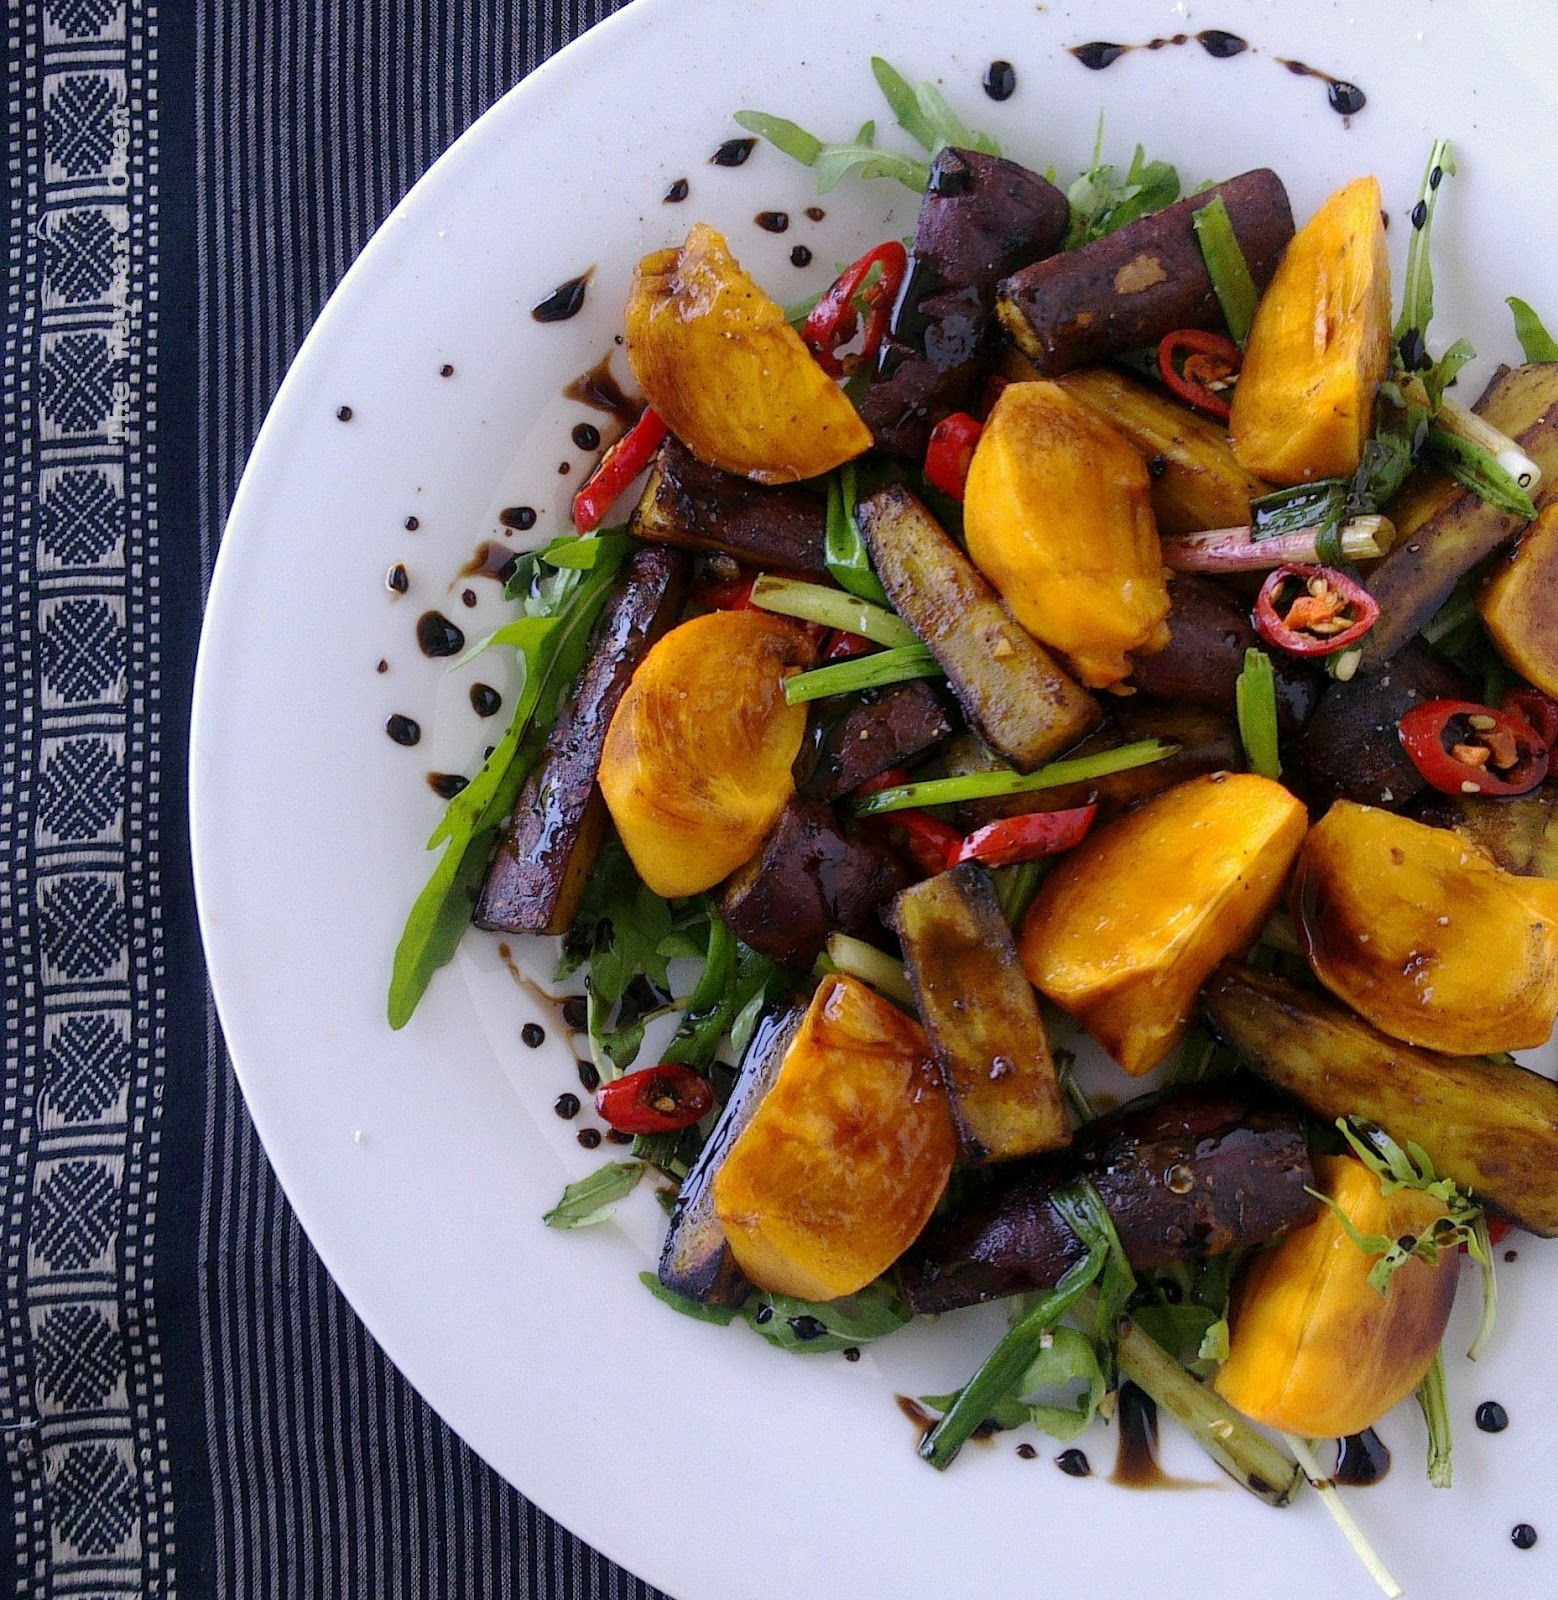
COOKED SWEET POTATO AND FRESH PERSIMMON 
Yet another vegetable dish inspired by my newest acquisition, Jerusalem by Yotam Ottolenghi and Sami Tamimi. There's more to come – a snack bread has already been lined up – and why not? The recipes in this book are enticing and not difficult to do, and I really like all the flavours from that part of the world.
I can't always get all the ingredients though, but that shouldn't be an obstacle. Take this dish. The original recipe calls for roasted sweet potato and fresh figs. The book authors say that this combination of cooked and raw ingredients is very popular at one of their restaurants. Well, fresh figs are difficult to find over here – although having said that, I did see some at the grocers last week (understandably, quite expensive) before I got this book – so I thought about a good substitute, and wanted to keep it local if possible.
Well, I went up and down the fruit aisle but couldn't find any local fruit that is similar to figs. And then I saw some persimmons (Korean, however) and thought why not?
As I mentioned earlier, the original recipe incorporates roasted sweet potato and fresh figs, as well as goat's cheese. I omitted the cheese, and used steamed sweet potatoes instead. They're just as good and I didn't want to turn on the oven. Well, good recipe writers inspire and Ottolenghi and Tamimi certainly do.
Substituting persimmons for fresh figs
Sweet Potato and Persimmon Salad
Serves 1-2

A handful of rocket or other salad leaves
2 medium sweet potatoes, skin on
2 tbsp balsamic vinegar
1 tsp sugar
3 thin stalks spring onion, sliced into 4cm lengths
1 long red chilli, sliced thinly
2 persimmons
2 tbsp sunflower oil
Flaky salt and black pepper

Arrange the salad leaves in a large plate.
Wash and dry the sweet potatoes and then steam them until tender. Cut into quarters lengthwise and then into 5cm lengths (like thick chips).
Heat a tablespoon of oil in a small frying pan and stir-fry the sweet potato chips briefly to crisp their skin. Arrange over the salad leaves in the plate.
In the same pan, heat the other tablespoon of oil and flash fry the spring onion and chilli. Scatter the mixture together with the oil over the sweet potato. Sprinkle with salt and pepper to taste.
In the same pan over low heat, place the balsamic vinegar and sugar. Simmer the mixture, swirling the pan around now and then, until reduced to about one tablespoon. Take off the heat while it is still runny as the reduction will continue to thicken.
Cut the persimmons into six wedges and tuck them around the sweet potato chips. Drizzle the balsamic reduction over all the plate (if too thick to drizzle, loosen with a drop of water).

Bread fritters

Thursday, March 14, 2013

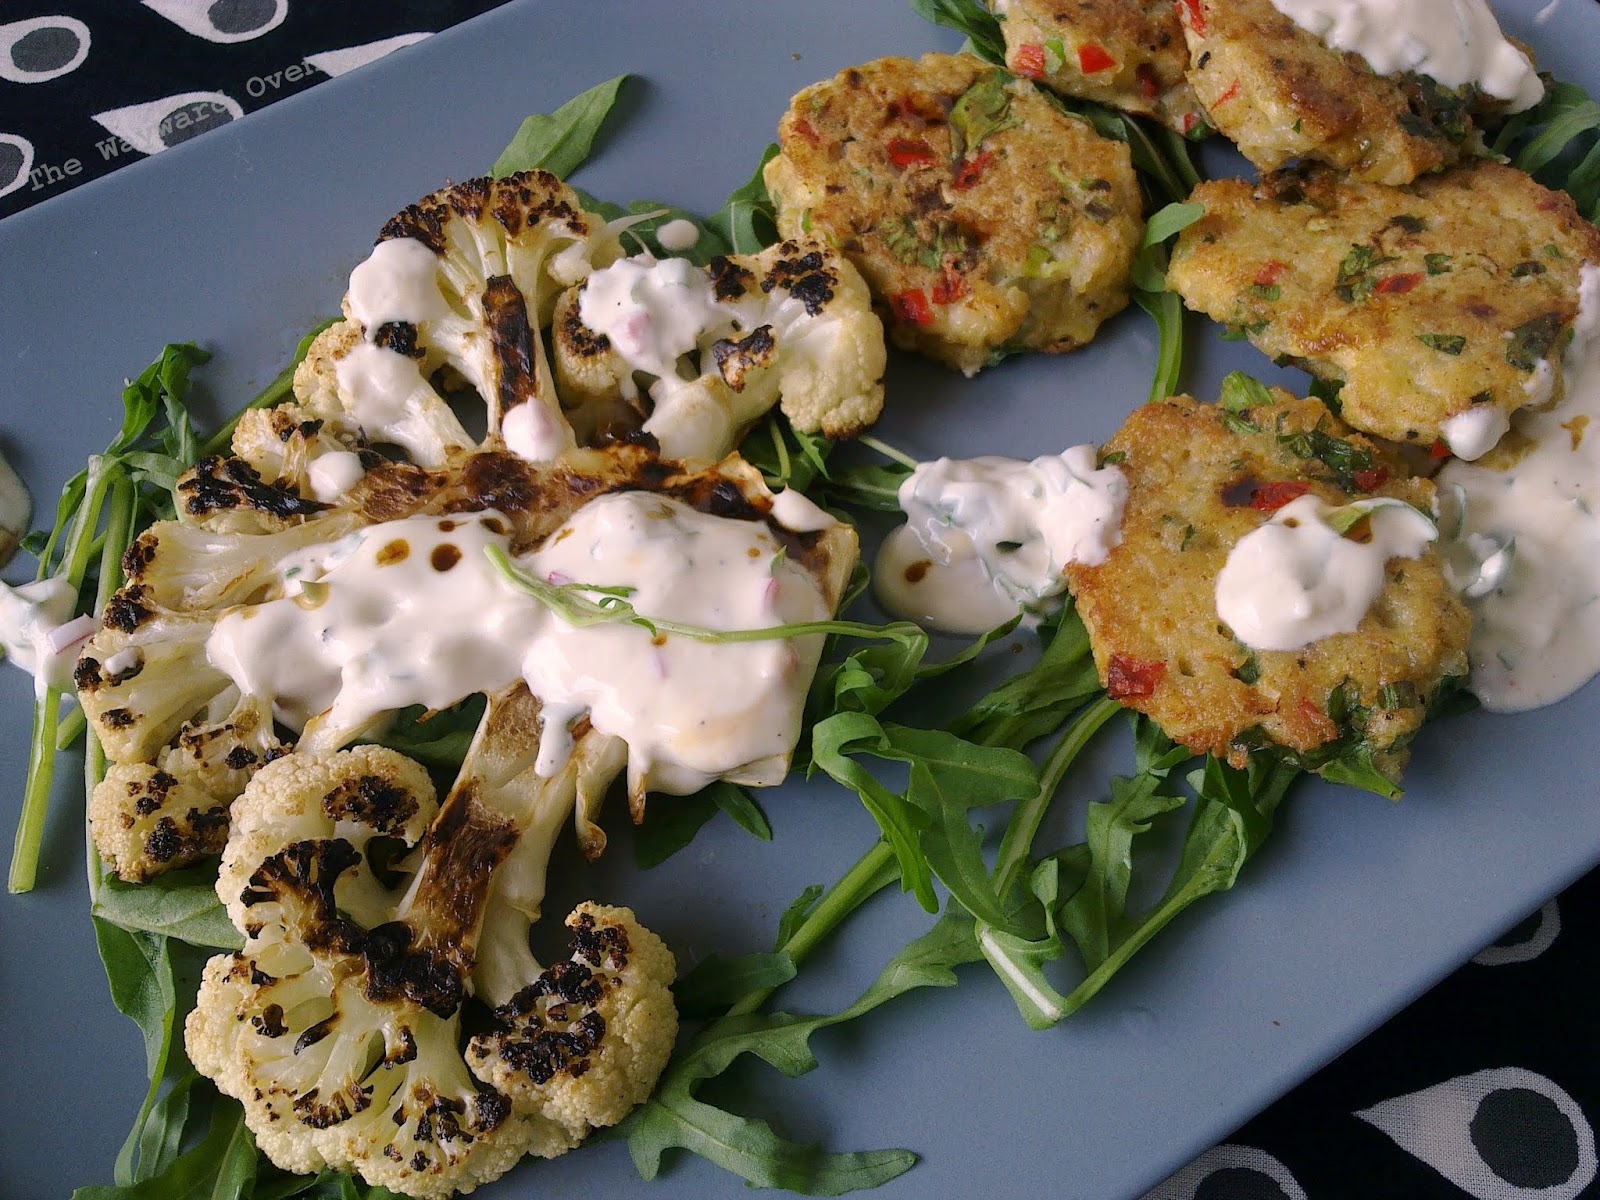
FRIED CAULIFLOWER STEAK AND BREAD FRITTERS 
Yotam Ottolenghi and Sami Tamimi anticipated that readers of Jerusalem (yay, I just got the book!) might be sceptical about their recipe for a'ja or bread fritters.
"It may not sound appetizing, but taste it once, and see what it's all about," they say about the herbed-based fritters that use leftover bread and seasonal vegetables. I couldn't imagine what they would be like when I read the recipe, but I was really pleased with how they turned out. This is a simple recipe and open to one's own interpretation. 
And that is what I did when I made the fritters. I didn't have all the herbs that were asked for in the recipe, nor the feta that was included, so I just put in stuff that I had and produced something that I liked. I think the most important element is the bread – it must be robust and flavourful. I used a homemade sourdough. It was a little stale but that worked for the fritters. If you want to fool someone into thinking they were eating meat, these have the texture of minced chicken ;-)
Another inspiring recipe from the book is fried cauliflower with tahini. The cauliflower is separated into florets and fried and then served with a tahini- and pomegranate molasses-flavoured yoghurt. Unfortunately, I didn't have tahini, but again it didn't matter. Instead, I combined strained yoghurt with a little sesame oil and added chopped Chinese celery leaves, spring onion leaves, lime juice, chilli powder and pomegranate molasses (I'm sure another type of syrup would be fine).
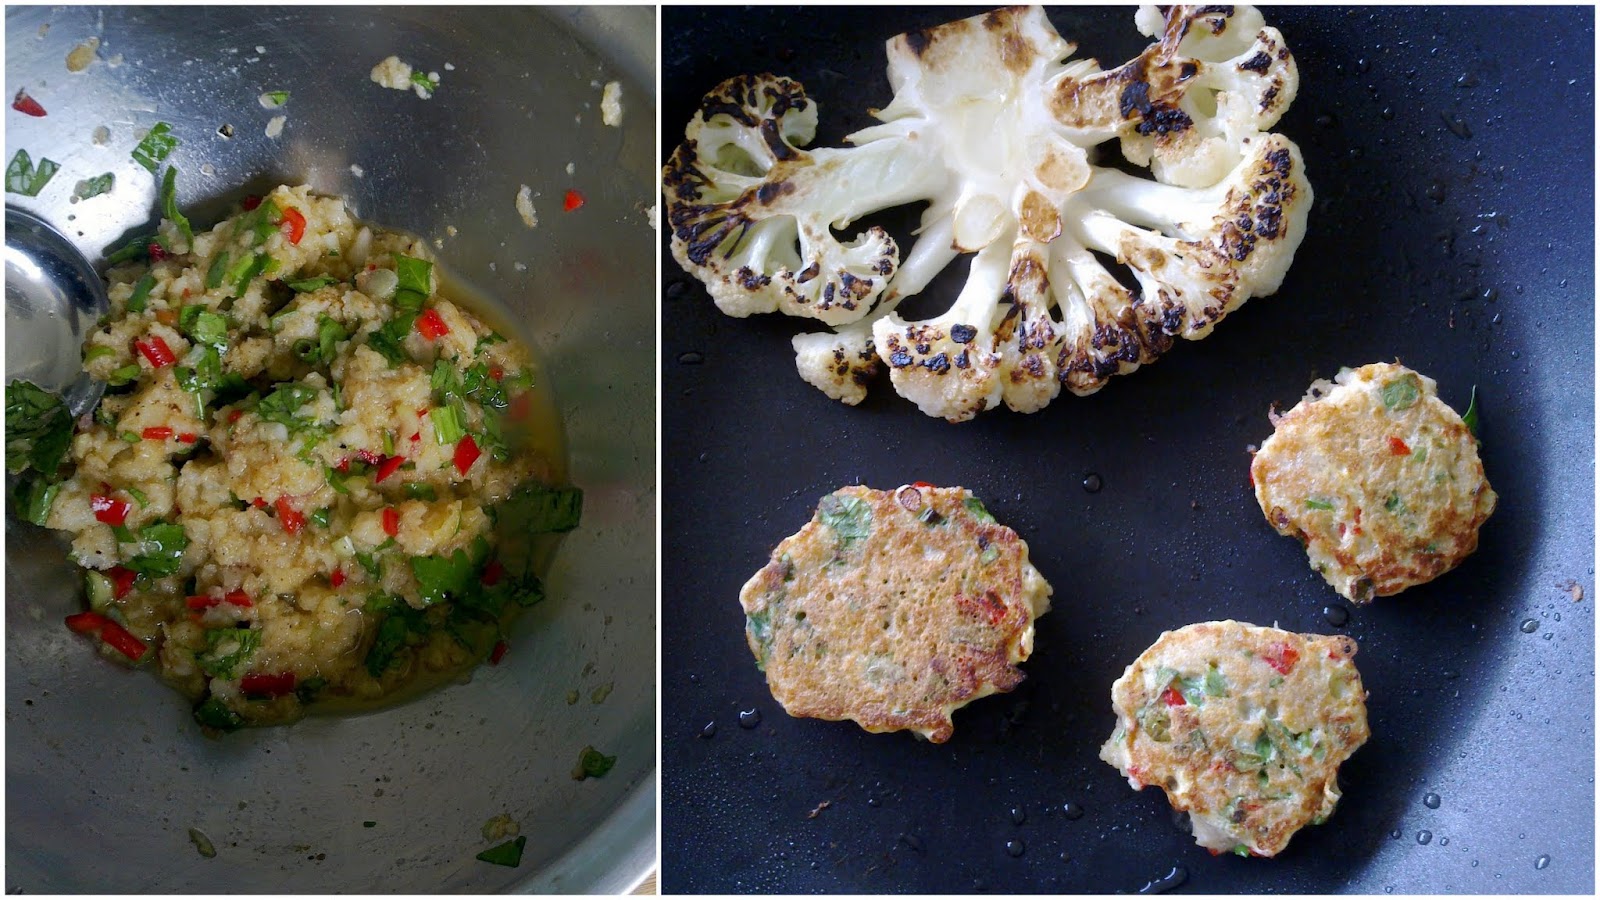
Instead of florets, I cut a head of cauliflower crosswise through the stem to make a "steak", about 1.2cm thick. It's not seasoned but simply pan-fried on both sides. It's such an easy way to bring out the flavour of the vegetable.
The fried cauliflower, yoghurt dressing and bread fritters were excellent together, and I'm already on to more recipes from Jerusalem. The ones with vegetables all look so good and I'll be trying the meat dishes after Lent.
A'ja mixture (left) and fried with the cauliflower steak
Bread Fritters
Makes 6. Inspired by the recipe in Jerusalem. Herb and spice amounts are approximate; season to taste.

1 thick slice of good bread, crust removed (about 50g)
1 medium egg
½ tsp garam masala
¼ tsp paprika
½ long red chilli, chopped
1 tbsp chopped spring onion
1 tbsp chopped fresh Chinese celery leaves
Salt and black pepper, to taste
Sunflower oil for frying

Soak the bread in cold water for 1 minute, then squeeze well.
Crumble bread into a bowl and add the egg, spices and herbs.
Heat a tablespoon of oil in a frying pan. Scoop slightly heaped tablespoons of batter into the pan. Fry the fritters for 1-2 minutes on each side or until golden brown.

Sourdough Surprises: Flatbreads - Thosai

Thursday, February 21, 2013

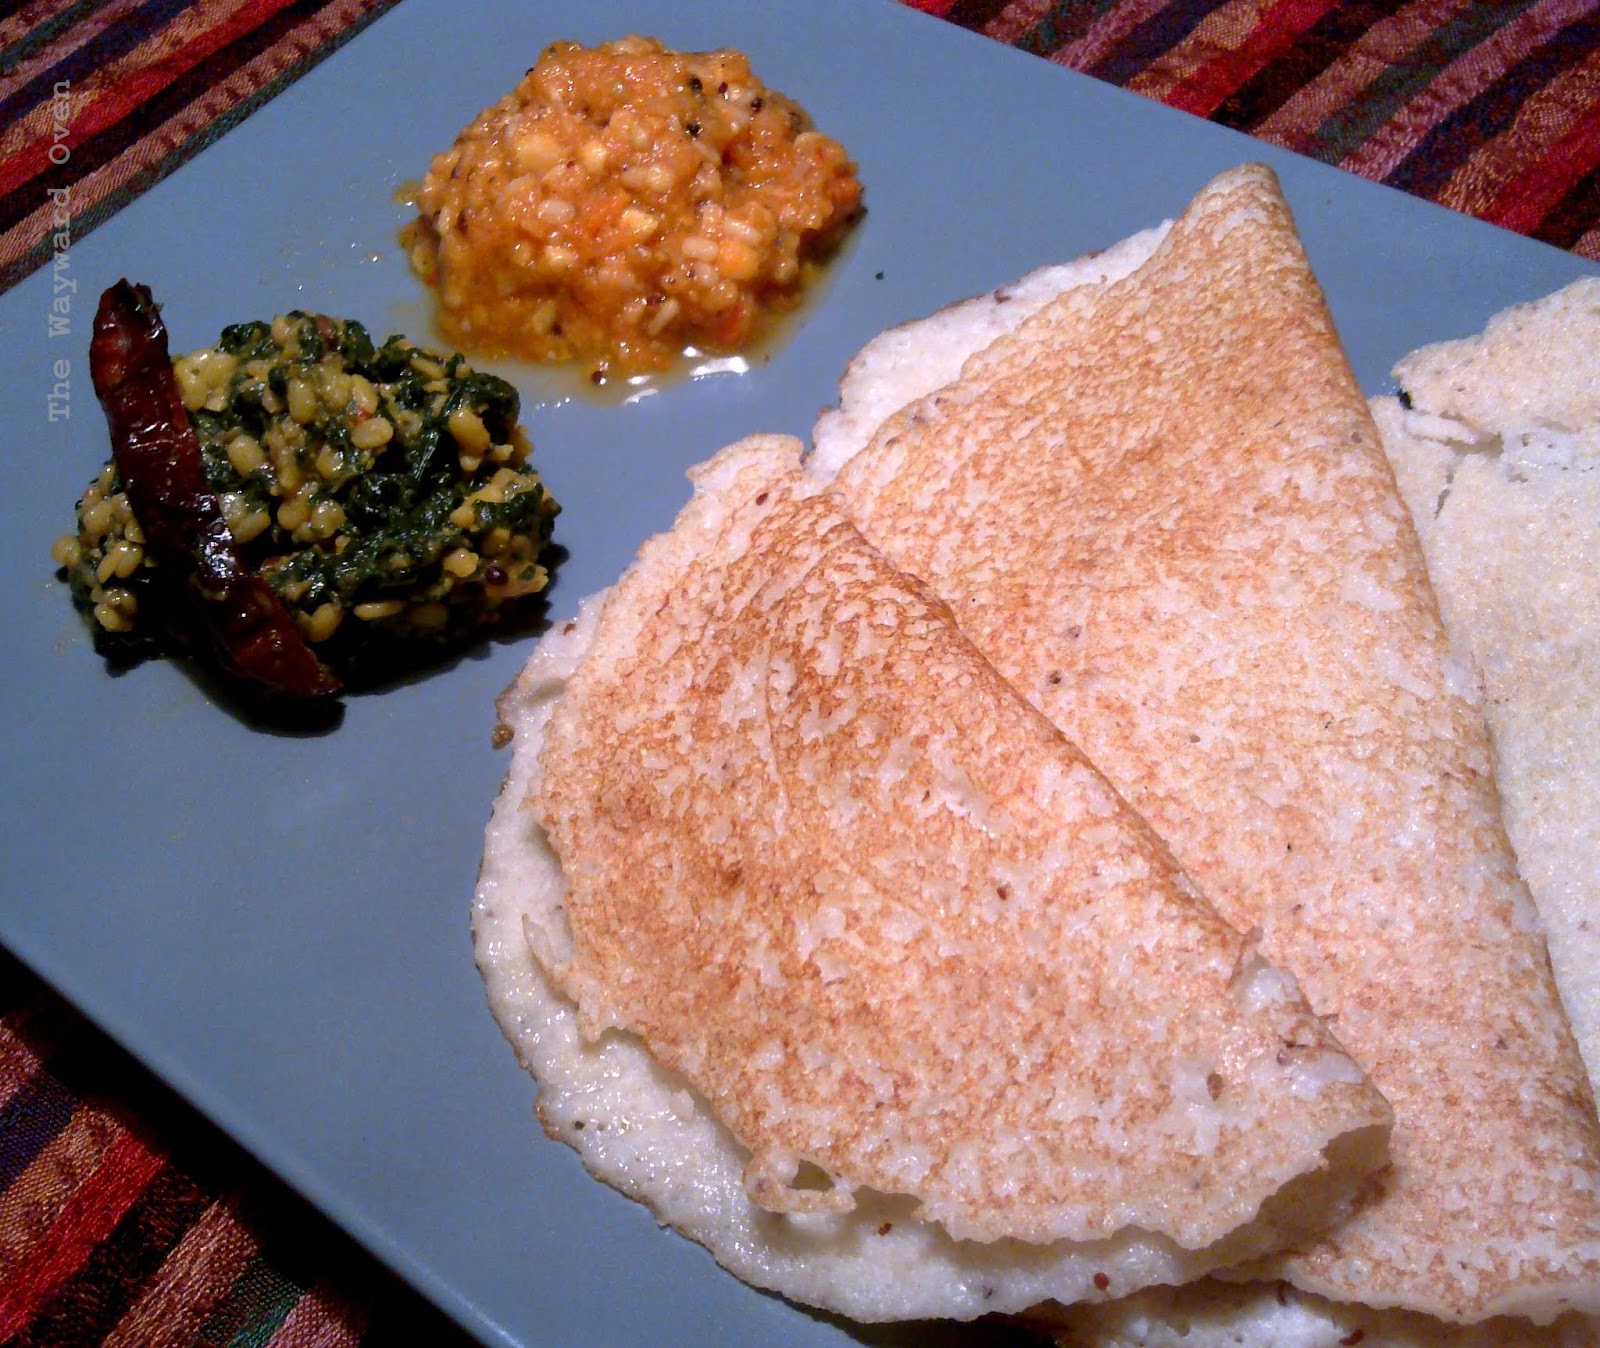
THOSAI, A DELICIOUS SOUTH INDIAN FLATBREAD 
Thosai (also spelled tosai and dosa) is an Indian crepe-like bread I grew up eating. It's one of the staple dishes served in south Indian restaurants in Malaysia, especially at breakfast time, quite often on a banana leaf. The bread is so popular that there are instant mixes that you just add water to, but really, it's not difficult to make from scratch.
The Sourdough Surprises challenge for this month is flatbreads which is defined as "a soft, pliable bread that is cooked on a griddle or stovetop". One of the flatbreads I usually make with my sourdough discard is the Indian chapati, made with a soft wheat flour called atta.
Thosai doesn't actually contain sourdough starter (made with wheat/rye flour), so perhaps it doesn't fulfil the requirements of the challenge. But the batter – made with raw and cooked rice and black gram lentils – is left to ferment overnight, and the whole thing is basically a sourdough. It even has a naturally sour taste and will rise slightly. Some recipes call for rice flour instead of raw rice. It does simplify the process, especially if you don't have a blender strong enough to make a smooth purée.
Thosai is often served plain with a selection of dhall curries and chutneys – coconut chutney is a must, and that is the only condiment I like with my thosai. But thosai can also be filled, usually with spicy mashed potatoes, turning it into masala thosai.
The thosai that I have made here is soft and spongy. For a crisper thosai, the batter is spread very thinly, and is about 45cm (18 inches) in diameter or more! It's usually only found in restaurants with huge griddle plates on the burners. The thosai is then rolled up like a large cigar or a cone shape. It's called "paper thosai".
I have posted a day late because I just wasn't able to get to the shops for grated fresh coconut to make my favourite coconut chutney. In the end, I didn't make it, after all. I do, however, have a tomato chutney and spinach with dhall as side dishes.
In restaurants, the server may bring along a spoon and fork with the order, but the best way to eat thosai is with the fingers!
Thosai
Makes 6 medium thosai

½ cup raw white rice
¼ cup skinless black gram lentils (ulunthu)
Large pinch fenugreek seeds
2 tbsp cooked white rice
½ tsp salt, or to taste
Vegetable oil

Wash the raw rice, dhall and fenugreek seeds and soak them separately in water for about six hours (overnight is fine).
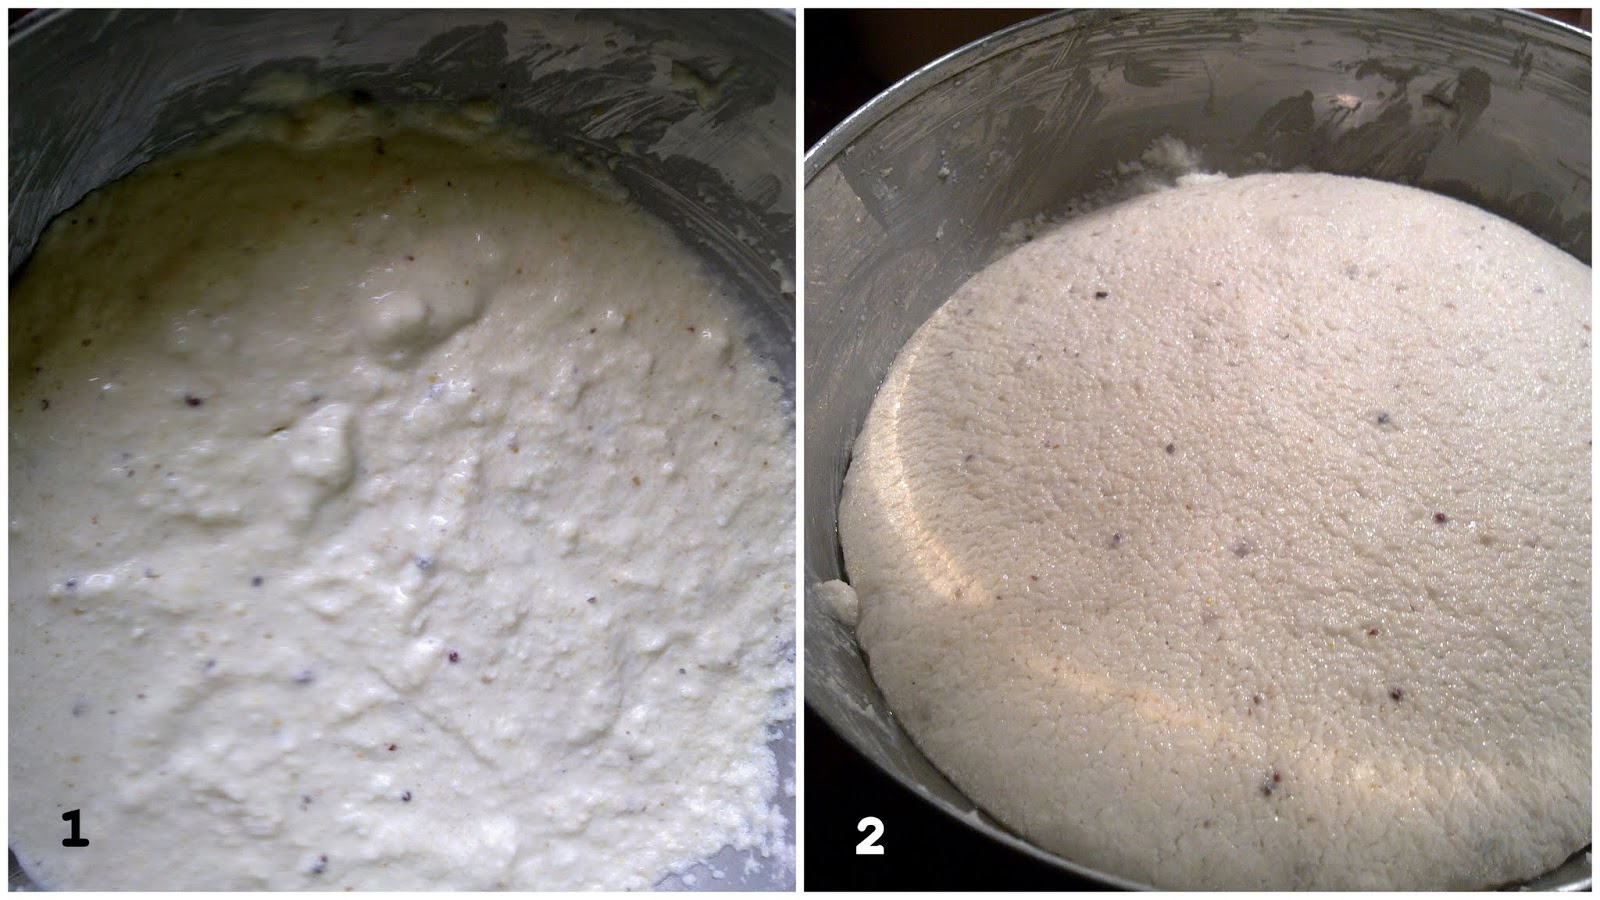
Drain and rinse the soaked ingredients. Blend them together until very smooth with enough water to turn the blades of the blender. Transfer to a large bowl. Blend the cooked rice with a little water and stir into the bowl. The batter will be fluid but quite thick (pic 1). Cover and set aside at room temperature, preferably overnight, to ferment.
Thosai batter: before and after overnight fermentation
When fermented, the batter will have domed slightly with tiny bubbles on the surface (pic 2). Stir in salt. The batter should have the consistency of pancake batter so if it too thick, add a little water.
Heat a tava or crepe pan or large non-stick frying pan. Dip a crumpled up piece of kitchen paper into some oil and rub it on the surface of the pan.
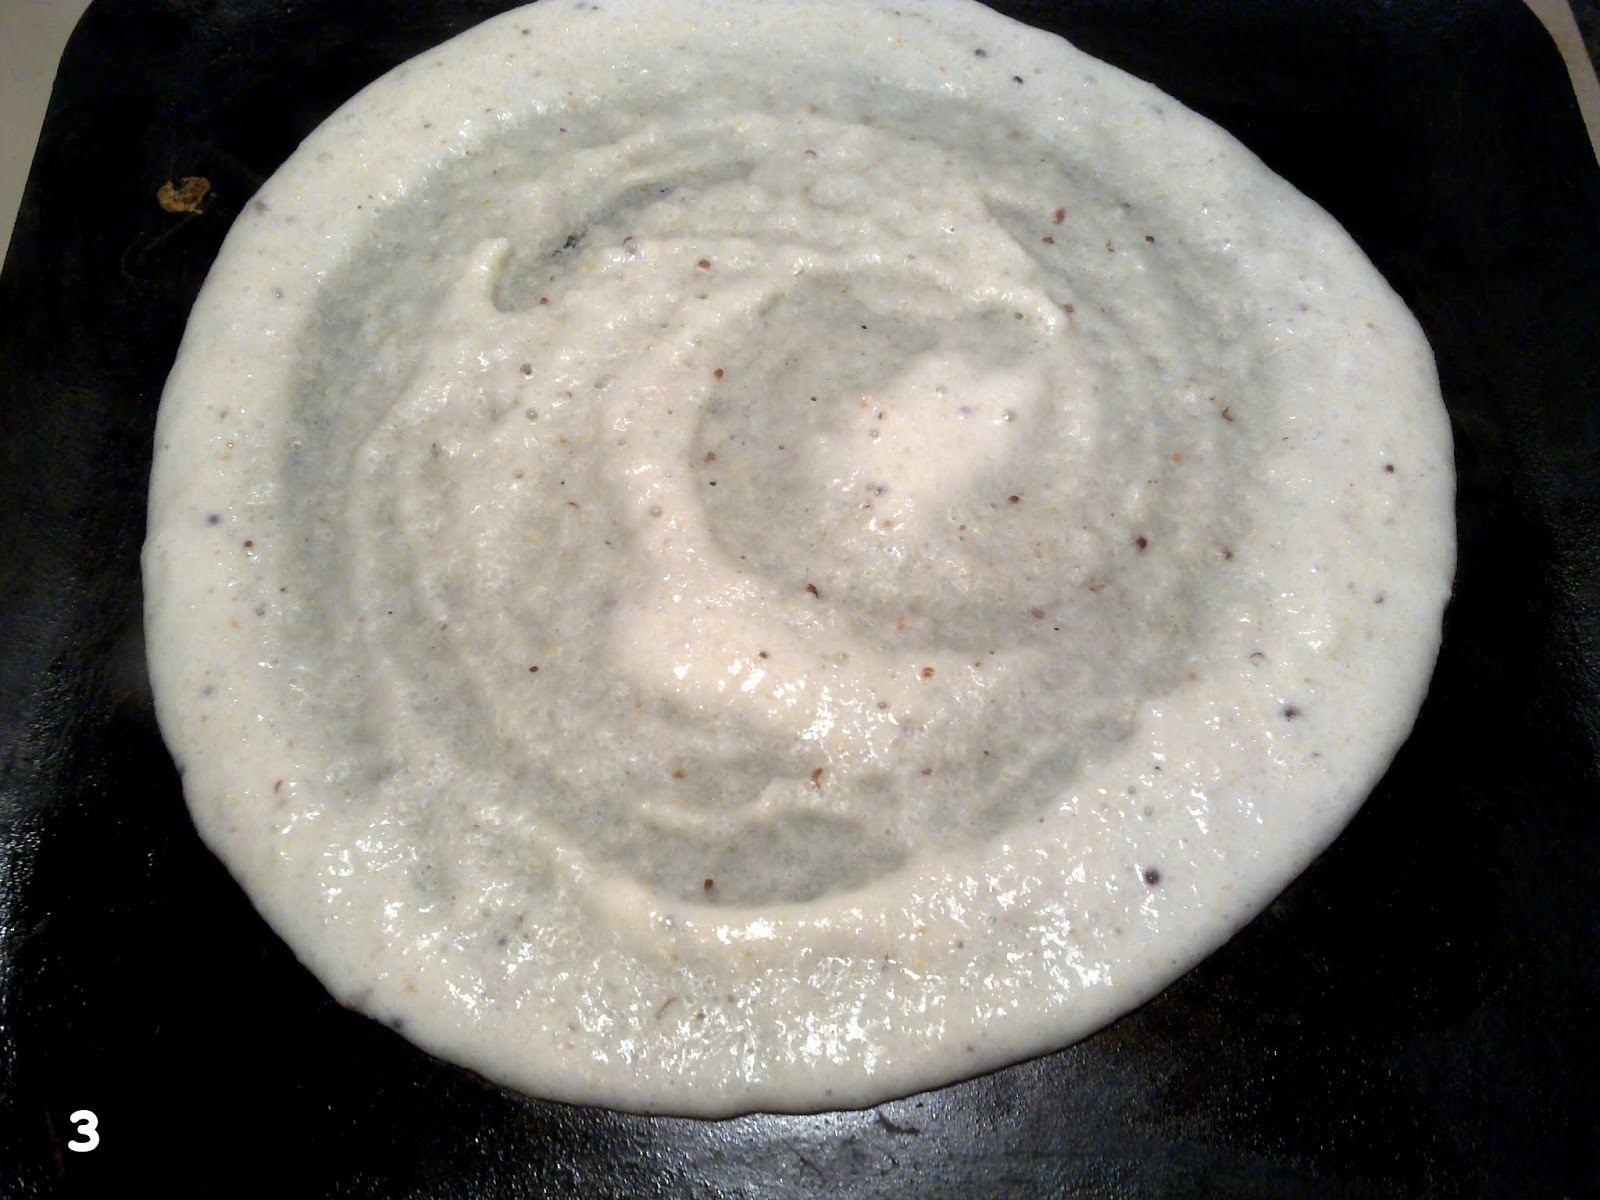
Use a metal ladle or similar implement (a metal measuring cup, for example) to scoop up about ¼ cup of batter and pour it onto the pan. Using the bottom of the ladle/cup, quickly spread out the batter into a thin circle but with slightly raised "ripples" (pic 3). Turn down the heat.
The first thosai never turns out well! This one stuck to the pan.
For crisper edges, dribble a little oil around the thosai.
Bubbles will form all over the surface like a pancake. The thosai is not flipped so leave it until the top is no longer wet and the bottom is a light brown, about 30 seconds. Fold the thosai in half and serve.
(For crisper thosai, spread the batter thinner and more evenly. The thosai is then usually rolled up like a large cigar or even into a cone shape. It's called "paper thosai".)
Make only as many thosai as will be eaten. Store uncooked batter in an air-tight container in the fridge. It can be used straight from the fridge.

Have a heart, cook en papillote

Wednesday, November 14, 2012

COOKING EN PAPILLOTE STARTS WITH A HEART 
Cooking en papillote or in parchment is a good way to retain flavour in a dish as it seals in the juices. I used to think that using paper would be difficult and messy, and that aluminium foil or cling film would be a better alternative. But unlike paper, foil and plastic are not permeable, and while that keeps the food from leaking, there is also the risk of overcooking. 
After using paper a few times, I found that it works very well, especially with  items like seafood and vegetables. It may not stand up well to the wet heat of a steamer, but it fares well in the oven.
Estimating the cooking time may take some trial and error at first. But a good indicator is looking at the colour of the paper. Once the packets start to brown and puff up, it won't be long before the food can come out of the oven. 
Snip, fill, fold, seal
Preparing and filling the paper parchment hearts

1. Fold a piece of parchment paper (about 30cm by 35cm) in half and cut it into a half-heart shape, staying as close to the outside edges as possible.
2. Open the parchment heart. Brush oil on the paper and place ingredients to one side of the fold line, at least 5cm from the paper’s edge.
3. Fold the top half of the heart over to enclose the ingredients. Starting at the top of the heart fold about 1cm of the edge towards the centre. Fold again to make a tight seal. Continue folding over the edge of the parchment packet, doubling the edge over so that it is tight.
4. When you come to the bottom of the heart, twist the tip and fold it under the packet to seal. Place on a rimmed baking tray to bake.
To serve, snip an "X" in the top of the packet and peel the paper open. 
Keep the colour
Tofu And Vegetable Parcels
Serves 4

3 cakes square white tofu
1 cup small broccoli florets
½ cup carrot matchsticks
1cm fresh ginger, minced
2 tsp light soya sauce
1 tsp sesame oil
4 prepared parchment paper hearts
Fresh coriander leaves, chopped, to serve 

Preheat oven to 200°C. Cut tofu into 3mm slices.
Brush parchment paper hearts with oil and divide tofu between them, overlapping the slices slightly.
Layer with broccoli florets and carrot matchsticks. Sprinkle with minced ginger.
Drizzle on the soya sauce and sesame oil.
Crimp the edges of the parcels tightly and place on a rimmed baking tray.
Bake for 15-18 minutes.
Cut open the parcels at the table and sprinkle each one with chopped coriander before serving.
Seal in the goodness
Mustard Mushrooms and Brown Rice Parcels
Serves 4

2 cups cooked brown rice
6 large dried shiitake mushrooms
1 cup assorted fresh Asian mushrooms (shimeji, enoki, oyster)
½ red capsicum, sliced thinly
2 cloves garlic, minced
2 tsp coarse grain mustard
Salt and pepper
Oil for brushing
4 prepared parchment paper hearts
Salad leaves, to serve

Place the dried shiitake mushrooms in a bowl and cover with hot water. Leave to rehydrate and soften. Squeeze lightly to remove excess water (reserve the mushroom juice) and remove mushroom stems. Slice mushroom caps into three. Mix with the other Asian mushrooms and capsicum. Set aside.
Combine mustard and 1½ tbsp of the reserved mushroom juice. Season with salt and pepper to taste. Toss with the mushrooms and capsicum.
Heat oven to 220°C. Brush the parchment paper with oil. Divide brown rice among each parchment piece. Top with mushroom mixture and sprinkle with minced garlic. Pour on a little more of the mushroom juice if desired. Crimp the edges of the parcels tightly. Place parcels on a rimmed baking tray and bake until parcels are puffed, 20-25 minutes.
To serve, place parcels on individual plates, cut open and serve with salad leaves.

Currying flavour

Sunday, October 7, 2012

TURN CURRY LEAVES INTO A WONDERFUL CONDIMENT 
Any plant that requires more than weekly watering and occasional pruning is going to die in my care. I've killed many and now have more empty pots than plants on my apartment balcony.
I've tried to grow chillies and coriander and they have not survived past the first fruiting/sprouting. Even mint, which people say will grow wild if you just stick a stalk in soil, starts to wilt after a while. Obviously, I don't have a green thumb.
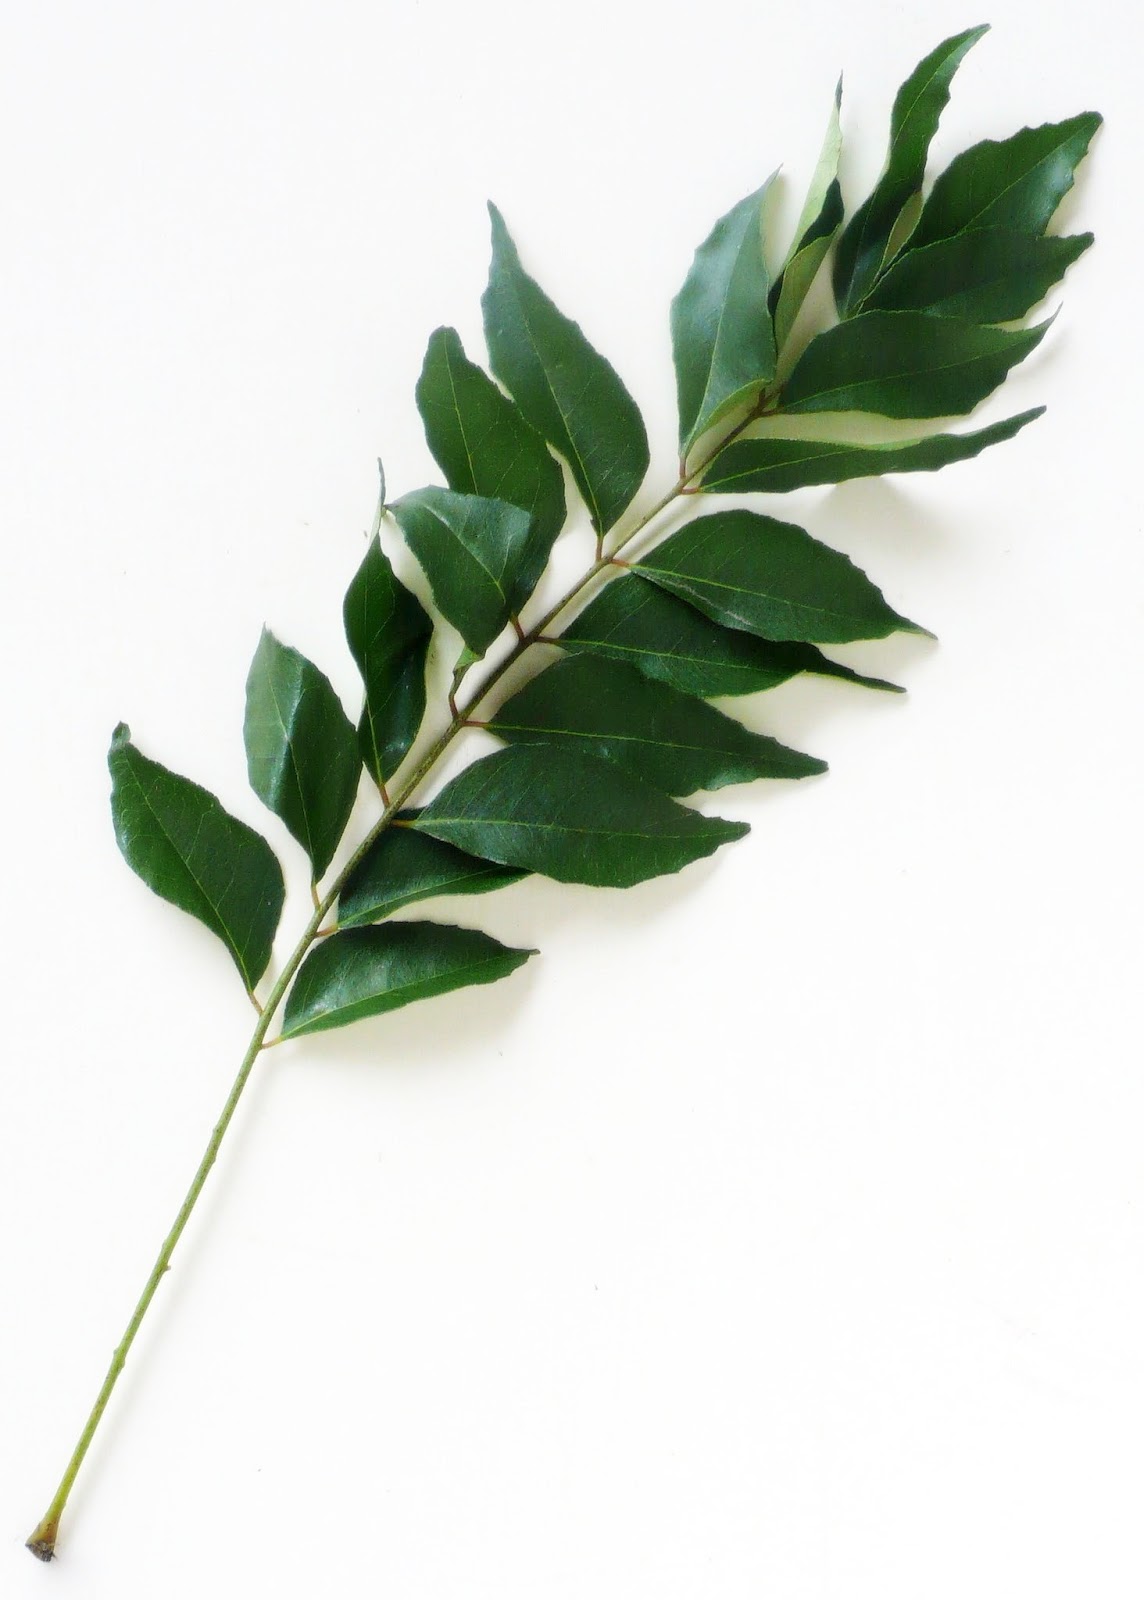
Curry leaf, or karuvepillai in Tamil, is one of those hardy plants that seem to grow easily. A lot of people have them in pots, many have a tree in their yard, and some even plant them just outside their house gates – and share it with their neighbours.
It's hard to imagine a South Indian curry without curry leaves. They are put in for flavour (many fried dishes also have crisp fried curry leaves as a garnish), but diners often just leave them on the side their plates and they are discarded at the end of a meal. Not me, I love curry leaves and pick them out of the curry (sometimes off someone else's plate!) to eat. 
Most recipes call for a sprig or two, and cooks who grow their own plants can just pluck off what they need. But if you have to buy curry leaves (which I did to make this minced beef curry), they usually come in a bunch or packet, and to use up that amount would take me many, many curries (they can be dried and stored, though).
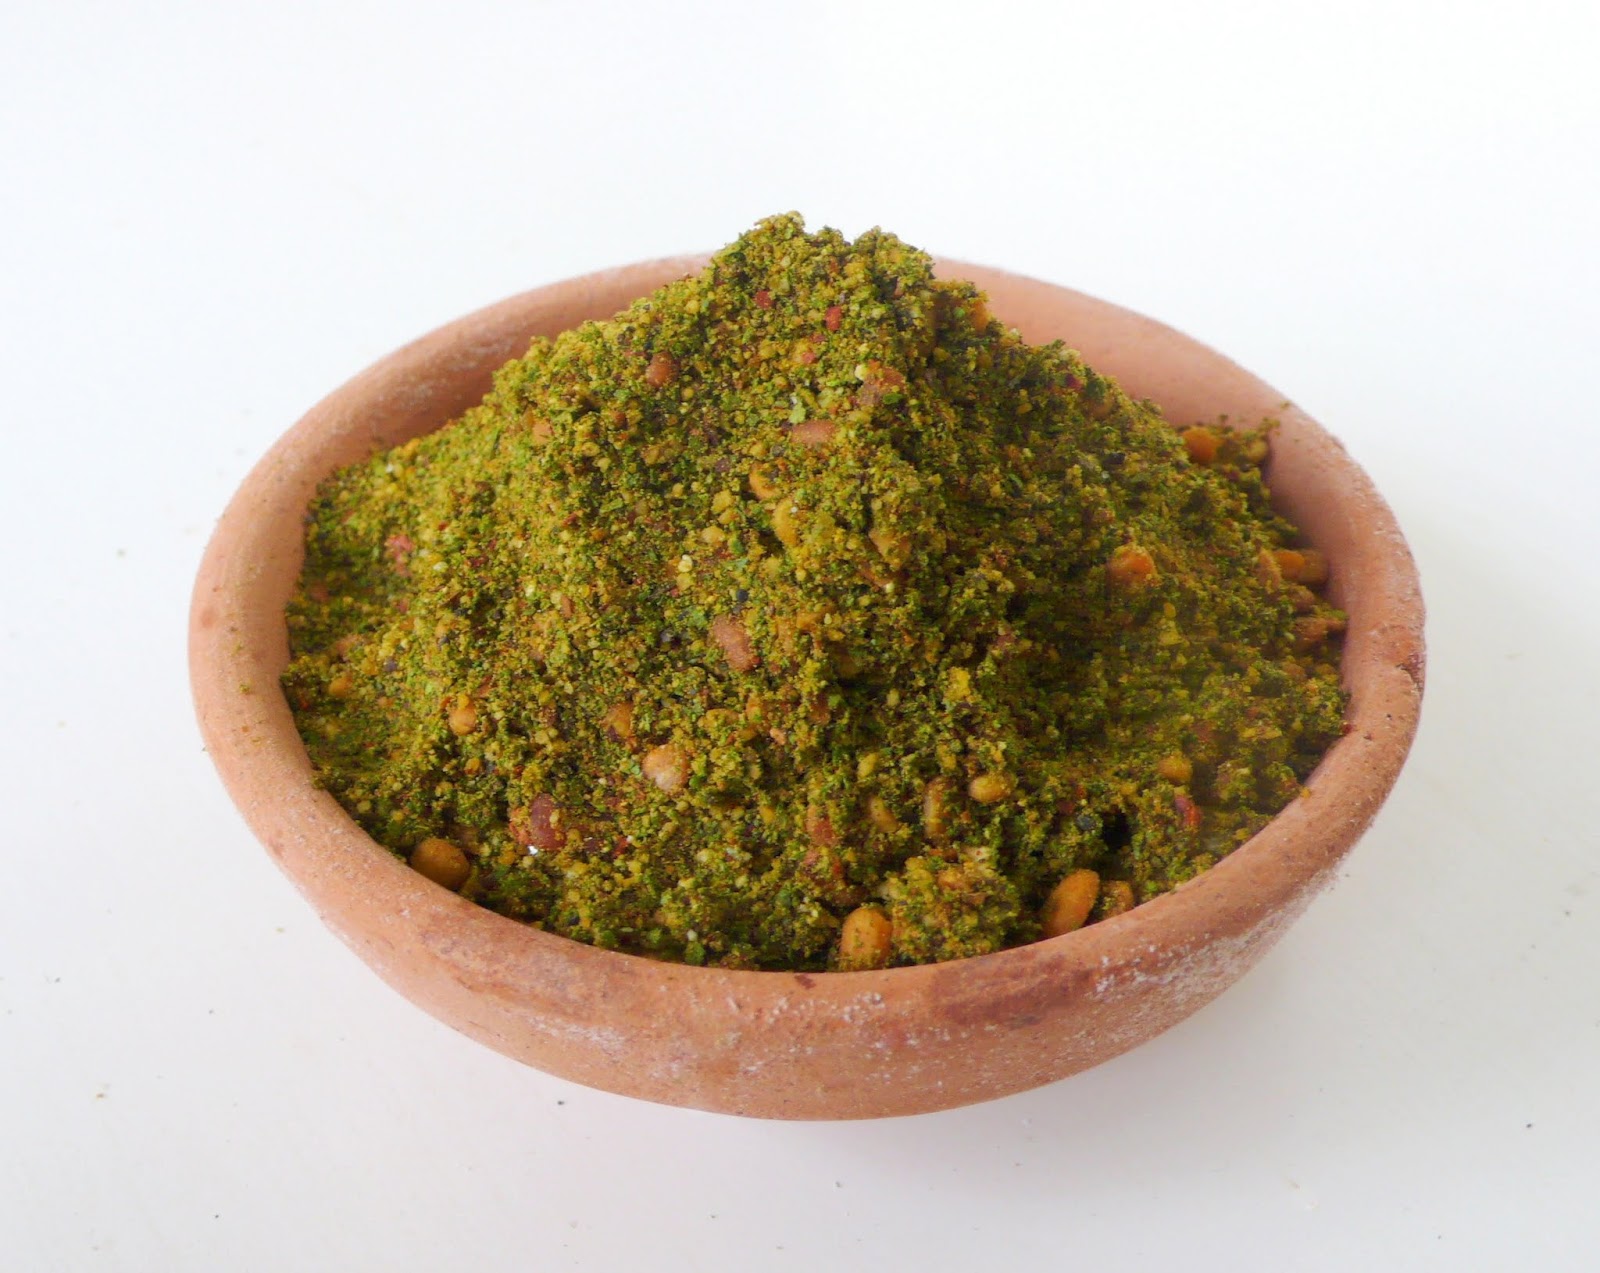
So, I looked around online and found some curry leaf chutneys and powders (podi). They are popular South Indian condiments and are a good way to use these aromatic leaves. The powder is often sprinkled on rice or flatbreads, and can be used to flavour Indian "soups" like rasam. Recipes abound online, and each has its own special mix of spices. I've kept the mix simple, but I'm already imagining how I can use the powder in combination with other ingredients in various dishes.
Coming up: How I use curry leaf podi
Some of the dhall in this coarsely ground curry leaf powder has remained whole. 
Curry Leaf Podi (powder)
Makes about 3/4 cups

1½ cups firmly packed curry leaves (stems removed)
1 tsp oil
1 tsp mustard seeds
1 tsp asafoetida powder
2 tbsp black gram (urad) dhall, rinsed and drained
3-5 dried chillies, soaked to soften and drained
1 piece dried tamarind (assam gelugor)
Salt to taste

Wash the curry leaves and drain well to remove as much water as possible. Dab with a kitchen towel. In a dry frying pan over medium low heat, toss the curry leaves until they are dry and slightly crisp. Set aside.
Heat the oil in a frying pan over a low flame. Add mustard seeds and sauté until they start to sputter. Add the asafoetida and dhall. Fry until the dhall turns reddish brown, about 2 minutes.
Add the dried chillies (use to taste and tolerance to heat) and tamarind. Stir until chillies start to colour and become crisp, 1-2 minutes.
Add curry leaves and toss together, 1 minute.
Take mixture off the heat and grind to a powder in a mini blender or food processor (how fine is up to individual tastes). Add salt to taste. Cool and store in an air-tight jar.

Beef up a curry

Sunday, September 30, 2012

MINCED BEEF CURRY USED AS A FILLING FOR PUFFS AND BUNS 
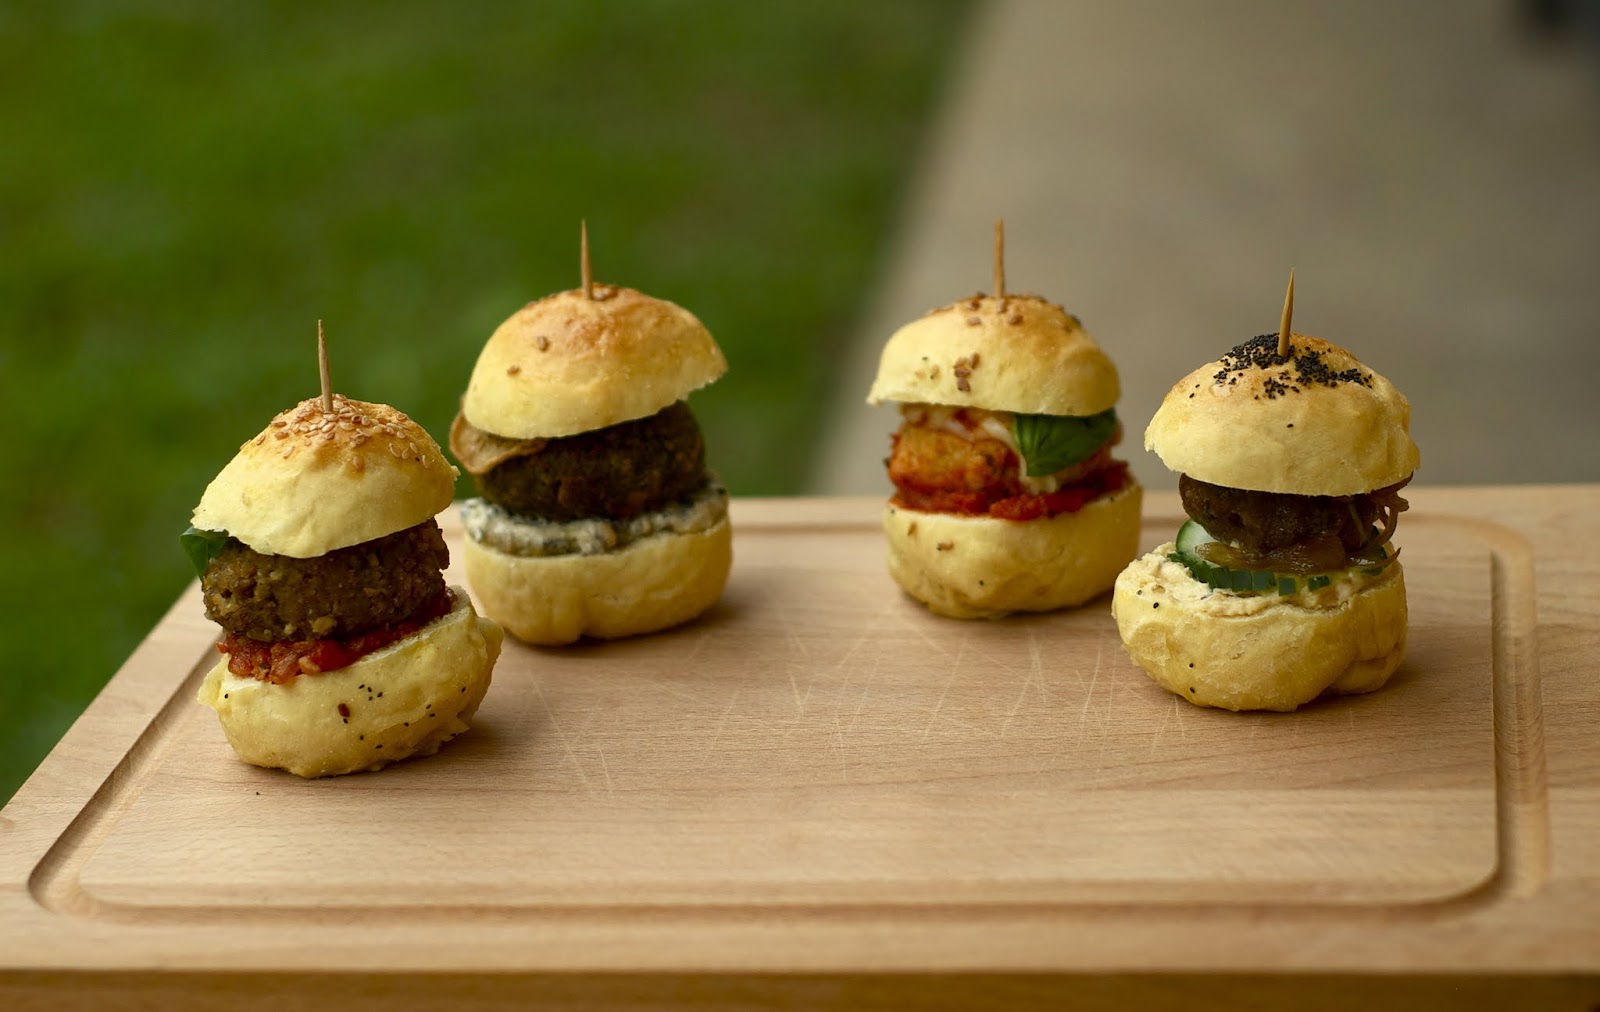
Yesterday, I took part in a "gourmet" street food market event called "Food Bites" with my partners Indra and Sree (our enterprise is called Crazy Juliet, a story for another time). Our menu consisted of four types of Mediterranean-inspired sliders, which we described like this:
Pollo alla Parmigiana: Minced chicken breast flavoured with garlic, herbs and parmesan cheese bathed in a marinara sauce. Topped off with mozzarella and a sprinkling of fresh basil.
Lamb Casablanca: Rock the Casbah with this aromatic lamb patty. Served on a bed of luscious hummus and topped with sage-infused caramelized onions.
Soy Nut Wonder (V): The patty is a combination of soy, nuts, mushrooms, herbs and spices. Served with a curry apple sauce and crispy fried mushrooms.
Aubergine Delight (V): Oven-roasted aubergines are the star of this patty. It’s also packed with ingredients like (yellow) capsicum, chilli, lemon and pumpkin seeds. Served with pesto.
All the sliders come in a hand-made soft bun enriched with butter and egg, and topped with a variety of seeds.
Here's a picture of the mini burgers we put together for the food tasting a couple of weeks before the actual event (and before our final tweaking).
Crazy Juliet sliders for Food Bites – photo by Indra
Indra and Sree made all the patties and condiments, and I made all the buns. On the day of the sale, Indra and I assembled the sliders to order and Sree explained the flavours on offer and took care of the money. We started at 11am, the meat sliders were sold out by 2pm (the lamb first), and our last item was gone at 4.03pm.
Man, I don't know how people sell food for a living. It is so much hard work! I was on my feet practically the entire five hours and at the end of it, I was drenched in sweat. We didn't do too badly in terms of profit, though. And we were even asked if we catered for children's parties!
But it's not something I would do very often. Two or three times a year is probably all I can manage. Especially with a full-time job and other interests besides making food.
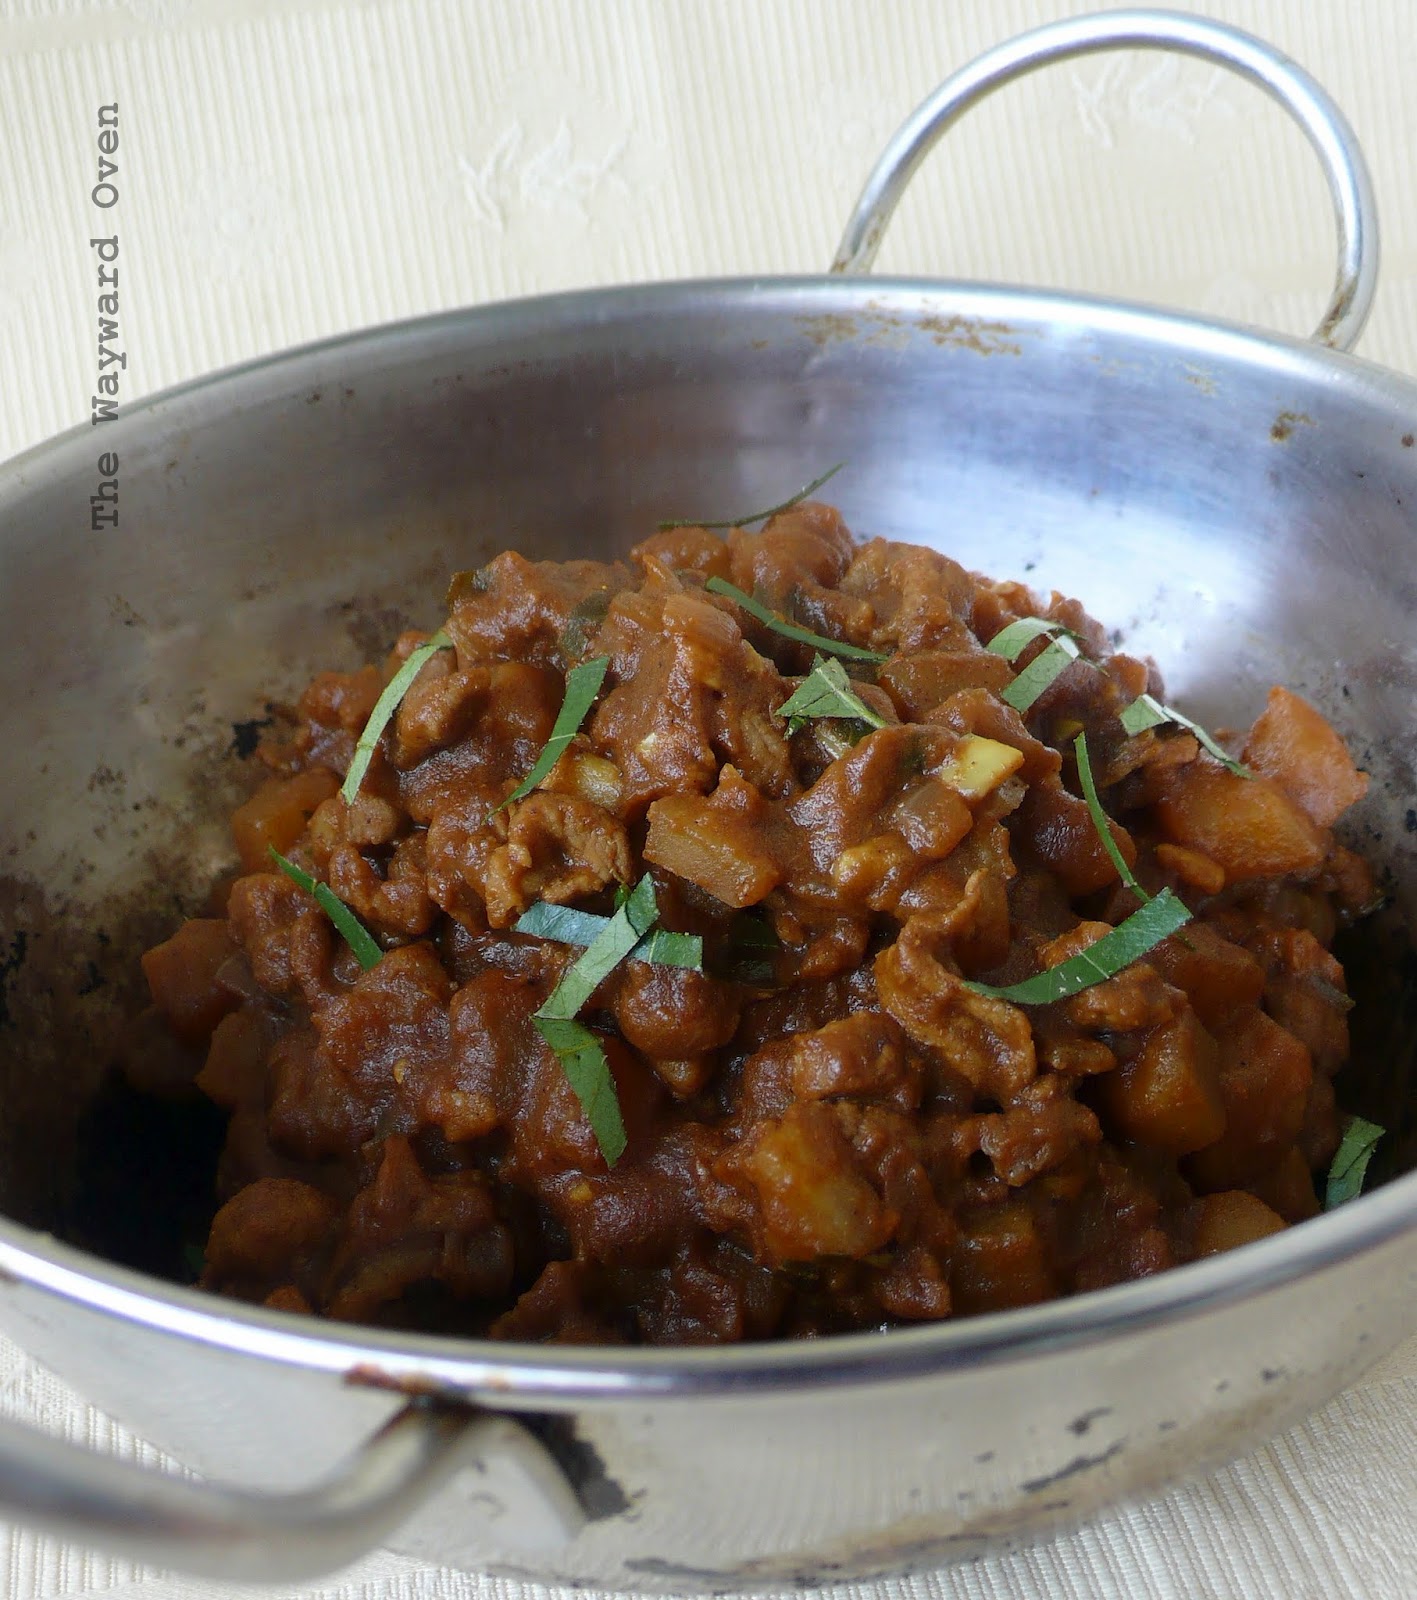
I was talking to my sister Joyce, who lives in California, about Food Bites. She would have loved to have participated and we would probably have partnered up if she was here. We may have considered making her beef curry puffs. It is the last recipe she posted at her blog WokTales two years ago (being a mum to two small girls is a lot of work and she's put the blog on hold). The curry puffs are similar to what our mother has been making since we were children. They won Joyce first prize at her husband Keith's office baking contest!
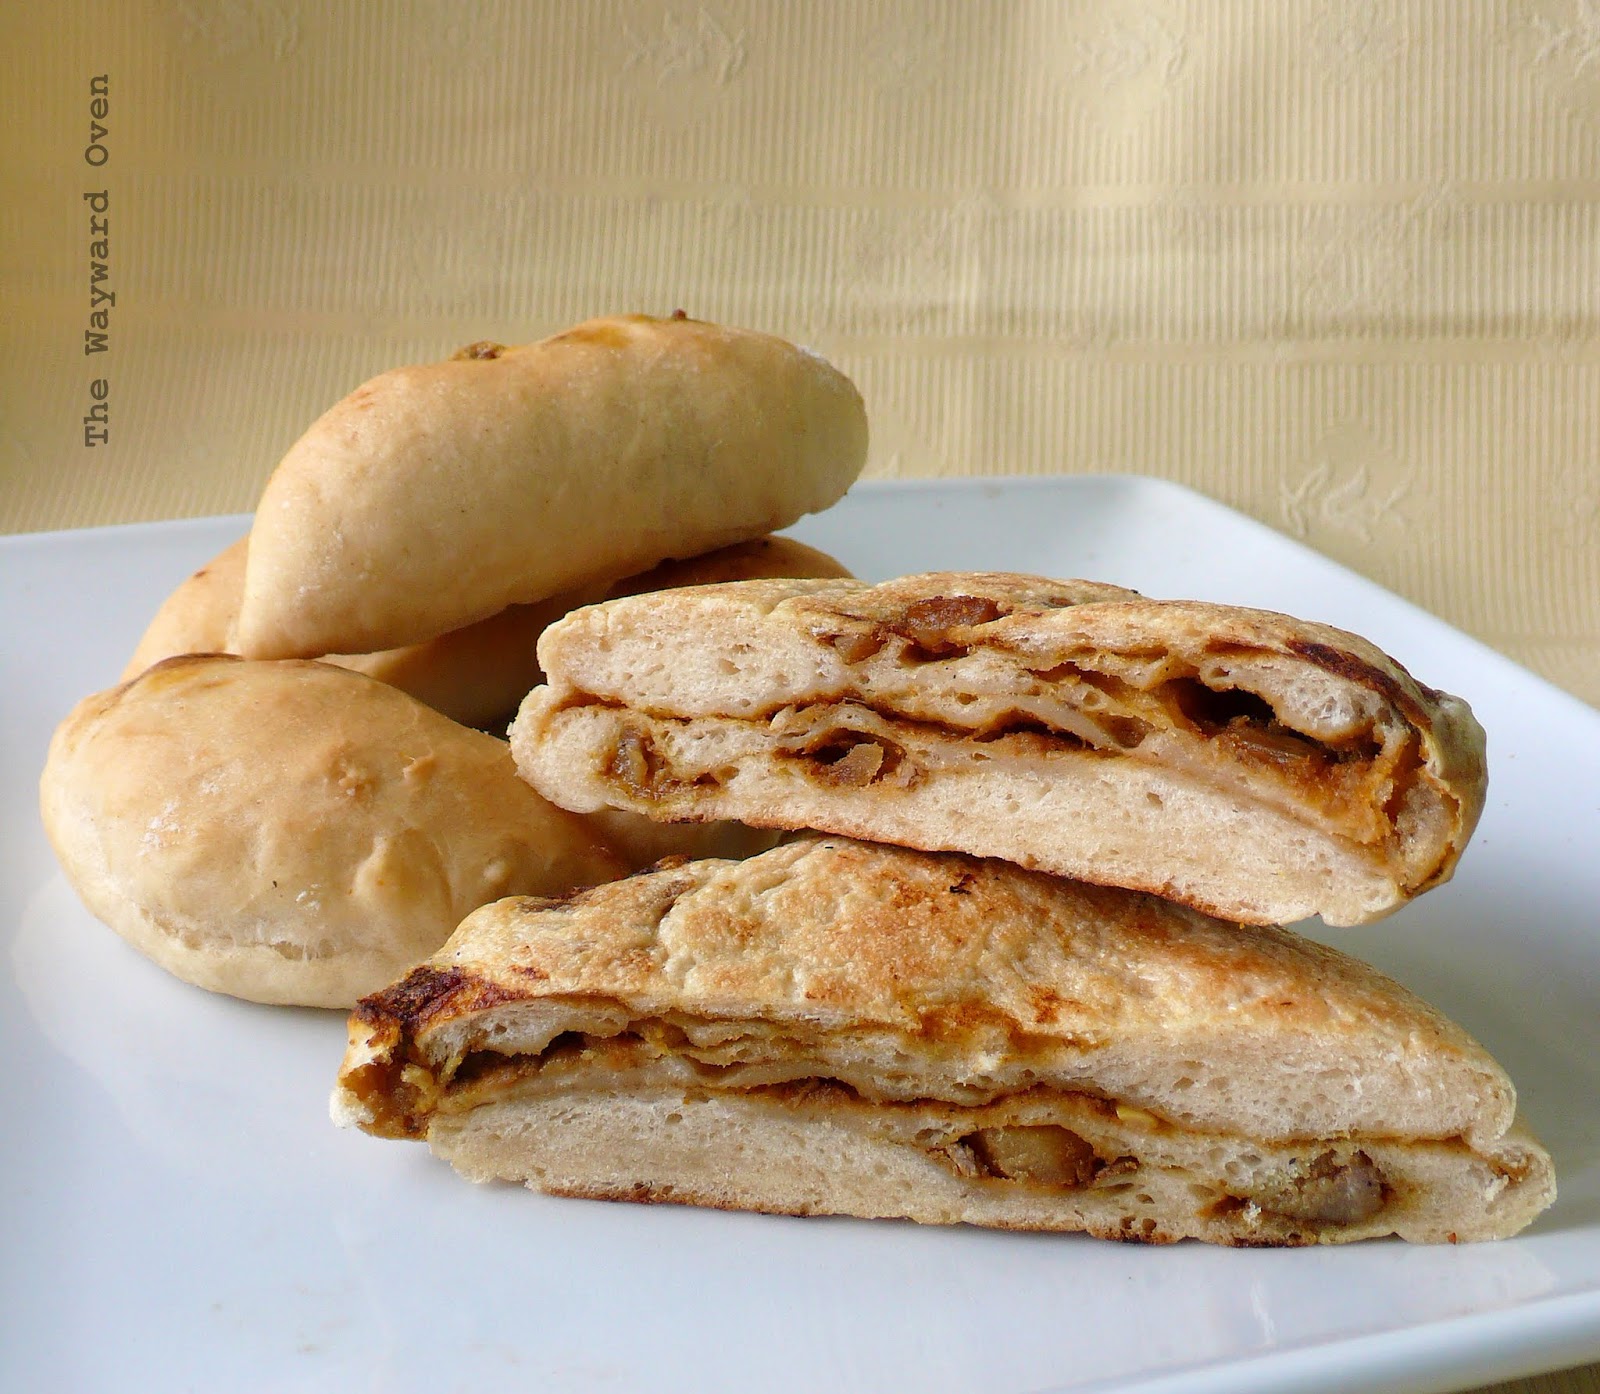
I used the minced beef curry as a filling in some bread snacks. I was inspired by the last Daring Baker's challenge to make empanadas, and used one of the dough recipes provided by the host, Patri.
Baked empanada (back) and layered bread cooked on the stove-top
Minced Beef Curry
From my sister, Joyce

2 tbsp oil
1 medium onion, finely chopped or grated
5cm ginger, finely chopped or grated
6 pips garlic, finely chopped or grated
6-7 curry leaves, finely sliced
675g minced beef
2 large potatoes, peeled and cut into small cubes
3 tbsp meat curry powder
1 tsp cinnamon powder
1 tbsp beef stock granules
Salt to taste
½ cup water

1 tbsp lemon juice

Heat oil and cook onions until translucent, then add ginger, garlic and curry leaves; cook another 1 minute. Add beef and cook until beef is browned.
Add potatoes, curry powder, cinnamon powder, beef stock granules and salt to taste. Add water, cover and cook for about 15 minutes until potatoes are cooked.
Add lemon juice, stir and leave to cool before using.