The Oven has baked its last loaf. This blog is no longer being updated.

My cooking videos appear at youtube.com/janeragavan

I write on food at star2.com

Showing posts with label sourdough. Show all posts

Sourdough Surprises: Rolls (Garlic Knots)

Thursday, November 20, 2014

Does this look like fried chicken to you? I took this to the office for a colleague's farewell tea and more than one person said they thought it was fried chicken. Huh?

They're garlic knots. I admit they're a lit-t-tle big for a snack but they make good-sized rolls for dinner. They're for this month's Sourdough Surprises.

Anyway, they're made with the 1:2:3 sourdough formula ~ one part leaven to two parts water to three parts flour by weight. It's easy to remember and always produces a good loaf. For these knots, the amounts were: 92g refreshed and very active leaven (at 80% hydration), 184g water, 276g all-purpose flour and a teaspoon of salt (which should be weighed so that it is around 4%, but I winged it this time).

Lately, I've been making cooking videos for work and made this one which I can probably use when I write about bread in the future ~ although before I put it up on YouTube, I will have to edit in new bread knots that don't look like fried chicken!


The dough is bulked proofed in a square container so that when it is transferred to the work surface, I don't have to fiddle around with the shape too much (I learnt this from Paul Hollywood's recipe for ciabatta and watching the latest series/season of The Great British Bakeoff). Using a pizza cutter, I divide the dough into 11 strips (the last one was runty!), tie them in knots and bake them for around 25 minutes. I didn't let them get crusty or too brown on top or they wouldn't soak up the garlic-parsley dressing.


Sourdough Surprises: Granola bars

Wednesday, August 20, 2014

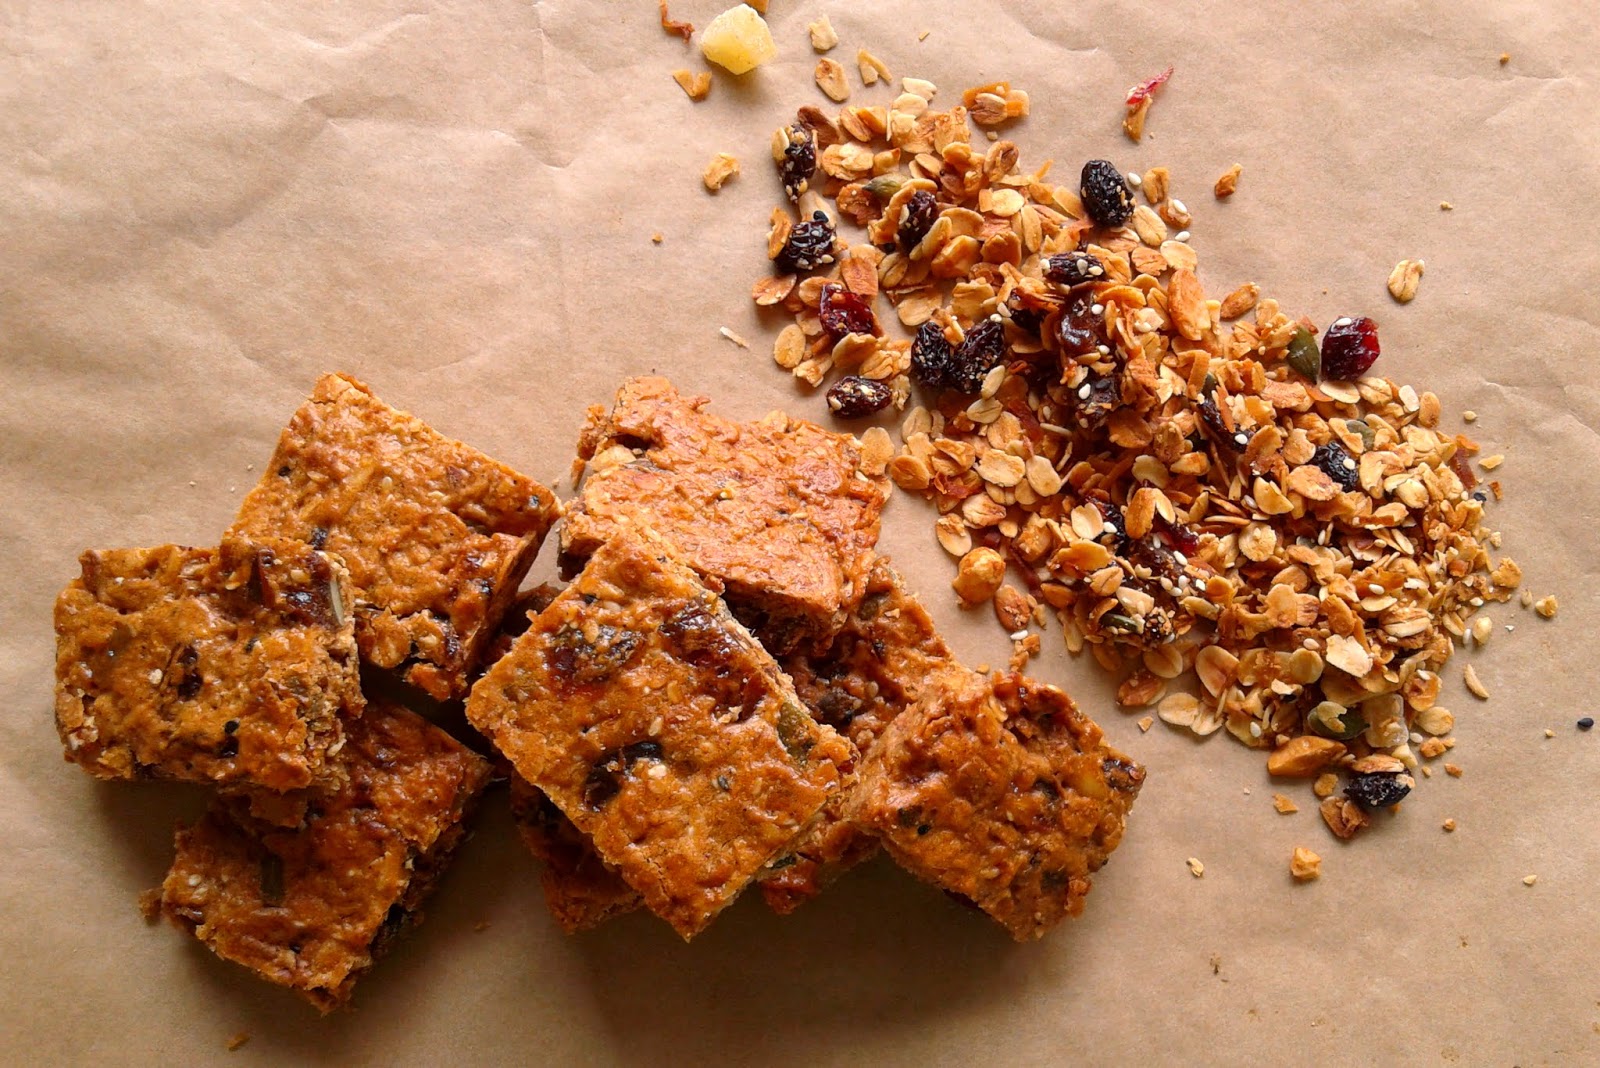
Granola bars are the challenge this month for the Sourdough Surprises baking group. I've made mine with homemade granola that's based on "Aunt Melissa's Recipe" from the book, Artisan Bread in Five Minutes a Day (the recipe can be found online at the authors' site). My tweaks: coconut oil, black sesame seeds, pumpkin seeds, dates and crystallised ginger. This is really good tasting granola.

So I was surprised that the bars didn't taste all that great the day I made them. I used 100g of starter and simply added a spoonful of agave nectar and enough granola for the mixture to hold its shape without being too stiff. But the next day... the taste was so much better. This seems to be the case with all my baked goods made with sourdough starter. Odd. You feed your starter and let it mature through the months and years, and yet it still takes a day to develop in flavour. Huh. You just gotta love it...

Have a look at all the other other granola bars in the group.


Sourdough Surprises: Hot cross buns

Sunday, April 20, 2014

These buns were made in the USA with starter made in Malaysia. I am visiting my sister and her family in California over the Easter holidays and since I knew I would only be making these sourdough buns for the Sourdough Surprises challenge while I was here, some of the starter had to fly over with me. It behaved very well, and has produced these dual-nationality hot cross buns.

If I had made these in Malaysia, they would probably have contained some stout, a variety of spices and fillings. But my sister said to keep it child-friendly for her little girls, so it only has raisins and a light cardamom flavour.

I didn't follow a precise recipe. What I did was feed my starter twice. There was just over a cup of it after the second feeding to which I added an egg yolk, less than a half cup of brown sugar, ground up cardamom seeds, salt, and enough flour to mix to a soft dough. Then in went some softened butter and two cups of plumped up raisins. The dough was left to rise overnight, then I shaped nine buns, baked them without (I forgot!) an eggwash and later brushed on some jam to give them shiny tops. I would have preferred baked-in flour crosses, but my sister said to use icing instead.

I know I would have been more precise with weights and scheduling back home, but the buns turned out edible so I'm okay with them.
Happy Easter!

Vacating the fridge and baking a pumpkin seed sourdough loaf

Monday, April 7, 2014

When Indra wrote a post on making seeded sourdough bread using some of my starter, she graciously pointed her readers to this blog and my post on making a seeded sourdough loaf for the first time using a leaven (both recipes from Dan Lepard) which I had cultivated for a while. I went back to that post and realised how things have changed. I've become more confident in how I use my leaven and I'm not afraid to try making a loaf without referring to a trusted recipe. There's much more to learn, but I'm happy with how far my sourdough loaves have come. A couple of days ago, I made that same loaf from so many posts ago. Wasn't happy that it was slightly undercooked, but here's the thing: I actually know the reason for it (lousy time management) and know what needs to be done to improve. I also know that slice needs a lot more butter spread on it than what's in the picture.

Sourdough Surprises: 'Satay' Pull-apart Bread

Thursday, February 20, 2014

FILLED SOURDOUGH PULL-APART BREADS 
These were fun loaves to make. I've made monkey bread only once before (in the shape of a spider for Halloween, although the "blobs" didn't come out well-defined) and I wonder why I don't do it more often. The bread is nice to look at and easy to eat too. So thanks to Sourdough Surprises for coming up with this suggestion.
I knew I wanted a savoury bread and when I spotted a packet of ready-made satay peanut sauce in my pantry, I thought why not. But the sauce is quite sweet and a little too fluid to spread, so I added some fresh chilli paste and a little more chopped peanuts. 
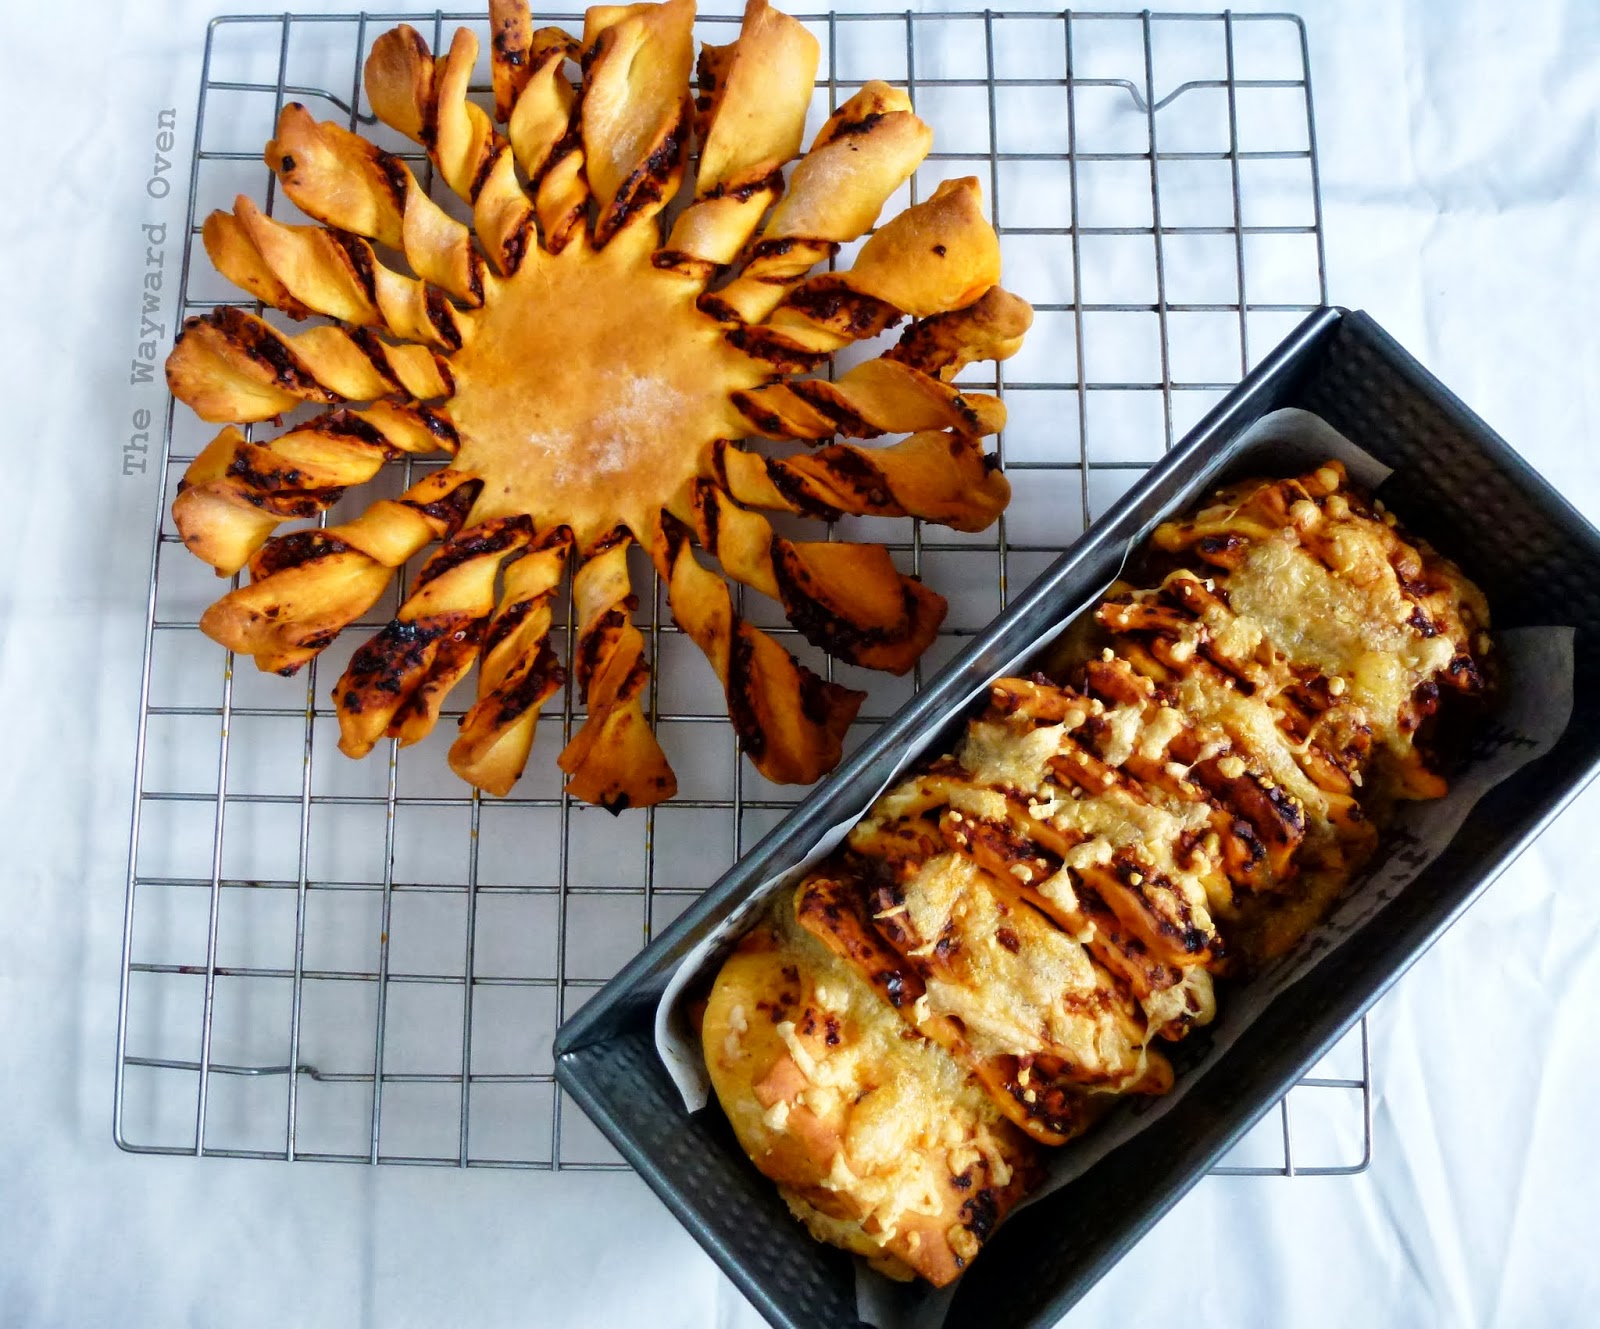
Satay sauce-filled sourdough pull-apart 'sun' bread
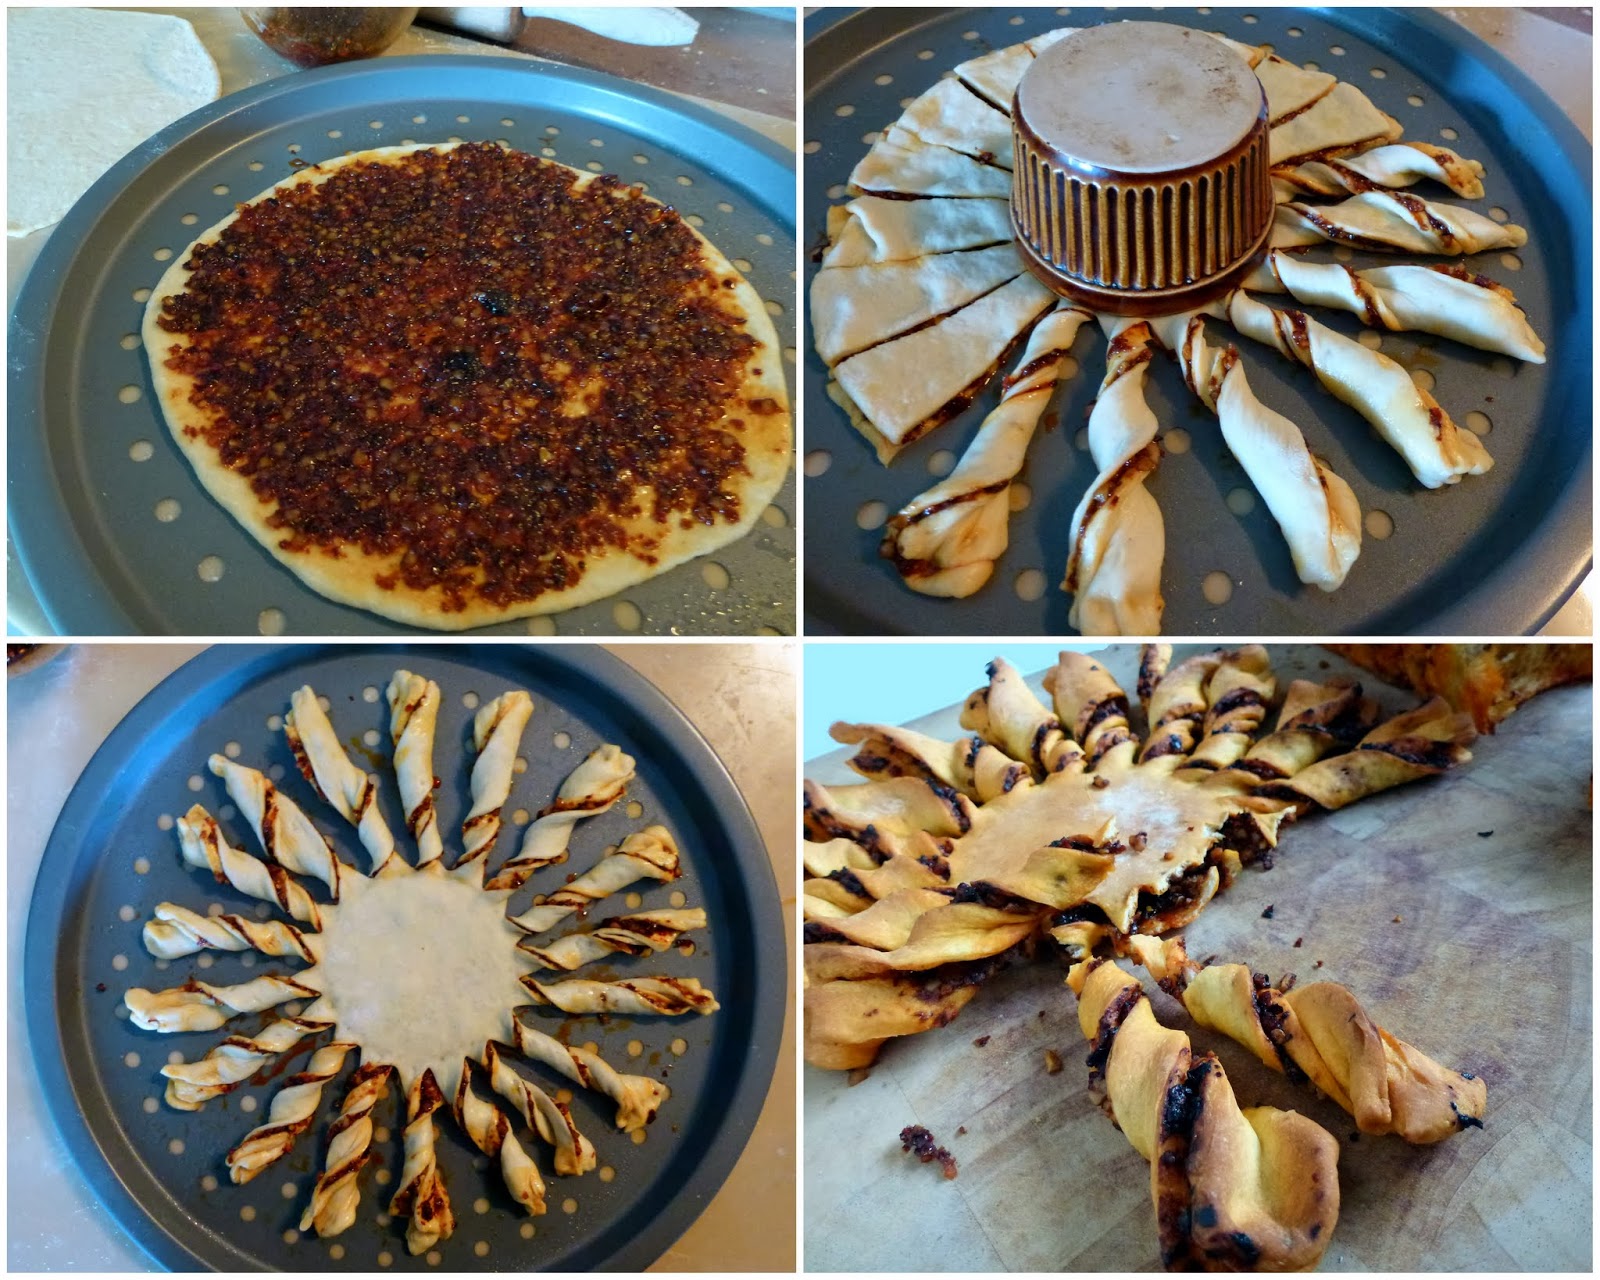
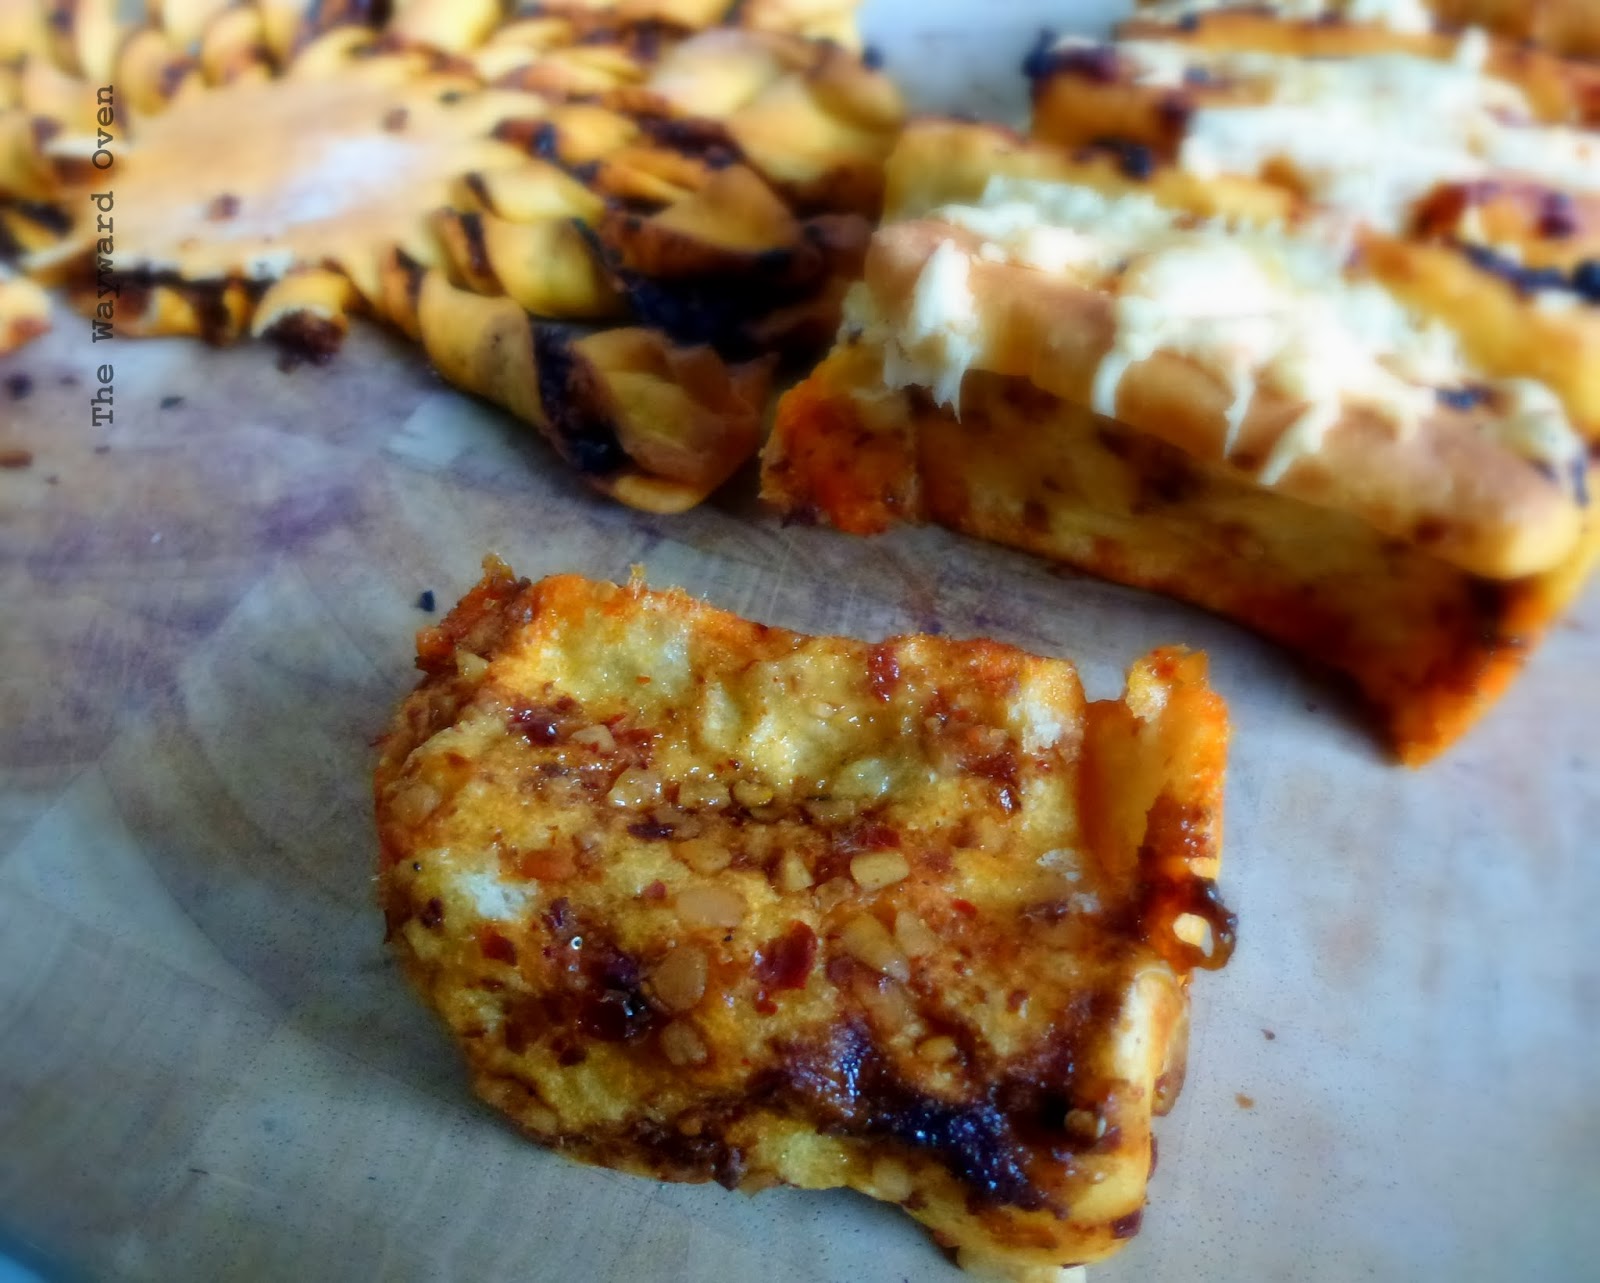
I made enough dough for two loaves, so the first one I made into a sun shape. No complicated shaping here – just a few cuts and twists. I couldn't stop pulling off the "rays" – crisp and chewy like breadsticks – to munch on!
The second loaf was a regular rectangular pull-apart bread shaped in a loaf tin. There was a little less peanut sauce for this one so I looked through the fridge for something to add bulk. It probably sounds gross but you'd be surprised how well sweet and hot peanut sauce goes with salty mozzarella cheese!
Cheese-topped sourdough pull-apart loaf
For more ideas, check out the monkey breads and pull-apart breads made by the other bakers in the Sourdough Surprises group.

Sourdough Pull-apart Breads with Peanut Sauce
Makes 2 loaves

Sponge
45g mother starter (100% hydration)
75g bread flour
75g water

Mix the sponge ingredients in a jug, cover with cling film and set aside until well risen and bubbly, about 8 hours.

Final dough
250g bread flour
¼ tsp salt
1 egg
All the sponge (about 180g)
1 tbsp neutral-flavoured oil

Fillings and toppings
180g packet satay peanut sauce
Fresh chilli paste, to taste
Finely chopped roasted peanuts
Shredded mozzarella

In a large bowl, combine all the ingredients for the final dough. Stir together so mixture comes together. If there are dry bits, add water by the tablespoon until the mixture forms a rough dough. Cover and set aside for 20 minutes, then knead the dough (use your preferred method) until soft, smooth and elastic. Form into a ball and leave on the work surface covered with the mixing bowl until tripled in size. In warm weather, this takes 4½ hours.
Divide the dough into two equal portions. Combine the peanut sauce, chilli and chopped peanuts until it is thick but still spreadable.
To make the "sun" loaf, divide one portion of dough into two. Roll each portion out into a thin disc. Place one disc on a baking tray and spread with some of the peanut sauce; top with the other dough disc. Place a ramekin upside down in the centre and make slits (to make 16-18 sections) through both layers from the rim of the ramekin to the curved edge of the discs. Twist each section several times. 
To make the rectangular loaf, roll out the other portion of dough into a rough rectangle, about 30cm by 20cm. Spread with peanut sauce. Cut the rectangle into three 10cm strips and stack them. Cut through the stacks into squares. Arrange in a loaf tin, sprinkling mozzarella in between and around the stacks, and more on top.
Cover both loaves and set aside while the oven is preheating at 180°C. Bake the loaves until cooked through and golden, 20-25 minutes.

Sourdough Surprises: Focaccia with chilli oil

Monday, January 20, 2014

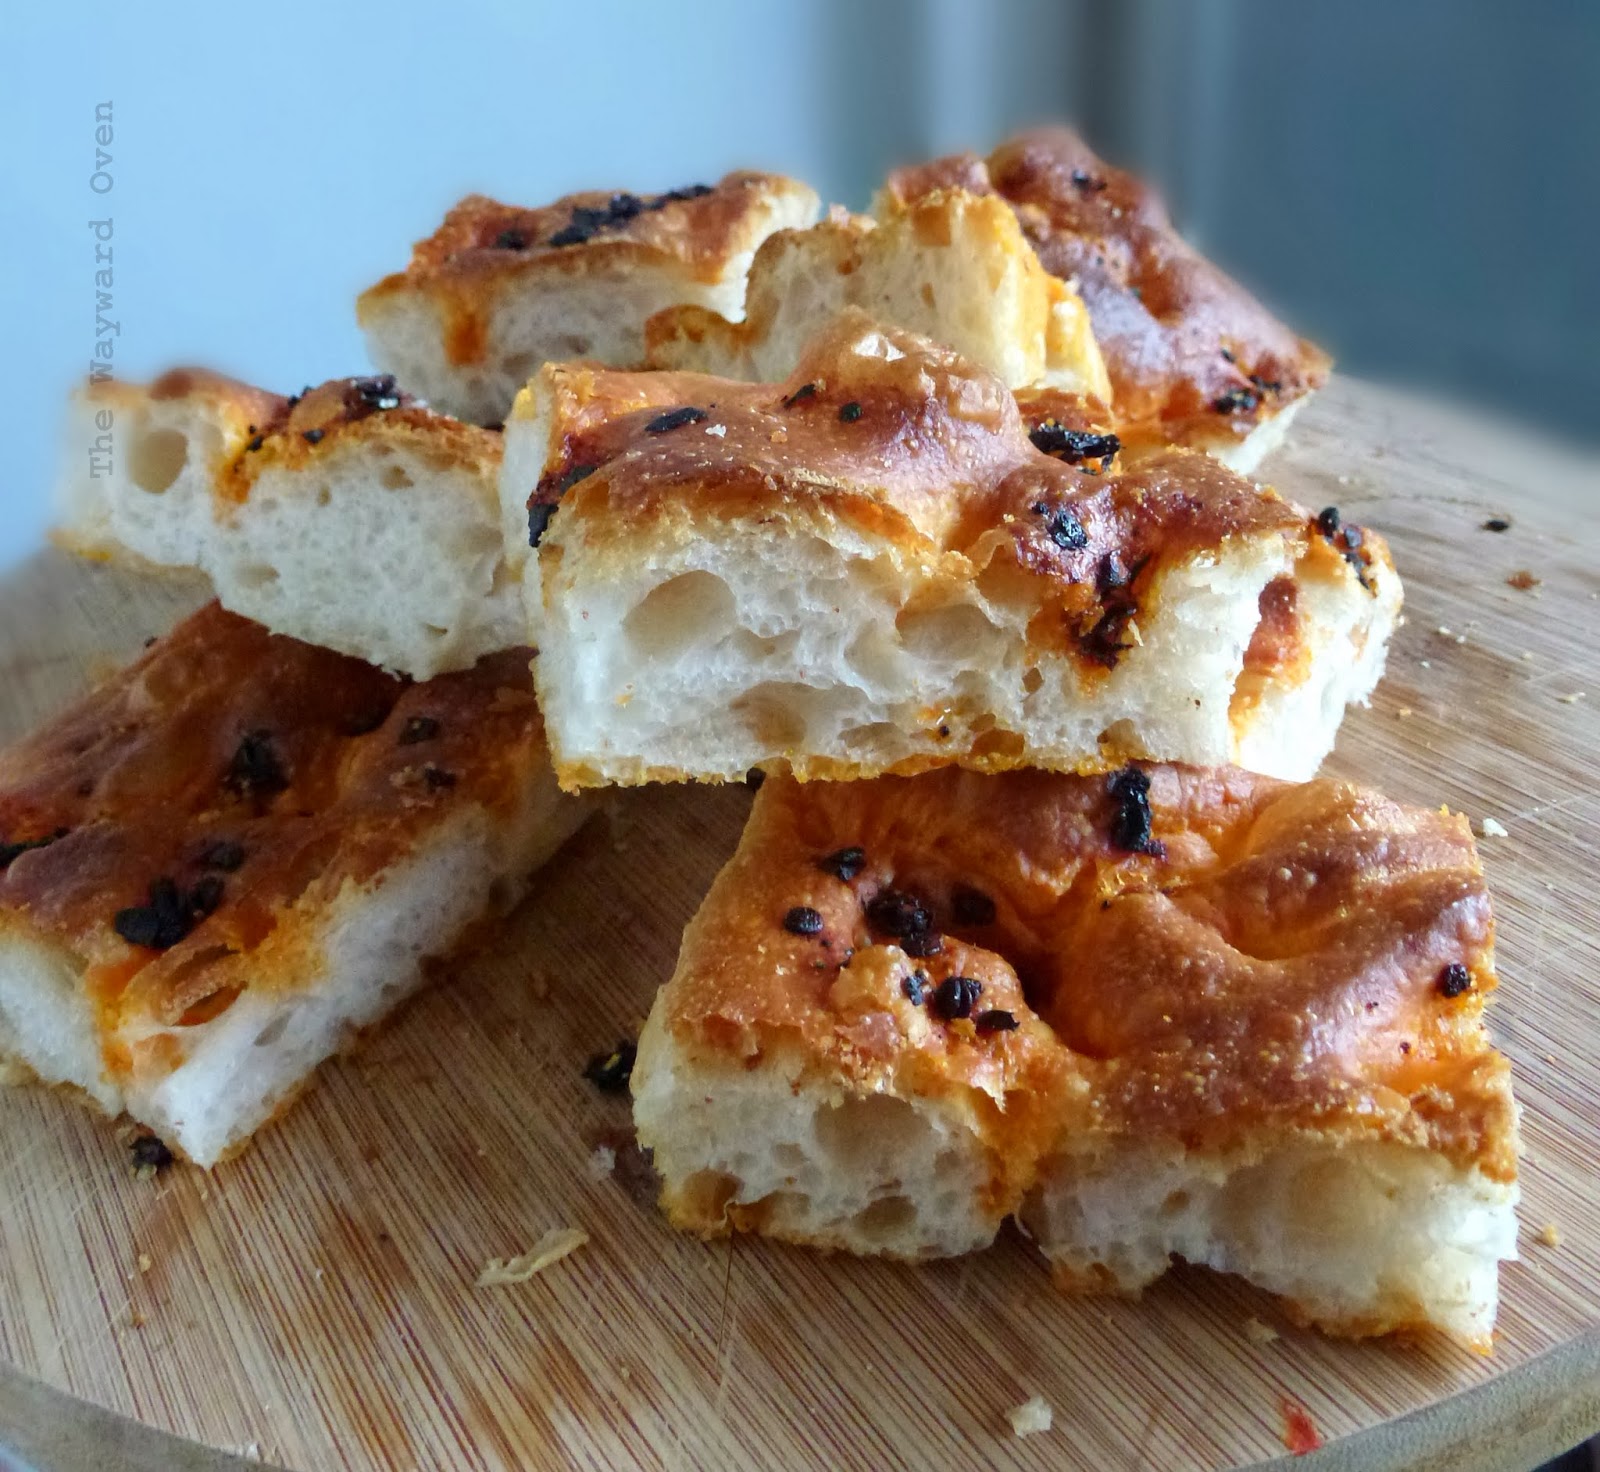
HOT AND AIRY: SOURDOUGH FOCACCIA WITH CHILLI OIL TOPPING
My leaven turns three on Jan 24. It's made from a recipe by one of my gurus, Dan Lepard, from The Handmade Loaf, a book that has been a great source of reference.

The challenge for Sourdough Surprises this month is focaccia, which was perfect for Dan Lepard's recipe for olive oil flatbread from his book. He also uses a tiny amount of commercial yeast, which I left out, but since I practically followed his recipe word for word, it's not right for me to reproduce it here.

Having said that though, Dan Lepard does say in the intro to his recipe that in Genoa, Italy, the focaccia is "simply made with the house white dough, and it is the shape that defines it."

But what is most important, and what really gives focaccia its character, is this:
"Contemporary artisan bakers work the dough over many hours, so that holes created by the fermenting yeast are stretched and enlarged, giving an exaggerated honeycomb effect."
After the initial proofing, Dan Lepard says to pat out the dough into a rectangle, fold it in thirds, and flip it over. This is done every 40 minutes for two hours. By the end of that time, the dough is airy and light.

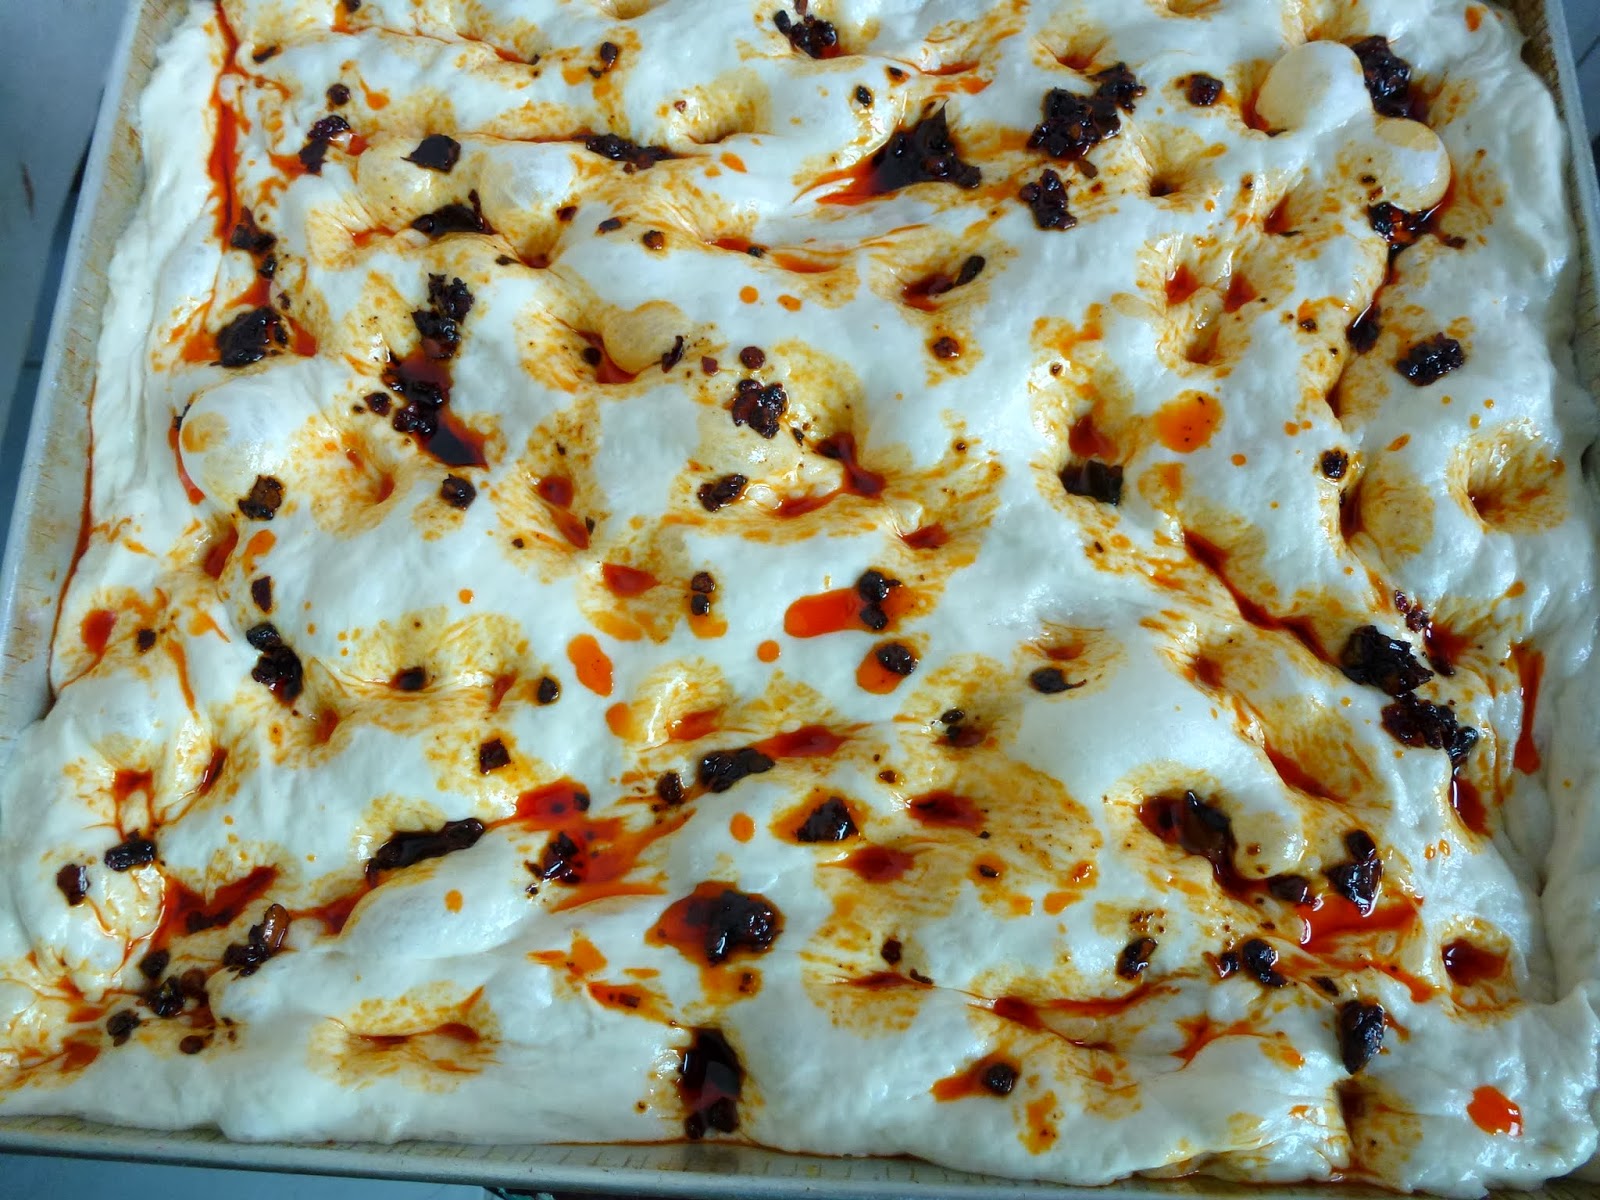
Following that, the dough is gently stretched out in a tray, dimpled, spread with whatever topping, and baked. It takes a long time, but it is worth it.
The focaccia could have done with more chilli oil ~ a lot more!
I topped my focaccia with a store-bought chilli oil. But then I left the bread too long in the oven and the top is a little dark.

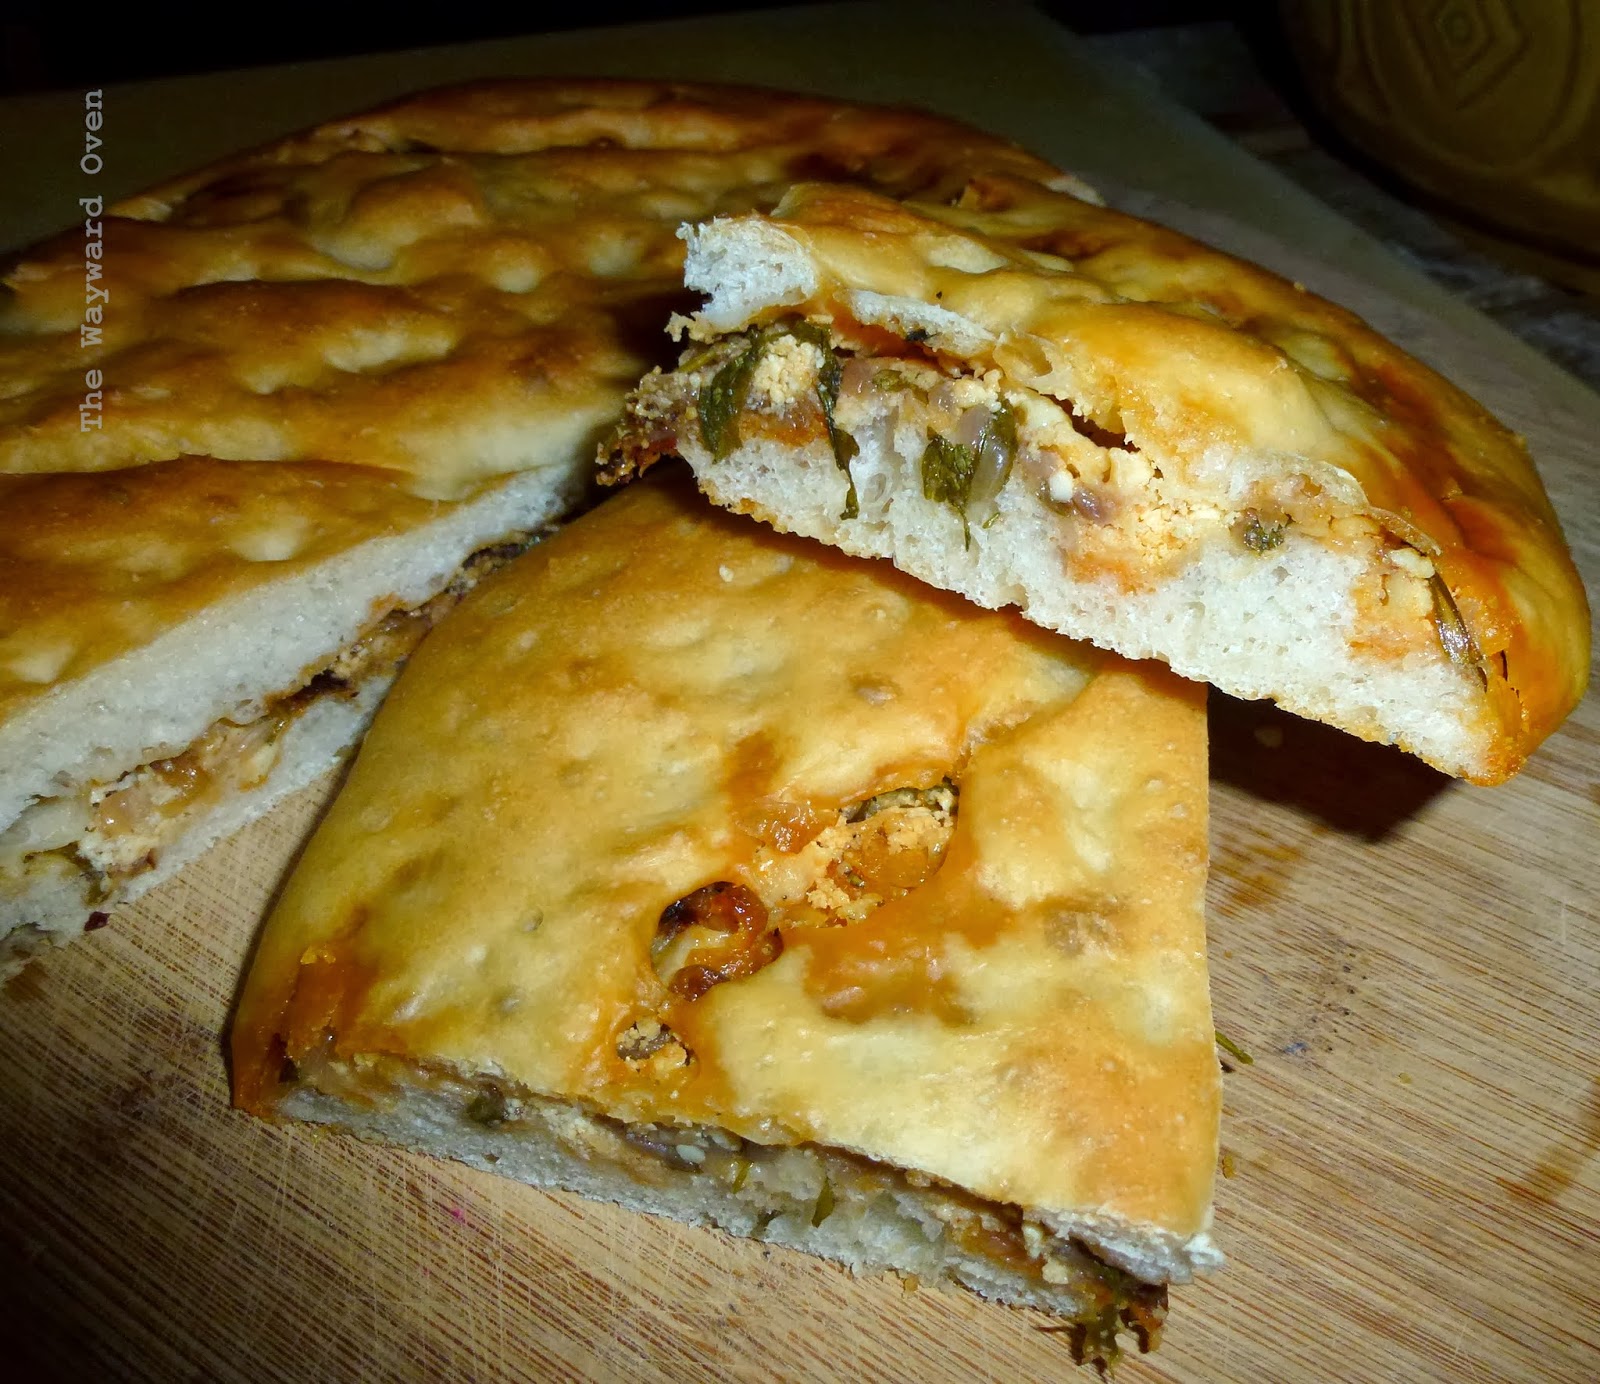
A few days later, I made a pie with the focaccia dough which Dan Lepard also includes in his book. The dough is divided into two, the bottom layer is spread with the filling (mine was the chilli oil and a combination of fried onions, Turkish cheese and rocket leaves), and topped with the other piece of dough (right).

Here are more focaccia from the baking group.


Sourdough Surprises: Kolaches

Wednesday, November 20, 2013

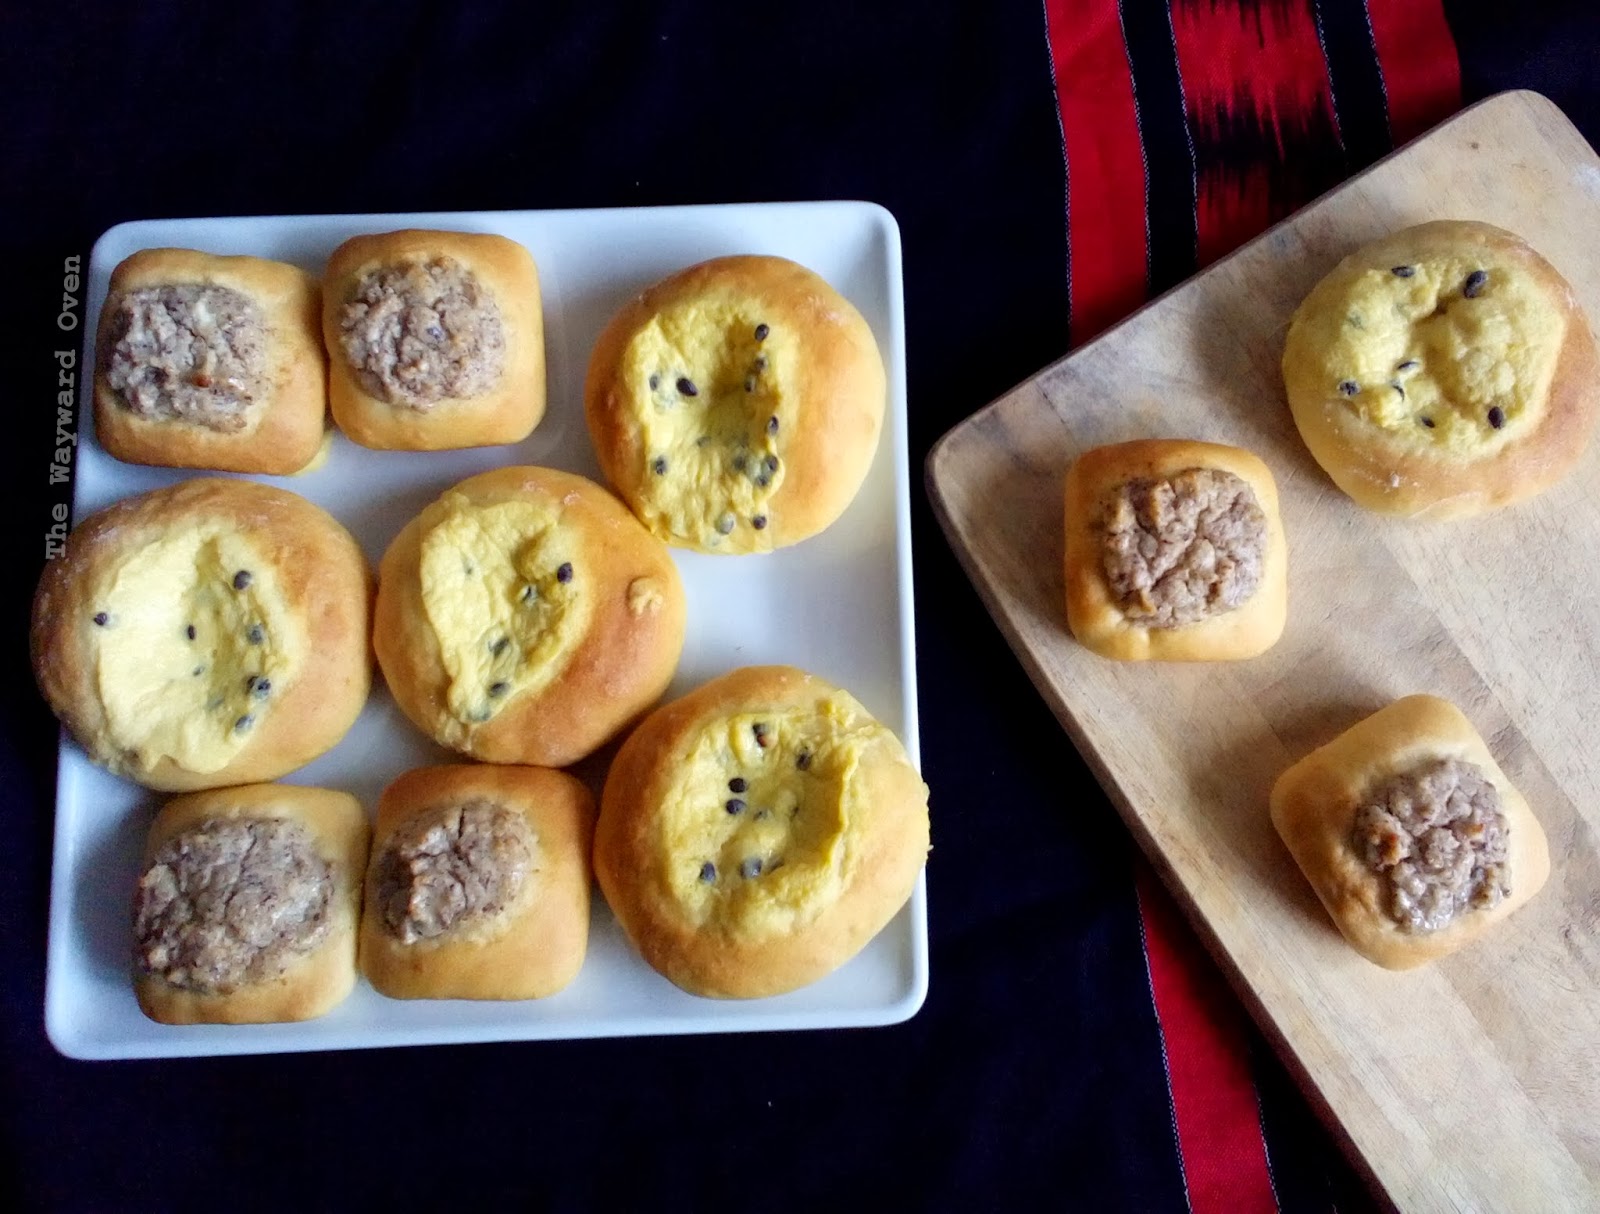
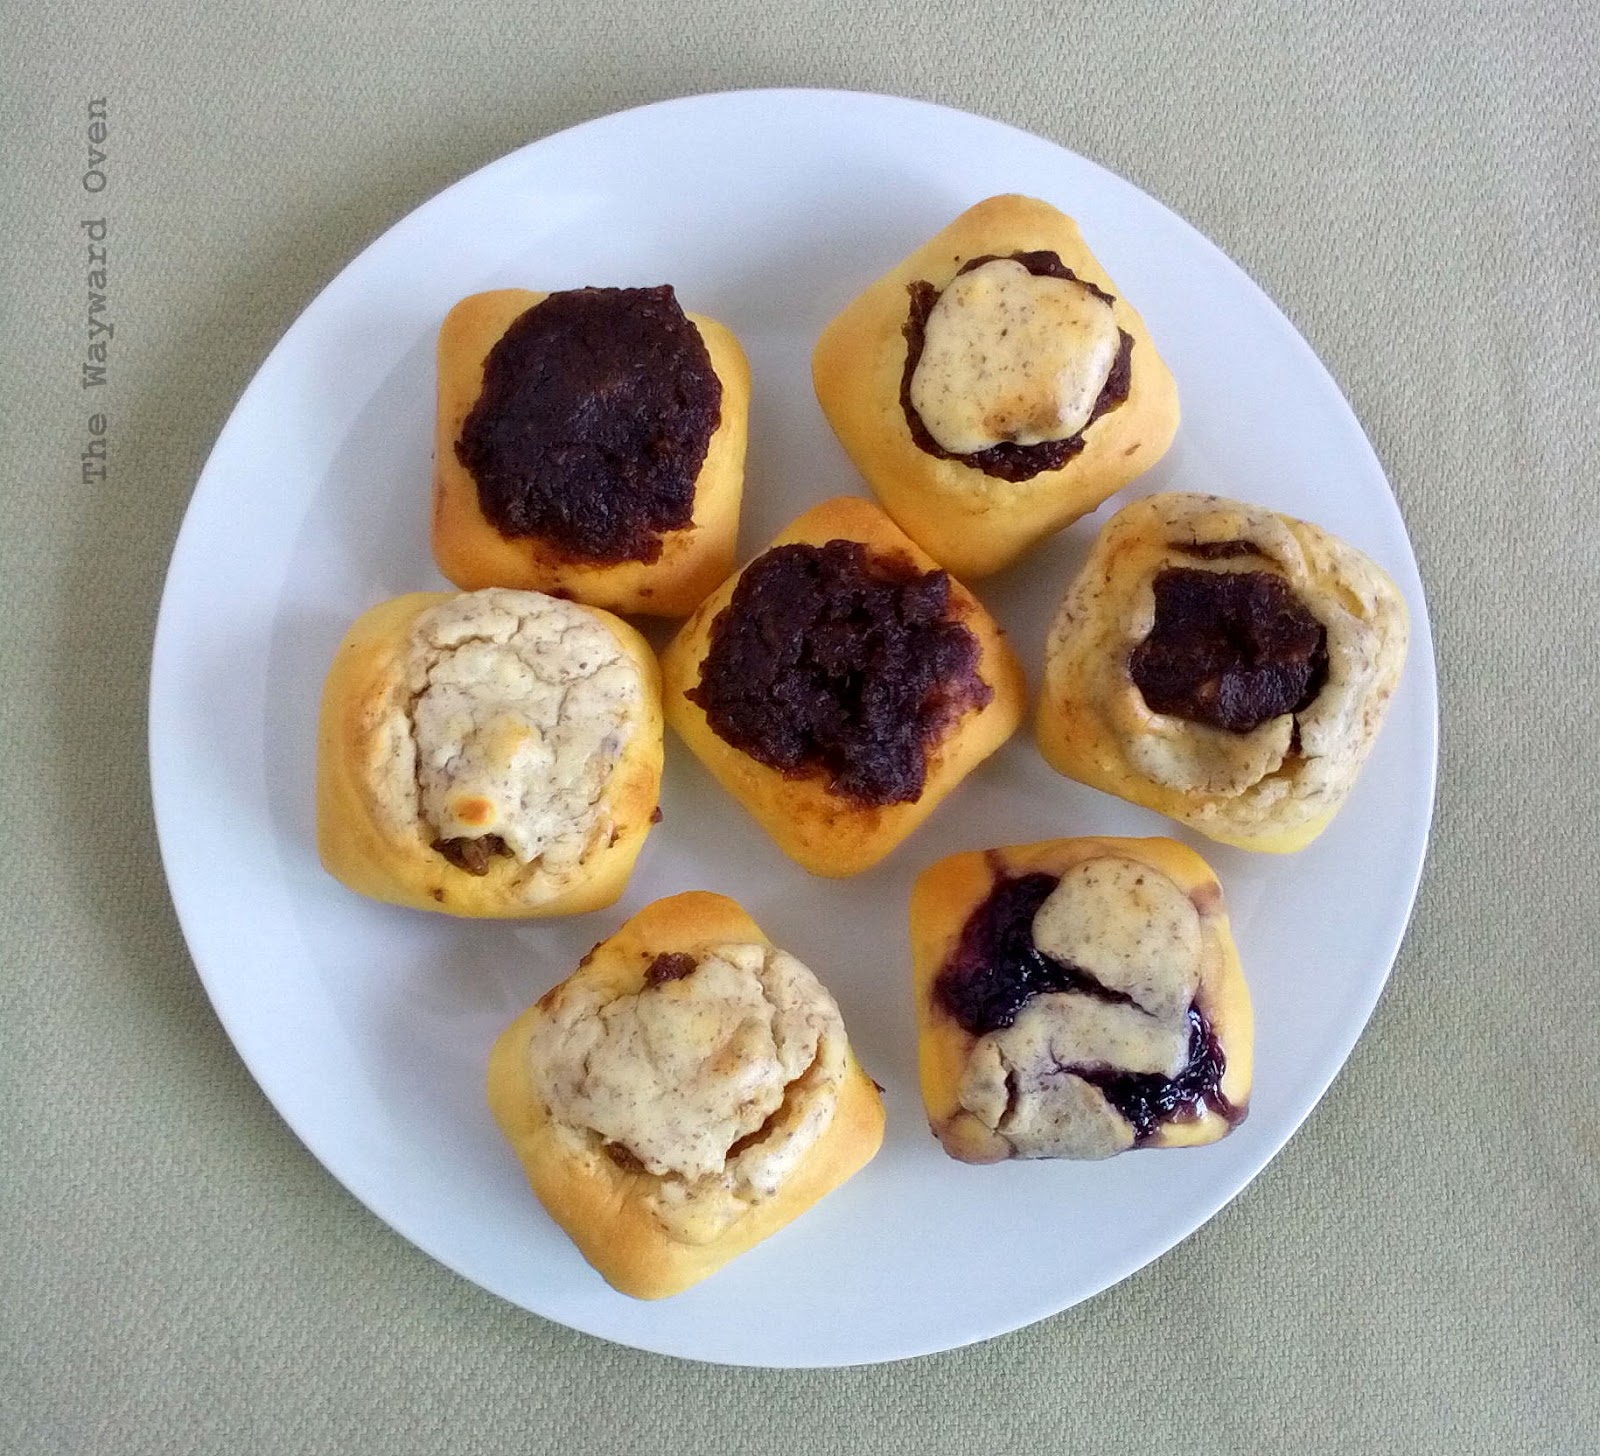
SOURDOUGH KOLACHES WITH PASSION FRUIT CUSTARD AND COFFEE-HAZELNUT CREAM FILLINGS 
I don't know if you would call what I made kolaches. The round ones (pictured above) – filled with passion fruit custard – were humungous! I've seen pictures of authentic kolaches and they certainly weren't as big as a newborn baby's head.
That aside, I loved this month's Sourdough Surprises baked goods. I made the kolaches twice, first filling them with a poppy seed-date paste that I had coincidentally made just a few days prior to the announcement of the challenge, and the second time with passion fruit custard and a hazelnut cream.
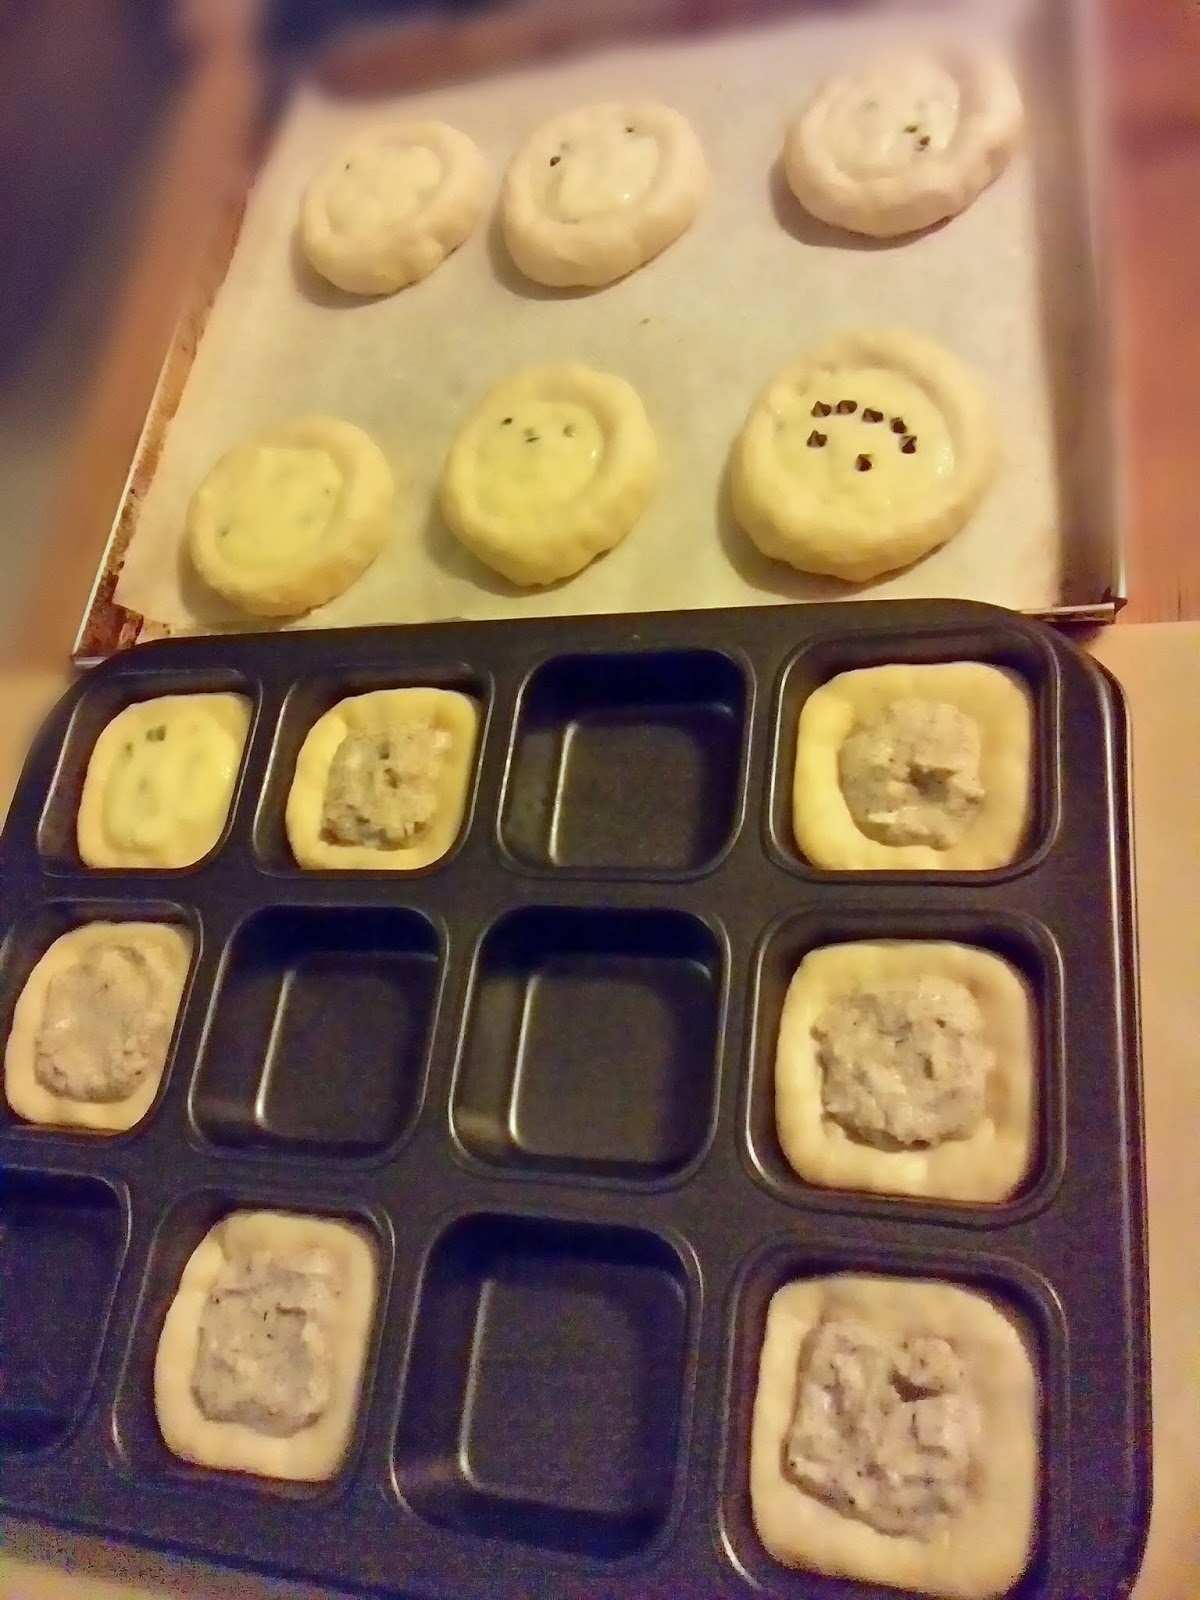
I also got to use my new brownie/lamington mould. (Seriously, how hard is it to cut out squares from cake? But it's one of those unnecessary things I had to get when I saw it.) I baked those a little too long though so they were a little firmer than I liked.
But what I was happiest about this challenge was that I challenged myself to develop a sourdough sweet enriched dough that I like. I have been working on a naturally raised dough for a while, changing the percentage of the components each time, and I hit the right formula with this one. It has a touch of saffron and cardamom in it 
Kolaches baked in a brownie/lamington mould. These are filled with poppy seed-date paste and topped with cream cheese.
Saffron Sourdough Kolaches
Makes 15


Sponge
45g mother starter (100% hydration)
75g bread flour
75g water

Mix the sponge ingredients in a jug, cover with cling film and set aside until well risen and bubbly, about 8 hours.

Final dough
Pinch of saffron threads (about ½ tsp)
¾ tbsp boiling water
250g bread flour
25g sugar
¼ tsp salt
½ tsp cardamom powder
⅛ tsp active dry yeast
All the sponge (about 180g)
1 medium egg
½ tsp vanilla extract
60g butter, cubed and softened

Fillings and toppings
Date poppy seed paste
Cream cheese, passion fruit custard, nut creams, etc
Jams

Place the saffron threads in a small bowl and pour in the boiling water. Set aside for 10 minutes.
In a large bowl, stir the bread flour, sugar, salt, cardamom powder and dry yeast together. Add the sponge, egg and vanilla, and stir together to form a shaggy mixture. Add just enough water (1-2 tbsp) to bring the bits together into a firm and knobbly ball. Cover and leave for 10 to 15 minutes for the liquid to be absorbed.
Smear the softened butter on the dough and mix together it in until fully incorporated (squeeze with the whole hand and fold several times). 
Rub some water onto a work surface (marble is best). Place the dough on the surface and using wet hands, knead the dough until soft, smooth and elastic, wetting your hands occasionally. This will take 8-10 minutes. Form into a ball and leave on the work surface covered with the mixing bowl until tripled in size. In warm weather, this takes 4½ hours.
Deflate the dough, for into a ball again and place in a greased mixing bowl. Place the bowl in a large plastic bag or cover tightly with cling film and refrigerate overnight.
Divide the dough into 15 even pieces (30-35g each) and form each one into a tight ball. Place on a a parchment-lined baking sheet or into well-greased muffin or brownie moulds. Set aside for 10 minutes, then make a wide indentation in the centre and fill with desired filling.
Meanwhile, preheat the oven to 180°C. Bake the rolls, 20-25 minutes. The tops will be lightly golden.
Remove from oven and cool for five minutes.


Sourdough Surprise: Butterscotch plantain pancakes

Friday, September 20, 2013

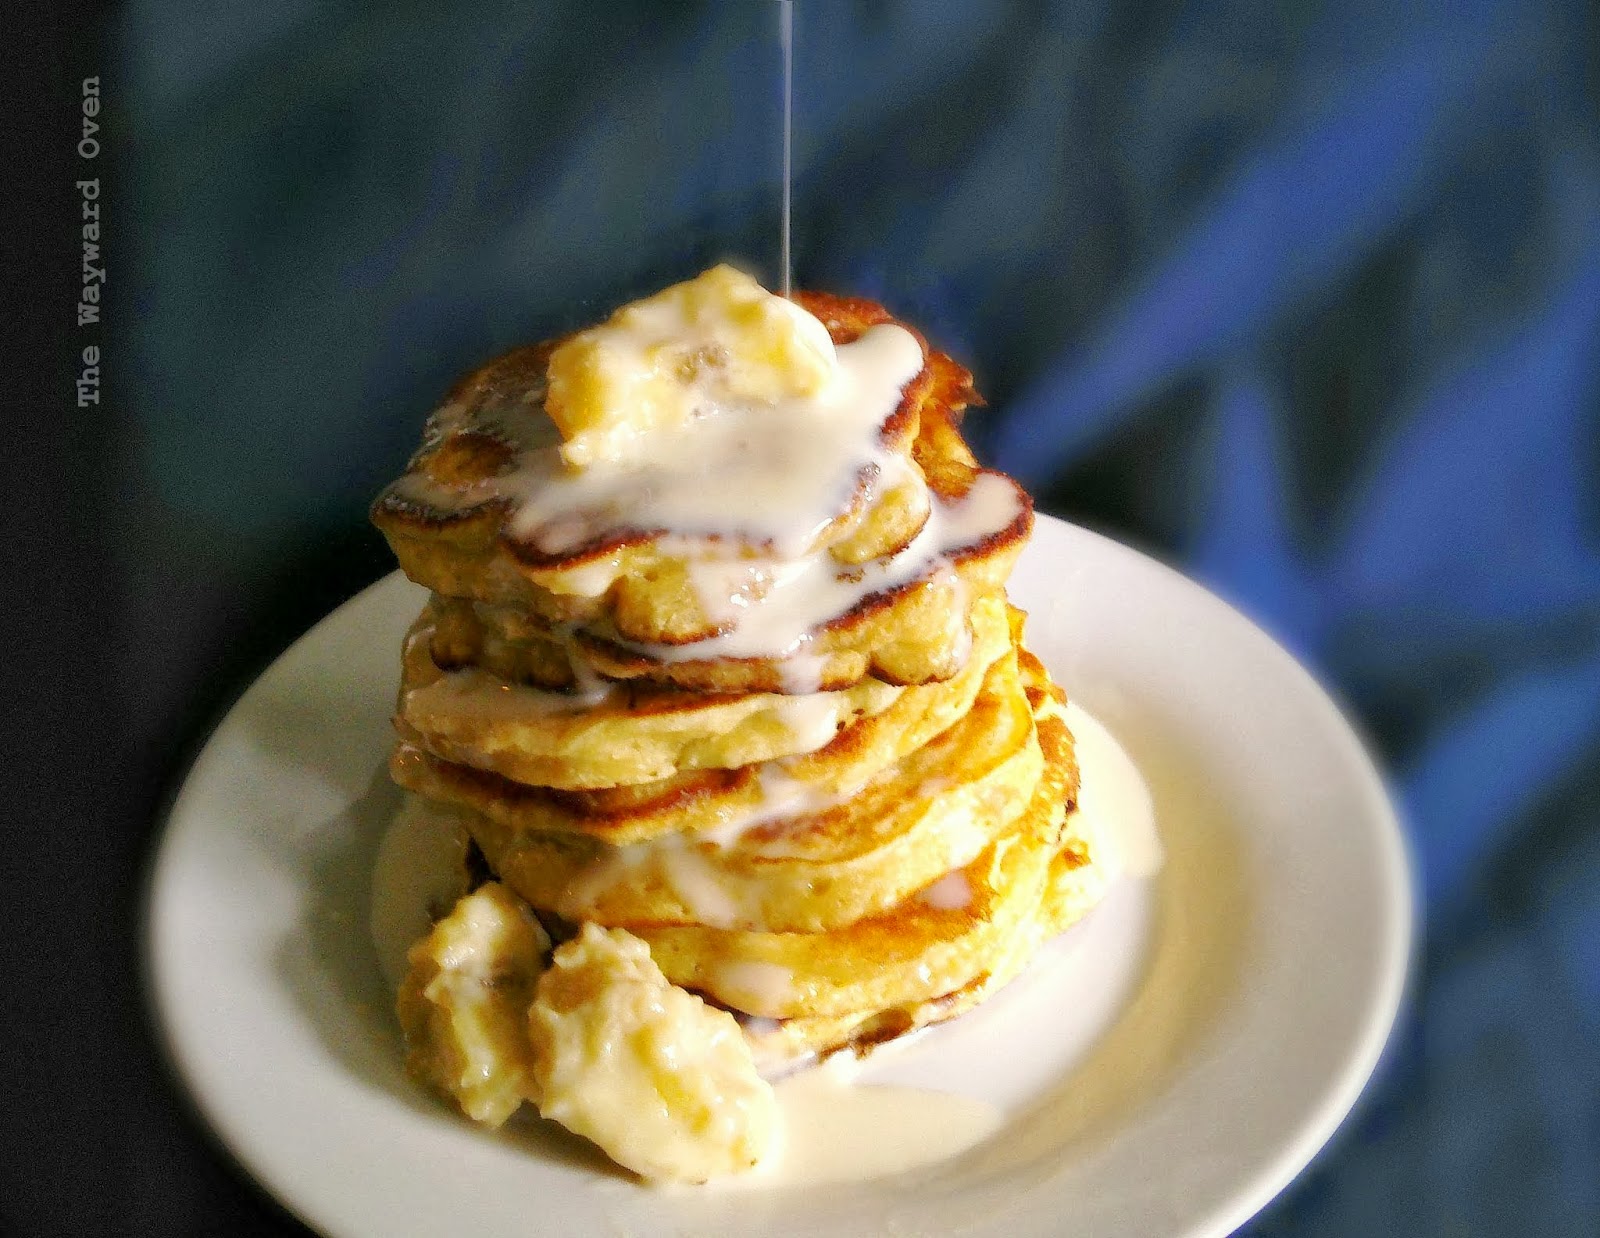
BUTTERSCOTCH PLANTAIN SOURDOUGH PANCAKES 
I am not kidding when I say the plantain was as long as my arm – there it is in the picture below. It's called pisang tanduk or horn banana in Malay for good reason.
I wanted to make a curry or plaintain chips and you need still green bananas for that, which this one isn't. So I ended up making fritters.
My mother got the banana at the farmer's market. The thing is,I didn't just have one banana, not even two. My mother got three and each one weighed about 400g! Needless to say, I had to find a few more uses for the giant bananas beyond fritters.
So pancakes it was since Sourdough Surprises suggested pancakes and waffles with unusual flavours for this month. (I wish I had a waffle maker because I would have liked to try the plantain in waffles instead.) To give it a boost, I was inspired by Dan Lepard's recipe for a butterscotch banana cake in his book, Short and Sweet, and cooked the banana in a sugar syrup before adding to the pancake batter. I used condensed milk instead.
What a stack! Pour on tres leches and dig in. 
I'm happy with how these pancakes turned out. I ate them with a three-milk mixture (tres leches; from an upcoming recipe) of condensed, evaporated and coconut milks.
After seeing what the Sourdough Surprises group came up with, I really need to get a waffle maker!


Sourdough Surprises: Papadum crackers

Tuesday, August 20, 2013

SOURDOUGH PAPADUM CRACKERS
This month's Sourdough Surprises challenge was to make crackers. I like crackers but I do have a problem with them – I tend to eat too many! They're really hard to resist, savoury ones especially, but even the plain type is moreish. It must have something to do with reliving our childhood – or further back, our baby years, when we were given rusks to chew on while we were teething. 
Well, I'm no psychologist so I shall get back to what we came here for: crackers. I decided to try making sourdough papadum.
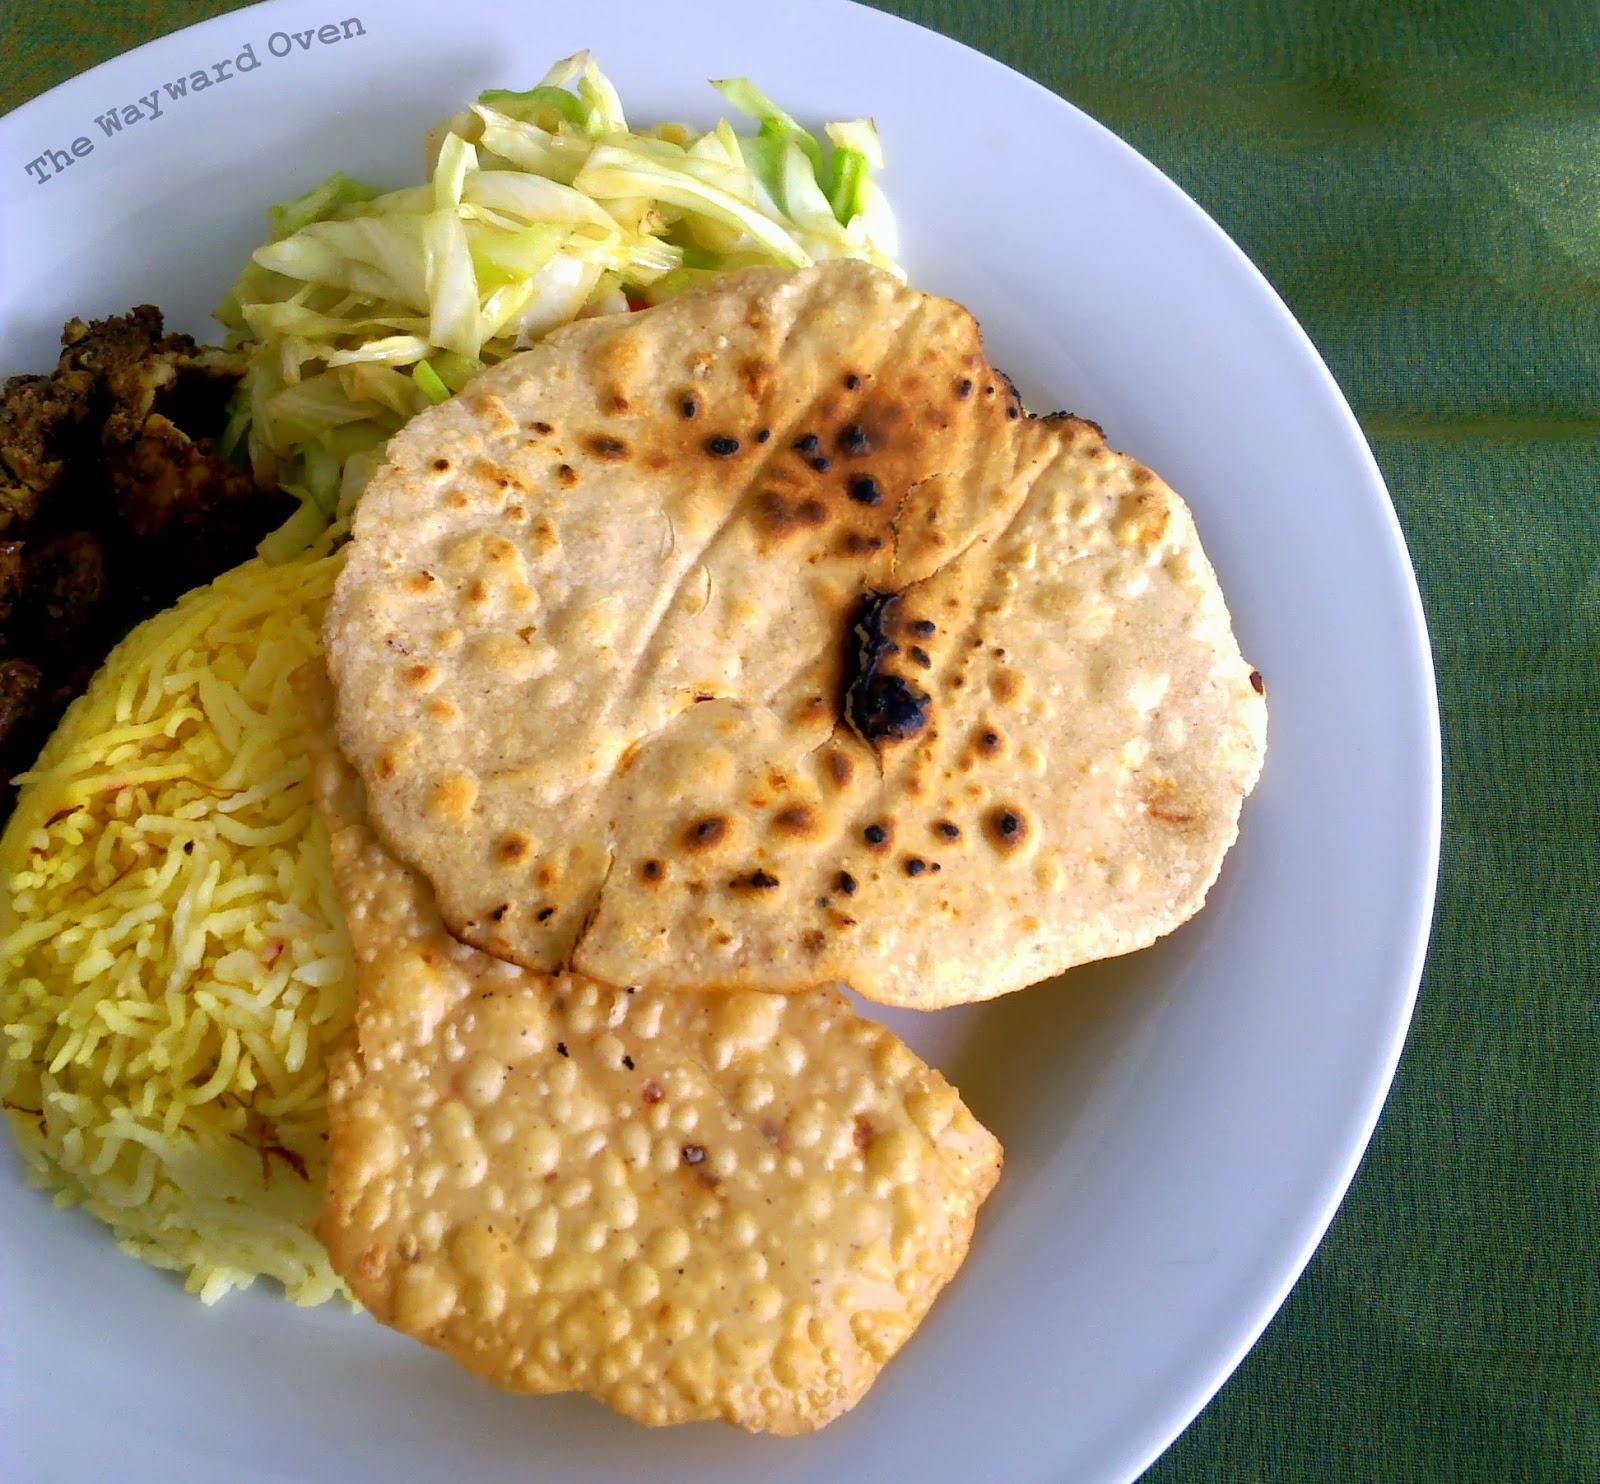
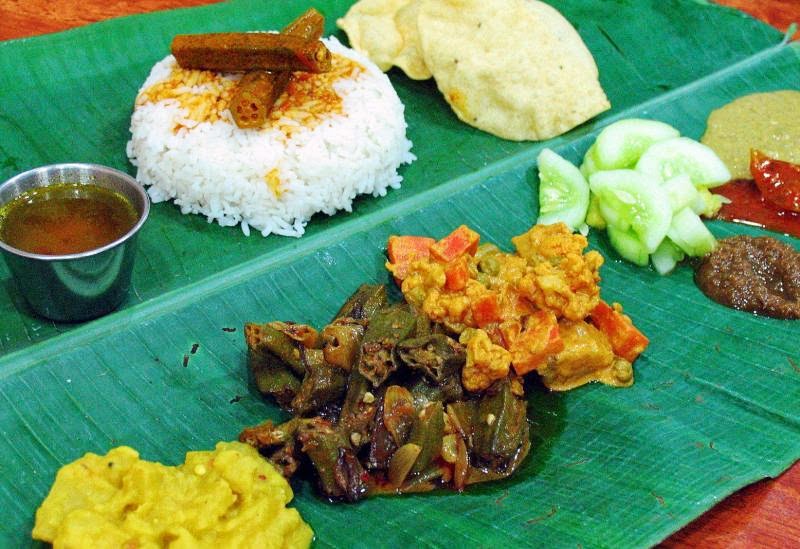
Banana leaf rice lunch served in South Indian restaurants in Malaysia. Papadum is at top right.
Although papadums are eaten as a snack or used to scoop up dip, they're typically an accompaniment to a South Indian banana leaf lunch – rice is placed in the centre of a large piece of banana leaf and the meat, fish and vegetable dishes are placed around it with the curry poured over the rice. The food is usually eaten with the right hand although some people use a spoon and fork. The discs of papadum are crushed by hand and mixed in with the rice.
Papadum is made from a variety of flours. The dough is rolled out thinly into discs and dried out under the sun. I think all the papadum we find in Malaysia is imported from India; I doubt if anyone actually makes their own as it's so easily available.
I've seen dried papadum being cooked directly on a flame and parts of it will char, but when cooking a large batch, as in a restaurant, they are simply fried. The puff up immediately and are drained quickly, then stored in large air-tight containers.
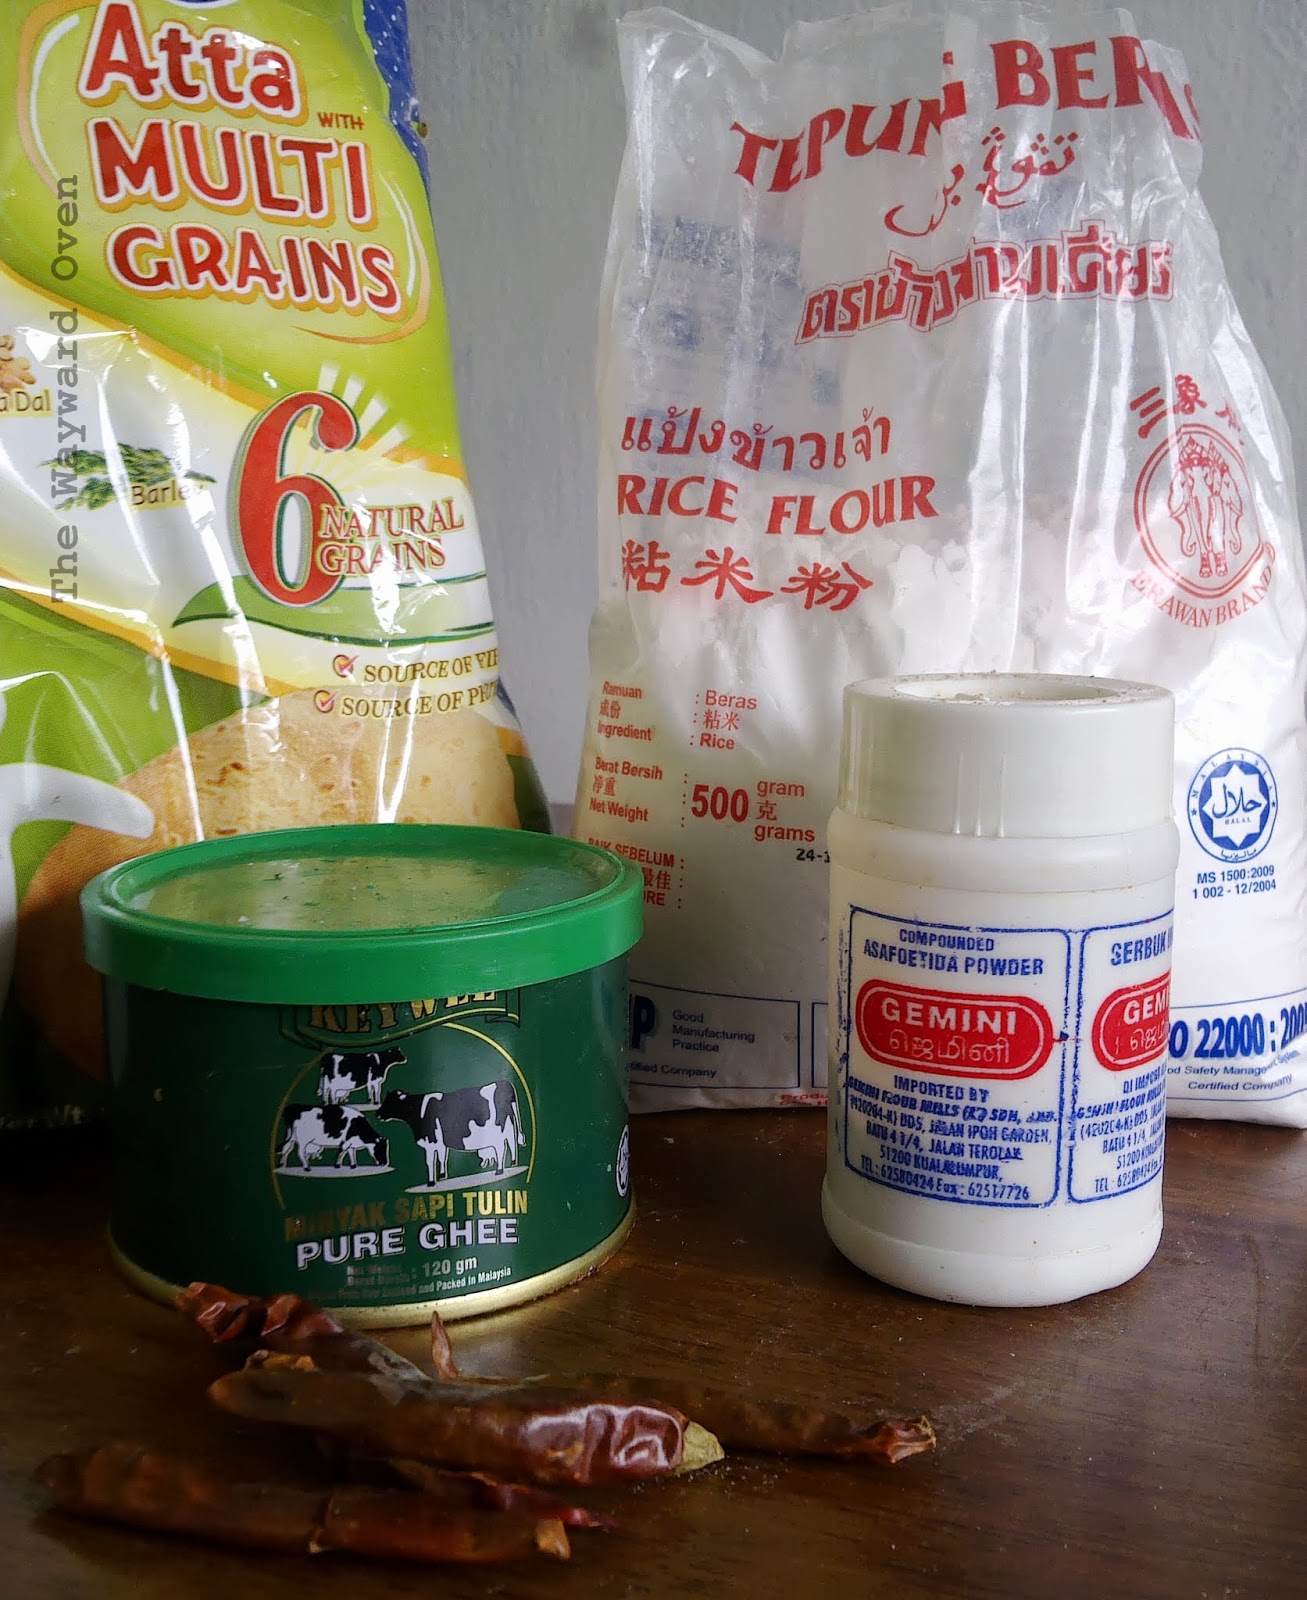
Sourdough papadum ingredients
Besides the sourdough starter, my papadum contains multi-grain and rice flours, ghee, asafoetida powder and dried chillies flakes. I divided the dough into small rounds, then rolled them out into thin discs (about 10cm wide) on greaseproof paper. I didn't put them out in the open air but simply dried them out in a low oven, then cooked some of the papadum directly on a flame and shallow fried the others. The fried ones came out with little blisters all over the surface.
My recipe is sketchy because I didn't really measure anything but just went with the feel of the dough. Roughly, there's three-quarters of a cup of sourdough starter, a quarter cup of rice flour, two tablespoons of ghee, then enough multi-grain flour to mix into a firm dough. After that salt, asafoetida powder and chilli flakes to taste. I left the dough overnight and then carried on with the rolling and drying.


Sourdough Surprises: Cinnamon rolls

Saturday, July 20, 2013

CINNAMON ROLLS THAT JUST DON'T ROCK 
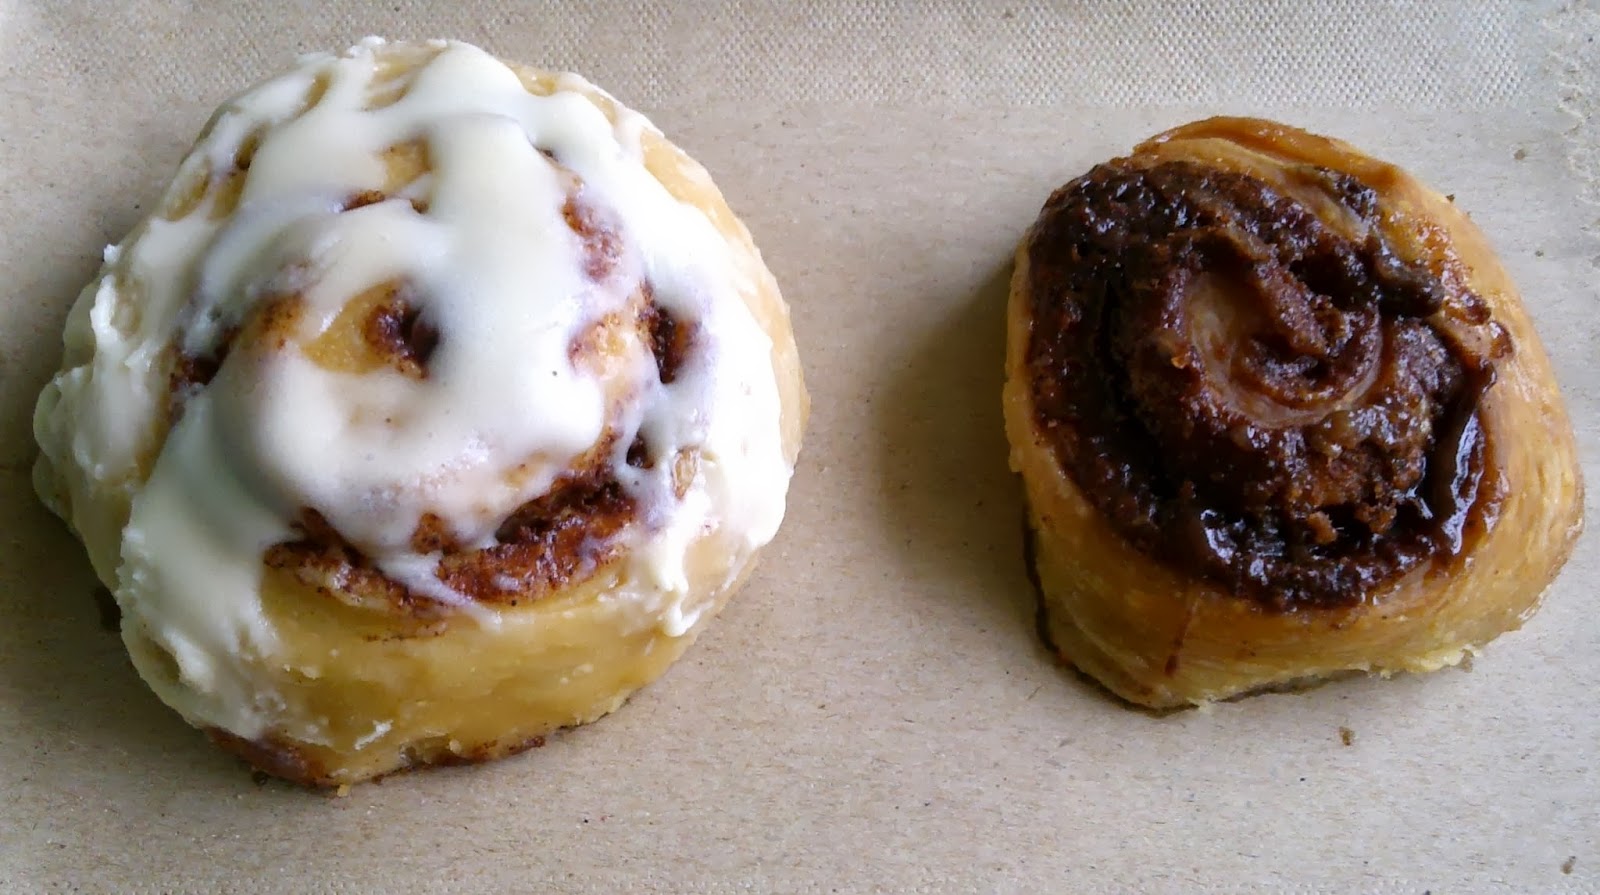
Meet my sourdough cinnamon rolls chums, Blah McBland and Hock E. "The Rock" Puck.
Sure, they may be dolled up in cream cheese bling and filled out with cinnamon sugar padding, but underneath it all, they're flat and unexciting.
I used this recipe from The Fresh Loaf for the dough and cream cheese icing, and Ciril Hitz's recipe for cinnamon bun filling from his book Baking Artisan Pastries & Breads. The dough was perfect – it was quite wet but I used the slap-stretch technique of kneading and it was manageable. So in no way do I fault the recipe! Others have made these cinnamon rolls as billowy as their name suggests.
Let me just describe the rolls without too many details. I made two batches of rolls on different days. The first one is on the left in the picture. They rose a little in the oven, but they just would not colour and came out with a light crust! Also, there wasn't enough filling so they were anaemic and tasted insipid.
The ones on the right were more elegantly formed into rolls and had more filling. They looked like they were taking on good colour in the oven, but didn't rise and ended up as dark river rocks with the texture of dry rusks. Oh dear, oh dear.
That's my chums for you. I may try this recipe again in the future, but for now, I'm just going to admire what the other bakers on Sourdough Surprises did.


1:2:3 sourdough

Wednesday, July 17, 2013

A RATIO TO REMEMBER: 1:2:3 SOURDOUGH
The 1:2:3 Sourdough formula has been around for a while and it's one that's worked very well with the breads I've made – as long as I don't confuse the components. The ratio refers to the dough mix: 1 part starter to 2 parts liquid to 3 parts flour by weight (plus about 2% salt). 
This means that if I start off with 100g of refreshed starter, I just add 200g of water, 300g of flour (sometimes just white; other times a mixture) and 6g of salt. The percentage of water is only 66%, which makes the bread far from wet and very easy to knead completely by hand. I often use the stretch-and-fold method, but sometimes it's good to get back to basics and go through the full-on "traditional" hand-kneading process.
Airy and creamy crumb
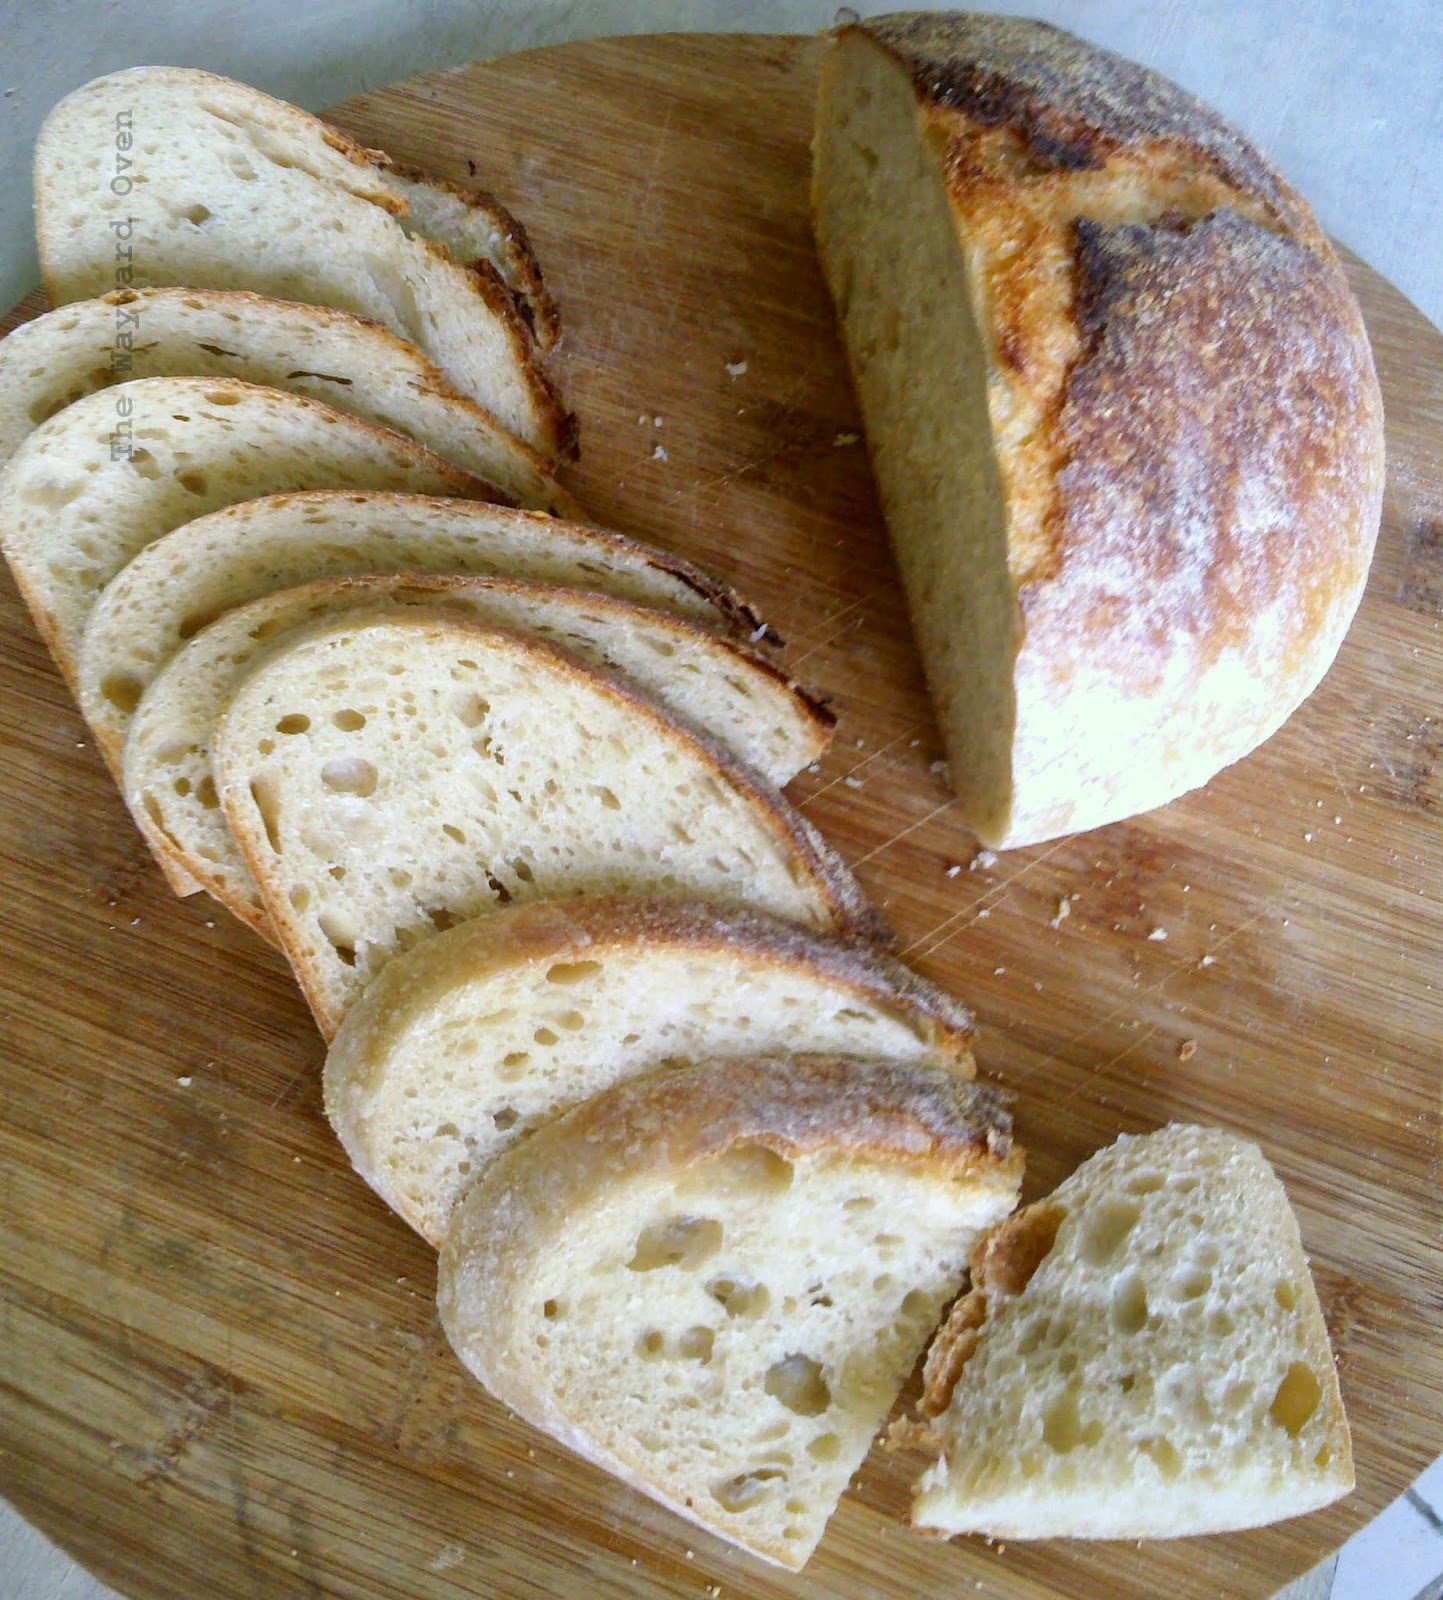
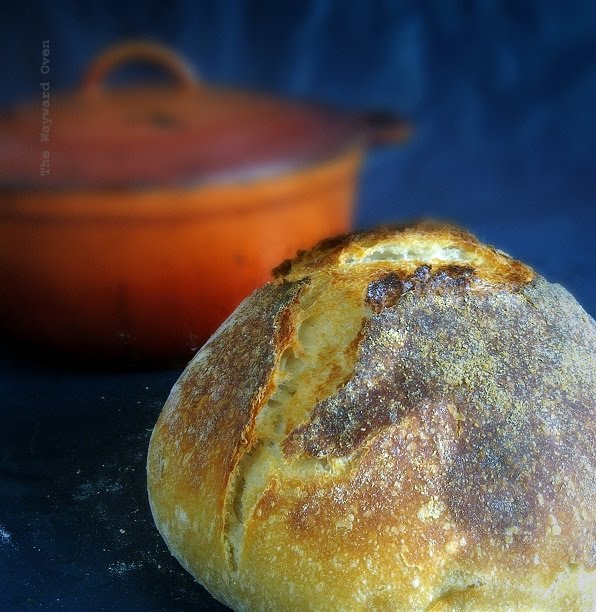
The bread is well-aerated, even though the dough isn't that highly hydrated, with a creamy crumb and good chewy crust. I have baked it freestanding on an upturned preheated baking tray with steam from ice cubes, and also in a Dutch oven.
With the Dutch oven, I use a method I learnt from Ken Forkish's book Flour Water Salt Yeast. He lets the loaf proof seam side down in the bread proofing basket and then flips it into the preheated pot so the seam is on the top. As the bread bakes, the crust cracks open naturally. Almost all the breads I've baked this way have come out with a three-point crack. And as the bread cools right out of the oven, there's always a loud crackling! 
The loaf is baked seam side up in a Dutch oven and cracks naturally
I often just tear off a hunk of bread and eat it on its own because it tastes good, but I have also used the same 1:2:3 formula and added fried onion to the dough. Another time, I made a grated potato and spring onion version, so the dough is quite versatile that way. The crumb on those "flavoured" breads was slightly tighter, but the loaves were still springy and delicious.

Sourdough crêpes with crunch

Friday, June 28, 2013

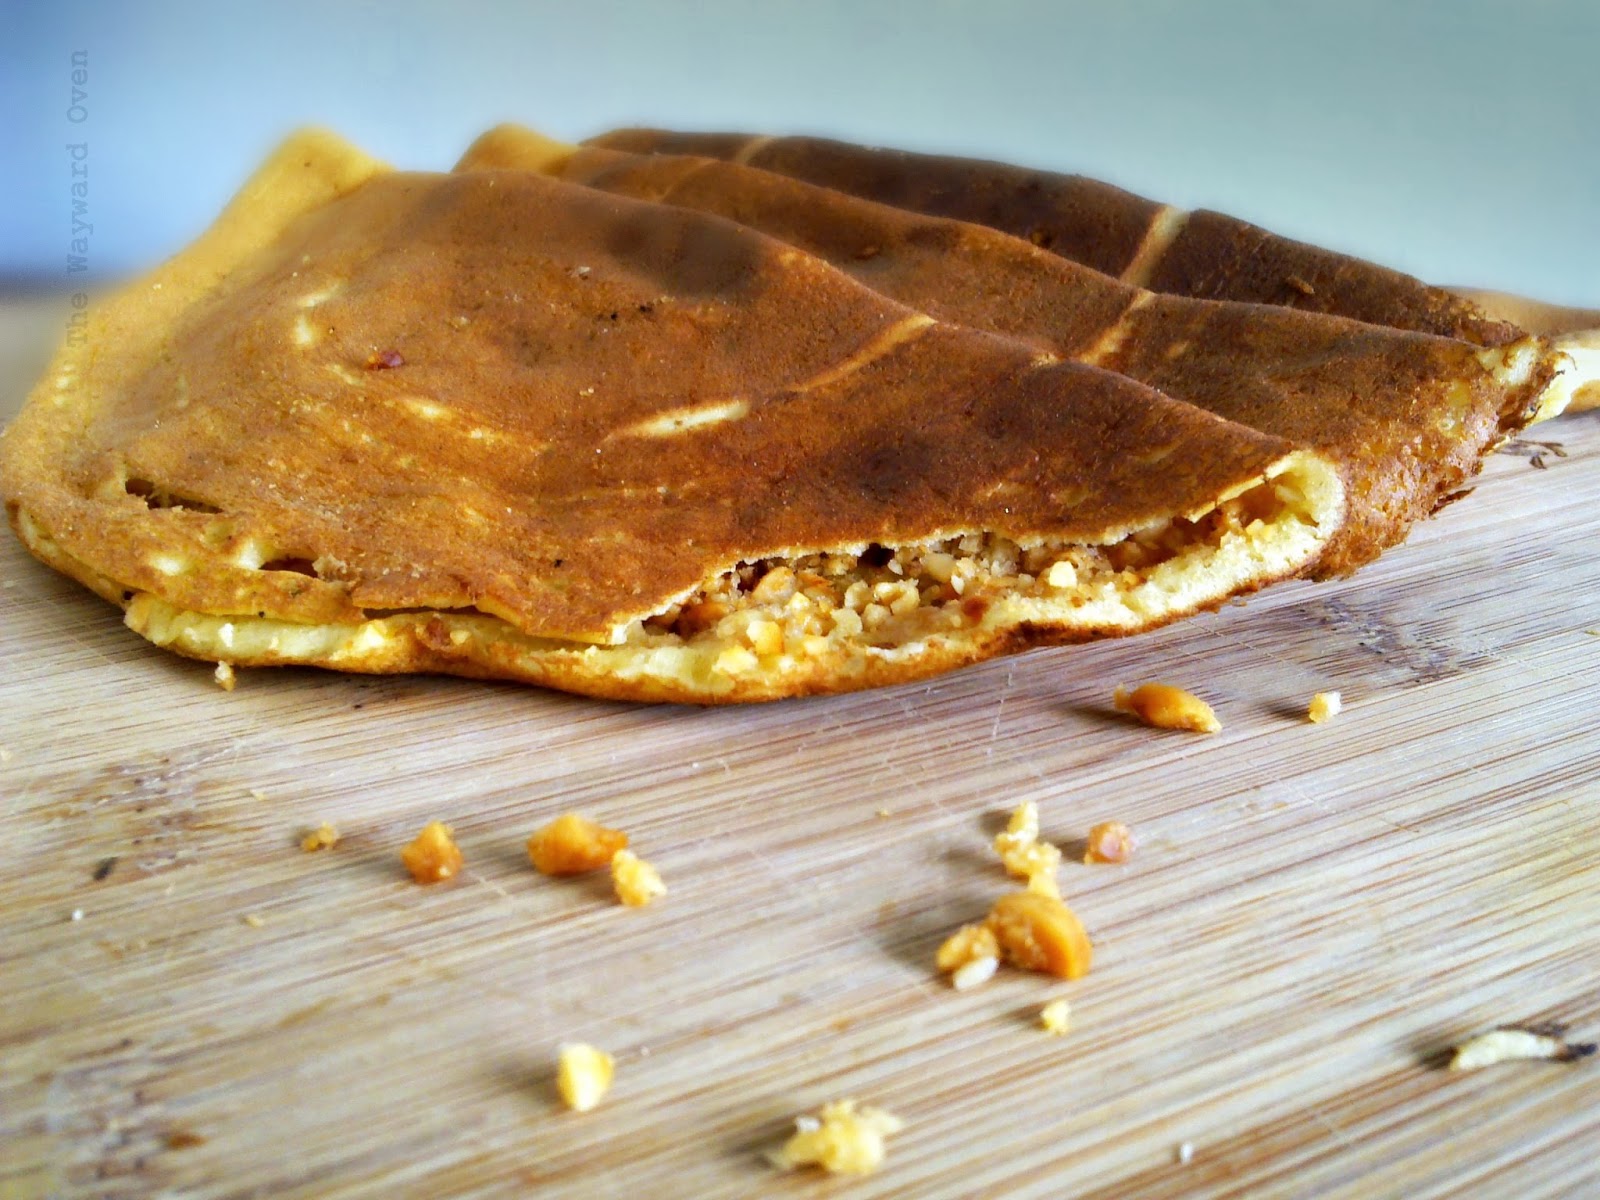
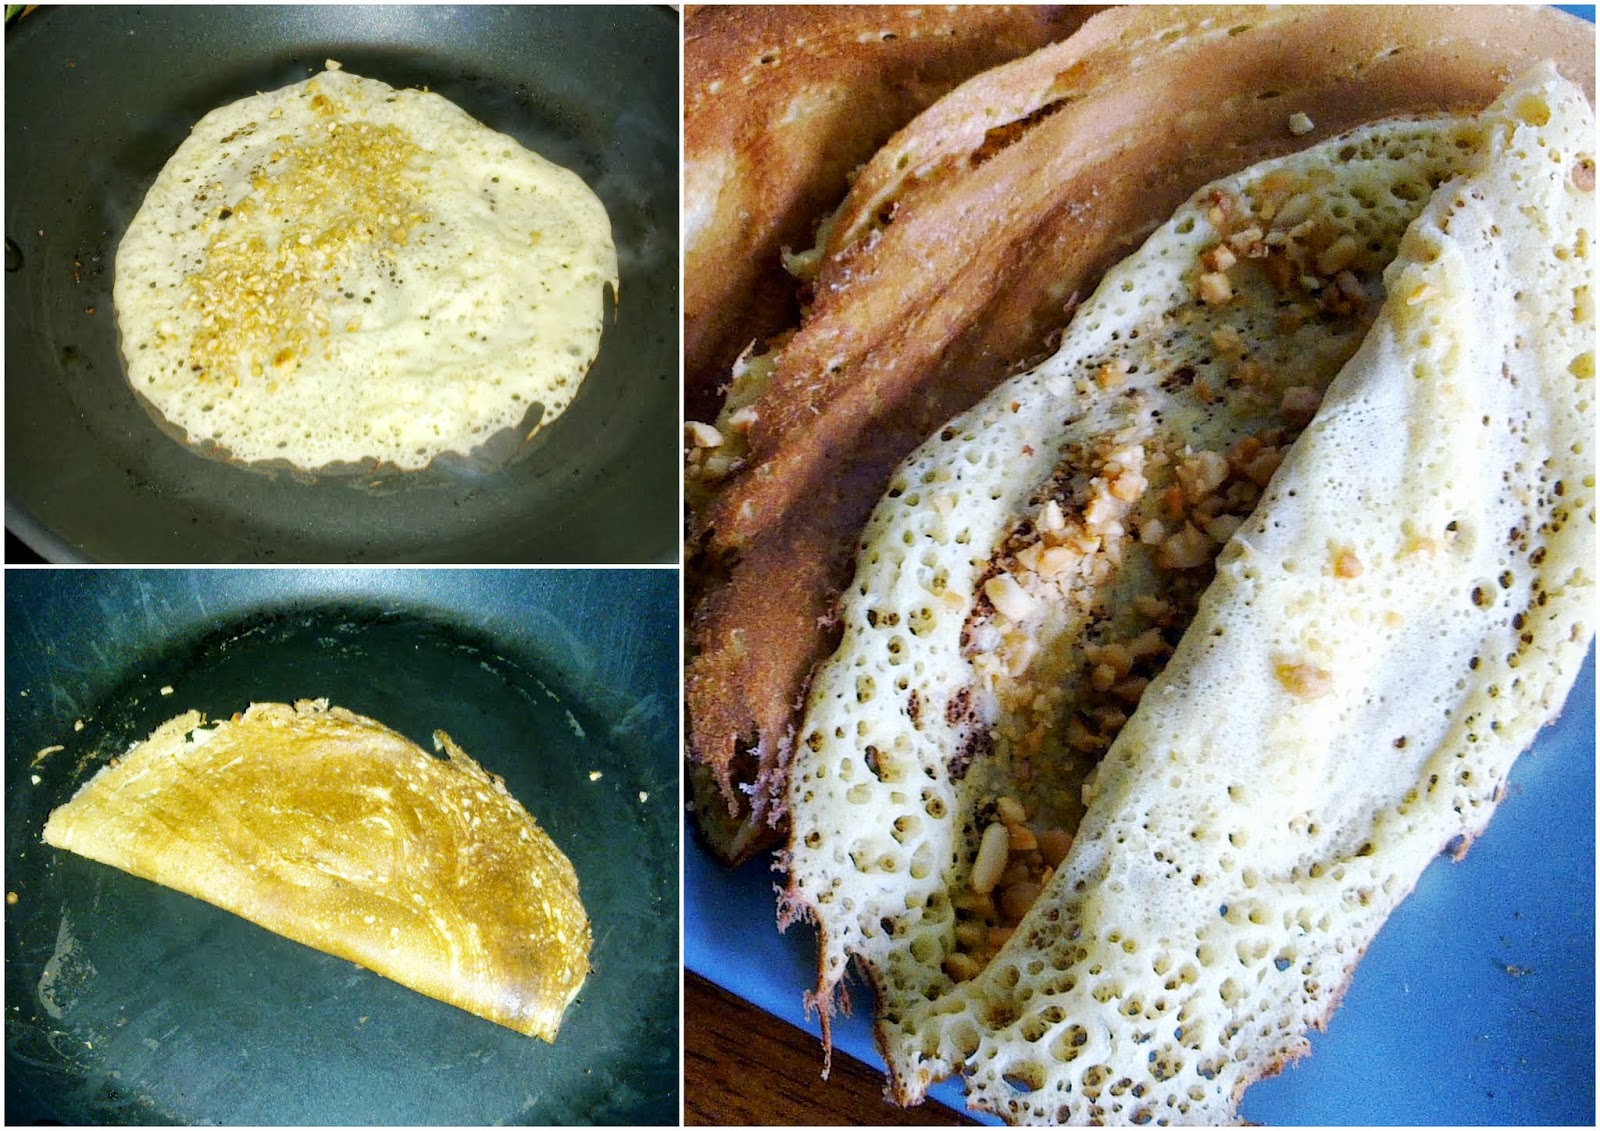
SOURDOUGH APAM BALIK (PEANUT CRÊPES) 
These crêpes are based on the Malaysian street-food snack called apam balik (apam = pancake; one of the definitions of balik in Malay is to turn over) – a folded pancake traditionally filled with a mixture of peanuts and sugar, but creamed corn can also be added if you ask for it.
There's a thick, puffy version, which, when cooked by experts, have vertical tunnels of air running through the inside of the pancake. That might have something to do with the thick heavy brass pans that apam balik are cooked in – they distribute heat better and food cooked in them don't burn easily. Expert vendors often cook these pancakes six at a time!
There are also thinner, crunchy pancakes called apam balik rangup, which often shatter into splinters and crumbs as you bite into them hot off the vendor's stove – but that's the joy in eating them! These are the crêpes I have attempted in a sourdough version.
I was supposed to make them for the June Sourdough Surprises group challenge and post about them on the 20th of last month. With all that's been happening, it's taken me a while to even make the attempt.
Filled with a peanut-sugar mixture
In a traditional apam balik batter, rice flour is the most important component as it provides the crunch – plus it's a very Asian type of ingredient. I made my batter with about a cup each of fed sourdough starter and rice flour together with cornstarch, baking powder, bicarbonate of soda, sugar and salt, and added just enough water to make a moderately thick batter. I left it overnight and the next day, it was a little puffy.
Unfortunately, the crêpes didn't turn out as I had hoped. They tasted good, and the crushed peanut and sugar mixture on the inside provided some crunch, but the shell wasn't really crisp. I think it was because I couldn't spread out the batter thin enough. In hindsight, I should have made the batter more runny so it could be swirled around the pan and just coat the base. Next time.
For now, looks like these crêpes are best left to the experts at the pasar malam (night market)!

More (and moreish) sourdough brownies

Saturday, June 1, 2013

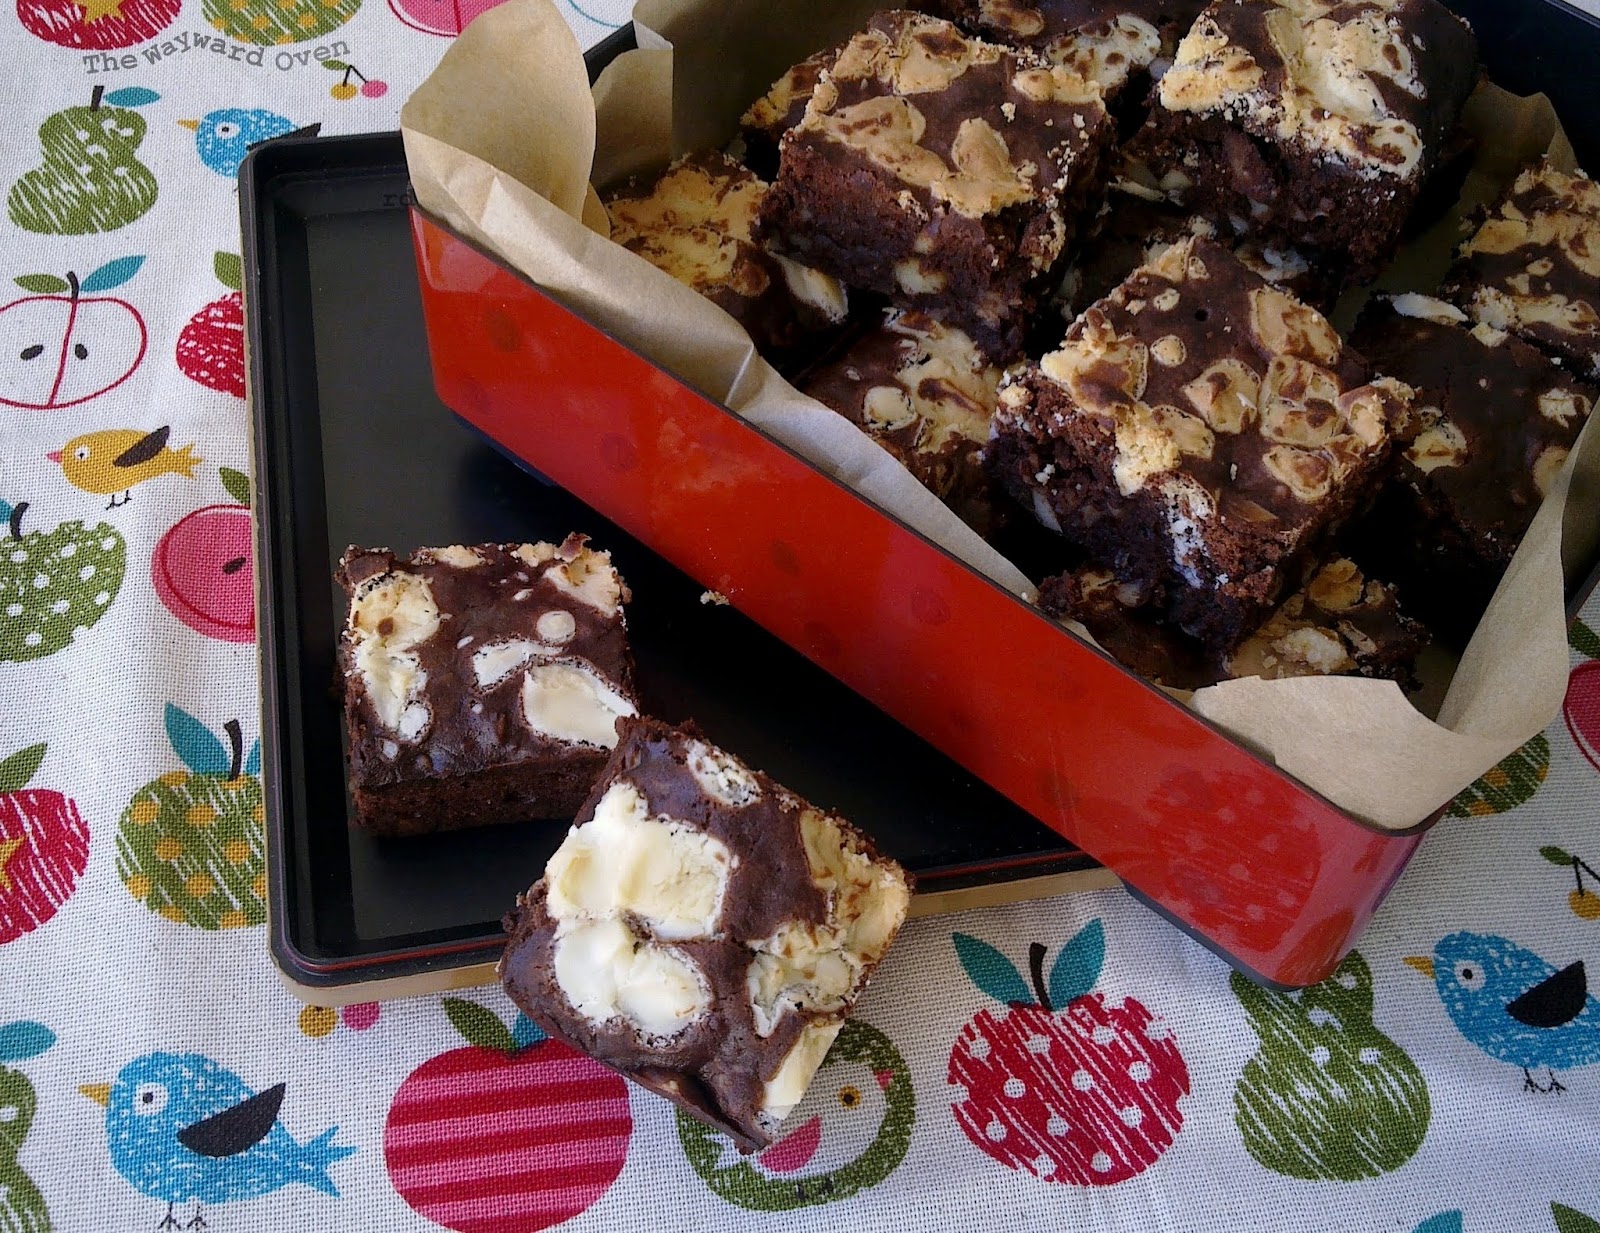
ALMOND SOURDOUGH BROWNIES CAPPED WITH WHITE CHOCOLATE 
Everyone has their own favourite brownie recipe, the one some people call "the best brownie recipe ever" or "the ultimate brownie".
I don't doubt that a brownie can be the best ever or the ultimate one. But it is all a matter of taste. Personally, I'm not so keen on really squidgy or pudding-like brownies or the ones with an additional gooey layer slathered on top. If I have to eat it with a fork or keep wiping away the creamy topping or chocolate smears from around my mouth and on my fingers, then I consider that not quite ideal.
I prefer my brownies crisp and crackled on top, and chewy and tender in the middle. Brownies are often referred to as a cross between cake and cookie and that's how I like it. If there's a topping, it should be baked on. I'd like to be able to pick up a brownie with one hand and not have it crumble as I eat it.
These brownies came about because I wasn't satisfied with the Coconut Nut Sourdough Brownies that I made for the Sourdough Surprises baking group challenge. That recipe was adapted from a sourdough-less but very reliable cocoa brownie recipe from Mad About Brownies by Barbara Albright and Leslie Weiner. Well, I did say in that post that I would be tweaking the recipe. 
So I played around with my basic sourdough recipe, and thought about reducing some ingredients and adding others – and changing how they are added – and this is what I came up with.
I think – in fact, I know since I have done it many times before – that it's easy to make ordinary brownies. But it's easy to make extraordinary ones too. 
These cocoa sourdough brownies may not be everyone's idea of the best ever or ultimate brownie, but to my taste, they are.
Crisp top, firm nutty centre
White Chocolate & Almond Sourdough Brownies
Makes 16

Sponge
25g unfed leaven
55g all-purpose flour
45g tepid water

Mix all the ingredients together, cover and set aside until slightly bubbly, 2-3 hours.

Final batter
25g all-purpose flour
¼ tsp baking powder
¼ tsp table salt
150g caster sugar
75g butter, softened
1 egg yolk
2 egg whites
All the sponge (about 110g)
1 tsp vanilla extract
50g unsweetened cocoa powder, sifted
90g almond nibs
50g white chocolate, roughly chopped

Preheat oven to 180°C. Grease a 20cm square baking tin and line the base and sides with parchment paper.
Sift the flour, baking powder and salt together. Set aside.
In a mixing bowl, beat together the sugar and butter until light and fluffy. Beat in the egg yolk until just combined.
Beat in the sponge and vanilla extract.
Fold in the cocoa powder, followed by the flour mixture and almond nibs.
Whisk the egg whites in a clean bowl until the soft peak stage. Stir a third of the egg whites into the cocoa mixture to loosen it. Fold in the rest of the egg whites.
Spoon the batter into the prepared tin and sprinkle with the chopped white chocolate. Press down lightly and bake for 35-40 minutes until a toothpick inserted in the centre comes out with just a few crumbs sticking to it.
Cool in the tin on a wire rack until warm, the remove from the tin. Best cut and served after storing overnight in an air-tight container at room temperature.

Sourdough Surprises: Mad for brownies

Monday, May 20, 2013

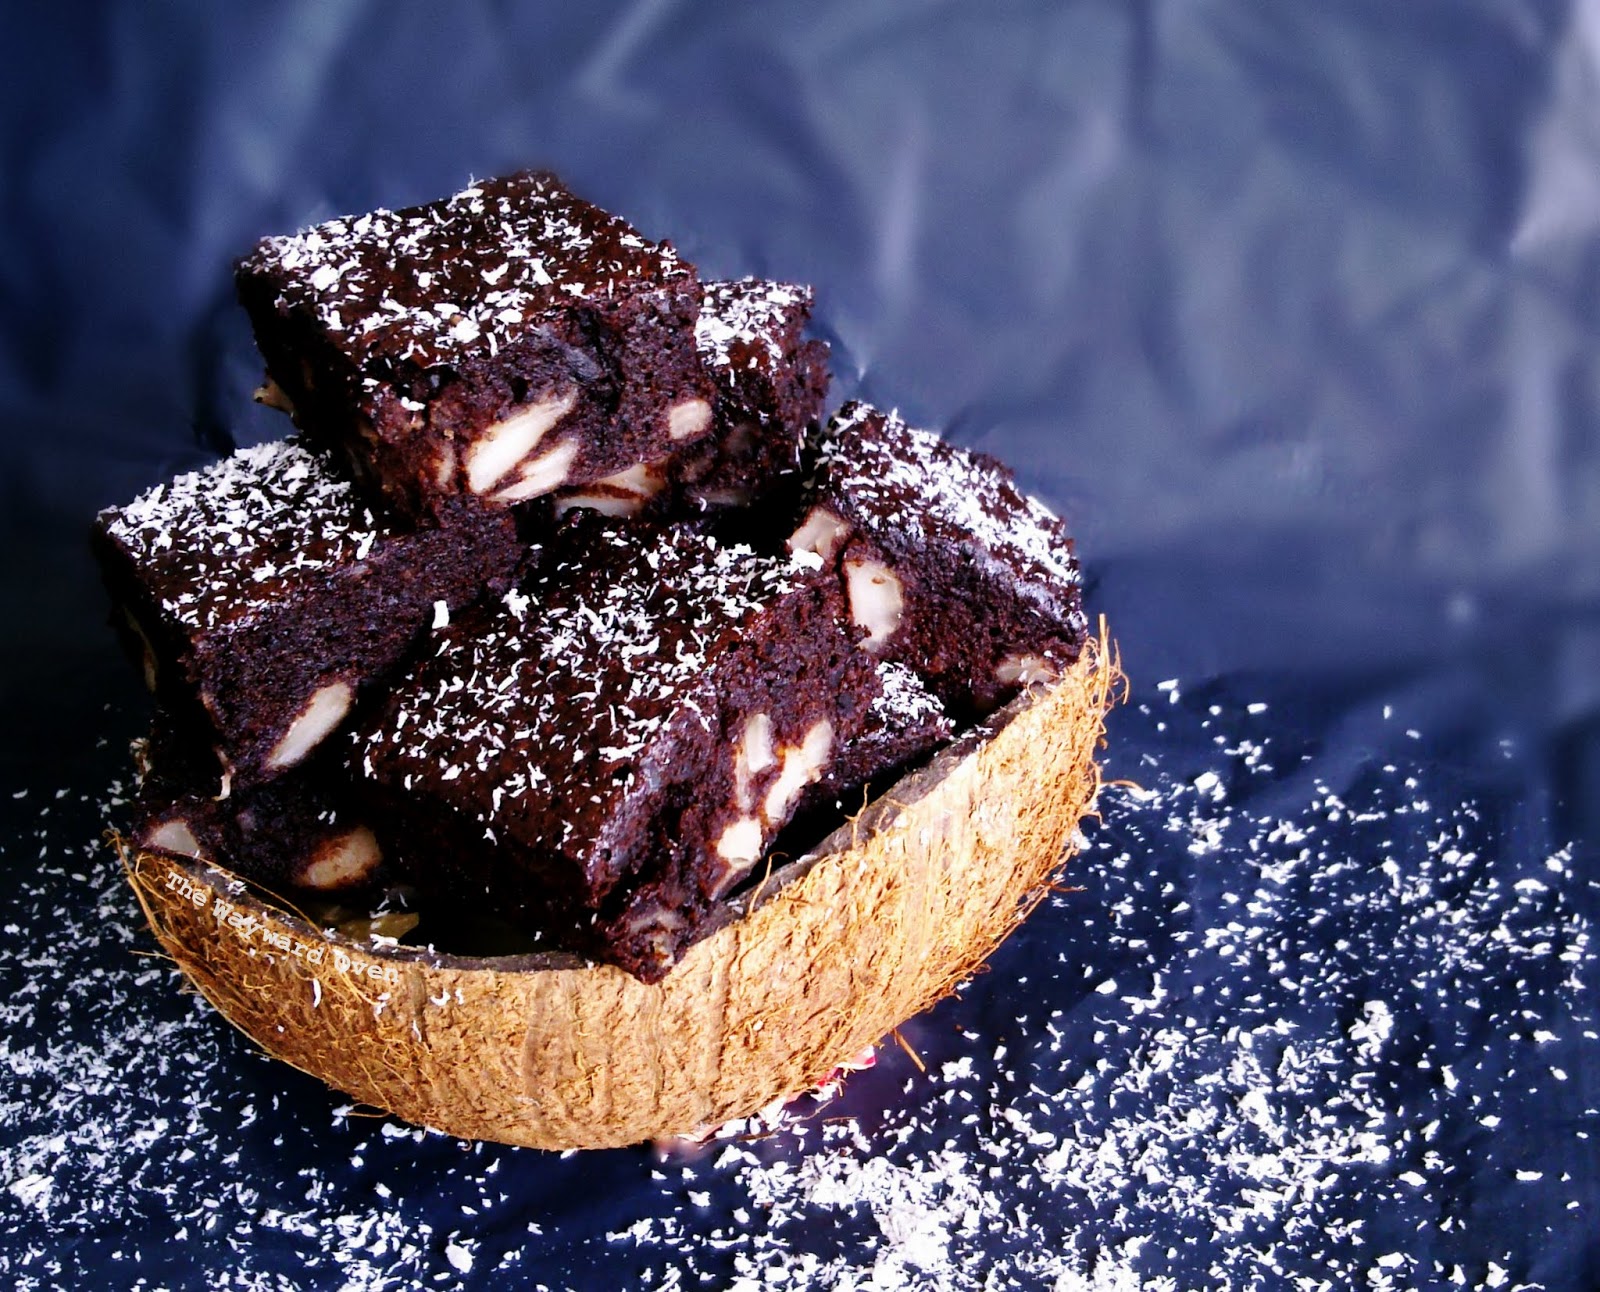
COCONUT NUT SOURDOUGH BROWNIES 
We've all been there. We get an idea for a dish in our head and we keep smelling and tasting it in our minds. We plan how to prepare it and what would go into it. And then we just have to run with it.
For me, it was coconut. I couldn't stop thinking of coconut and just had to use it in every way possible when Sourdough Surprises came up with the idea of brownies.
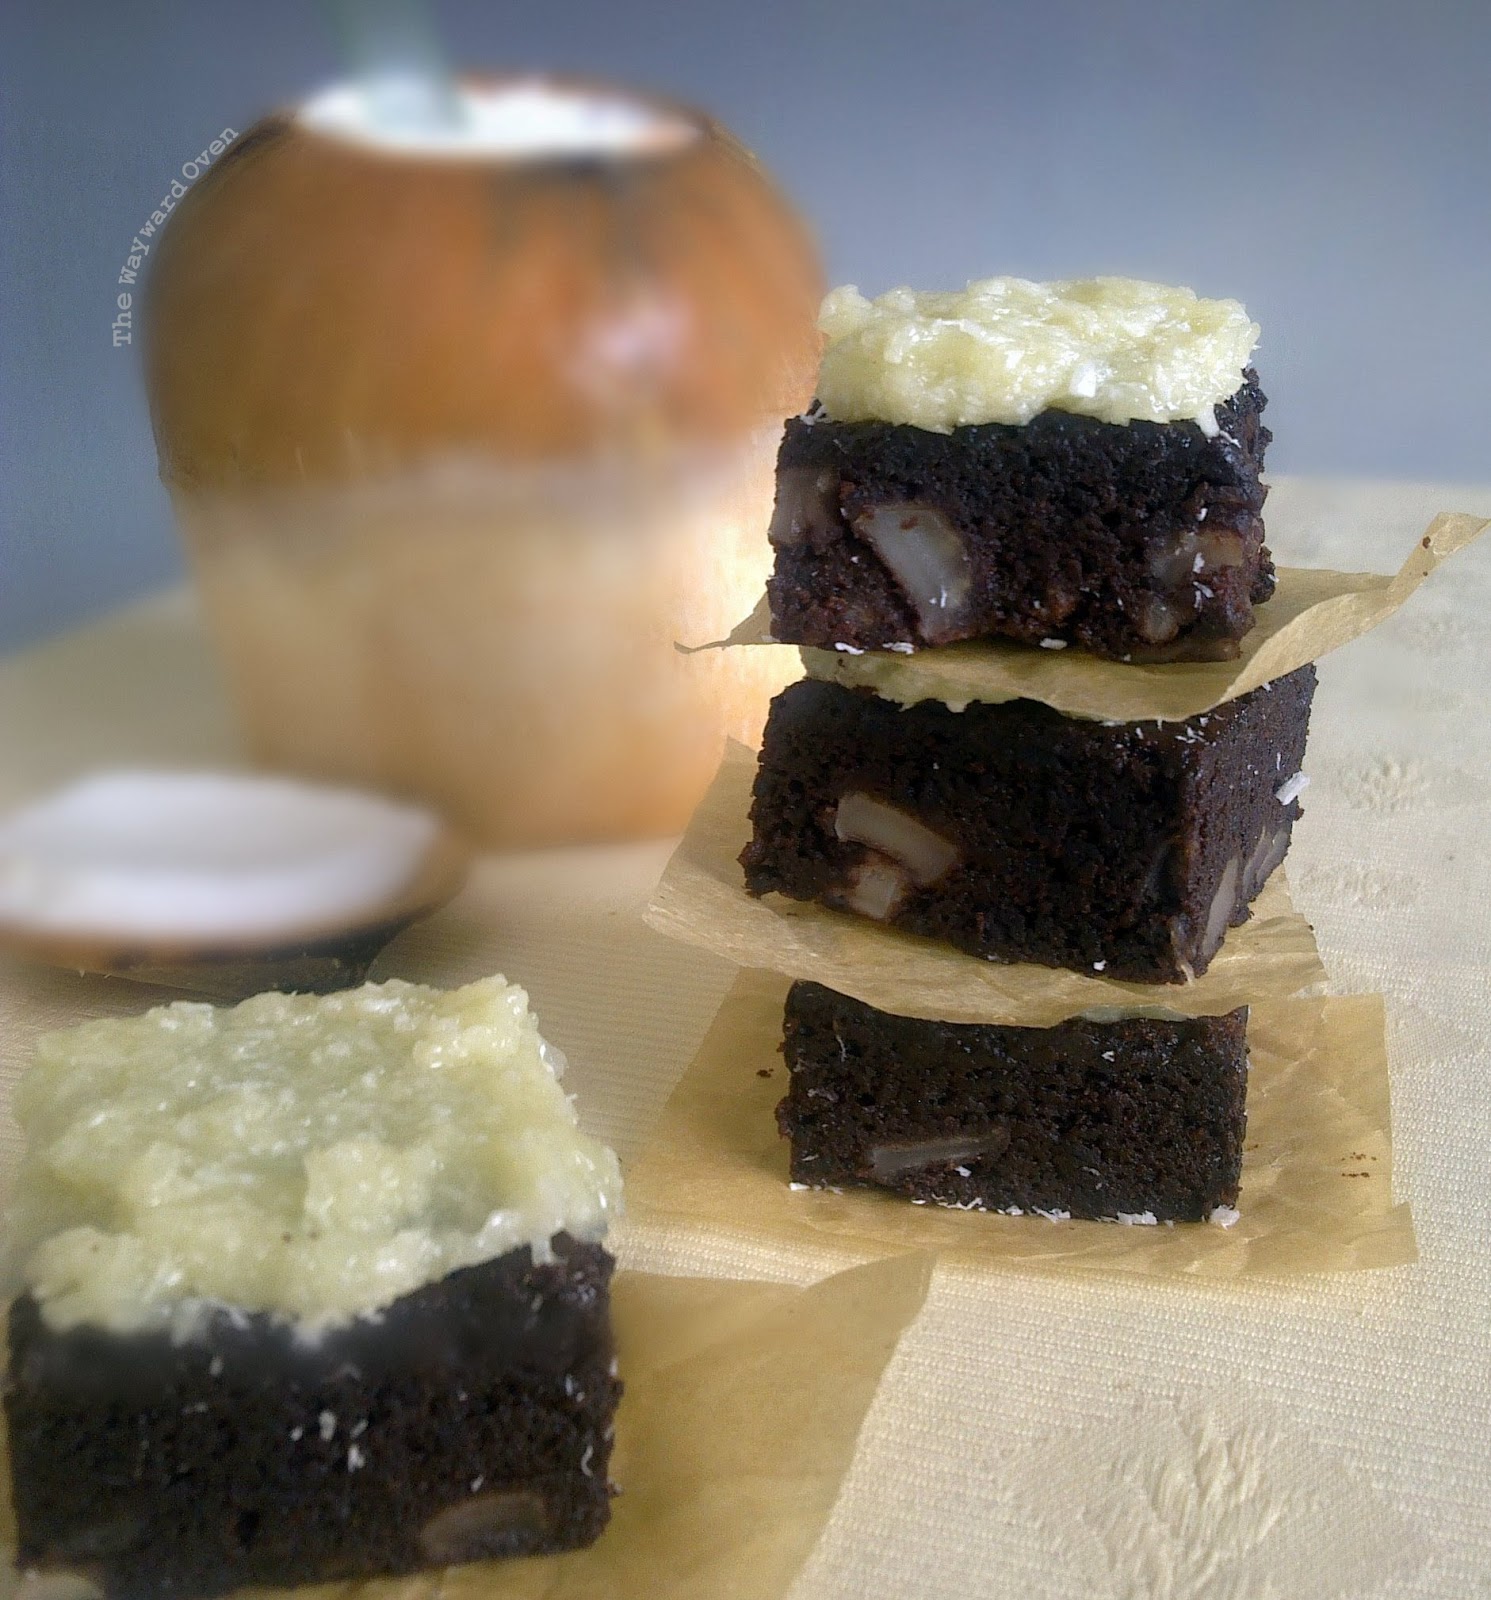
Since I've used the suggested recipe for sourdough brownies elsewhere with slight modifications, this time, I adapted a cocoa brownie recipe that I've been using for a long time because it is so good (adapted from Mad About Brownies by Barbara Albright and Leslie Weiner). I cut down on the flour and liquids to make up for what is already in the starter and then piled in the coconut elements by substituting them for ingredients in the original recipe: vegetable oil --> coconut oil; walnuts --> fresh coconut meat; buttermilk --> coconut cream; and almond essence --> coconut essence.
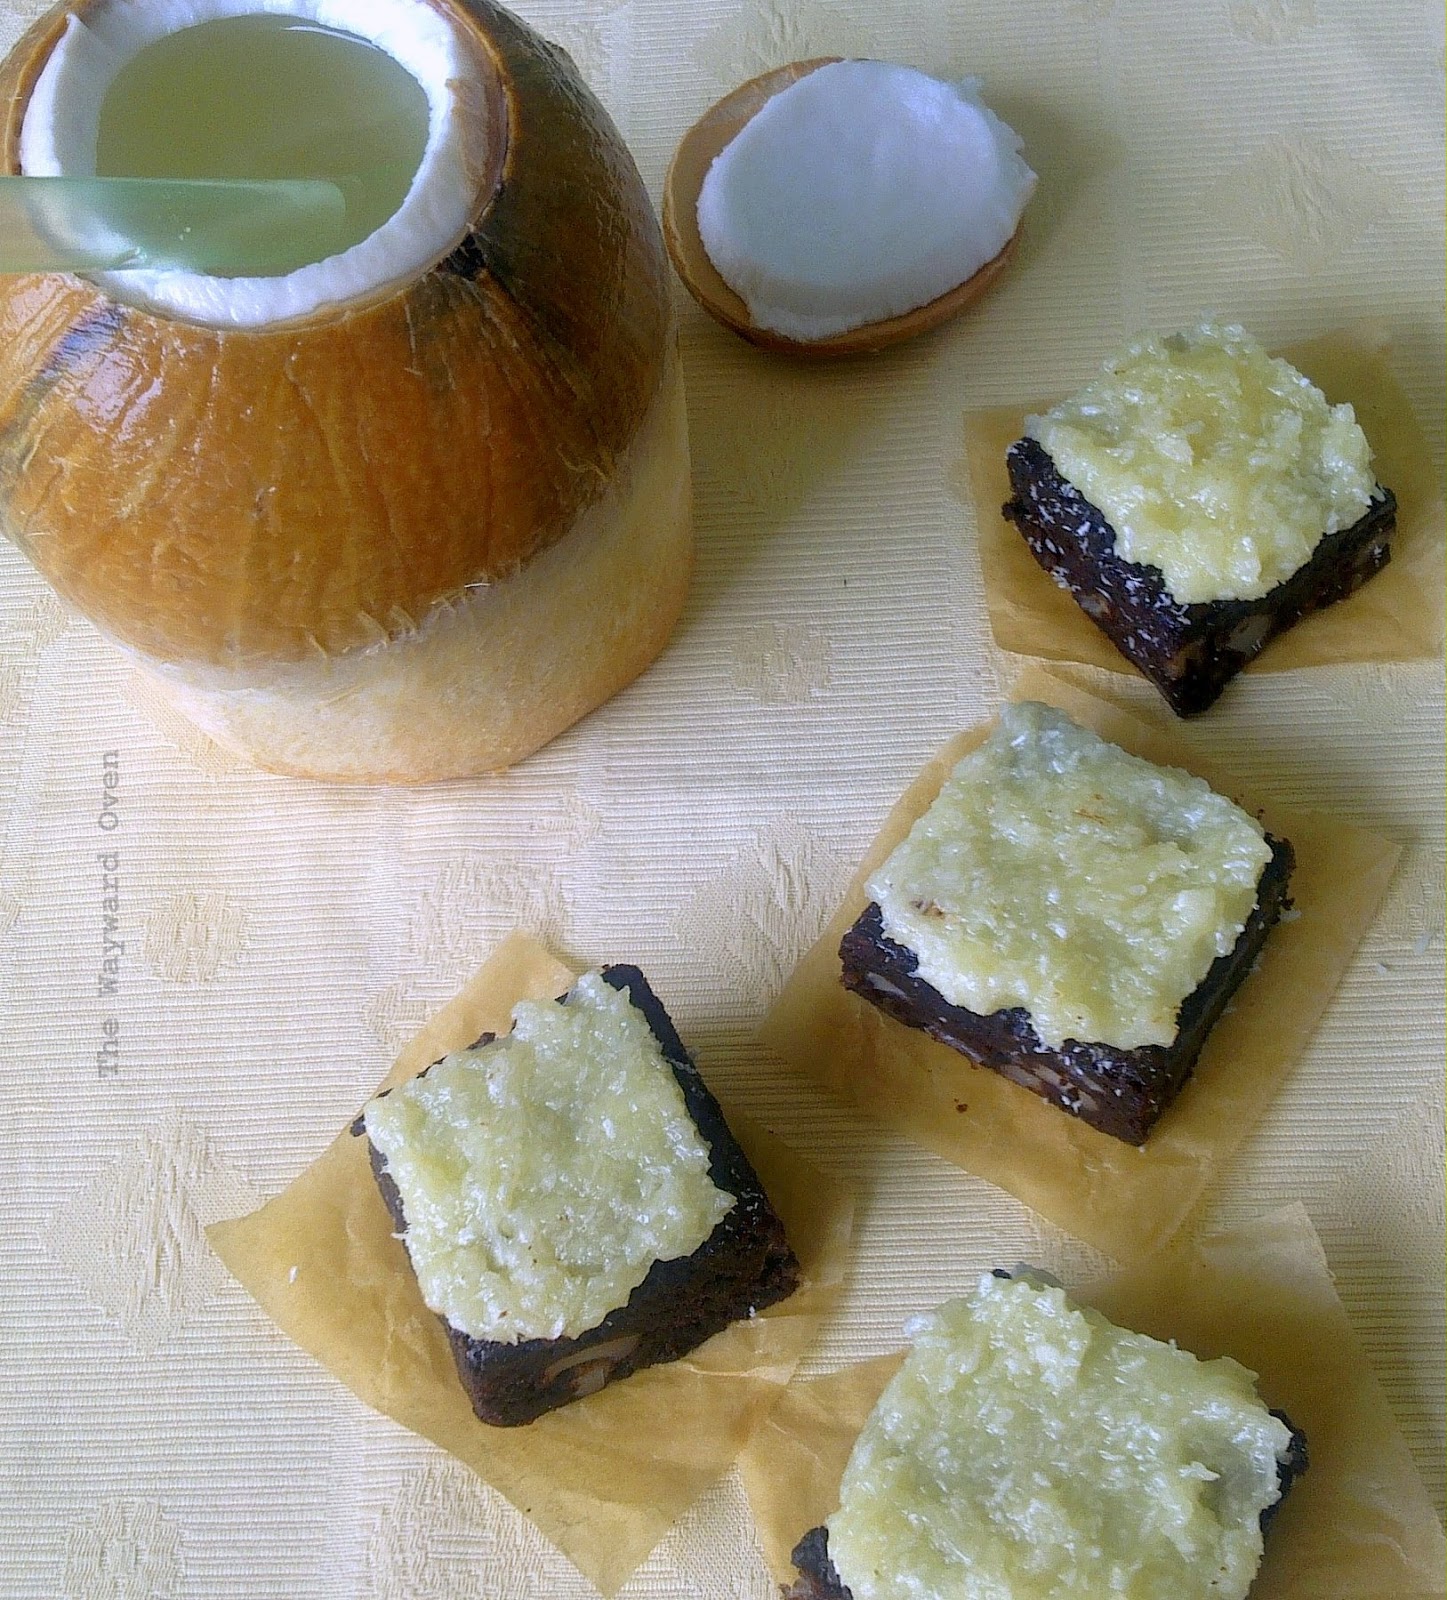
After tasting a few brownies, I decided there still wasn't enough coconut and made a coconut marshmallow frosting to add on top. In the end though, I have to admit the brownies were all right but not outstanding. They turned out cakey rather than with that desirable chewy crumb and crackled top. I've put down the recipe below but I will be tweaking it.
Check out what other brownies the Sourdough Surprises group made (new links will appear as posts are uploaded).


Have these brownies with a drink of cold coconut water straight from the shell
Coconut Nut Sourdough Brownies
Makes 16

Preferment
25g unfed leaven
55g bread flour
45g tepid water

Mix all the ingredients together, cover and set aside until slighly bubbly, 2-3 hours.

Final batter
25g all-purpose flour
¼ tsp baking powder
¼ tsp table salt
90g fresh coconut meat, roughly chopped
160g caster sugar
75ml coconut oil
1 egg
All the preferment (about 110g)
80ml coconut cream
1 tsp coconut essence
50g unsweetened cocoa powder, sifted

Preheat oven to 180°C. Grease a 20cm square baking tin and line the base and sides with parchment paper.
Sift the flour, baking powder and salt together. Toss the coconut meat with the flour mixture. Set aside.
In a mixing bowl, beat together the sugar, oil and egg until pale.
Beat in the preferment, coconut cream and coconut essence until just mixed.
Fold in the cocoa powder, followed by the flour-coconut meat mixture.
Pour into the prepared tin and bake for 35-40 minutes until a toothpick inserted in the centre comes out with just a few crumbs sticking to it.
Cool in tin on wire rack for 10 minutes, then remove from tin to cool completely. Best cut and served after storing overnight.
Take these brownies over the top with a coconut marshmallow frosting
Coconut Marshmallow Frosting
Makes about 1 cup

½ cup milk
1 tbsp butter
1 tbsp sugar
1 cup mini marshmallows
½ cup dessicated coconut

Place all the ingredients except the coconut in a small saucepan and heat gently until marshmallows are melted and mixture is smooth. Stir in the coconut. Spread while still warm on top of the brownies.

    Fasta sourdough pasta

    Friday, May 17, 2013

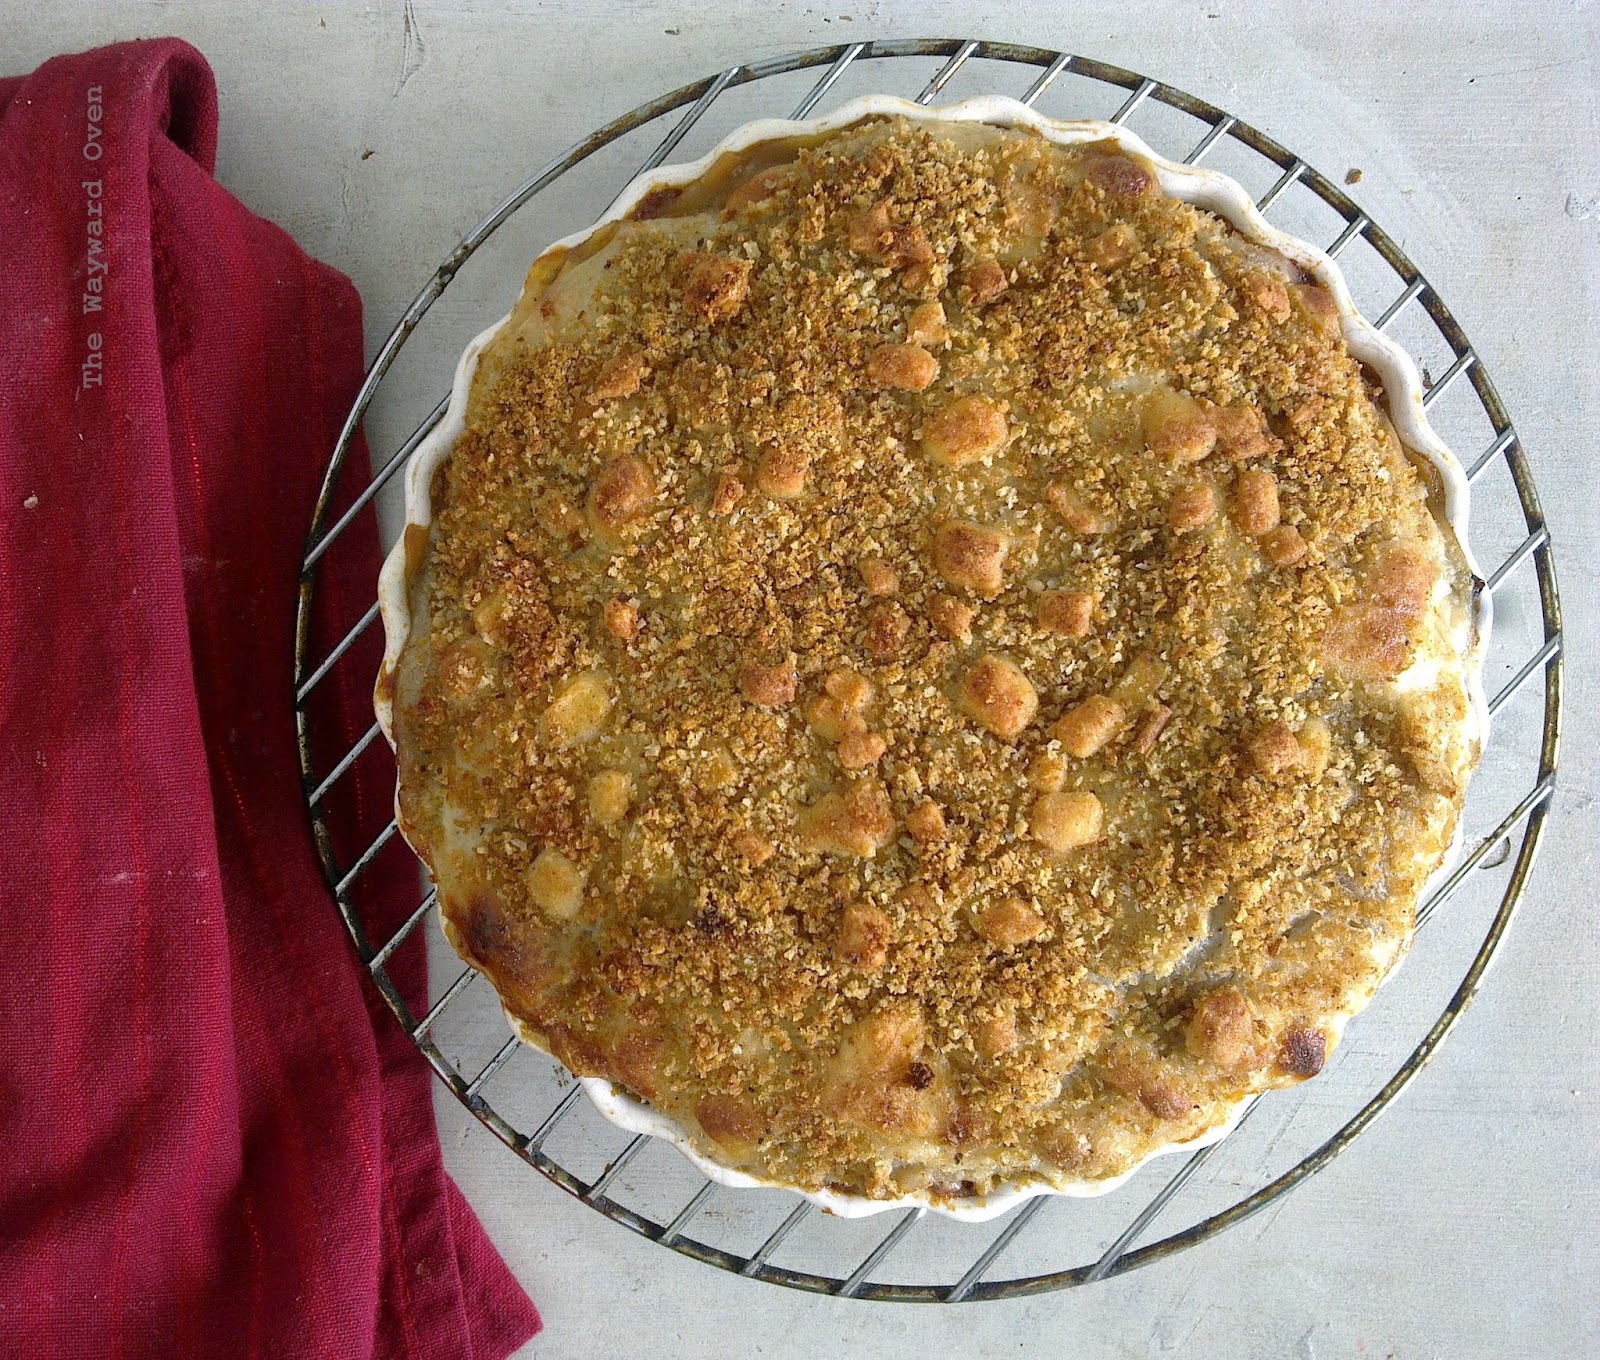
    VEGETABLE AND PASTA STRATA WITH SOURDOUGH PASTA 
    When Sourdough Surprises chose to make sourdough pasta for April, I was excited. I have a hand-crank pasta machine that rolls (and kneads) the dough and cuts the noodles, and I try to use it as often as I can, but to be honest, the machine only makes an appearance three or four times a year. A shame really, because although I like dried pasta and use it all the time, pasta made from scratch is a notch above.
    I actually made three flavours of dough and used them for various pasta dishes, but the posting date of April 20 came and went without a word from me. I'll get to the reason in a minute.
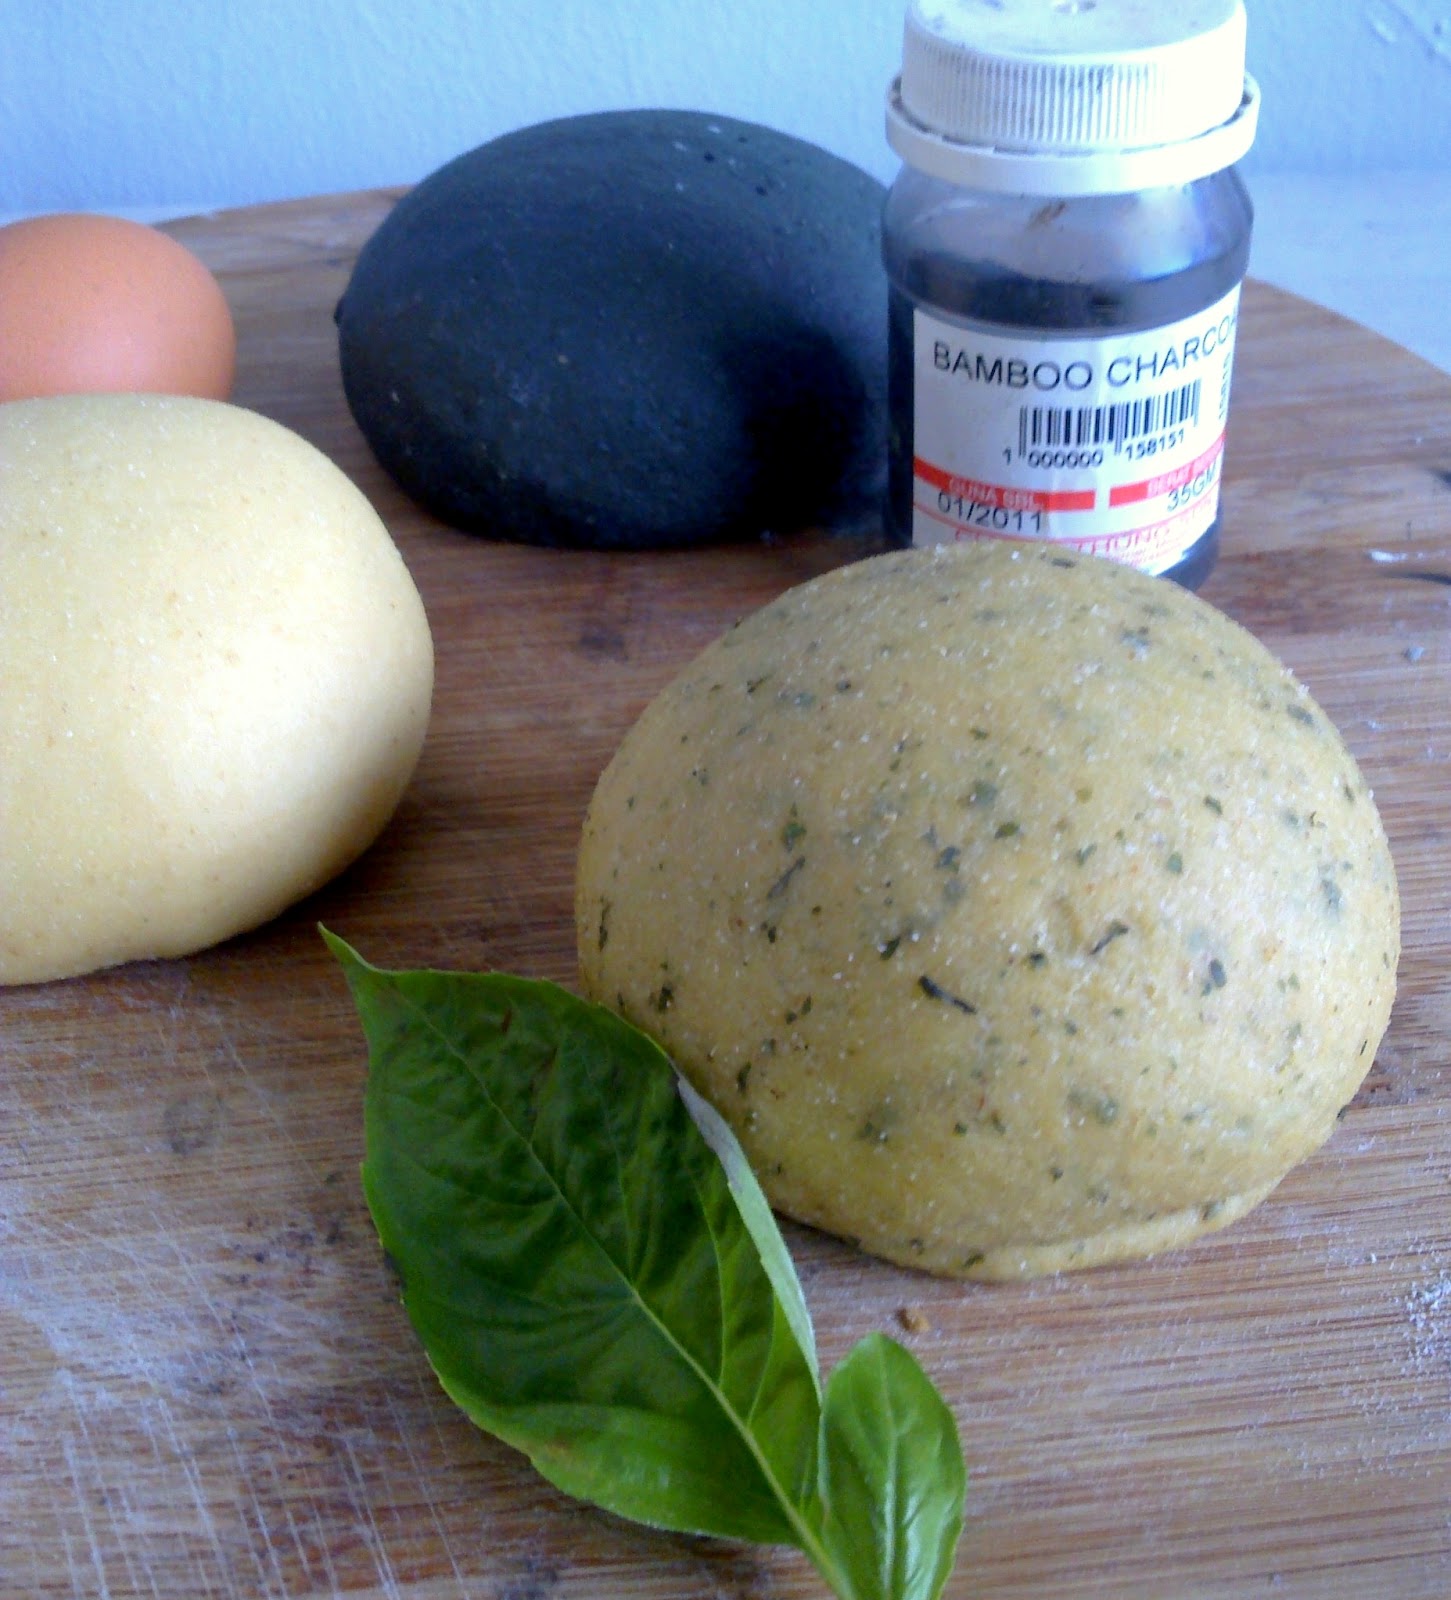
    I had made two of the sourdough pasta doughs with semolina (durum) flour and egg – one of plain, the other flecked with Thai basil. The third one, I thought I would like to try making my version of soba noodles and combined all-purpose and buckwheat flours with the addition of bamboo charcoal powder (no egg this time).
    Three flavours of sourdough pasta dough
    The egg doughs came together well, but not the black buckwheat noodles, possible because of the lack of eggs. The noodles broke up into little bits (they looked like orzo) almost as soon as they hit the boiling water.
    However, I realised something when I tasted all three noodles: they were extremely sour! Which meant there was a problem with my sourdough starter.
    I'm sure some people like that level of sourness, and in fact, it isn't extreme in a loaf of bread, but for the pasta dough that I made, it was almost like biting into a lemon.
    Anyway, the reason I didn't post on April 20 was because I was really busy and didn't have time to write up a post (we had our country's General Election on May 5 and there was a lot of activity before and after the date). But that gave me time to come up with a better tasting sourdough pasta. 
    I discarded over half the starter I have tended to for over two years, and fed the remainder every day for a few days. Maybe I'm just imagining it, but the bread dough I made recently appeared stronger and was more flavourful. I've also made sourdough cakes with the "new" starter, and the chocolate ones have been very good.
    So then, on to the sourdough revamp. I mixed the dough by hand, like I've illustrated here. For my vegetable strata (pan-fried courgette, eggplant and mushrooms, mustard cheese sauce and tomato sauce), I made just a plain egg (sour)dough, again with semolina, and the flavour of the pasta was at just the right level of sourness for me. I'll add flavourings next time.
    Cubed gouda cheese and breadcrumbs for the topping
    Fresh Egg Sourdough Pasta (Dough)
    Makes about 240g

    120g (about ¾ cup) semolina durum
    Large pinch of salt
    70g (a bit more than ¼ cup) unfed starter
    1 medium egg

    Flavourings (and colours)*
    2-3 tsp tomato paste (red)
    1 tbsp finely chopped basil (speckled)
    1½ tbsp puree of cooked spinach (green)
    A pinch of saffron threads mixed with 1 tbsp warm water (bright yellow)

    Place the semolina on a work surface. Sprinkle the salt on top and stir together with your fingers. Bring the semolina together into a mound, then make a hole in the centre. Place the starter and egg* into the hole and then gradually stir in the semolina with your fingers or a fork. Incorporate the mixture until no dry bits remain. 
    Knead the mixture; it will be crumbly at first but the semolina will soon absorb the liquids and the mixture will come together into a smooth ball. Leave in the work surface and cover with a clean tea towel. Set aside for 1 hour before rolling out and cutting into shapes by hand or a pasta machine.
    * If including flavourings, add with the liquids.

    Easter-slash-birthday cake

    Sunday, March 31, 2013

    MINT-CHOCOLATE MARBLE SOURDOUGH CAKE 
    HAPPY EASTER!

    10.30am: The troops are gathering. And by "troops", I mean my large family – who are far from doing anything together with military precision!
    Today, we're also having an early celebration of my nephew/godson's birthday which is on April 3. My mother asked him what cake he wanted, he told her he'd like a mint-flavoured cake, she asked me if I had a recipe for said cake... and in my family, "Do you have the X recipe?" is code for "Can you make the X?"
    I'm not complaining. I was going to make a crepe cake with a caramelised banana filling (I have a ton of frozen bananas), but that will just have to do for another day. This cake would have required more effort than a mint-flavoured cake anyway – all that standing over the stove and cooking 25 or more crepes.
    After successfully adapting the King Arthur Flour chocolate sourdough cake recipe for a two-toned matcha sourdough cake, I decided to make the mint cake the same way, this time marbling two colours as well as two flavours.
    The un-iced cake
    And so I made a plain white sourdough cake batter and divided it. I flavoured one portion with peppermint and coloured it a soft green with food gel, and added cocoa powder to the other portion. The batters were then layered in a baba pan and swirled by cutting through them with a butter knife as the pan is rotated once. Just eight knife cuts are sufficent. The sourdough batters are thicker and stickier than normal cake batter, so there might be a tendency to swirl more than normal.
    I tasted some crumbs when the cake was done, and there was a nice combination of mint and chocolate – which would be more pronounced once I added the two icings. But I couldn't tell what the inside would look like until my nephew cut it at his party.  
    To be continued after the cutting of the cake...

    The swirls in the crumb; (inset) embarrassing the just-turned-teenager with little-girl candles
    5.52pm: The swirls on the inside of the cake didn't come out as evenly as I had hoped but they were all right. My nephew was very pleased with the minty taste, and that is all that matters to me.

    Sourdough Surprises: Create waves with cake

    Wednesday, March 20, 2013

    TOPOGRAPHIC MAP SOURDOUGH CAKE 
    When it comes to making sourdough cakes, many recipes say to just add unfed starter straight from the fridge. It's certainly as quick a method as making any creamed cake.
    But from experience, I've found that a well-fed bubbly starter gives cakes better rise and lightens them. It takes at least two days to make the cake, but I think it's worth it.
    So when Sourdough Surprises suggested cakes this month, I got started immediately. I've made chocolate, banana, and carrot sourdough cakes before and it would be a different flavour this time – I decided on matcha – but I also wanted an interesting appearance.
    At first glance, this looks like any layer cake, but the design is actually made in an unusual way. I'd seen this cake with the wavy pattern on a few blogs and was intrigued. The original cake is just a rich butter cake and in Malay, it's called "Kek Alunan Kasih" – which leads me to believe that it may be a Malaysian invention – and this is translated as Waves of Love Cake. "Alunan" is also the word for "melody", which makes sense too since the pattern does look like sound waves. (Or perhaps something you might see on a heart monitor?) I didn't do the effect so well, but take a look at these better examples.
    One blogger mentioned that it looked like a topographic map – as in geography – and that's the description I like best.
    The outside of the cake (left); the waves in the crumb 
    The process of creating the strata and waves is not difficult, but it is a bit fiddly. The cake batter – which has a dropping consistency – is divided and coloured, and after each layer, cocoa powder is sifted on top before another layer of cake batter is put on. The difficulty is in trying to level the batter over the cocoa powder without disturbing it. However, you don't want to make the layers too smooth because then the wavy effect would be lost. You can taste the cocoa but it's not very prominent.
    Even without the strata, the cake is good on its own. The layers can be any colour (and from that link I provide above, you can see some kooky tie-dye combinations!) and the cake can be any flavour (the matcha powder is my cake provides the flavour and colour). I based it loosely on the sourdough chocolate cake from King Arthur Flour which I made some time ago, replacing the cocoa powder in the batter with all-purpose flour. This is a good basic recipe, and lends itself to other flavours.


    Create waves with this cake
    'Topographic Map' Sourdough Matcha-Vanilla Cake
    10-12 servings. Cup measures are approximate.

    Preferment
    90g (½ cup) refreshed 100%-hydration sourdough starter
    110g (½ cup) whole milk
    150g (1 cup) all-purpose flour

    Final batter
    60g (6 tbsp) all-purpose flour
    ½ tsp salt
    ½ tsp baking powder
    ½ tsp baking soda
    140g (¾ cup) caster sugar
    110g (½ cup) butter, softened
    1 medium egg, at room temperature
    1 tsp vanilla extract
    1½ tsp matcha powder, mixed with 1 tbsp of water into a paste

    Wave pattern
    2½ tbsp unsweetened cocoa

    Combine the starter, milk and flour in a large mixing bowl. Cover and store in the refrigerator overnight or let rest at room temperature for 2-3 hours. If chilled, take it out of the fridge an hour before proceeding with the final batter.
    Preheat the oven to 170°C. Lightly grease and base line a 20cm by 11cm (8"x4½") loaf pan.
    Sift the flour, salt, baking powder and baking soda together in a bowl. Set aside.
    In a large bowl, beat together the sugar and butter until light and fluffy.
    Cut the preferment into four or five pieces. Beat one piece at a time into the butter mixture, blending well each time. Beat in the egg and vanilla. Fold in the flour mixture. The batter will have a soft dropping consistency.
    Divide the batter into two equal portions and place in separate bowls. Take about 2 tablespoons from one portion and mix with the matcha paste. Blend this mixture into that same half-portion of cake batter.
    How to create the layers
    Spoon half of the white batter into the prepared cake pan and smooth the surface (1). Sift one-third of the cocoa powder evenly over the top of the batter (2). Using half of the green matcha batter, distribute small dollops all over the cocoa powder (3) and then spread them out without disturbing the cocoa powder (4). Sift another third of the cocoa powder over this batter. Repeat the layering process with the white batter, then the remaining cocoa powder (5) and finish with the matcha batter on top (6).
    Bake the cake for 30 to 40 minutes, until the top springs back when lightly pressed in the centre, and a toothpick inserted into the centre comes out clean.
    Remove the cake from the oven, and set it on a rack to cool for 10 minutes, then remove from tin and cool completely on the rack. Best to allow a day before eating.