The Oven has baked its last loaf. This blog is no longer being updated.

My cooking videos appear at youtube.com/janeragavan

I write on food at star2.com

Showing posts with label mains. Show all posts

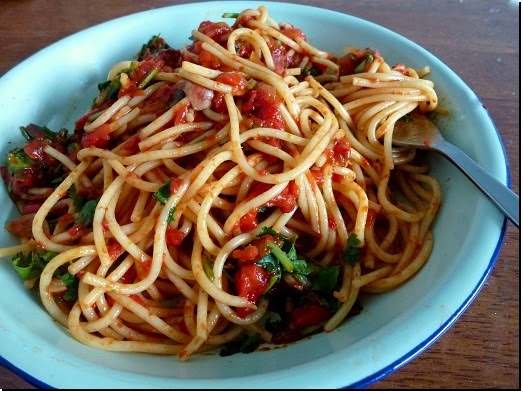
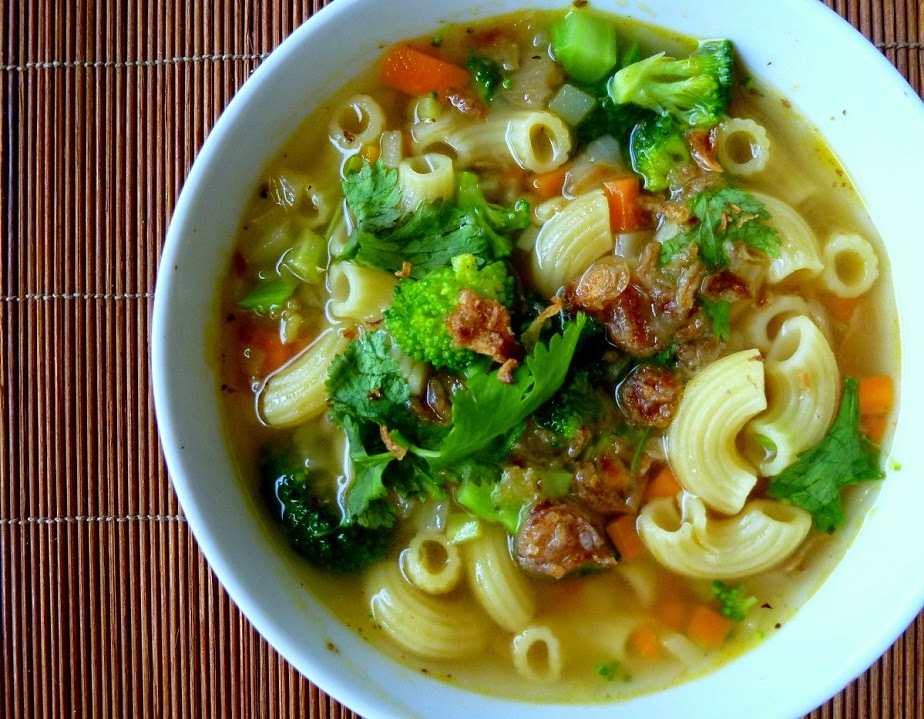
Spiced macaroni soup

Saturday, December 13, 2014

I never thought this recipe would get the reception that it did when I put it up on my newspaper's website, but it did so I thought I would put it up in this space too.

Spiced Macaroni Soup
Serves 3

3/4 cup elbow macaroni
1/2 cup broccoli, cut into small florets (optional)
1/4 cup finely diced celery
1/4 cup finely diced carrot
1/4 cup finely diced onion
1 large garlic clove, minced
1cm fresh ginger, peeled and bruised
1 stalk lemon grass (white part only), bruised
1 cinnamon stick
1 star anise
1-2 bird's eye chillies (cili padi)
750ml water
salt or soya sauce, to taste

Spice powder*
1/2 tsp white peppercorns
1/4 tsp fennel seeds
1/4 tsp cumin seeds
1/4 tsp coriander seeds
2 whole cloves

To garnish
fried shallots (store-bought)
torn coriander leaves
Cooked the macaroni in boiling salted water until firm to the bite (al dente). Rinse in cold water, drain and set aside.

Pound or grind all the ingredients for the spice powder with a little salt into a powder.

* If you do not want to grind the whole spices, get each one in powdered form and mix them together. 

Heat a tablespoon of oil in a medium pot. Add diced celery, carrot and onion and fry over medium heat until the onion turns translucent (do not let the vegetables brown), 8-10 minutes. Add the garlic, ginger, lemon grass, cinnamon stick, star anise, bird's eye chilli and half the spice powder. Cook for 1 minute, then add the water, cover and bring to the boil.

Taste and add salt or soya sauce and more of the spice powder, if desired. When you're happy with the seasoning, add broccoli florets and cook for 30 seconds. Turn off heat.

Divide the cooked macaroni between three bowls and pour in the soup. Garnish with fried onion and coriander leaves.


Asian-style braised beef with orange and yam

Wednesday, July 2, 2014

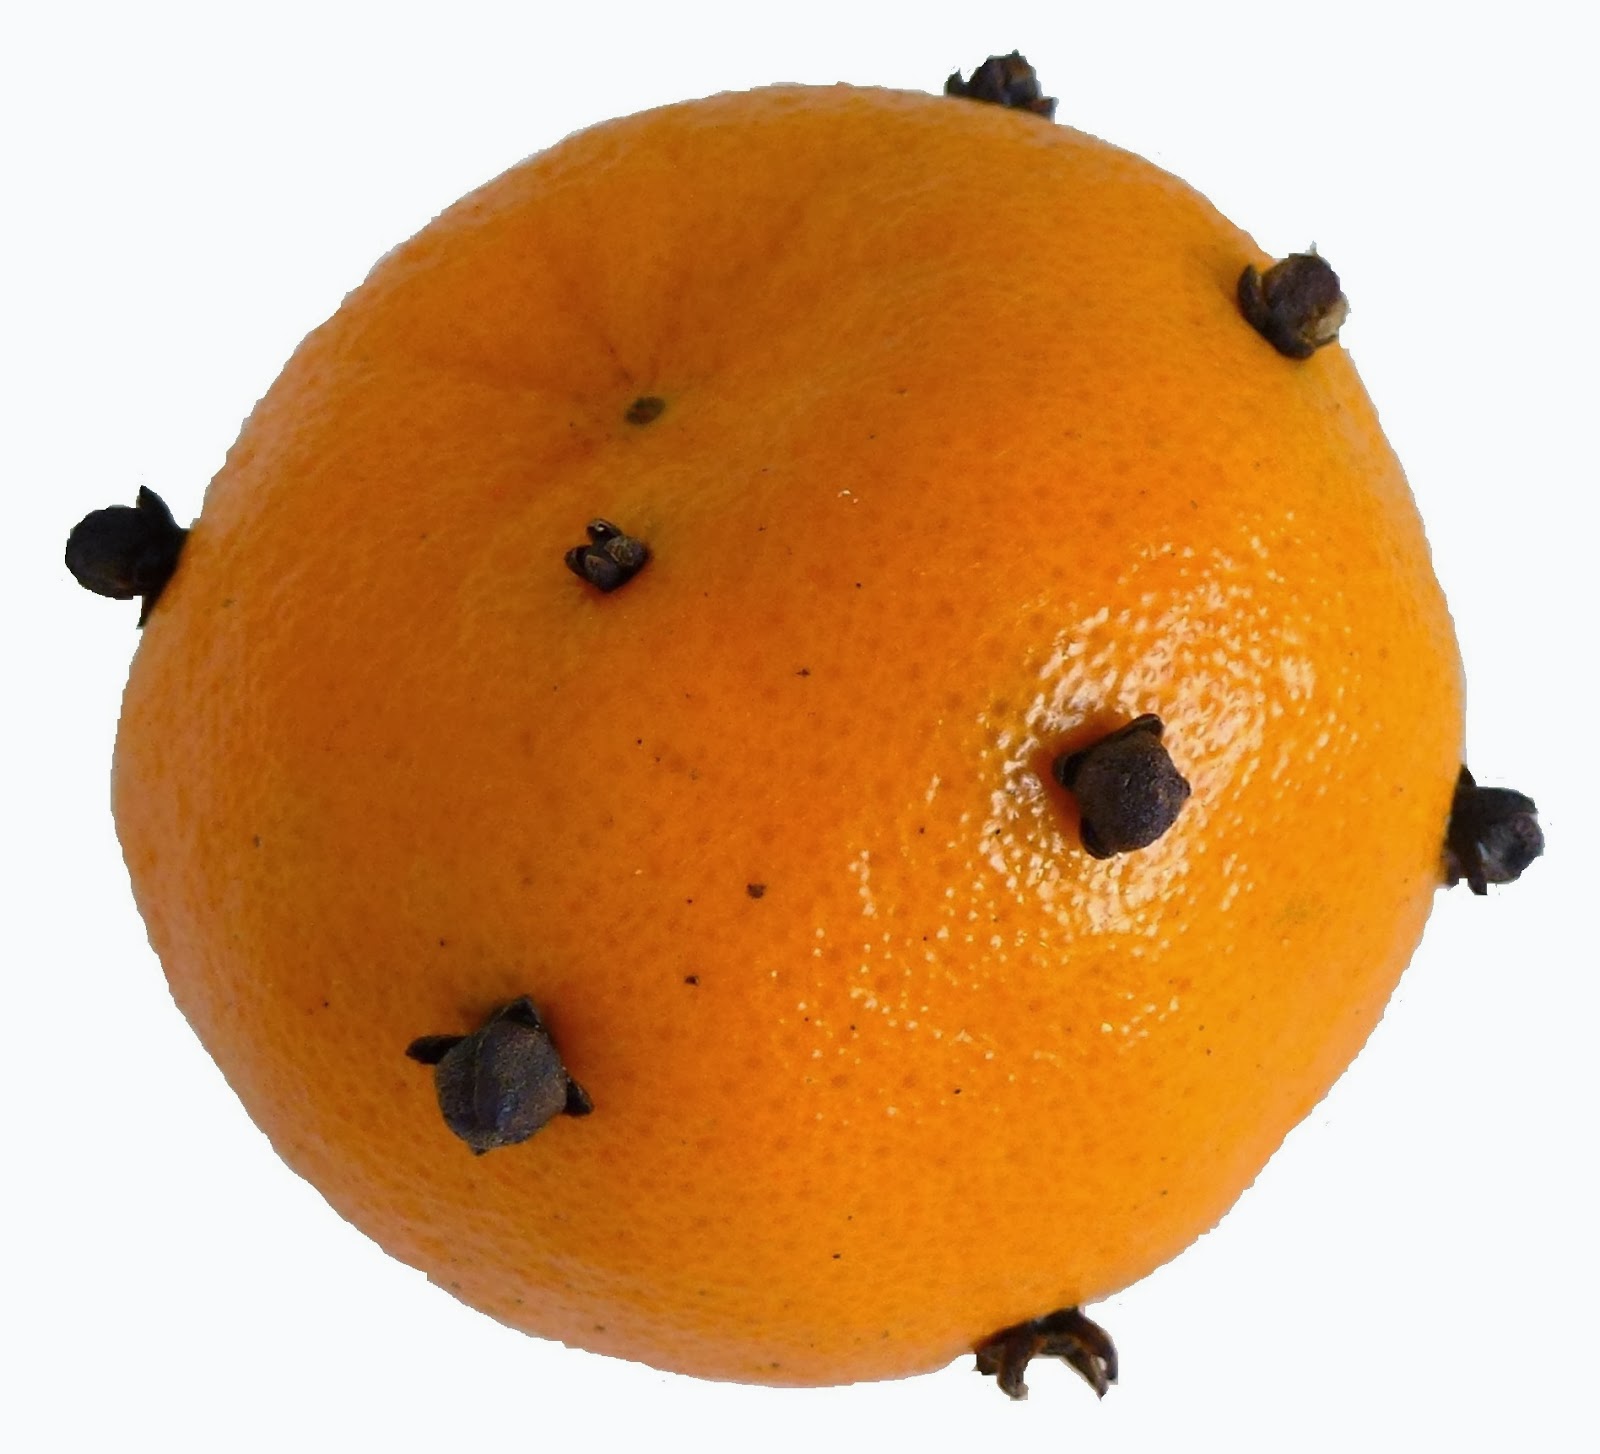
I made this dish months ago. It was for an article on how to use up Mandarin oranges left over from Chinese New Year ~ which was in January. Since I had the picture, recipe and a blog that hadn't been updated in a while, I thought why not plonk this in.

Asian-style Braised Beef With Orange
Serves 5-6
2 medium oranges
15 cloves
450g braising steak, cut into 3cm cubes
1 tbsp all-purpose flour
2 tbsp black vinegar
2 tbsp soya sauce
1 tbsp Chinese rice wine (optional)
1 tsp whole Szechuan peppercorns, ground
1 1/2 tbsp tomato purée
1 large clove garlic, minced
2 medium onions, peeled and cut into wedges
2 cinnamon sticks
4 whole star anise
1 beef stock cube
300g yam (taro)
Cooking oil
Celery leaves (daun sup), finely chopped

Wash the oranges well. Dry them and stud with the cloves.
Dab the beef cubes with paper towels to dry them. Dredge them in the flour.
In a bowl, combine the vinegar, soya sauce, rice wine (if using), ground peppercorns and tomato purée.
Heat two tablespoons of cooking oil in a large heavy pot. Fry the beef cubes so they are brown all over. Do this in batches and do not crowd the pan. Remove beef from the pan and set aside.
Drain most of the oil from the same pan and add the garlic and onions. Sauté briefly, then add the combined sauce, cinnamon and star anise. Let it come to a boil and return meat to the pot; add just enough water to cover the cubes.
Stir in the stock cube and drop in the two clove-studded oranges. Cover the pot, bring to the boil, then turn down the heat to low and simmer, covered, until the meat is tender and the sauce has thickened, 60 to 90 minutes. Scrape the bottom of the pot now and then so there’s no sticking.
Meanwhile, peel the yam and cut into 1cm-thick wedges.
Scoop out the oranges into a large sieve placed over the pan. With the back of a wooden spoon, press them to extract the juice. Discard the mashed oranges. Taste the sauce and adjust seasoning.
Add the yam to the pot, cover and cook until tender, another 10 to 15 minutes.
Sprinkle beef with celery leaves and serve with steamed rice.

Holy moly! Thai basil chicken stir fry

Tuesday, June 3, 2014

I don't use enough Thai holy basil in my cooking ~ but I aim to make up for that omission by cooking this stir fry as much as I can. It's called pad kra pao gai in Thai, and according to this site (from which I also got the recipe), the chicken can be substituted with pork, prawns and even tofu. Being a stir fry, it is a quick dish to make. The chicken is flavoured with common ingredients, and it is the Thai basil leaves that really give it that extra bite. I have added chunks of boiled potatoes to the dish and probably more basil leaves than the recipe called for. It was a hearty meal.

The Guardian's sardine pasta with tweaks

Thursday, May 29, 2014

In Malaysian kitchens, tinned sardines in tomato sauce are a store-cupboard staple. Not in mine though, I'm not even a bit of a fan although I did grow up eating the stuff. My mother used to make sardine curry with peas and potatoes to eat with chappati, and would also fry it with rice. I guess my childhood taste for tinned sardines has waned. But fresh sardines? Gimme. And tinned sardines in oil. Oh yes. I saw this recipe on The Guardian website and made the dish with a few tweaks. The onions are sliced, not finely chopped; had run out of fennel seeds so used a spice mix from Turkey; and no pine nuts but never mind. I used craisins instead of sultanas because I had a huge bag of them from my US trip, but I don't think they added much to the dish.

Chilli tuna chappati taco

Wednesday, May 14, 2014

A can of chilli tuna is fit for a meal. This dish is like a taco, only I used homemade chappati instead of tortilla for the wrap. One of the things my sister asked for from Malaysia when I visited her in the US recently was Ayam brand chilli tuna. This is the best of all the flavours in the range, we think. At first I got the full-fat variety but she wanted the one with 33% less fat, which meant it was down to me to use up the unwanted cans. Oh, how troublesome... Not! She likes to have her chilli tuna this way, so I followed her cue. This one has roasted red pepper sauce, fresh avocado, cucumber and basil leaves, and a squeeze of lime along with the tuna. Simple and delicious.

I'm looking forward to eating a lot more fish ~ the fresh variety ~ over the next few days. I'll be covering the Noosa Food Festival in Queensland, Australia, and will probably return home 5kg heavier!

Soba noodle soup with squid balls

Sunday, May 11, 2014

Some time ago, my colleague Ivy got a copy of Jamie's 15-Minute Meals to review. I decided to try my hand at one of the recipes too and chose the sticky squid balls, grilled prawns and noodle broth. It took me 19 minutes to make the dish, but I think it could have been within the time frame had I used two cooking pans as the recipe asks for. I didn't like the amount of washing up I had to do afterwards but that's another story. What I did particularly like about the dish were the squid balls ~ squid meat blitzed with chilli, ginger, coriander stalks, and salt and pepper, formed into balls and pan-fried ~ which were easy to make and delicious. When I made them again for the bowl of noodles here, I put all the ingredients together without even measuring and they were just as good.

Hold the meat: Spaghetti with roasted red pepper sauce

Saturday, April 26, 2014

I think I have eaten the equivalent of a normal year's intake of meat in the past week or so. I'm being a bit melodramatic, of course, but once a week is normal for me ~ it's unusual to eat meat every day and completely abnormal to have it for two meals in one day! But that's how I ate in America while visiting my sister and her family. And so it's spaghetti with roasted red pepper sauce today ~ I made and froze the sauce before I left on holiday. Got in at three this morning and had already planned what to eat. Talk about having food constantly on the mind!

Two-step mushroom lentil ragu

Monday, April 14, 2014


If portobello mushrooms weren't so expensive, I'd cook them three or four times a week. Unlike other fungi, portobellos don't disintegrate so easily or shrink when cooked in dishes like stews. They have such an intense flavour, even being compared to meat; and like meat, benefits from being seared before being added to stew-like dishes. That is what I did when I made this mushroom and lentil ragu: braise green lentils in a chilli tomato-based sauce; separately fry thickly sliced portobellos and flavour with soya sauce; combine the two components and simmer for a bit before tucking in. I served them (to myself!) with potato-cheese pierogies only because I had a stash of those and needed to clear out the freezer. Portobellos play second fiddle to no one.


Lunch: Deconstructed sushi

Sunday, November 24, 2013

DECONSTRUCTED SUSHI 
I was going to make sushi rolls for lunch today and then decided to try Ivy's deconstructed sushi (mixed sushi platter), which she wrote about for our newspaper column.
Of course, Ivy uses salmon in her dish and I just have surimi or imitation crabsticks (though they're a good quality variety) – the poor (wo)man's version, I suppose.
I can't believe I actually faffed about with the shredded omelette though. Normally, I would just pour beaten egg into a pan, give it a swirl, then just dump it on a plate. Here, I actually took the time to season the egg and water combination with instant dashi, cooked it over a low heat in a covered pan, rolled it up and sliced it thinly. I have to admit though that the egg had a much better taste and texture.
(I didn't plan it, but doesn't the composition of the photo look like Mickey Mouse falling over after being speared in the ear ?)

Tamarind squid pasta

Friday, November 8, 2013

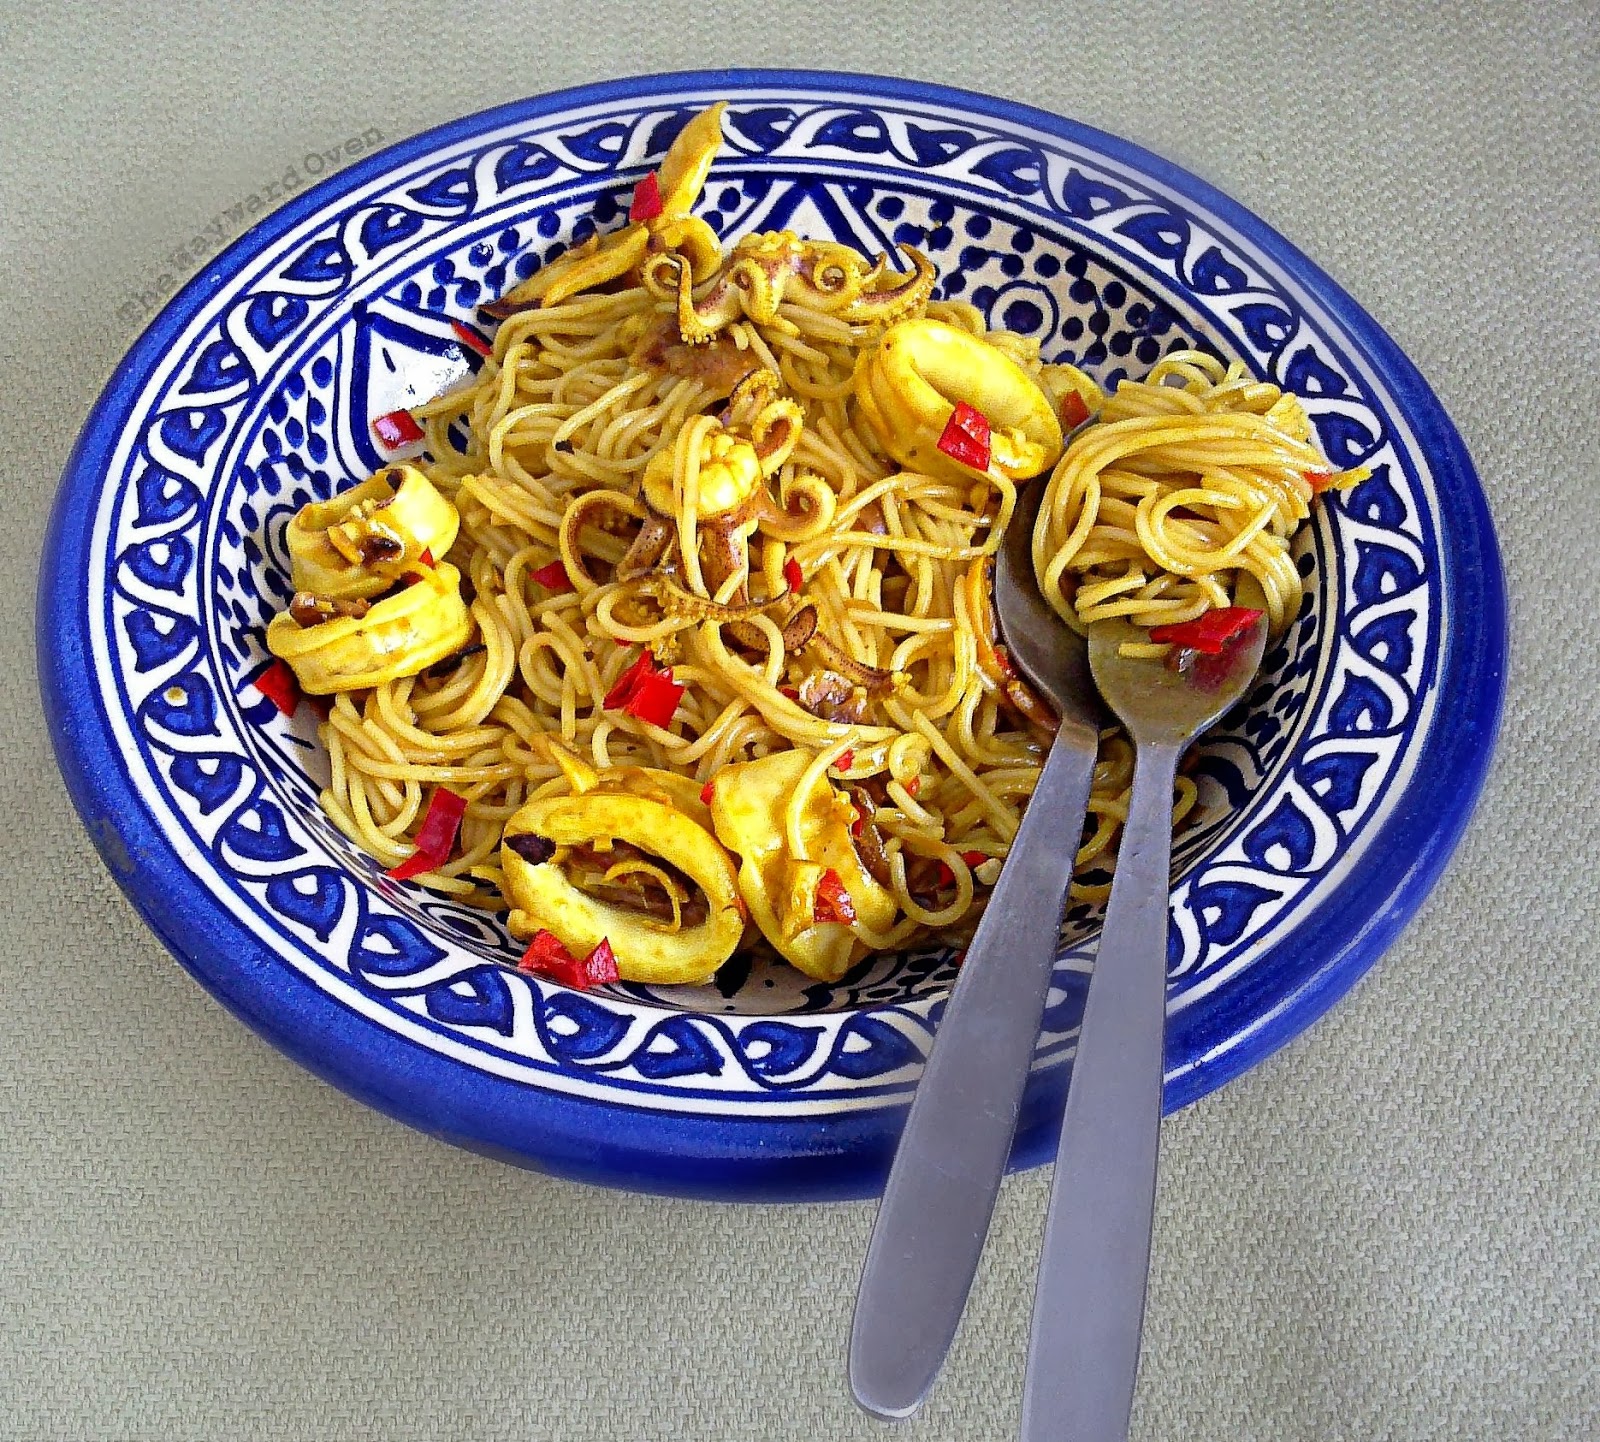
TAMARIND SQUID CAPELLINI 
This is a scheduled post.
I can't believe I have never posted on one of my favourite dishes, tamarind squid chilli pasta. I guess I think of it as everyday food, so it isn't so unusual that it needs to be featured. But I have posted on more mundane things before, and this really is a good, quick recipe, so why not.
If the dish looks a little yellow in the picture, that's because I had "preserved" the squid with turmeric powder. My friend Mumtaj told me about doing this when storing uncooked seafood. 
If there's time, I like to grill the tamarind-marinated squid until blackened and caramelised. That's even more delicious. But when I can't wait, it's a quick stir-fry.

Tamarind Squid Chilli Spaghetti
Serves 2

2 tbsp tamarind pulp or 1 tbsp tamarind paste
200g squid (3 medium), cut into 1.5cm rings (leave tentacles whole)
½-1 tsp sugar (preferably palm sugar)
A dash of white pepper
½-1 tbsp fish sauce
1 tbsp cooking oil
2 cloves garlic, sliced into thin chips
1-2 red bird's eye chillies, minced
1 stalk lemongrass (white part only), sliced thinly (optional)
2 servings of cooked spaghetti or other long pasta (reserve about ¼ cup of the cooking water)

Pour a little warm water on the tamarind pulp. Massage to loosen the seeds and pulp. Reserve the pulp but discard the seeds and tough fibres.
Combine the squid, tamarind pulp or paste, sugar, pepper and fish sauce in a bowl. Cover and set aside for 30-60 minutes.
Heat the oil and add the garlic chips. Fry until golden and crisp. Add the chillies and lemongrass and fry briefly, then add the marinated squid. Toss the squid around until cooked (the tentacles will curl). Add a little reserved pasta water to make it saucy (ahem!), then add the cooked spaghetti. Toss together and serve.

Ayam Percik

Saturday, November 2, 2013

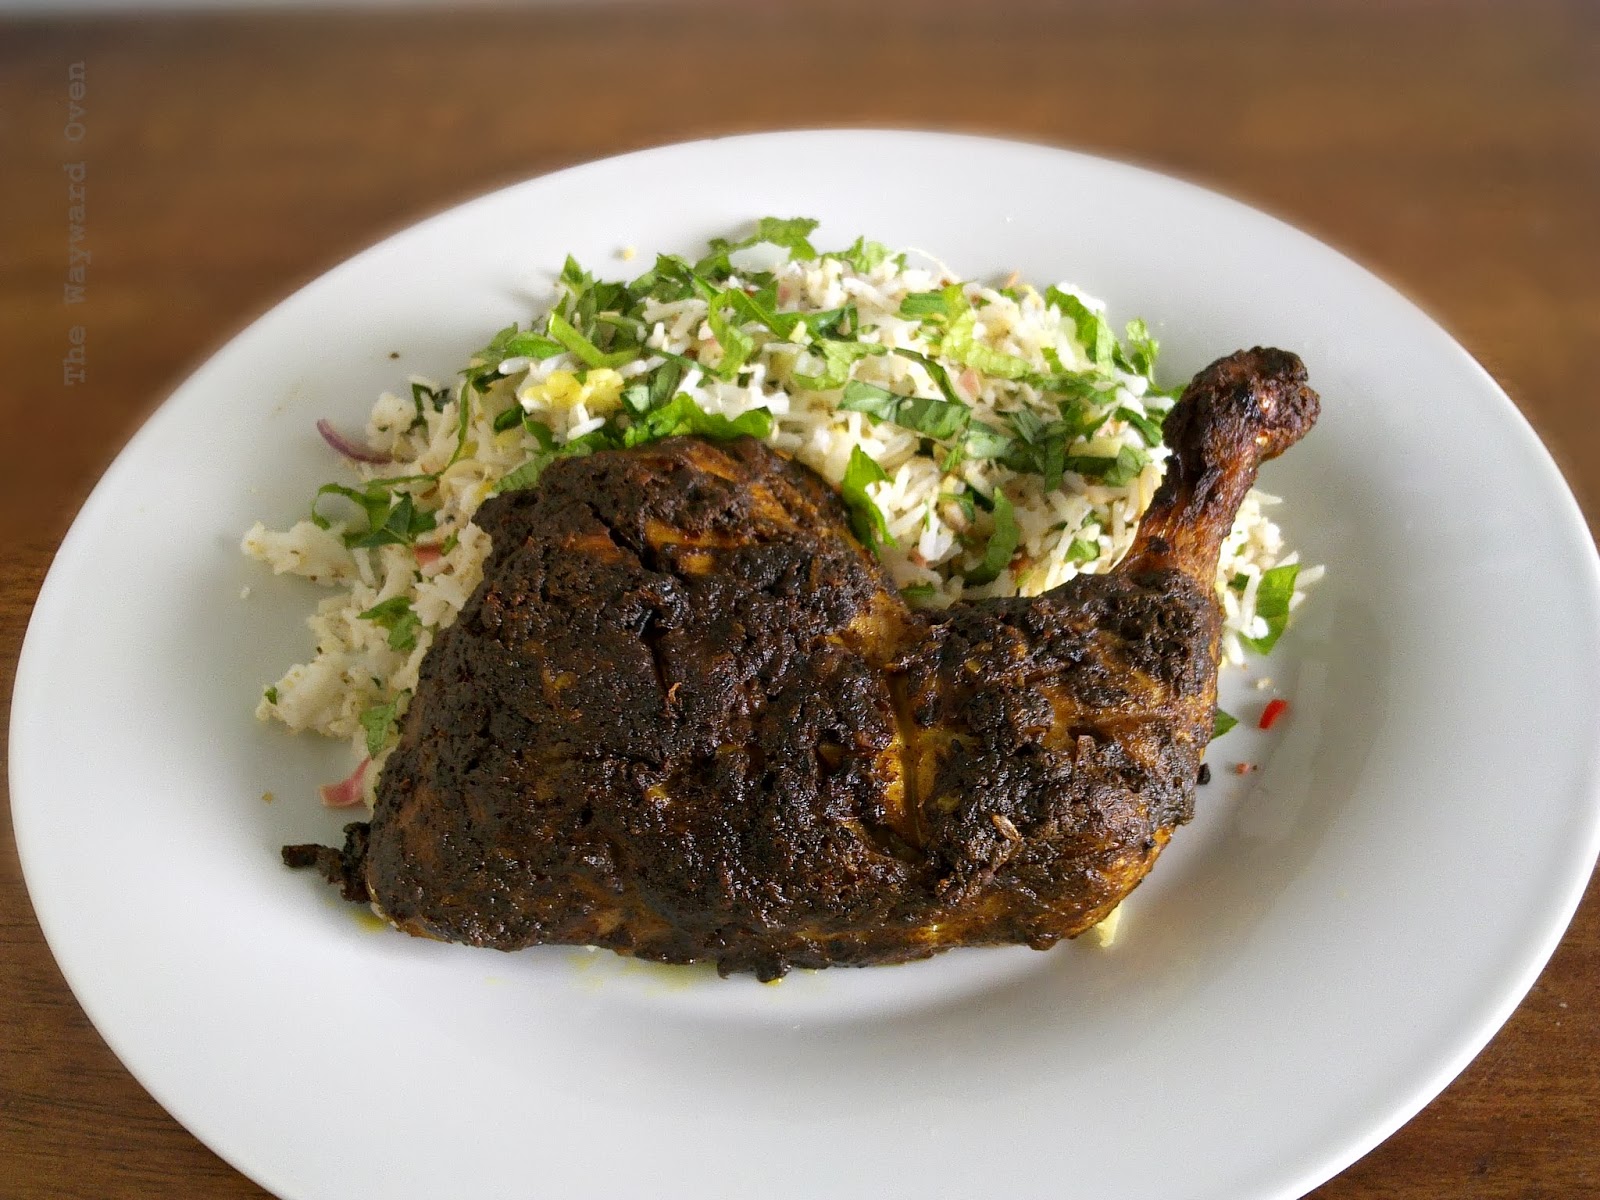
AYAM PERCIK 
This is a scheduled post.
I did a guest post for Jenni of The Gingered Whisk some time ago with a recipe for Ayam Percik, literally translated as spattered chicken. Mine isn't as "professional" looking as the ones you'd find at the pasar malam (night market), but for a home attempt, it turned out pretty good. Here's the recipe.
Ayam Percik
(Kelantan-style BBQ Chicken)
Serves 4

4 whole chicken legs (use skinless chicken if desired)
3cm fresh ginger, peeled and grated
2 tsp ground turmeric
¾ tsp salt

Marinade
6-8 dried chillies, soaked in hot water to soften
8 shallots, peeled
2 cloves garlic, peeled
¼ tsp belacan (dried shrimp paste)
250ml thick santan (coconut cream)
1 tbsp seedless tamarind paste
6 fenugreek seeds
¾ tsp salt
1 tsp palm sugar
1 tsp rice flour

Clean the chicken, pat dry and make a few slits in the thicker parts. Combine the ginger, turmeric and salt and rub over the chicken. Cover and set aside while you prepare the marinade.
For the marinade, grind/blend the chillies, shallots, garlic and shrimp paste with a little santan. Place this mixture in a pot large enough to hold the chicken together with the remaining coconut cream, tamarind paste, fenugreek seeds, salt, sugar and rice flour. Cook over medium heat, stirring frequently, until the marinade thickens and the oil separates from it (a layer of oil will appear on the surface; this is the coconut oil), about 15 minutes. Taste and adjust seasoning.
Add the chicken pieces to the pot and simmer uncovered, stirring frequently for 20 minutes. (The chicken should be about cooked by this time.)
Remove the chicken from the marinade and grill over hot charcoal or under the oven broiler for 8 to 10 minutes on each side until the chicken is browned, basting it several times with the marinade.
Simmer any remaining marinade over low heat in the pot until it thickens. Spoon it over the cooked chicken and set aside for 10 minutes to allow the chicken to cool. Serve with rice.

Baked peppers stuffed with pearl couscous

Tuesday, September 3, 2013

STUFFED RED PEPPERS WITH PEARL COUSCOUS 
I could have simply stir-fried a chopped red pepper, tossed it with some cooked pearl couscous, added herbs and nuts and had a very nice dinner. 
But while flipping through the pages of Nigel Slater's Tender Volume 1, I came upon his recipe for "stuffed peppers for an autumn day". Well, I had no autumn day, but most of the ingredients were in the fridge or cupboard, so it was baked stuffed peppers with pearl couscous for me.
Pearl couscous (also known variously in the Middle East as mograbieh, Israeli couscous or fregola) is not the easiest ingredient to get here, but with more Middle Easterners coming to live here, grocers have started to have a small stock of it. It's still very expensive for the average Malaysian income though, but I like the texture and pleasant chewiness, and I don't begrudge a single sen I spend on good food. It can, of course, be replaced with a grain such as rice or bulgur, in this dish.
Ready for the oven: Bake the peppers in the same pan the stuffing was cooked in
Stuffed Peppers with Pearl Couscous
Serves 1. Adapted from Nigel Slater's Tender Vol. I

1 large red pepper (capsicum)
¼ cup pearl couscous*
Olive oil
2 stalks spring onion, chopped
1 clove garlic, diced
Large pinch of paprika
2 tbsp sunflower seeds, toasted
½ a lemon, zested
1 small handful fresh mint, chopped
Salt and black pepper to taste

Heat the oven to 180°C.
Half the red pepper through the stalk, and remove the core.
Cook the pearl couscous in plenty of salted water (like pasta) until tender. Drain and toss lightly in olive oil.
Over moderate heat, soften the white part of the spring onion in a little oil. Add the garlic, paprika and lemon zest.
When fragrant, add the cooked pearl couscous and toss together. Take off the heat and add the sunflower seeds and mint. Add a squeeze of lemon juice to taste, and season with salt and pepper.
Scoop the stuffing into the pepper halves, place them in an oven-proof dish (or use the same pan in which you cooked the stuffing) and drizzle with olive oil. Cover the pan loosely with foil and bake for 35-45 minutes until sizzling.
Serve, drizzled with the pan juices. Goes nicely with Greek yoghurt.
* Replace with ordinary couscous or a grain like rice or bulgur.

Daring Bakers (from the archives): August 2010 ~ Pierogies

Saturday, July 27, 2013

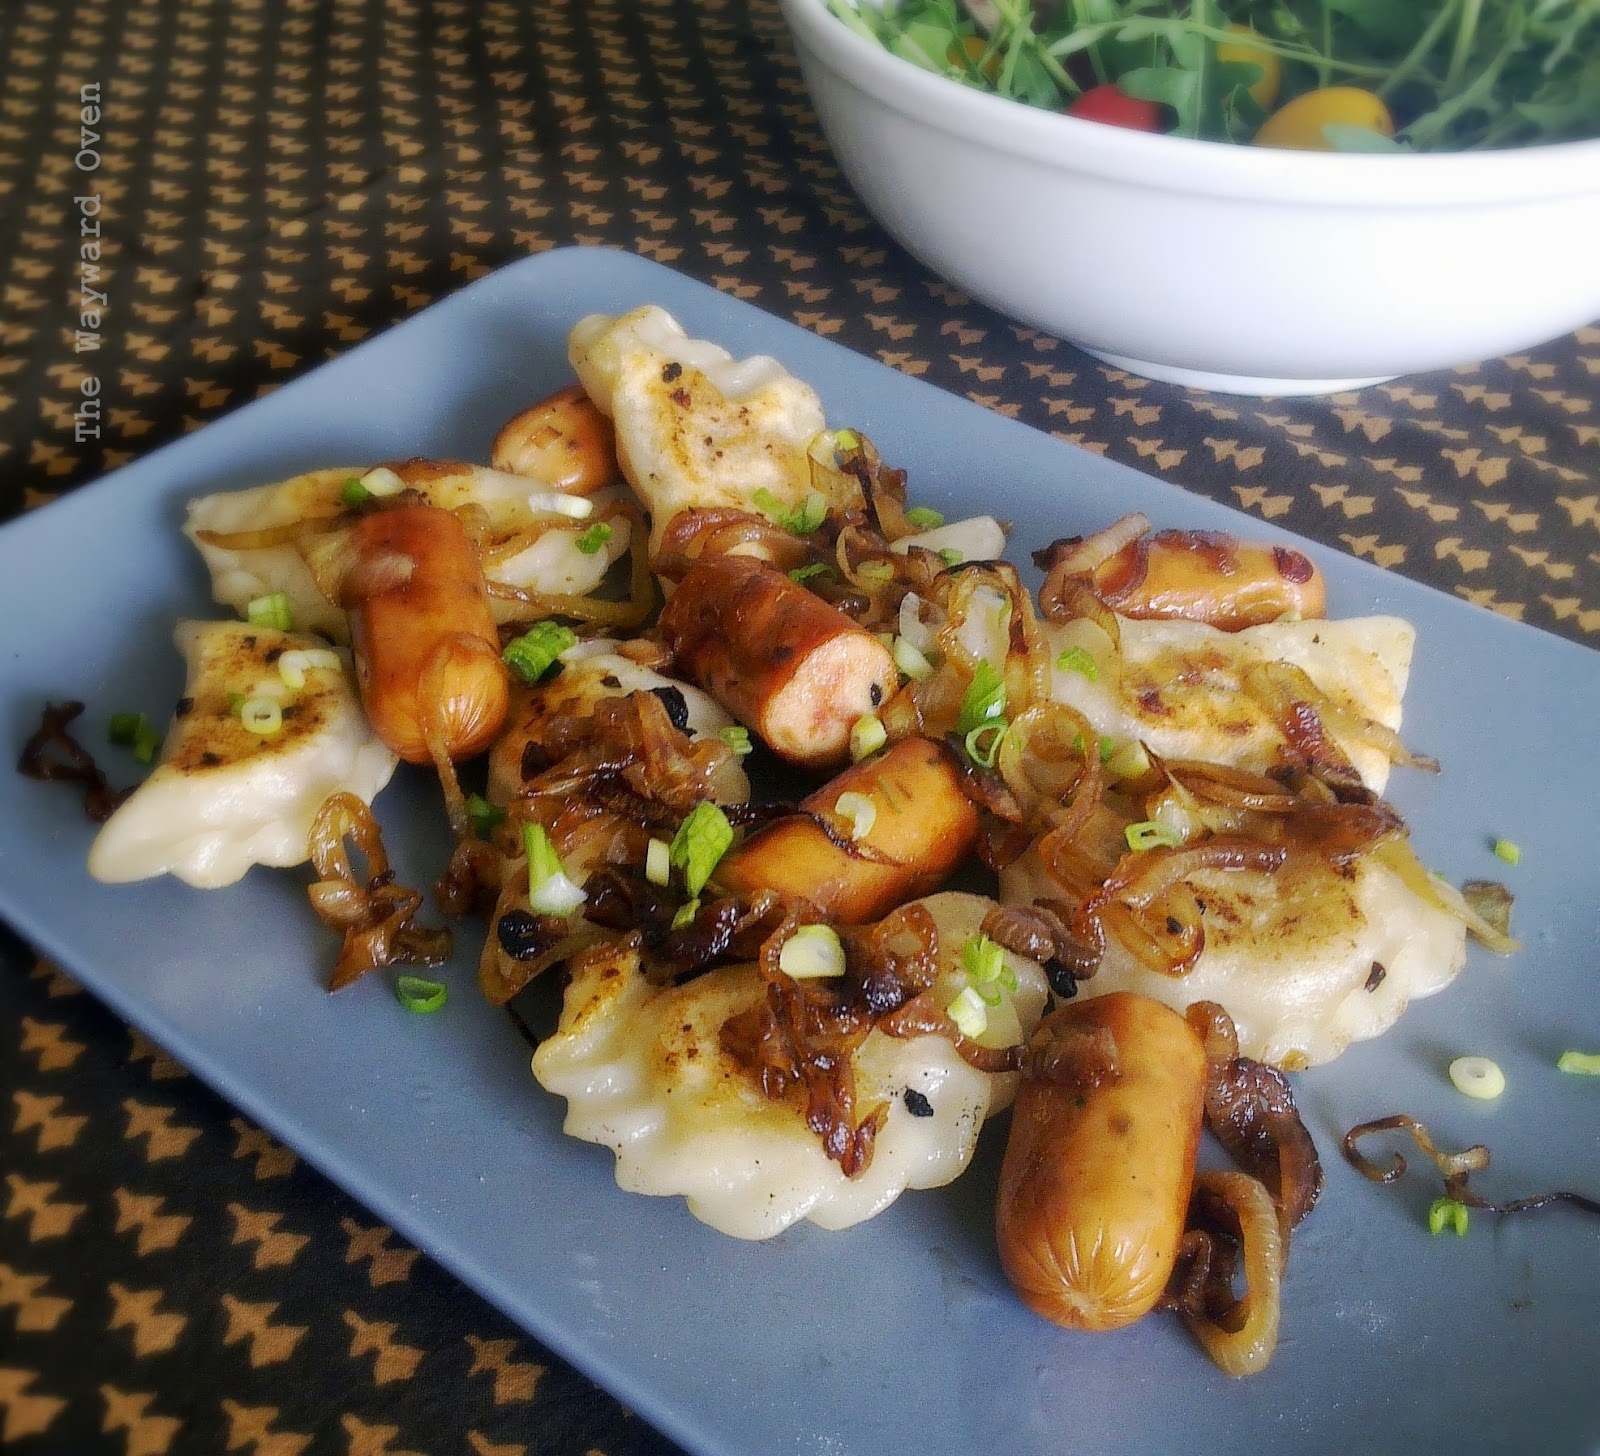
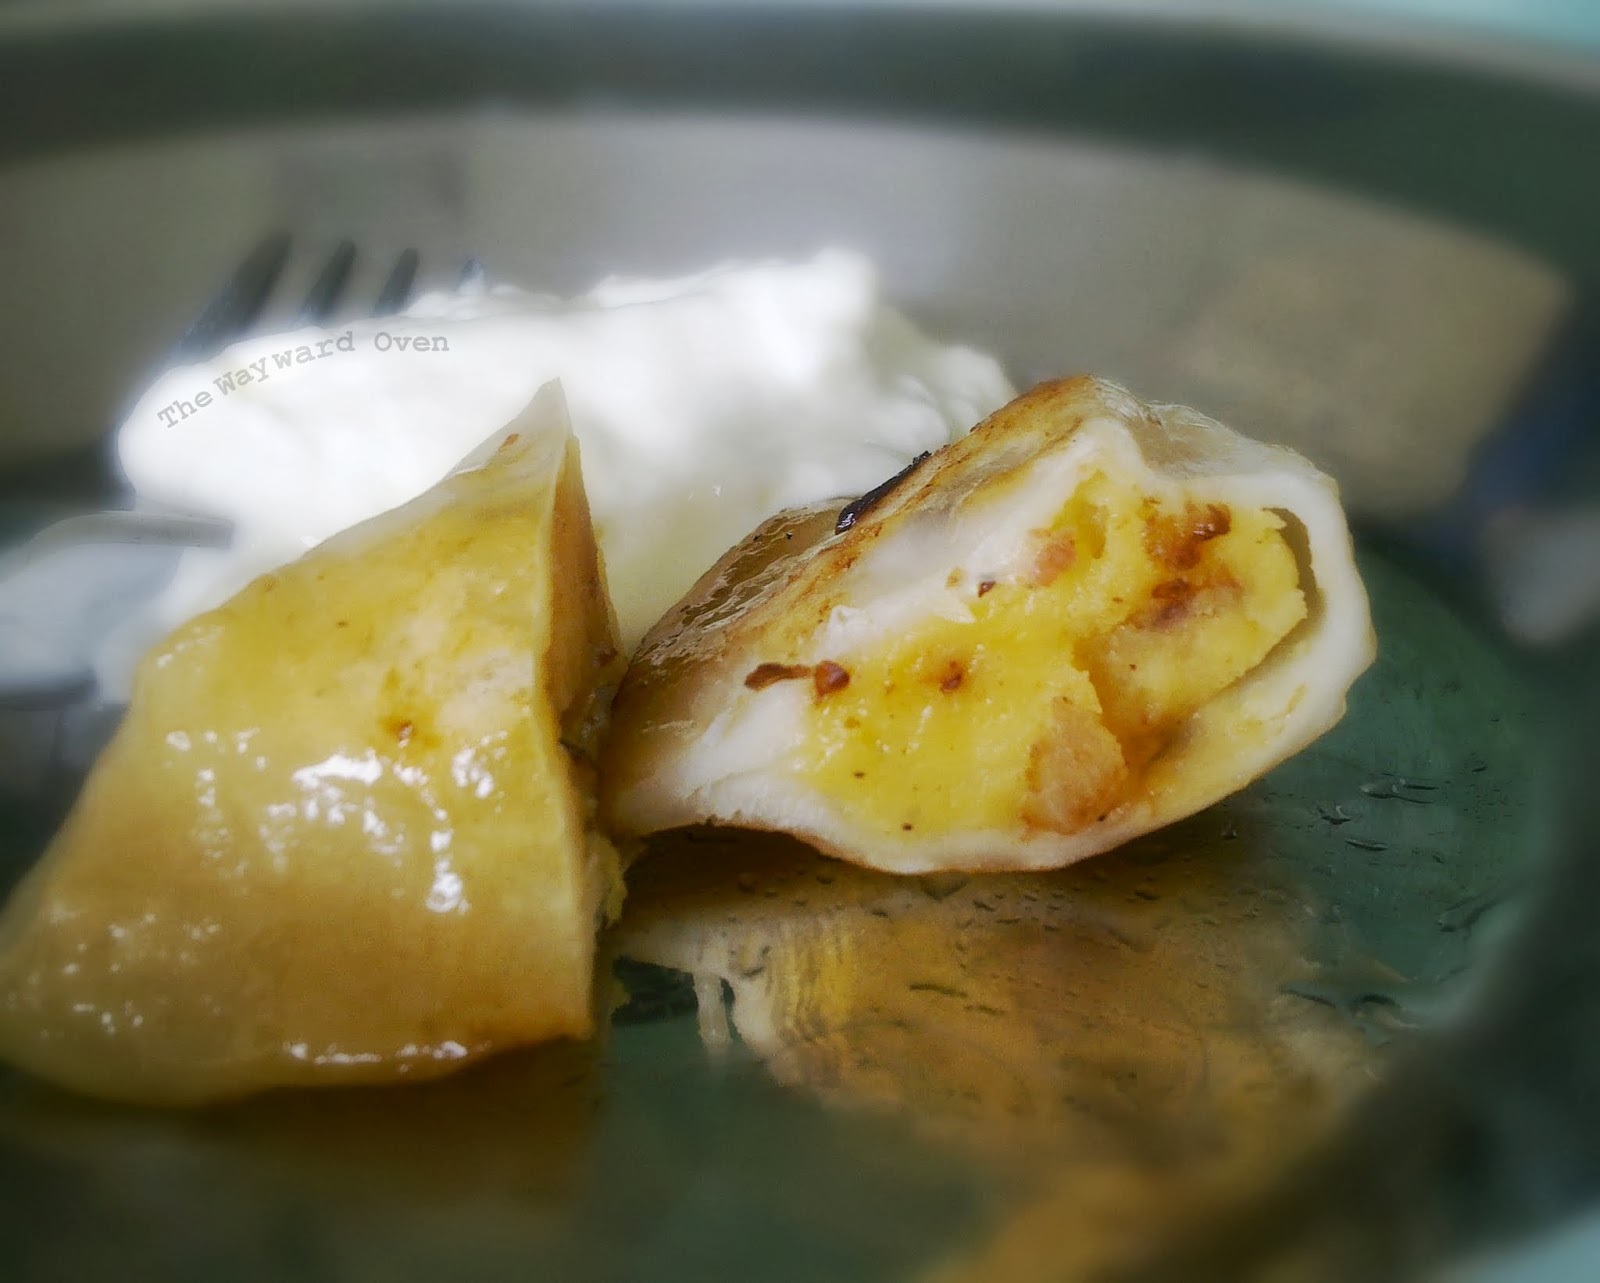
POTATO-CHEESE PIEROGIES WITH SAUSAGES AND FRIED ONIONS 
In a "celebration" of past Daring Baker and Daring Cook challenges, Lisa challenged all of us to search through the Daring Kitchen archives and pick any one we'd like! The REAL challenge was picking which delicious recipe(s) to try! 
Now, I have been a Daring Baker for a few years now and the reason I chose to be a baker and not a cook was because I could not resist making all those sweet baked goods. I have participated almost every month since I started – some dishes have come out well, others were excellent, and there were a few miserable failures as well. But I've learned many new things.
So for the challenge, I could have tried out a bake I had never done before, or gone back to one that had failed. But I decided to put aside the sweets this time and try out a Daring Cooks challenge. 
So I am making pierogies (August 2010 challenge hosted by LizG of Bits n' Bites and Anula of Anula's Kitchen) for the first time and after the whole process, which has several steps, I ask myself, "Why?" Why is this the first time I am making pierogies?! They're wonderful!
 Use the water after boiling the potatoes for the filling to make the dough
For the filling, I went with a traditional Polish/Russian one of potato and cheese. With the dough, I'd read that the water used to boil the potatoes is a good binder instead of eggs, and I also used sour cream. Apparently, low-protein flour makes a softer dough, so I used Chinese pau/bao flour. I like the texture of the dough, and it is easy to work with.
No doubt about it, pierogies are stodgy, so don't eat too many of these before doing something that requires moving about a lot. I had seven in one go – couldn't resist! – and had to have a lie-down after that.
Fry the onions, then brown the boiled pierogies in the same pan
Potato-Cheese Pierogies
Makes 30 pieces

Filling
300g potatoes, (about 4 medium) peeled and halved
4 rashers streaky bacon (optional)
1 medium (about 70g) white onion, finely chopped
1 clove garlic, minced
50g (about ½ cup) shredded sharp cheddar (or other cheese)
Salt and pepper, to taste

Dough
300g (about 2 cups) pau/bao flour (low-protein flour; or use all-purpose)
2 tbsp sour cream
175ml (about ¾ cup) warm potato water, plus extra

To make the filling, heat a pan and fry the bacon without any oil. Once the bacon is crisp and the oil is rendered, remove the bacon and crumble or chop. Sauté the onions in the bacon grease and cook until golden. Add the garlic and fry briefly. Set aside.
Boil the potatoes in plenty of lightly salted water until tender. Drain, retaining about 1 cup of the water.
Return the cooked potatoes to the pot over low heat to dry out slightly, 1 minute. Take pot off the heat and add the crumbled bacon, onion mixture and shredded cheese. Mash the potatoes, then let the mixture cool.
To make the dough, place the flour in a bowl. Stir in the sour cream. Make a well in the centre and add almost all the potato water. Bring the mixture together, adding more water a tablespoon at a time if necessary, until a soft dough forms. It should not be sticky. Cover and rest for 15 minutes.
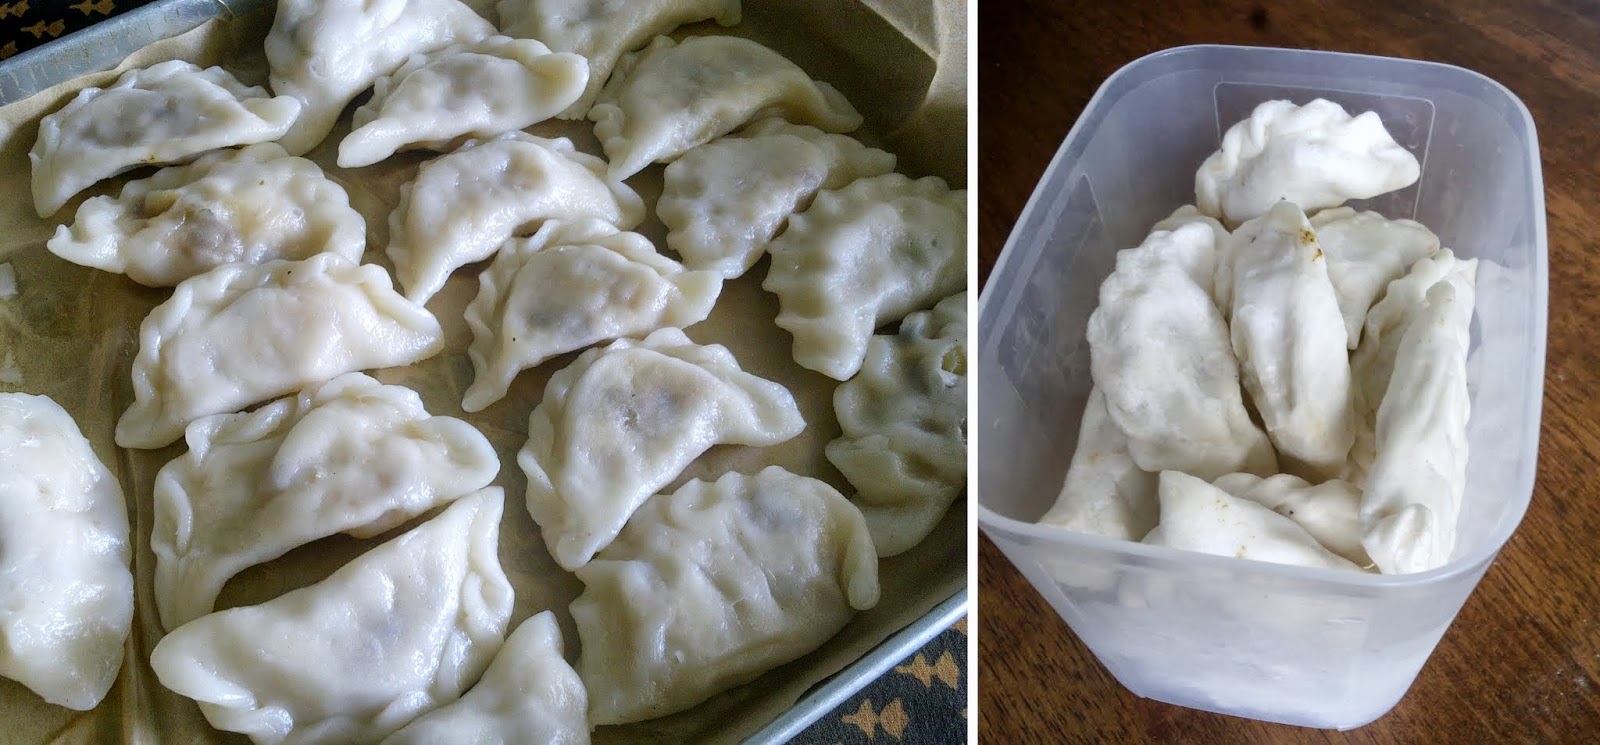
Pierogies: boiled and frozen. They may look bland, but these little half-moons pack flavour - and comfort.
To assemble, roll out the dough to about 2mm and stamp out 7cm circles with a plain cookie cutter or drinking glass. Turn a dough circle over so the moister side will now be on top, and place a teaspoon of filling in the centre; press the opposite edges together firmly to form a semi-circle. The edges do not need to be crimped as they stick together well but for a bit of decoration, crimp away! Place the half-moons on a lightly floured plate.
Bring a large pot of water to the boil; salt lightly. Boil the pierogies in batches. When they float, leave them in for 1-2 minutes longer, then transfer to a tray lined with greaseproof paper. If desired, the pierogies may be frozen after they cool. Freeze them in one layer, then transfer to a freezer-proof plastic bag. 
Serve them with sour cream, or lightly fry them on each side and serve with fried onions and good-quality sausages.
* * *
And on the Bakers' side...
The August 2010 Daring Bakers challenge was pound cake. I chose to use it in a Baked Alaska.

A bit of culinary Kerala

Tuesday, June 25, 2013

A LITTLE TASTE OF KERALA 
At the time of writing, I should have been packed and ready to fly to Chennai in India, and then on to Thiruvananthapuram (Trivandrum) in the southern state of Kerala for a short holiday.
Unfortunately, the trip has had to be postponed.
The Husband and I had planned to watch some Kathakali performances, eat Keralan food, visit interested sites, perhaps take a boat in the backwaters, gorge on Keralan seafood, explore markets, browse through bookshops, stuff myself... um, ourselves with Keralan food, and more.
I was disappointed... for a second, because I always remember my late father saying that "everything happens for the best". I've always believed in that and things usually work out. My father's parents were originally from Kerala and came to then British Malaya to work in the rubber estates, so perhaps they're telling me, in spirit, that it's not the right time to visit their homeland. *wink*
It would have been good to get out of Malaysia at this time, though. We are experiencing the worst haze (smog) I can remember. I don't think it has ever been this bad. I look out the glass doors of my flat and just beyond my balcony, I can see the haze pollutants just hanging in the air. Outdoors, it's hard to breathe and my eyes hurt. There's an eerie glow all around, which I would describe as pretty if it wasn't hazardous (in some places, it's at dangerous levels).
Well, if you have to stay in, cooking is always a good way to pass some time. And since I had been looking forward to Keralan food in Kerala but not getting to eat it there, I thought I should make a few dishes at home.
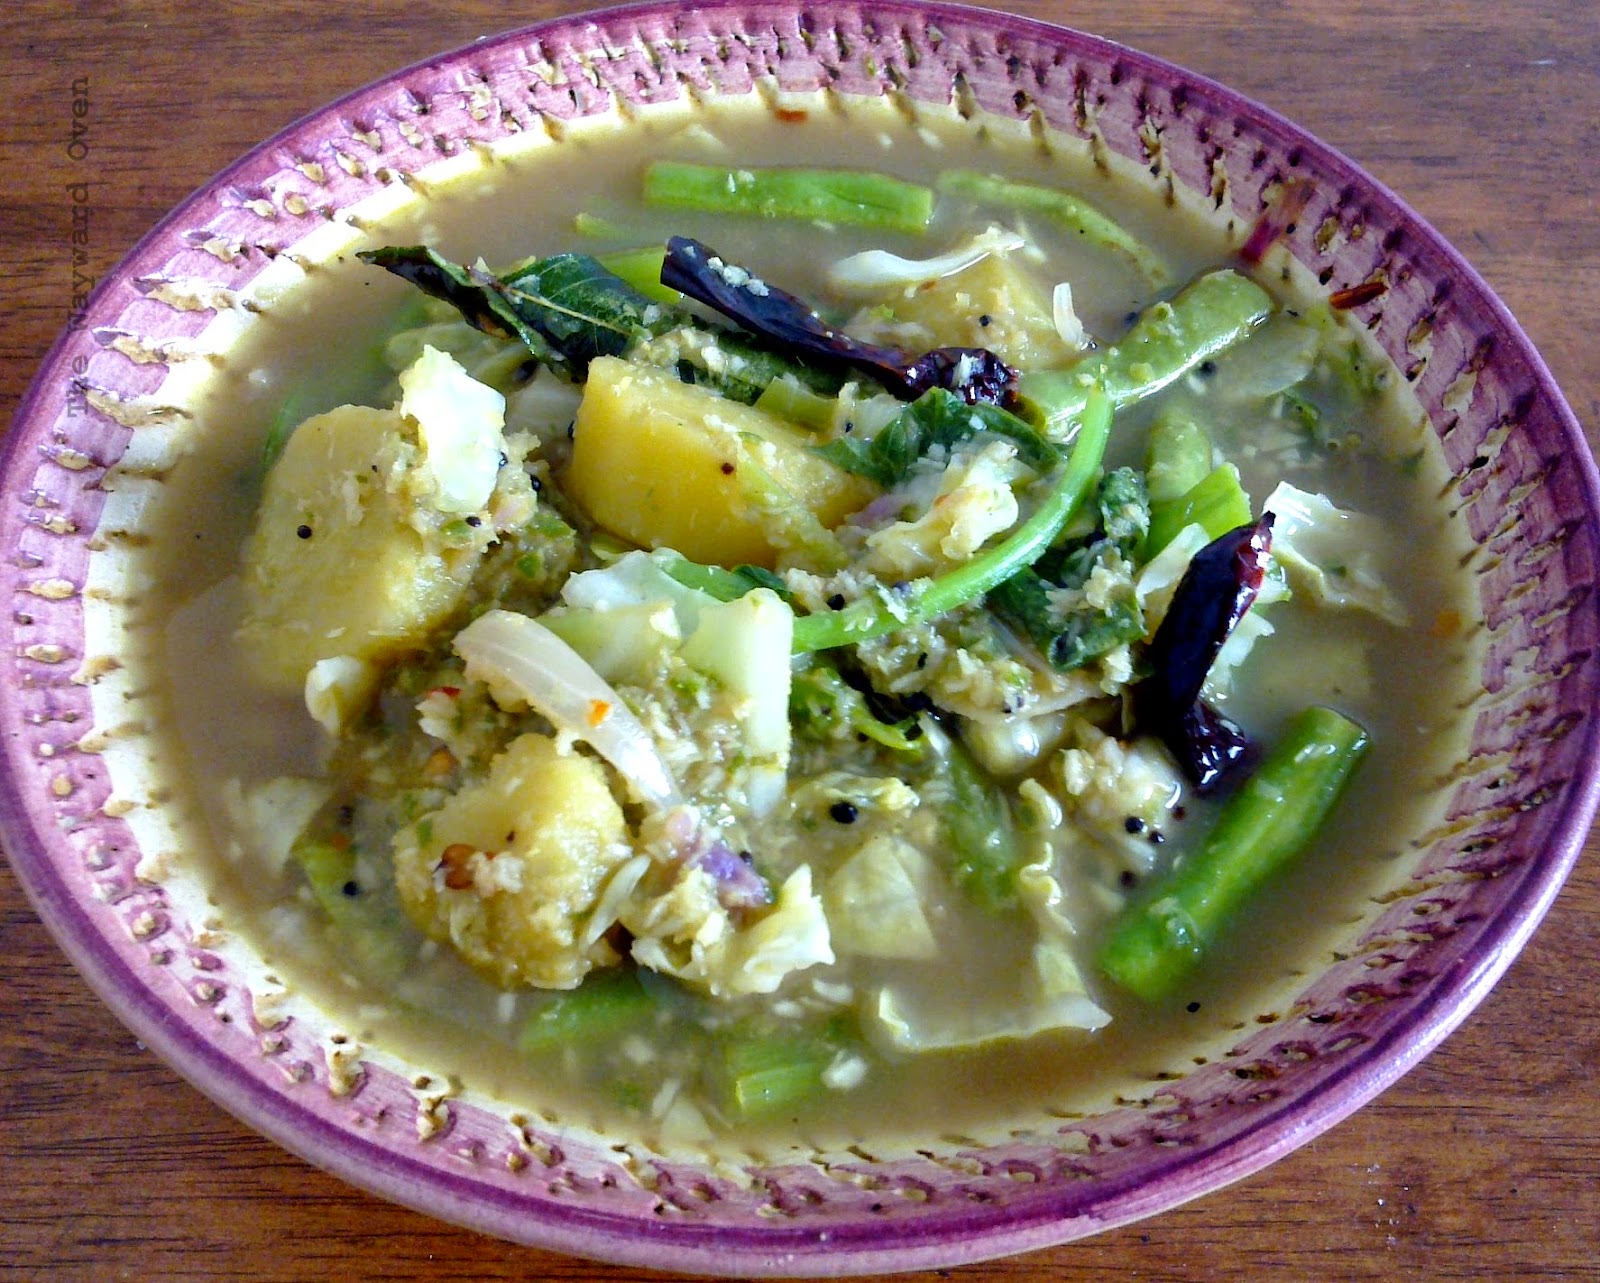
Aviyal
Coconut and green chillies are used a lot in Keralan cooking. A dish that contains both of these ingredients is aviyal, a mixed vegetable curry cooked with a fresh coconut-green chilli spice paste. Root and hardy vegetables like potatoes, plantain, carrots, long beans and drumstick pods are often included. I didn't have any of those so I used French beans, sweet potatoes, cabbage and after I turned off the heat, I added spinach so that it just wilted in the hot curry. I think I added too much water though, so the aviyal is not thick enough. And it should be yellow, which means I didn't add enough turmeric powder.
Fried fish with crisp onions
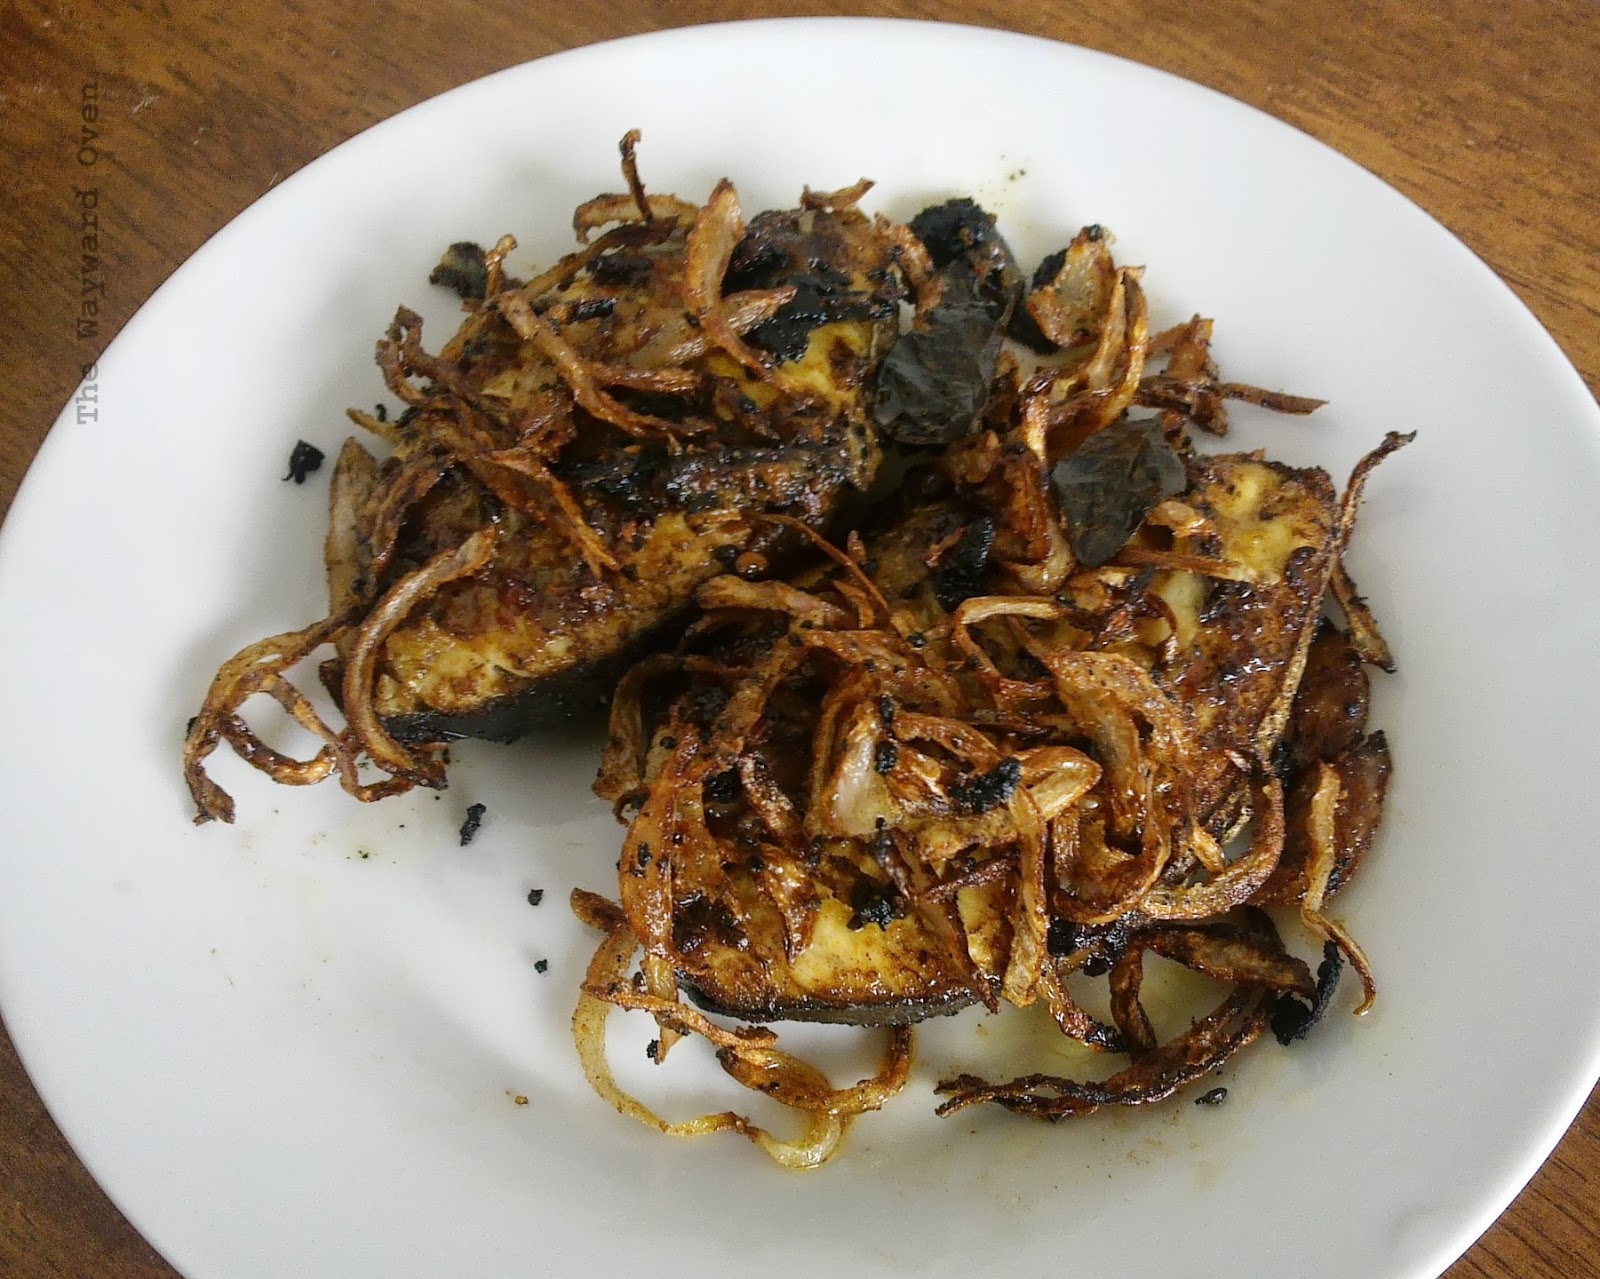
Kerala is also famous for its seafood dishes. Since there was already the aviyal, which has gravy to mix into rice, I just fried a couple slices of tenggiri fish that had been simply dredged in curry powder, turmeric and salt, and then garnished it with fried crisp onions and curry leaves.
Rasam
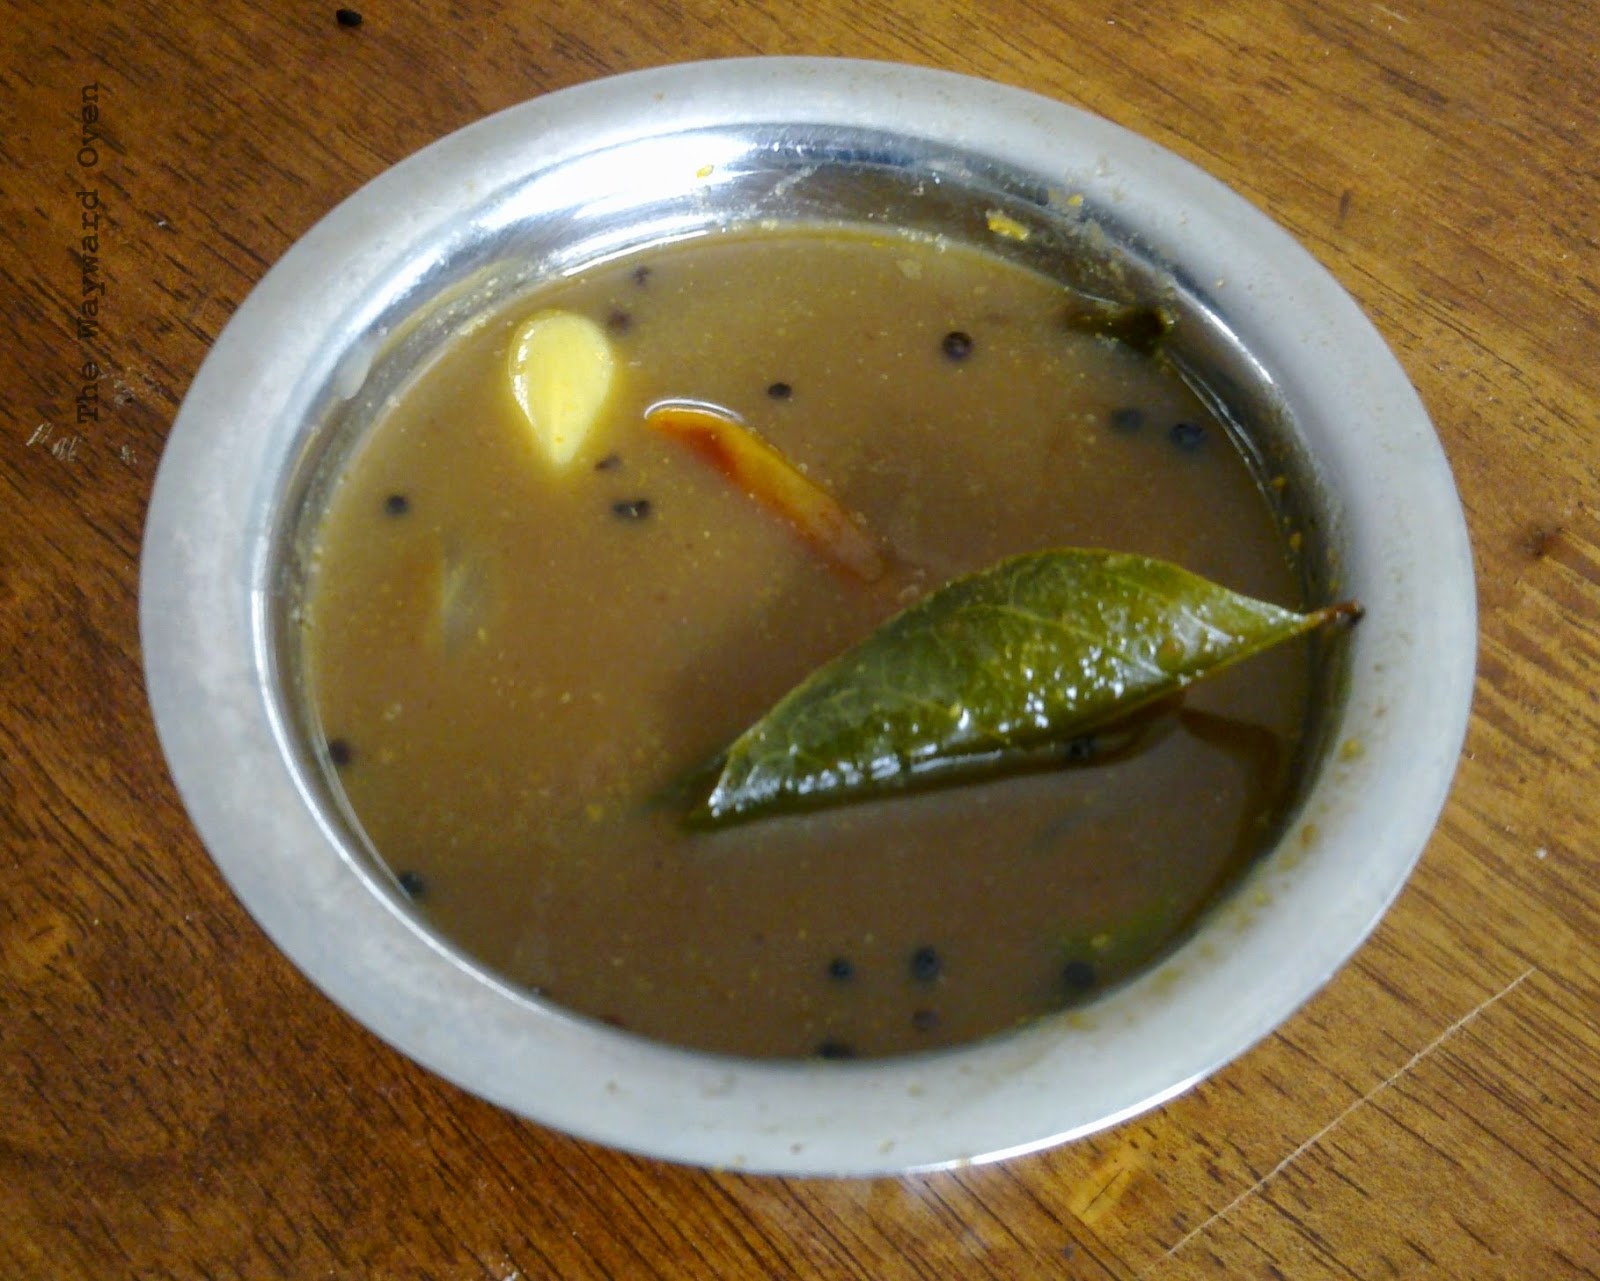
For me, no curry meal can be complete without rasam – a tamarind-based soup. I like my rasam sour because that's what I grew up with, while the Husband prefers rasam that is not so sour. I add hot water to it to thin it down.
Rasam is kind of a tonic, so I always make extra and drink it like a beverage. Taken on its own, I water it down slightly because without the rice, my version can be too sour even for me.
It was a good meal. It wasn't Kerala, but at least I ate well.

Rice, lentils and crisp onion

Thursday, June 6, 2013

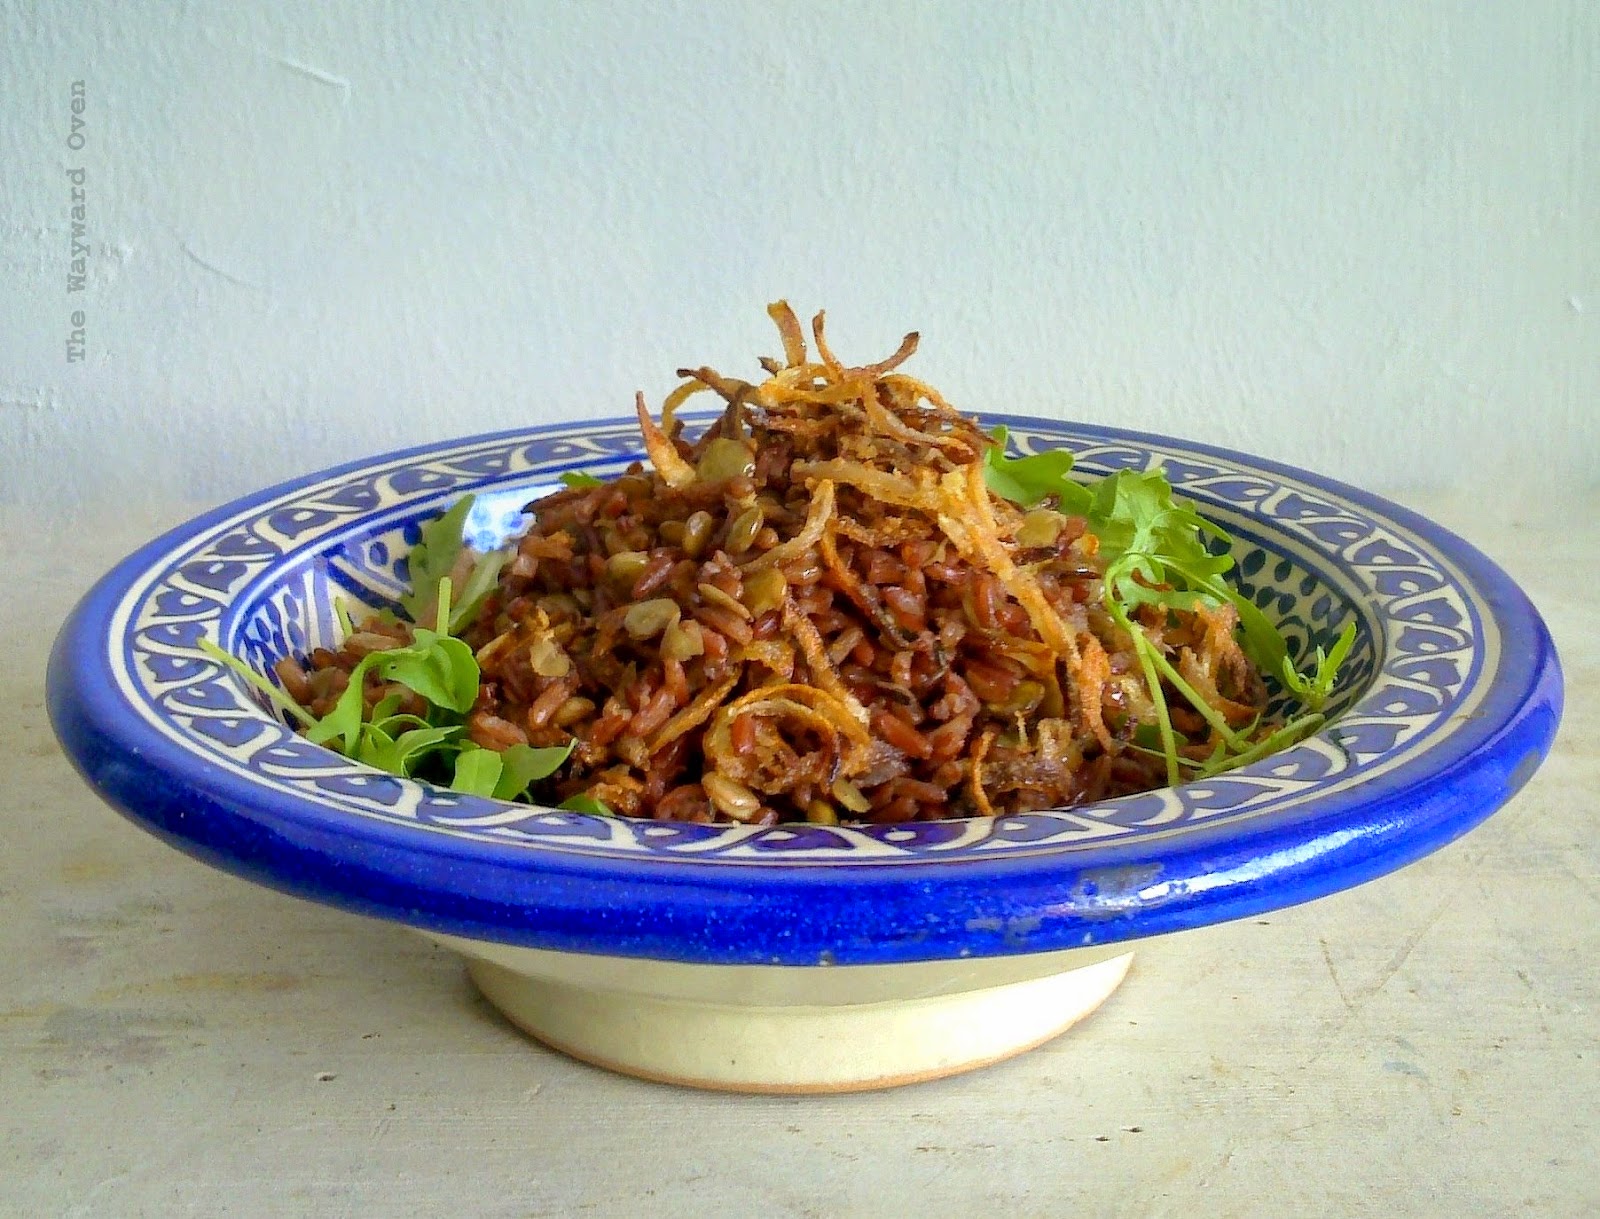
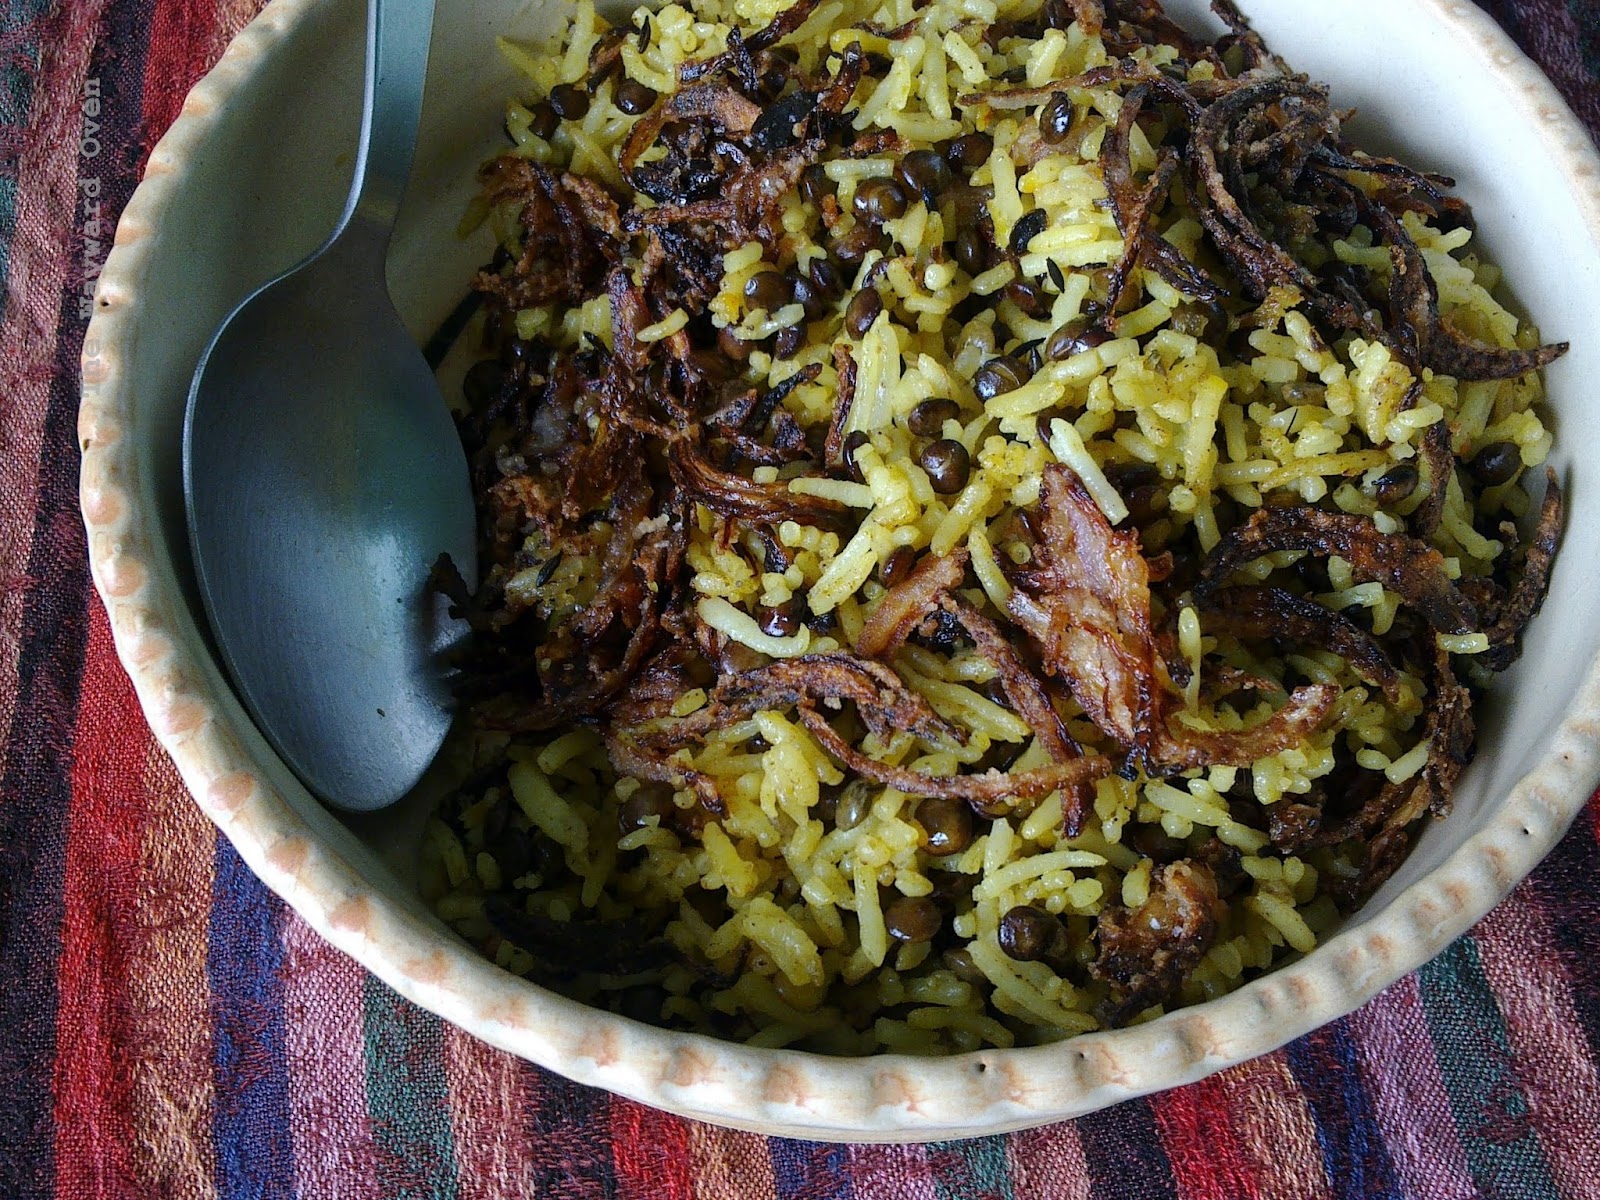
RICE & LENTILS WITH CRISP ONION
I first made mejadra from a recipe by Yotam Ottolenghi which I found online. It was adapted from the recipe in his book Jerusalem, written with Sami Tamimi, which I now have and from which I have cooked extensively.
I have prepared a mejadra-like dish many times since then, but have done it in a way that I consider much simpler. The original recipe lists uncooked rice as an ingredient and everything is cooked together like  a paella. I start with already cooked rice, leftover from the day or two before (always have some lying around), so this is like a salad in a way.
I also use the oil used to fry the onions as part of the "dressing"; the original recipe uses fresh oil to cook the spices and rice. But this is such a delicious ingredient, and it's a shame not to use it.
I've used white, brown and even black rice for my dish. I started eating red rice recently (ooh, try saying "red rice recently" quickly three times!) and have used it this time.
As for the lentils, I have used puy lentils and green lentils, which I suspect are the same thing. Although some recipes say to soak them overnight first, I have cooked them immediately after rinsing and they are tender in about 15 minutes.
I suppose this rice would be a side dish to meats and seafood, but I love it on its own as a one-dish meal and so I have added some rocket to it to get in some fresh and raw.
Salad or side dish... either one is fine by me

Rice & Lentils with Crisp Onion
Serves 2

3 tbsp green lentils, rinsed
1 medium onion, peeled and sliced thinly
1 tbsp all-purpose flour
1 tbsp rice flour (or cornstarch)
Vegetable oil
¼ tsp fennel seeds
Large pinch each of ground cumin, cardamom, cinnamon and allspice
1¼ cup cooked rice (coloured rice is nuttier and chewier)
Salt and freshly ground black pepper
Salad leaves, optional

Place lentils and a pinch of salt in a small pot and cover with water. Cook until tender. Drain the lentils but retain a little of the cooking liquid.
Toss sliced onion with both flours. Heat 2 to 3 tbsp of oil in a frying pan. Shake off excess flour and fry the onion until crisp. Remove onion from pan and transfer to a kitchen paper-lined plate to drain. Sprinkle some salt over it.
Leave about 2 tsp of oil in the frying pan and over low heat stir-fry the fennel seeds and ground spices until fragrant. Add the cooked rice and toss about to coat with the oil and spices. Add the cooked lentils. Add some of the lentil liquid if the mixture sticks to the bottom of the pan. Give it a few tosses and take off the heat. Add salt and plenty of black pepper and toss with the fried onion. Serve as a side dish or with salad leaves as a one-dish meal.

Fasta sourdough pasta

Friday, May 17, 2013

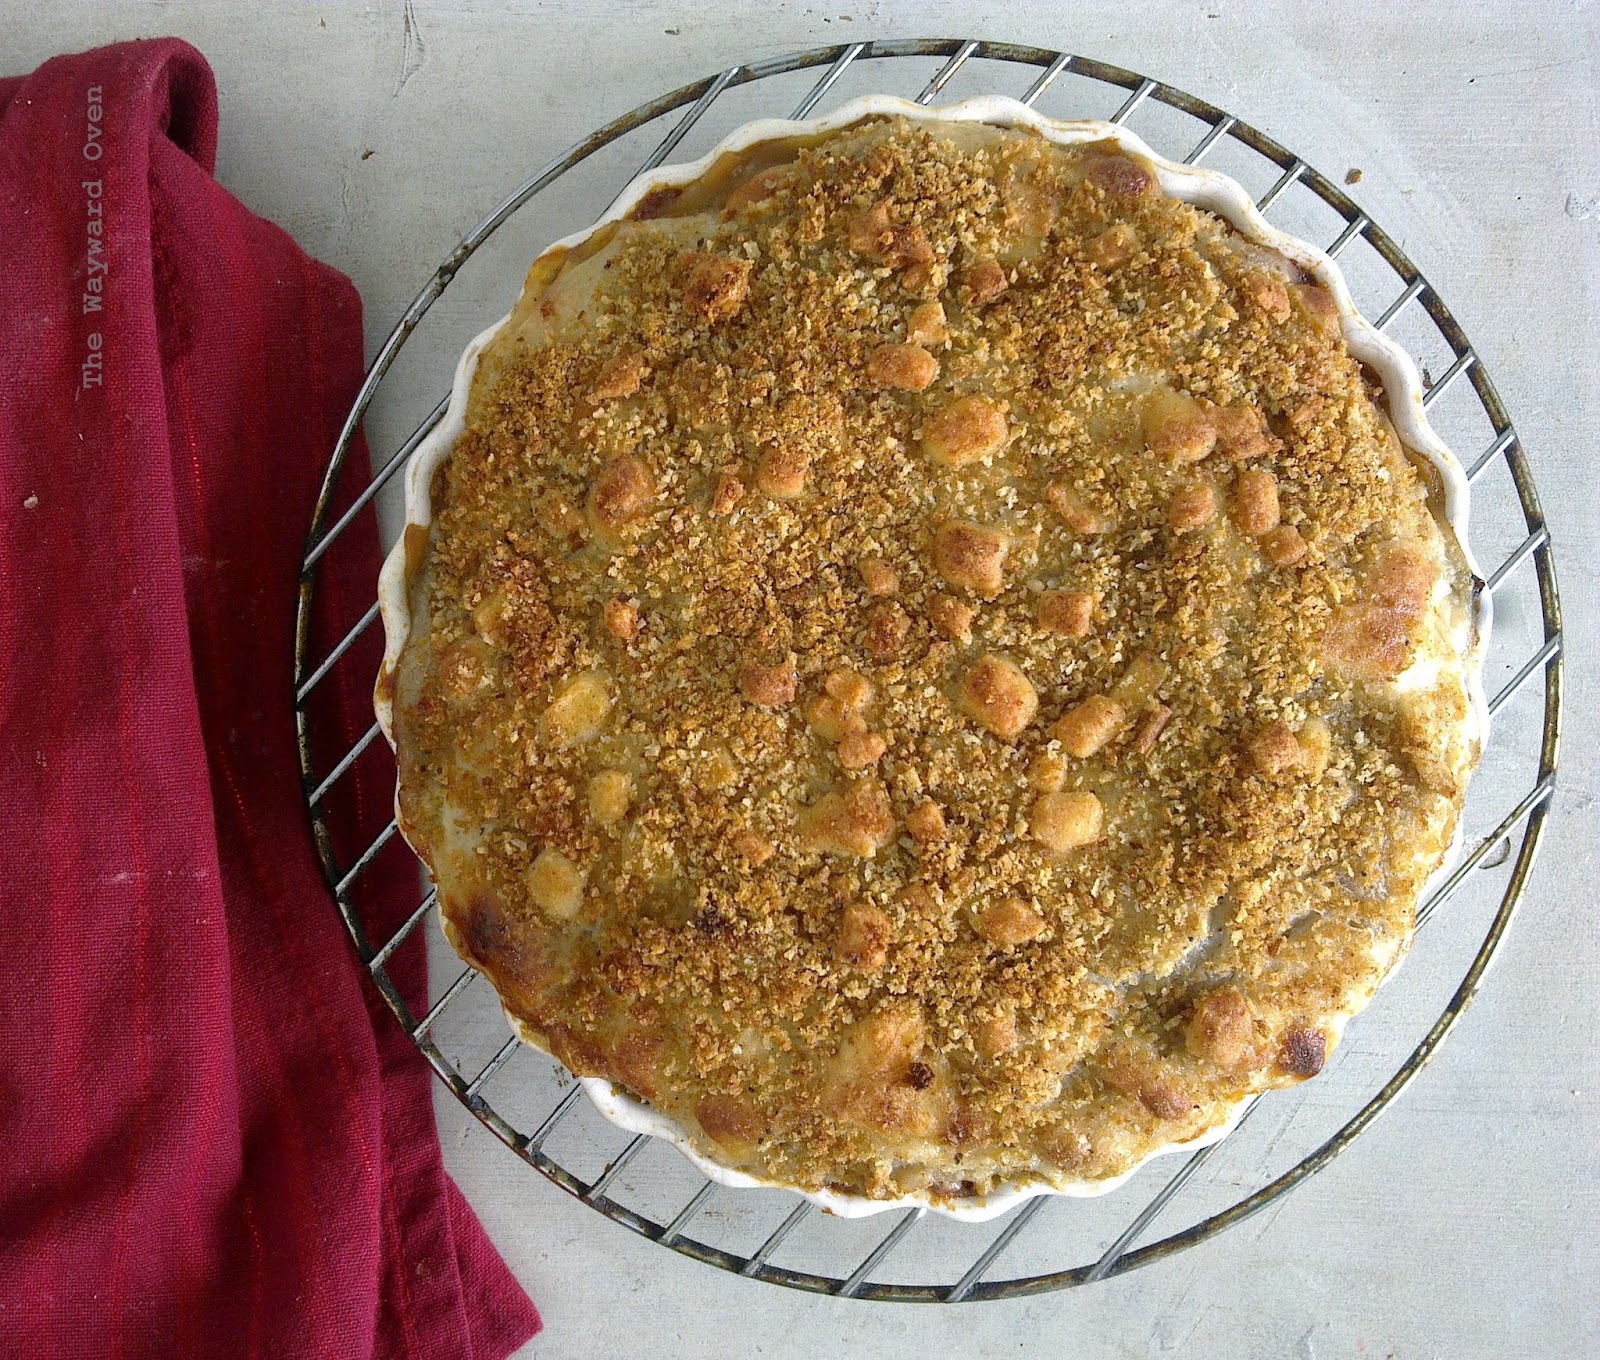
VEGETABLE AND PASTA STRATA WITH SOURDOUGH PASTA 
When Sourdough Surprises chose to make sourdough pasta for April, I was excited. I have a hand-crank pasta machine that rolls (and kneads) the dough and cuts the noodles, and I try to use it as often as I can, but to be honest, the machine only makes an appearance three or four times a year. A shame really, because although I like dried pasta and use it all the time, pasta made from scratch is a notch above.
I actually made three flavours of dough and used them for various pasta dishes, but the posting date of April 20 came and went without a word from me. I'll get to the reason in a minute.
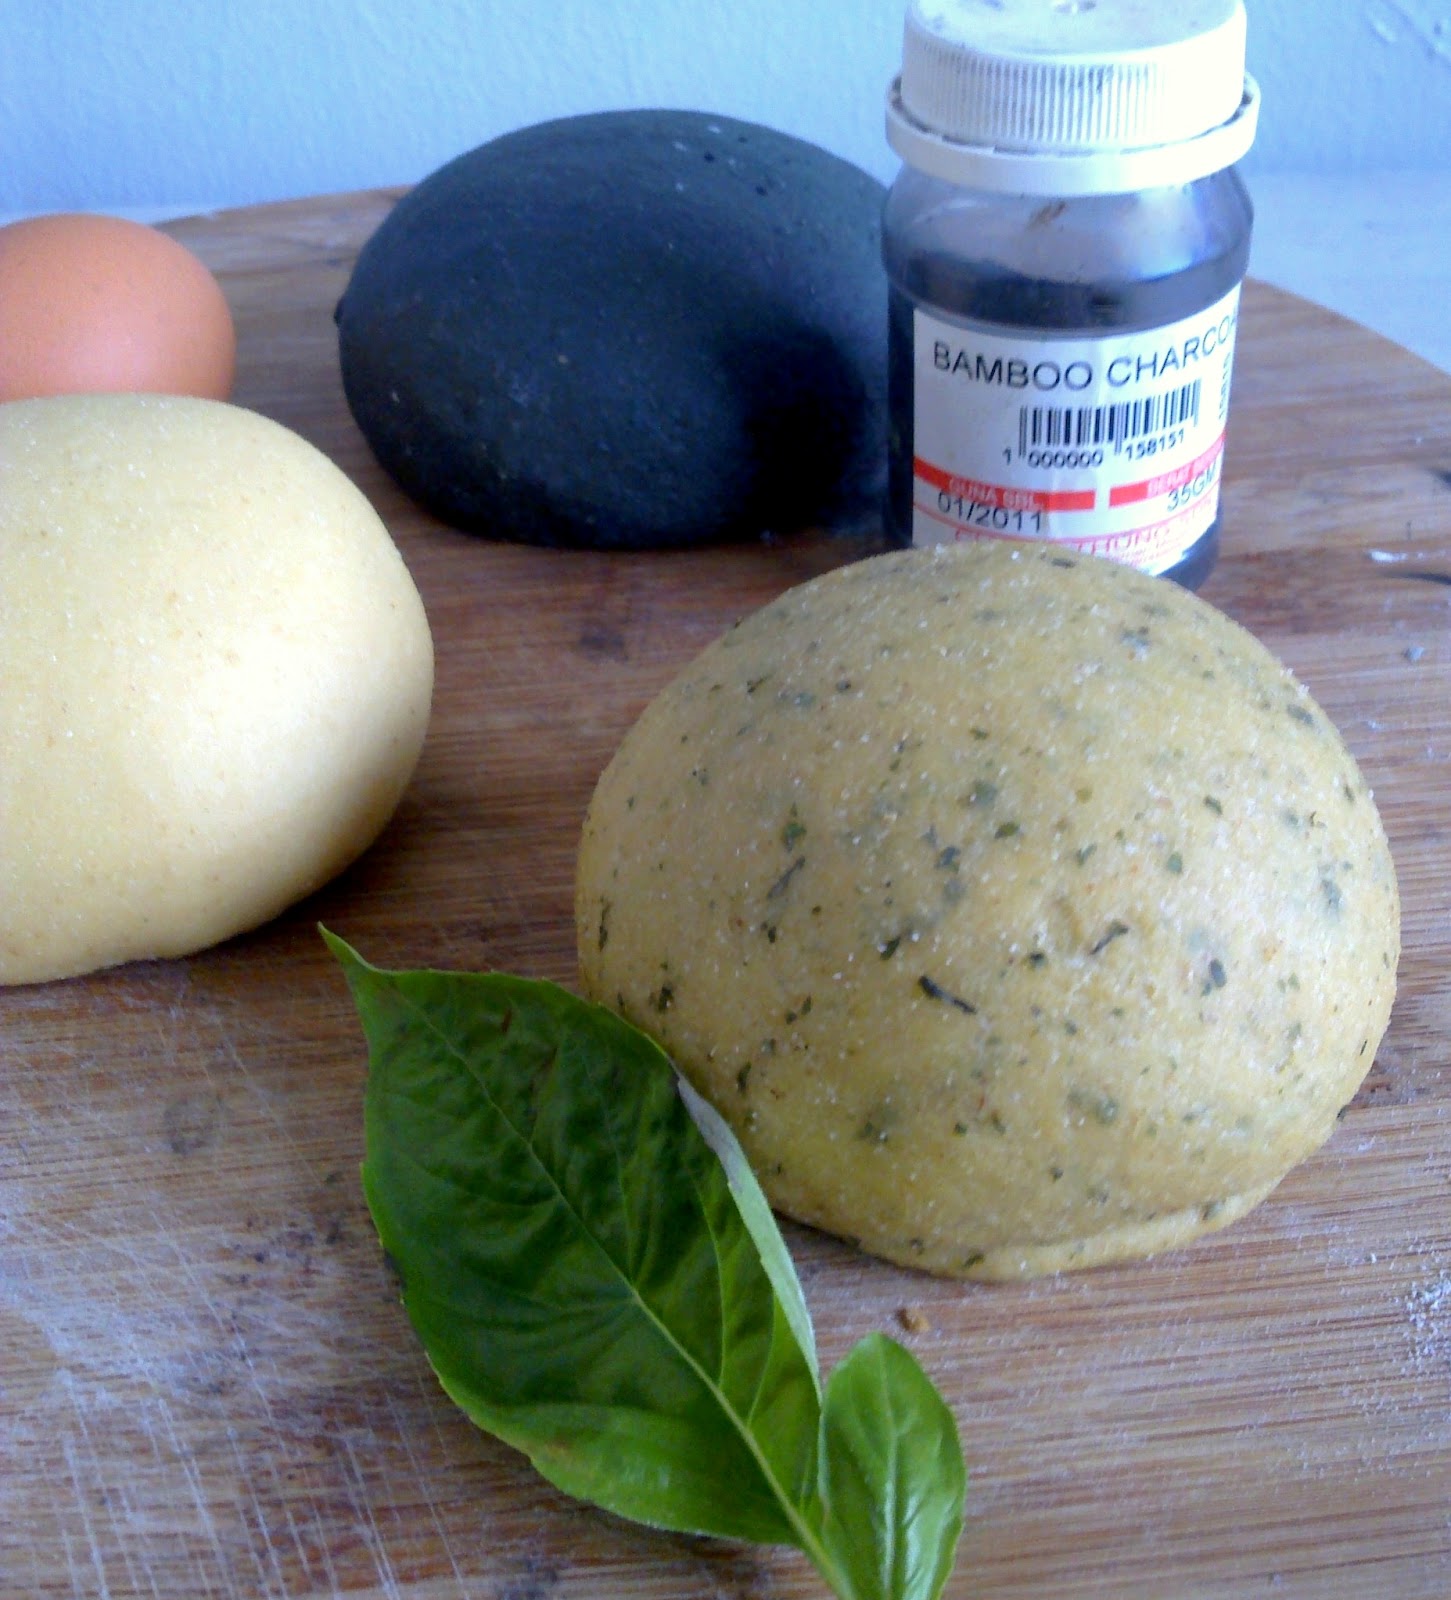
I had made two of the sourdough pasta doughs with semolina (durum) flour and egg – one of plain, the other flecked with Thai basil. The third one, I thought I would like to try making my version of soba noodles and combined all-purpose and buckwheat flours with the addition of bamboo charcoal powder (no egg this time).
Three flavours of sourdough pasta dough
The egg doughs came together well, but not the black buckwheat noodles, possible because of the lack of eggs. The noodles broke up into little bits (they looked like orzo) almost as soon as they hit the boiling water.
However, I realised something when I tasted all three noodles: they were extremely sour! Which meant there was a problem with my sourdough starter.
I'm sure some people like that level of sourness, and in fact, it isn't extreme in a loaf of bread, but for the pasta dough that I made, it was almost like biting into a lemon.
Anyway, the reason I didn't post on April 20 was because I was really busy and didn't have time to write up a post (we had our country's General Election on May 5 and there was a lot of activity before and after the date). But that gave me time to come up with a better tasting sourdough pasta. 
I discarded over half the starter I have tended to for over two years, and fed the remainder every day for a few days. Maybe I'm just imagining it, but the bread dough I made recently appeared stronger and was more flavourful. I've also made sourdough cakes with the "new" starter, and the chocolate ones have been very good.
So then, on to the sourdough revamp. I mixed the dough by hand, like I've illustrated here. For my vegetable strata (pan-fried courgette, eggplant and mushrooms, mustard cheese sauce and tomato sauce), I made just a plain egg (sour)dough, again with semolina, and the flavour of the pasta was at just the right level of sourness for me. I'll add flavourings next time.
Cubed gouda cheese and breadcrumbs for the topping
Fresh Egg Sourdough Pasta (Dough)
Makes about 240g

120g (about ¾ cup) semolina durum
Large pinch of salt
70g (a bit more than ¼ cup) unfed starter
1 medium egg

Flavourings (and colours)*
2-3 tsp tomato paste (red)
1 tbsp finely chopped basil (speckled)
1½ tbsp puree of cooked spinach (green)
A pinch of saffron threads mixed with 1 tbsp warm water (bright yellow)

Place the semolina on a work surface. Sprinkle the salt on top and stir together with your fingers. Bring the semolina together into a mound, then make a hole in the centre. Place the starter and egg* into the hole and then gradually stir in the semolina with your fingers or a fork. Incorporate the mixture until no dry bits remain. 
Knead the mixture; it will be crumbly at first but the semolina will soon absorb the liquids and the mixture will come together into a smooth ball. Leave in the work surface and cover with a clean tea towel. Set aside for 1 hour before rolling out and cutting into shapes by hand or a pasta machine.
* If including flavourings, add with the liquids.

Scrambled tofu looks like eggs

Saturday, March 9, 2013

FORGET EGGS, SCRAMBLE SOME TOFU 
I have been known to make a face when I see tofu. And I have rolled my eyes when people say tofu can absorb flavours well. I've even sniggered at vegetarians who spout off about how wonderfully versatile tofu is. (Oh-oh, I've gone and done it now. Will I find a cauliflower head in my bed?)
But honestly, I don't dislike tofu. There are some cooks who know the most amazing ways to make it delicious. Fried, steamed, stuffed, they're all good. In the wrong hands, however, tofu can remain horribly bland. And I admit, sometimes those hands belong to me. So obviously, tofu isn't completely to blame.
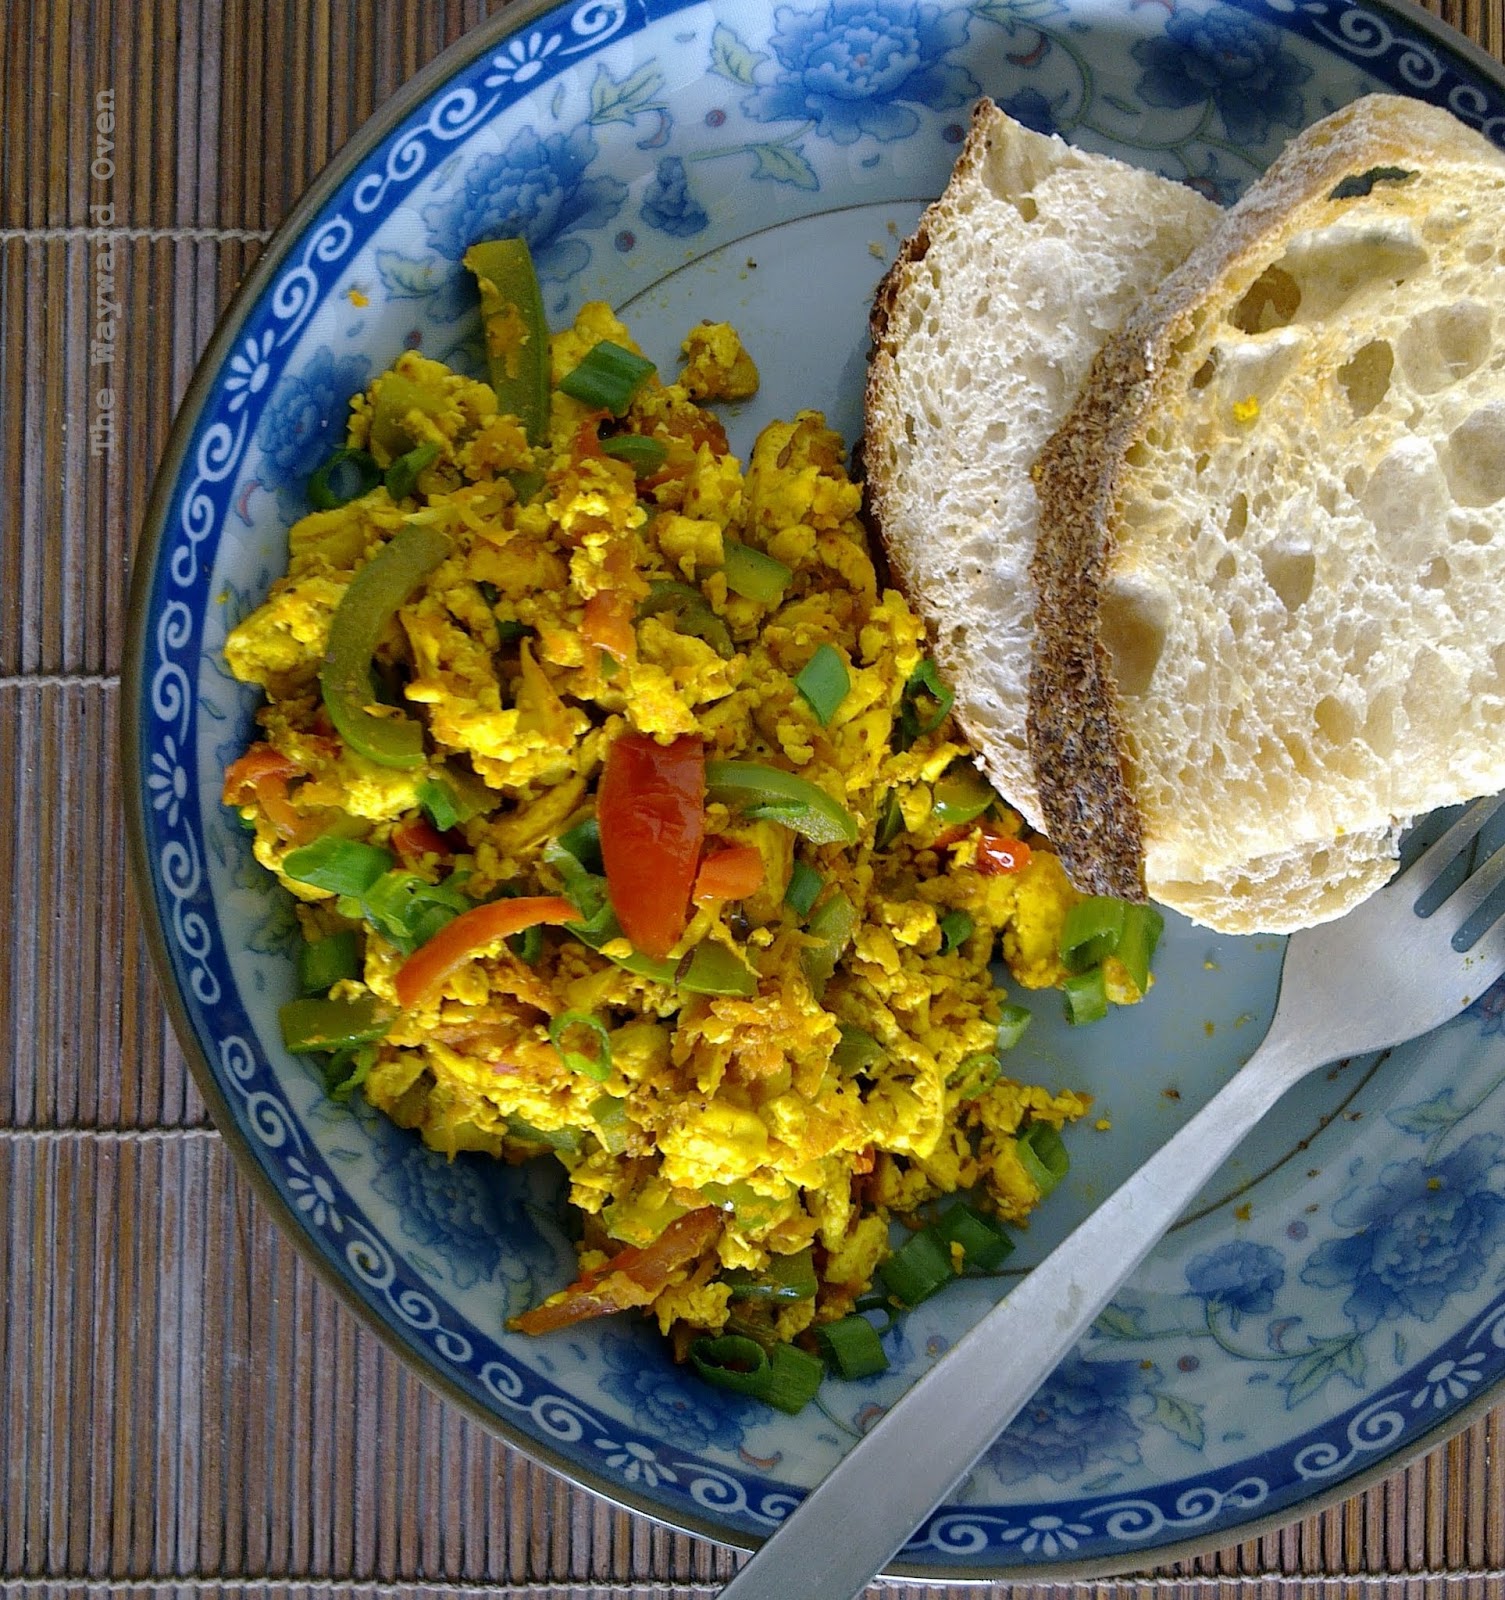
Well, here's something that I made myself and really like: scrambled tofu. I made it for breakfast one morning and cooked it again the next two mornings. Maybe it was just fooling my eyes because it really does look like scrambled eggs, but with the robust spices I included, the taste was also appealing.
No need to list exact amounts here. First, roast some cumin seeds in a dry pan over medium heat. Then add a little oil and stir-fry the chopped white part of a stalk of spring onion and a little crushed garlic. Then add a load of different vegetables – as many colours as possible. I used: green capsicum (bell pepper), cherry tomatoes, a fresh chilli and grated carrot. Cook until tender.
Crumble in firm tofu. Don't mash it up too much – you want some small crumbs and some clumps as well. After all, that's how scrambled eggs look.
To make it look like real eggs, add turmeric powder for that egg-yellow colour. And for a kick, add chilli powder. Stir around a bit more, season with salt and pepper, and the "eggs" are done. Sprinkle with the chopped green part of the spring onion and breakfast is ready. Serve with buttered toast.

Cooking from the WWW*

Sunday, February 24, 2013

MEJADRA, WHERE HAVE YOU BEEN ALL MY LIFE? 
* A few dishes I have cooked lately, using recipes off the World Wide Web.

The more I read about Jerusalem, the cookbook by Yotam Ottolenghi and Sami Tamimi, the more I want to get it. All the recipes I have seen so far on newspaper websites have looked delicious and easy to do. The latest one I read, in the Los Angeles Times, is mejadra, a dish of rice and lentils topped with crisp fried onions.
Sticky ginger cake
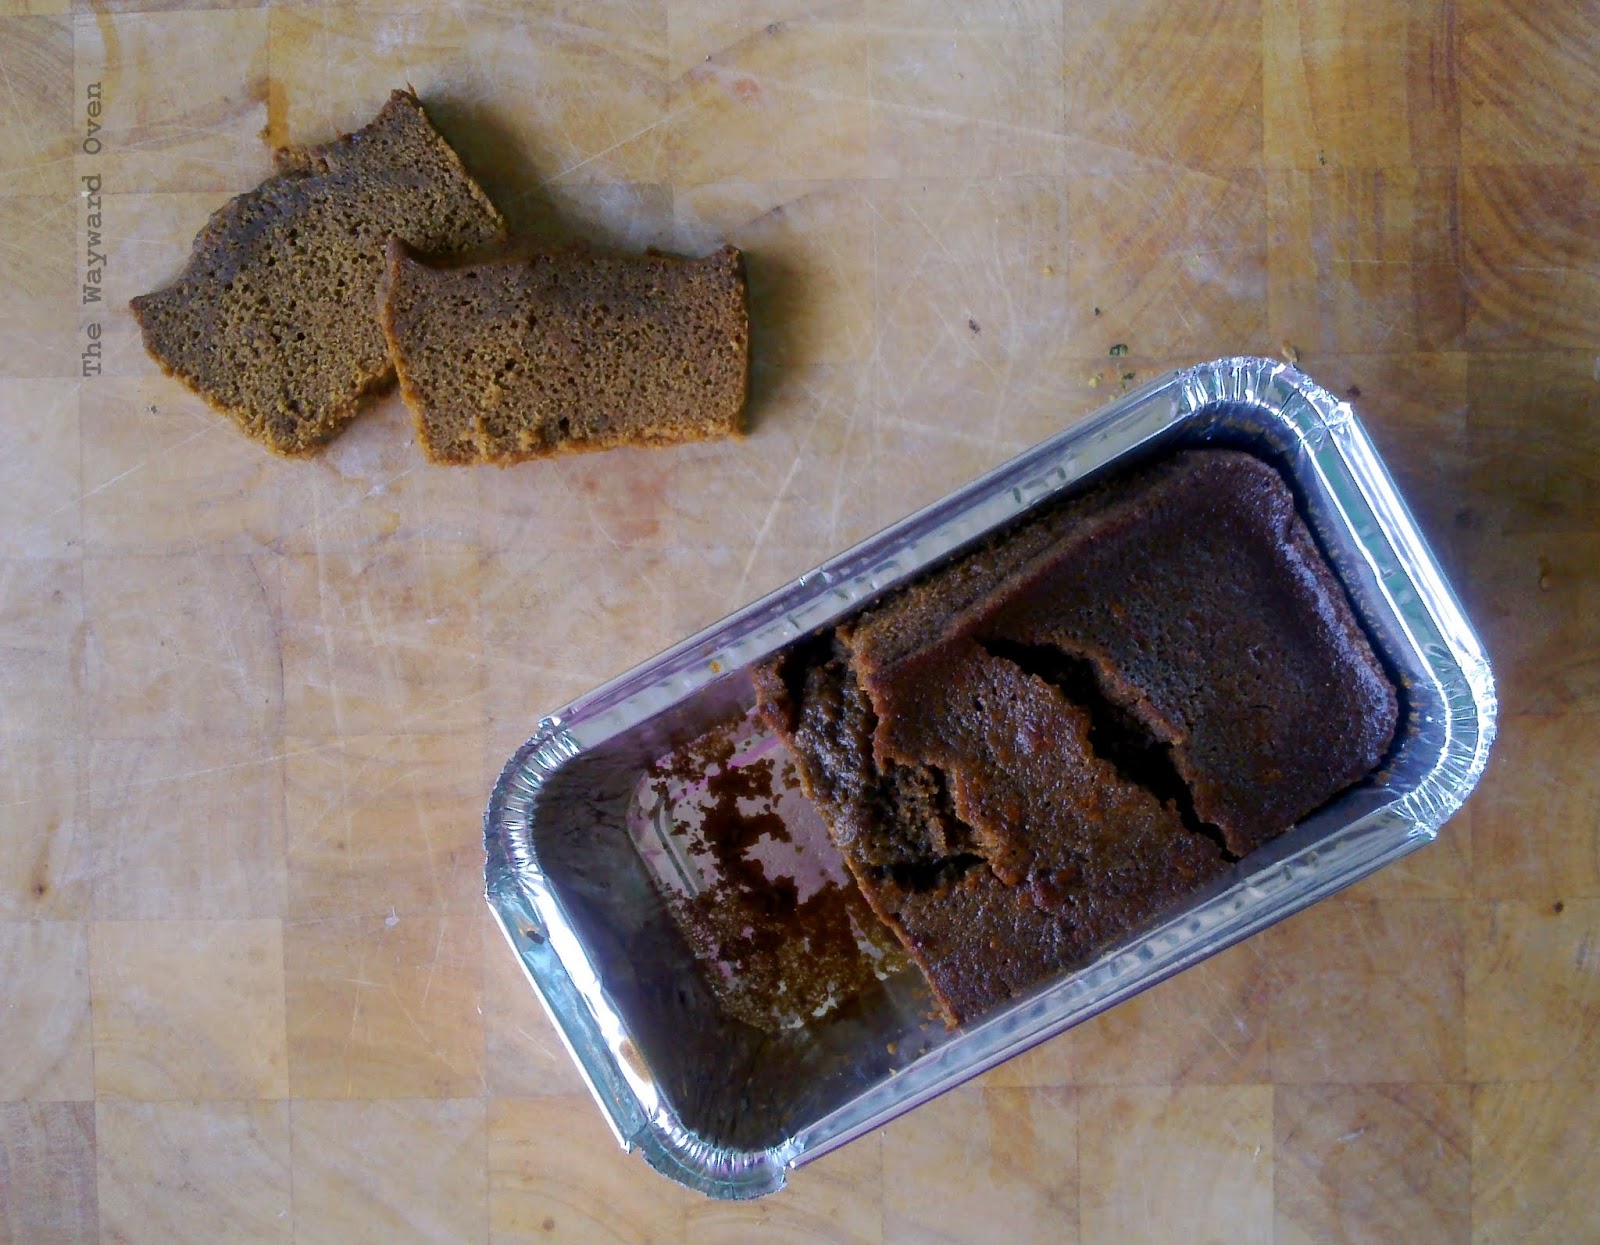
I never pass up Sticky Ginger Cake and the recipe from The Guardian was one to try. It's from the book Cherry Cake and Ginger Beer: A Golden Treasury of Classic Treats by Jane Brockett. Although I was anxious to have a slice straight out of the oven, I restrained myself and followed the instruction to wrap the cake in greaseproof paper and foil so that it would get an more sticky and gingery. It is a suggestion that should always be heeded. Yum. 
Emily Dickinson's coconut cake
Emily Dickinson's Coconut Cake from The History Kitchen. The Emily in question is the American poet. This is a good full-flavoured, moist cake. Fresh grated coconut gives it a rich coconut flavour. I was surprised to learn that fresh coconut was used in cooking in Massachussetts in the 19th century. I thought coconuts were just targets to knock down in old-time fairground games (very often rigged!).

Love letter to gnudi

Wednesday, February 13, 2013

SPINACH RICOTTA GNUDI 
It's easy to wax lyrical about the food we love. Poems have been written about everything from almonds to zucchini, songs have been sung about fried fish and bananas, and, well, cooking blogs only exist because food is never the last thing on our minds.
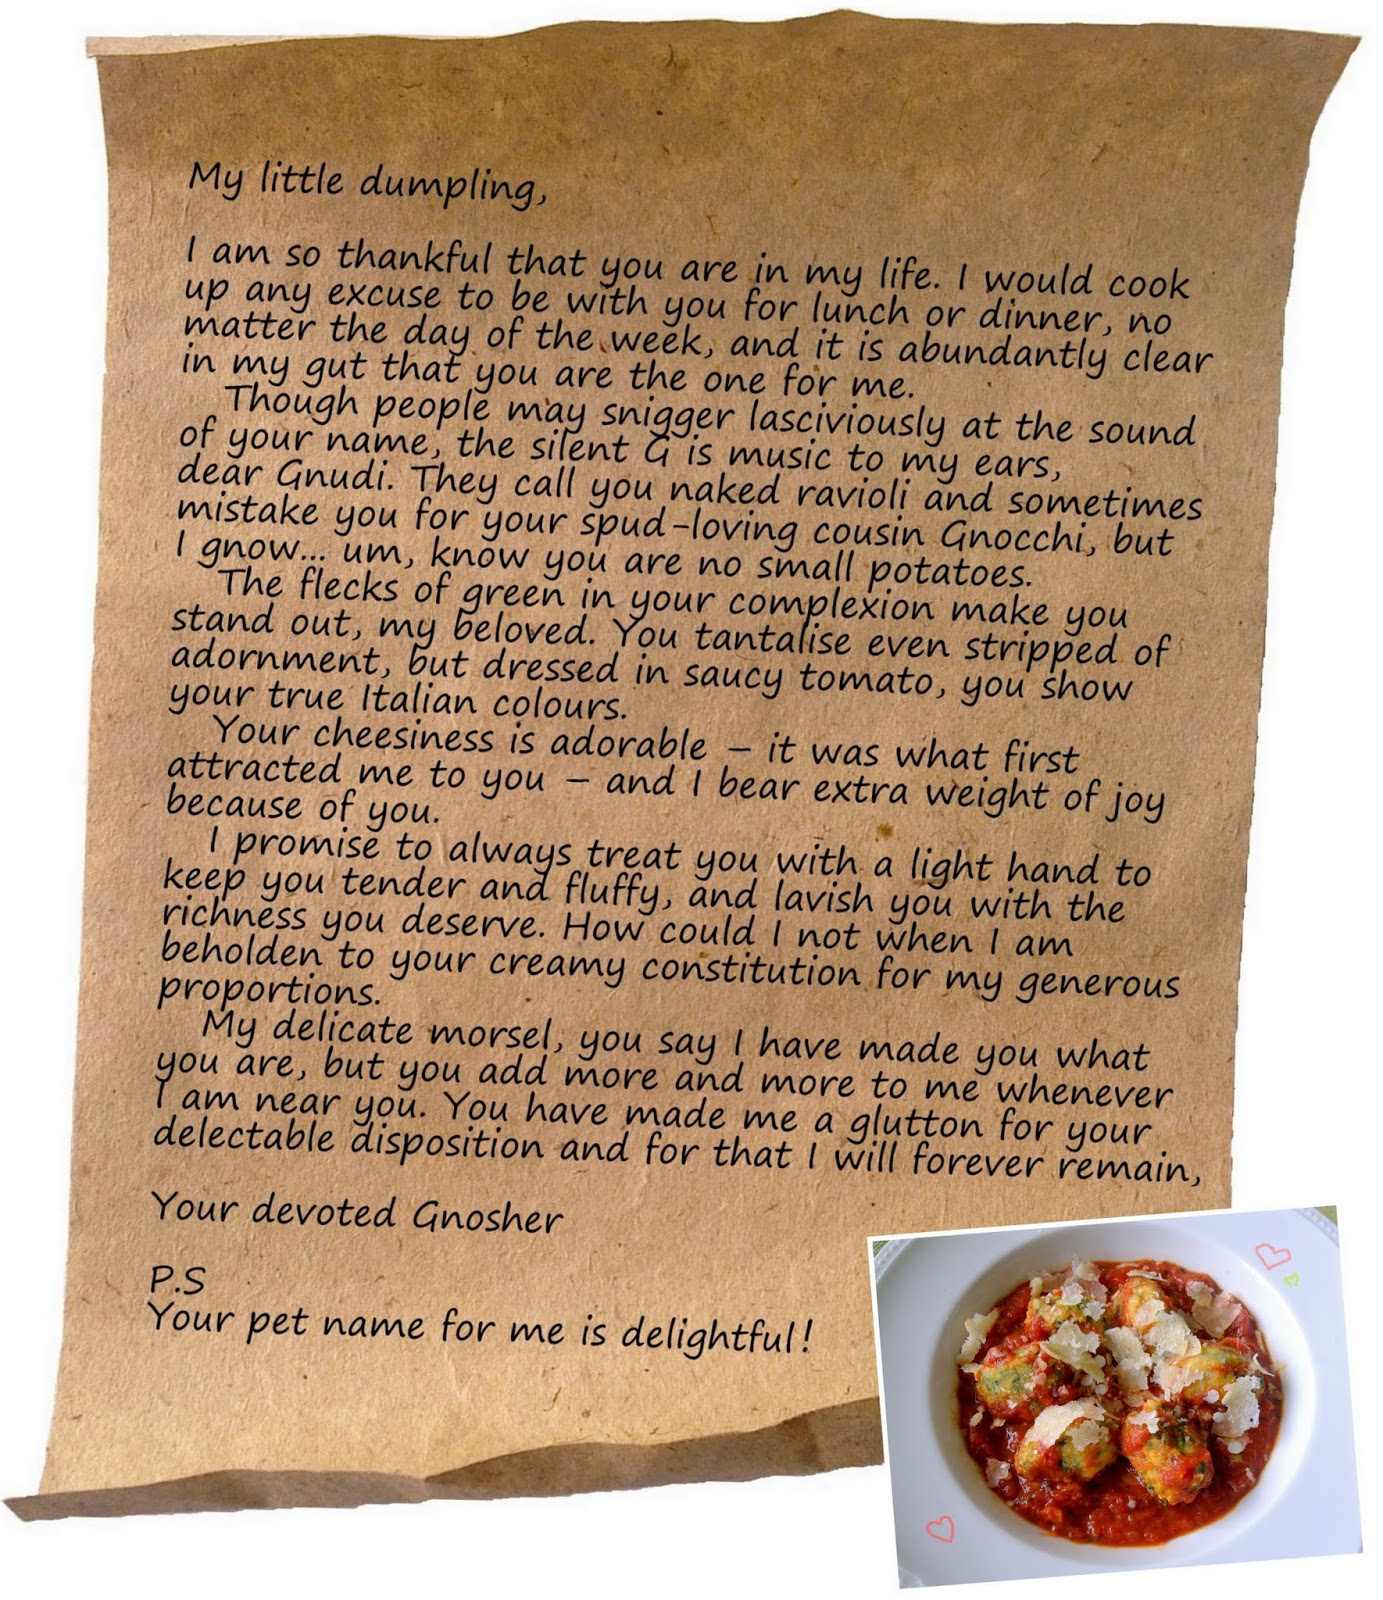
Last week, in our Don't Call Me Chef recipe column in The Star, Indra, Ivy and I paid tribute to the fattening dishes or ingredients we love so much that even if they gave us love handles, we would continue to cook and eat them. Indra is besotted with butter, Ivy can't stay away from any kind of fried chicken, and I love cheese and pasta. My recipe was for spinach ricotta gnudi and I wrote a soppy love letter to the cheese dumpling.
Gnudi is made with ricotta cheese. Spinach, however, is not what defines gnudi although Google images show these to be the most popular kind.
Recipes for spinach ricotta gnudi are quite straightforward – most advise to keep a light hand and to not overmix. Some dumpling mixtures are stiff and can be rolled out into ropes then cut, while others are pipeable or shaped into little ovals with teaspoons. Most instruct to cook the dumplings immediately after they are mixed, but I like the guidance given in April Bloomfield's recipe at Serious Eats that has one extra step: drying out the gnudi before cooking to prevent them from getting soggy.
It apparently takes her three days to make her famous Ricotta Gnudi which she serves at The Spotted Pig restaurant in New York. That may be a little too long for most of us, including me, but there was one time when I left the uncooked dumplings covered in semolina for two days in the fridge and they did taste a little lighter after they were cooked. Most times, I leave them to dry for just a day.

Spinach Ricotta Gnudi
Makes two generous servings

1 tub (250g) ricotta cheese
½ cup steamed spinach, finely chopped
¼ cup grated Parmigiano-Reggiano cheese
2 egg yolks
½ tsp flaky salt
½ cup plain flour, approximate
½ cup semolina flour (optional)
2 cups tomato (pasta) sauce (preferably homemade)
Parmigiano-Reggiano cheese, to serve

Remove ricotta cheese from the tub and place in three or four layers of kitchen paper on a sieve over a bowl. Leave for 20 minutes to drain. Discard the whey or reserve for another use (for example, add to soups or use in bread doughs).
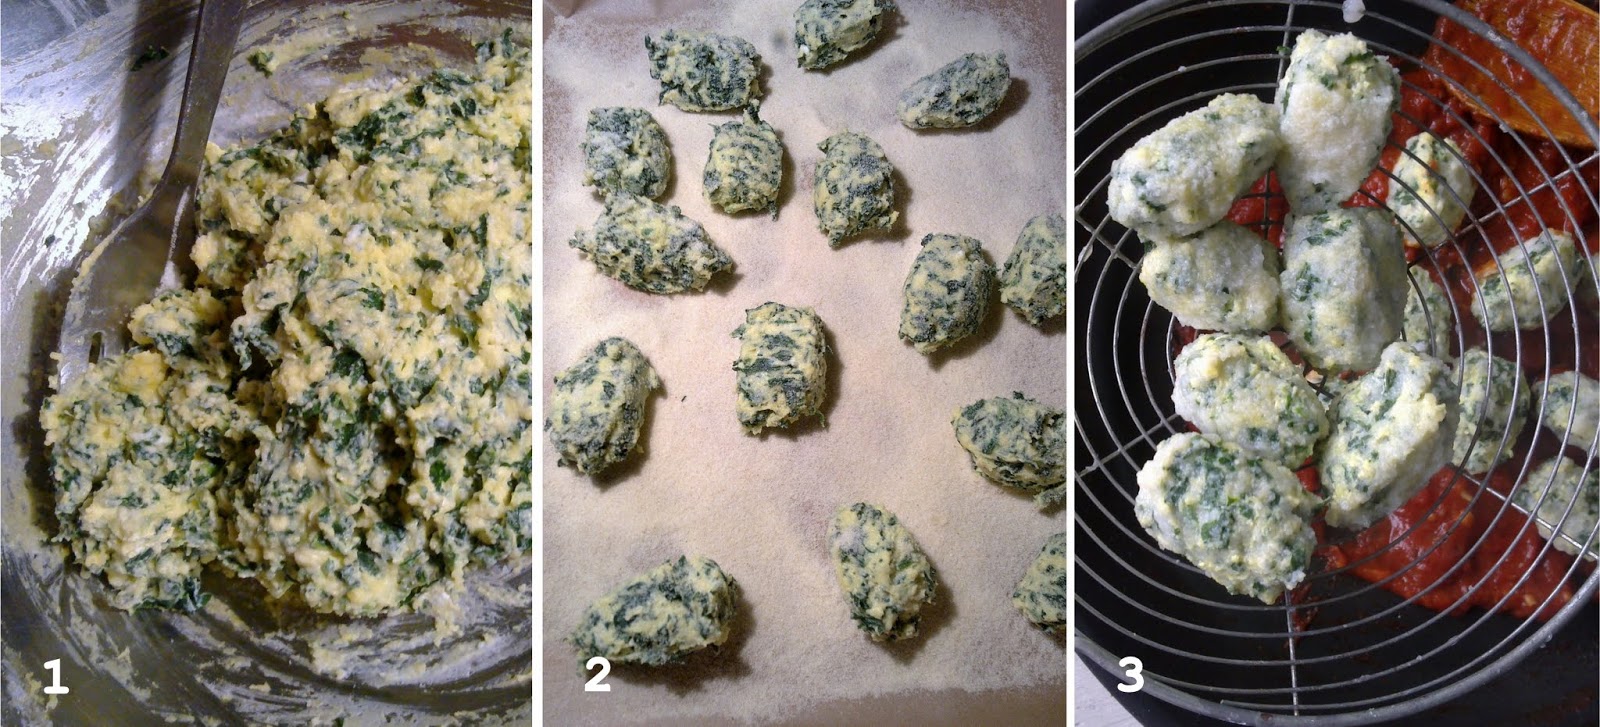
In a large bowl, stir together the ricotta, spinach, Parmigiano-Reggiano and egg yolks until blended. Stir in salt to taste, then gently stir in the flour, mixing just enough so the mixture comes together. It will have the texture of a creamed cake batter (pic 1).
This next step is optional but it will prevent the gnudi from becoming soggy. (Proceed to cooking the gnudi if omitting this step). Line a large plate with parchment paper. Sprinkle the semolina flour on it. Using two teaspoons, shape and compact the ricotta mixture into ovals. Dredge them in the semolina flour and leave them on the plate (pic 2). Place the plate in a large plastic bag and chill overnight or up to three days.
Bring a large pot of salted water to a boil. Heat the tomato sauce in a sauté pan on another burner and keep it over low heat.
Drop the gnudi directly into the boiling water in batches; do not crowd the pot. The gnudi will float to the surface when done, two to three minutes.
Using a slotted spoon, transfer the gnudi to the tomato sauce (pic 3). When all the gnudi are cooked, transfer to individual bowls. Shave Parmigiano-Reggiano over the top and serve at once.
Note: The cooked gnudi can also be frozen. Place in the fridge to thaw and heat up in the tomato sauce.

Shay... um, say yay for shakshuka

Wednesday, January 23, 2013

SHAKSHUKA MAKES ME SMILE
When chef du jour Yotam Ottolenghi talks about the food he eats and cooks, I immediately make a mental note to go look up some recipes for those very dishes. He's featured in The New Yorker food issue of Dec 3, 2012, and when I turned to the opening page with his portrait, the first thing that came to mind was: Take notes Nigella, now THIS is how you lick your fingers.
In the profile piece, Ottolenghi's friends talk about how the food at his delis and restaurants has to be "smiling" and he's been known to remove the food on display if it is not. The interviewer, Jane Kramer, wrote, "The smiliest dish I'd seen that week was shakshuka – a North African breakfast from Plenty, cooked and served in little cast-iron skillets".
I knew exactly what "smiling" food was after I made and ate shakshuka.
In his Guardian column a few years ago, Ottolenghi gave a recipe for shakshuka from his cookbook Plenty. There's also a video of him preparing the dish.
I didn't use the recipe but my dish has similar elements.
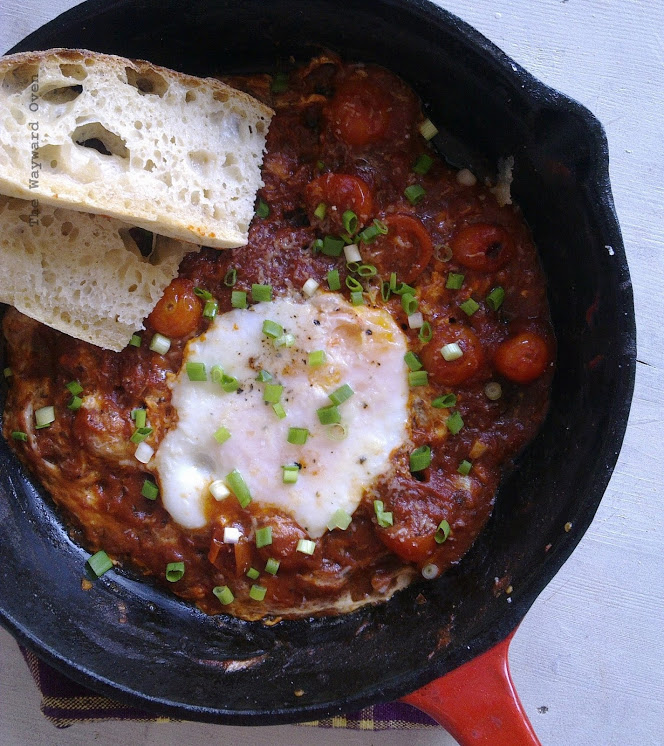
The essential ingredients are egg(s) and tomato sauce; the others are a bonus 
The tomato sauce is homemade and uses both fresh and tinned tomatoes. The lovely and flavourful cherry tomatoes add chunkiness and freshness to the dish.
But the star of the show, at least in my pan, is the egg. It is one of the freshest eggs I have ever bought – but it is certainly the most expensive. I was at the organic produce shop and picked up a pack of 10 eggs, paid for it and only checked the receipt when I got home. The pack cost RM13, which is almost two and a half times the price I usually pay for another brand of free-range eggs!
And it wasn't a mistake because I went to check the price at the shop the next day. Yikes!
With such expensive eggs, I told myself that I should have them fresh and not use them in baked goods, which is what I usually use eggs for. Shakshuka fits the bill.
I made the dish this way: Sauté some halved cherry tomatoes briefly in a skillet, add chopped garlic, then some tomato sauce. When it starts simmering, make a hole in the sauce, put in a sliver of butter and break an egg directly into the space. (I don't like a runny yolk so I broke it. Not so pretty, I know.) Cover the pan and leave until the egg (the white actually) is just set. Grate Parmigiano-Reggiano over the top and sprinkle some chopped spring onion around the pan. Serve with homemade crusty bread and eat straight from the pan.
I know this is not an authentic shakshuka, but it made me smile. And then I licked the sauce dripping off my fingers...